Einleitung

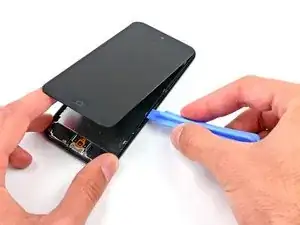
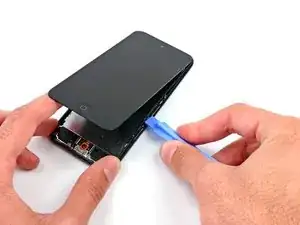
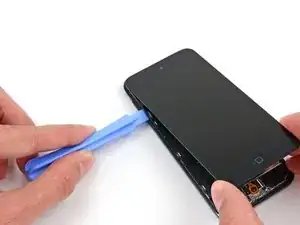
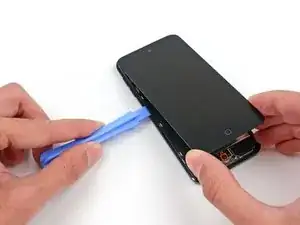
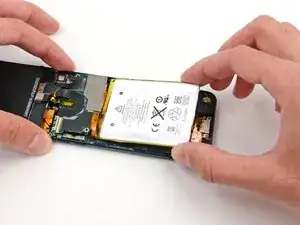
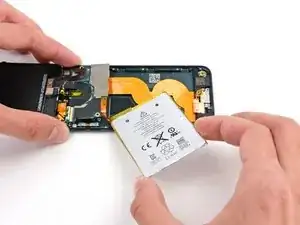
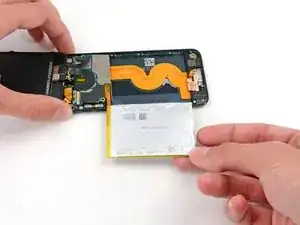
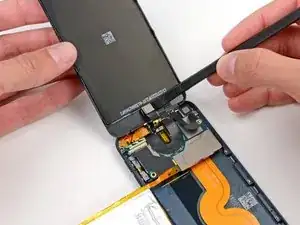
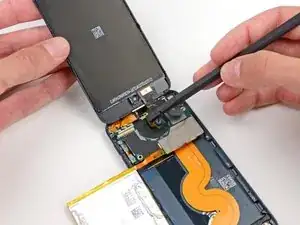
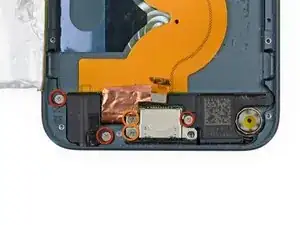
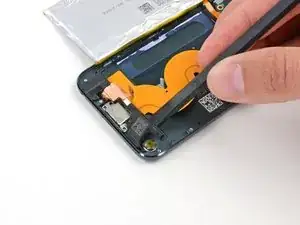
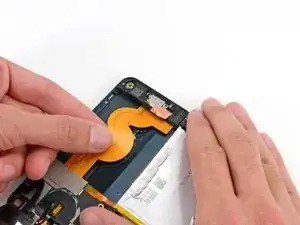
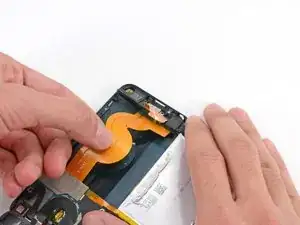
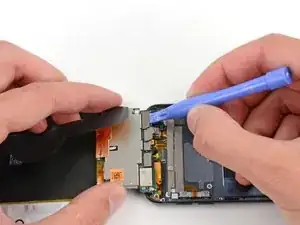
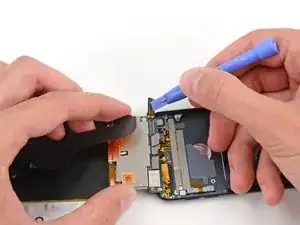
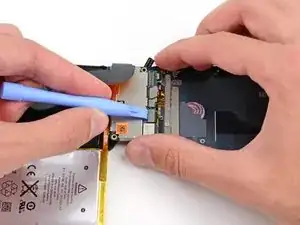
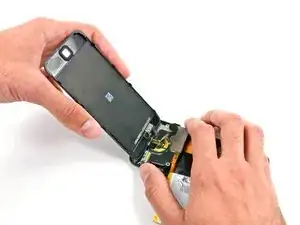
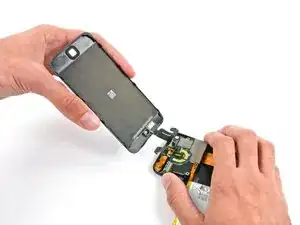
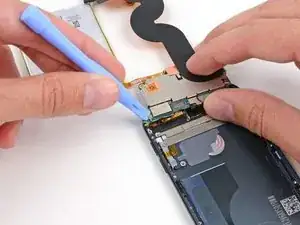
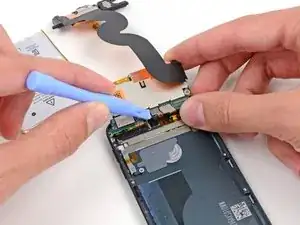
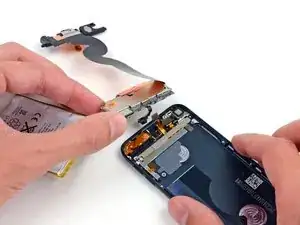
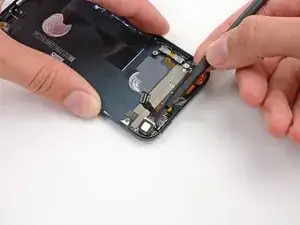
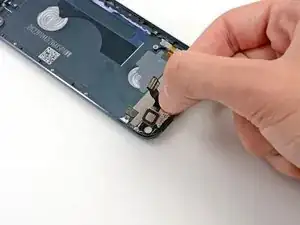
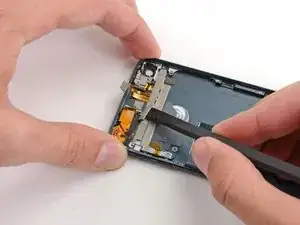
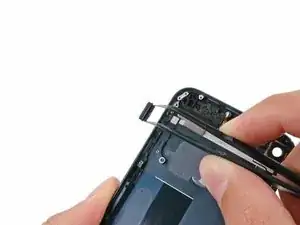
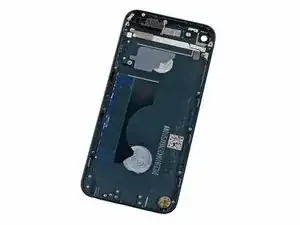
Use this guide to replace your rear case. Remove every component to transfer them into a replacement case.

  1. DXpoIFFtNjT3dOx4
    DXpoIFFtNjT3dOx4
    avx1b2VIF6fYH2NM
    CV2YITeFQnfwPVTR
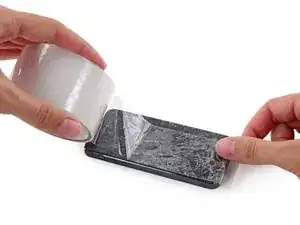
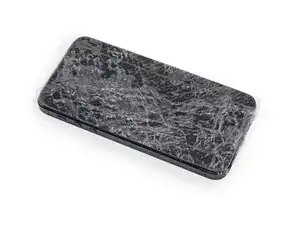
    • If your display glass is cracked, keep further breakage contained and prevent bodily harm during your repair by taping the glass.

    • Lay overlapping strips of clear packing tape over the iPod's display until the whole face is covered.

    • This will keep glass shards contained and provide structural integrity when prying and lifting the display.

    • Wear safety glasses to protect your eyes from any glass shaken free during the repair.

    Any repair guides for front camera?

    ipod touch 5th generation front camera freezes then returns to rear camera. This happened after replacing battery. Any ideas? Tried hard reset & restoring. Nothing worked.

    Libby -

  2. STUdOtPncgKVsjDI
    STUdOtPncgKVsjDI
    2tv3ctdqy4KrKx5Q
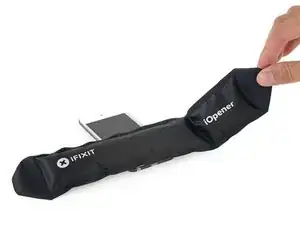
    • Use a hairdryer or prepare an iOpener and apply it to the lower edge of the iPod for about a minute in order to soften up the adhesive underneath.

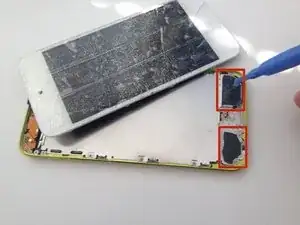
    • The bottom of the screen (near the home button) is held in place with strong adhesive.

    • As you start prying the screen off in the next stages, you may need to apply more heat to keep the glue warm and flexible.

  3. 5wNYMJJ1QTbAKQPT
    5wNYMJJ1QTbAKQPT
    KZxd36ixMtO45EwC
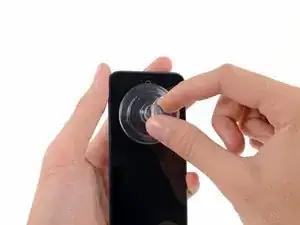
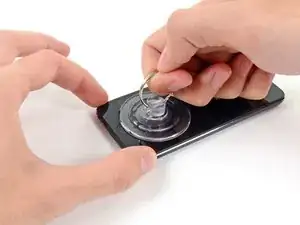
    • Center the suction cup on the lower section of the glass, with its edge centered over the home button.

    • Press in firmly and make sure the cup has a strong seal.

    Be very careful. I have bought the ifixit kit. Tried with the suction cup and it didn’t work. None of the tools actually helped. Follower the instructions carefully and still ended up with a cracked screen. I wish I could go back in time and not doing any of this. I literally just cried and have no money for a new screen.

    César Rodrigues -

  4. D6a3kERyis4ROfRX
    D6a3kERyis4ROfRX
    cBWlIkRsKfBxEstH
    umf1afUIdpCn2LAY
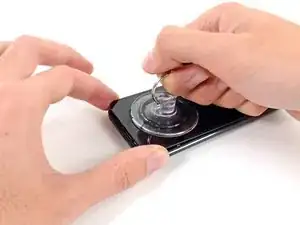
    • Hold the iPod firmly against a table or bench.

    • Place your thumb and index finger over the lower corners of the display to stop the display from opening too far when the adhesive breaks.

    • Lift the suction cup up and back toward the top of the iPod. Be patient, and pull with firm, constant force until the adhesive breaks and the display comes up from the rear case.

    • It may be necessary to use a heat gun to soften the adhesive (especially in cooler climates). If you can pry the screen apart, and the adhesive is still sticking and pulling apart like cheese topping on a pizza, you can slide a thin razor blade in and gently cut the adhesive.

    • After the display begins to lift from the rear case, be careful not to lift more than about an inch—a fragile plastic frame still connects the display assembly to the rear case.

    Step 2.5: Recover iPod from far side of the room due to suction assisted throwing.

    thanks, Apple

    Dave Davidson -

    Did as shown, button switch works fine, when I reinstall button, it's like it won't touch the switch to engage.

    What next?

    Gary Aguilera -

    I've got the same problem, managed to get the screen off, transferred the little steel plate to the new home button and put it in. The switch works fine when I press it with my finger, but it won't work with the home button??? - Did you manage to solve this problem?

    Tom -

    I've got the same problem. Been trying to find a solution for a few days now. Lots of people ask this question, but no one ever answers it. How did you solve it?

    tirgang -

    It sounds like you need to replace the home button dome switch rather than the actual home button. I'm currently searching for one myself. My customer jammed the home button and now it doesn't click. The dome switch is located on the home button ribbon cable and not on the home button.

    Mary Baldwin -

    The "home button" repair shows the physical button, but it's not actually the repair for the switch, which is what should be shown as the home button repair. The switch has a little black plastic tab that breaks off with excessive presses, and that's why the button plate cannot engage the switch when the screen is reinstalled. You will need to replace the switch, or modify it with something small enough to press the switch when the LCD is lowered.

    Rene -

    I also ran in to the Home button not working issue. I have not idea what changed with the button, but it would not work (from the outside) after the battery replacement & re-assembling. If you opened the iPod up, you could press the switch directly and it clicked & worked, but it seemed finicky. I ended up putting the tiniest dot of hot melt on the center of the switch (smaller than the switch 'dome', and thin too, maybe 0.6-0.7mm thick), re-assembled, and it works fine now.

    Jeff Brown -

    Use the hair dryer or a heat gun to loosen the adhesive. This did not work with just a suction cup for me.

    Dmitry Fedoruk -

    All good... But. All I wanted was to replace the cracked camera lens glass. Where in the guide is the instructions for the lens GLASS.

    kwylie -

    I also had to use a heat gun and the opening tool instead of just a suction cup to open the assembly. The rest of the guide worked really well!

    When putting back together, make sure the display connector is in firm or you might get lines. And also, perform a hard reset - my power wasn't working, I took it apart and checked the power flex cable, but all it needed was a hard reset when put back together.

    Tyler Weaver -

    use a razor blade to pry. there is a huge amount of leverage, and the old frame is most likely trash.

    trogfield -

    Suction cup and hair dryer method never worked for me. Even tried my heat gun. Finger went numb before I gave up. Used thin prying + suction cup and eventually opened it but screen cracked in the process when I was too aggressive opening it.

    In hind-sight, it would have been very helpful to know that the adhesive is just in the 2 areas to either side of the home button, nothing along the edges.

    Biggest complaint is the time wasted, should have just bought a replacement iPod, better return on my money/time.

    James Quinlan -

    The adhesive strips are only located to the left and right of the home button. Imagine two small squares of tape in each corner. Be careful heating. I used a heat gun on the lowest heat, but I think I may have overheated the area and damaged the digitizer on the bottom of the screen. I now have small green lines on that section of the screen. I too had to use a thin metal spudger to release the adhesive.

    muck -

    The suction cup is pulling large. pieces of glass off of the screen. What else can I use to pry up the screen?

    Ian Bogue -

    Any pictures on applying adhesive when placing the face plate? I know its two pieces to the left and right of the bottom home button. Are there pre-cut strips available?

    Ron -

  5. GyPdbnVOA2n5OaMo
    GyPdbnVOA2n5OaMo
    bxow53WqNhYUrW3y
    OLZqAu1ZR1WUMUyP
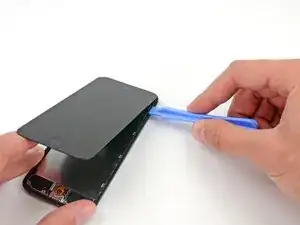
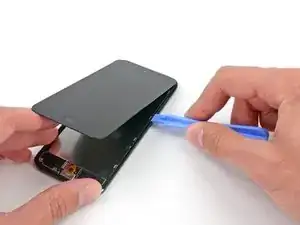
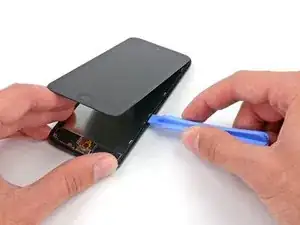
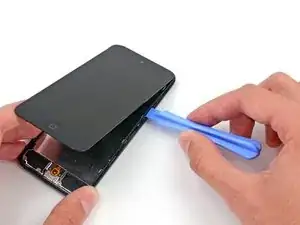
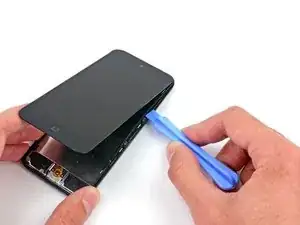
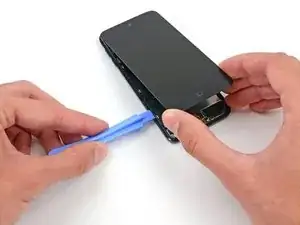
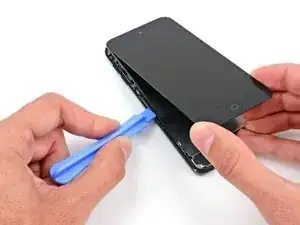
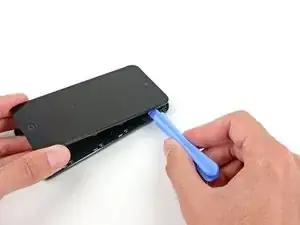
    • In the following steps, you will be loosening and freeing the plastic frame that surrounds the screen. It is connected to the rear case with several clips.

    • Starting at the top right of the device, insert a plastic opening tool into the gap between the plastic frame and the aluminum rear case.

    • Slide the tool down this crack, loosening the frame from the case.

    Careful! This piece is super fragile. It really helps to understand the way the clips work. I struggled for 10 min with not a single un-clip, snapped the plastic frame in 2 places because I didn't understand the clips, and as soon as I figured out how they work the piece was off like a prom dress.

    The clips are metal n shapes around the outside of the frame. They need to be pushed away from the center of the device to release the frame. You need to get something in between the plastic and clip to release, a guitar pick is probably too thick. A thin opening device would probably work but I used a razor blade. I'm not sure if these clips are on all of the newer Apple devices, but I've never encountered one before (usually work on android devices.)

    I hope this helps prevent someone from having to replace the frame.

    nlw93 -

    I wish I had read this comment before I broke my frame, hah! It made sense once I had the clips out, but while they were still in it was mystifying. Thankfully it won't be too big of a problem since all of the frame will still clip in, it just won't be connected.

    Joshua Horan -

  6. ZOJWpkYdSKHwidId
    ZOJWpkYdSKHwidId
    IjCwZdLiuyBEmbCg
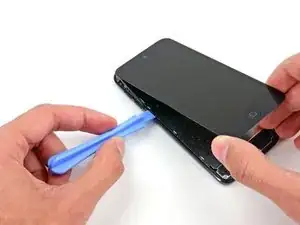
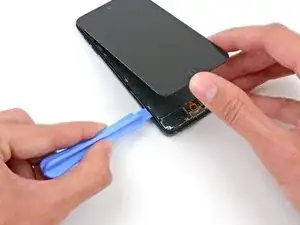
    • Insert the plastic opening tool between the frame and the rear case behind the first clip.

    • Rock the tool sideways, to spread the gap behind the clip and separate it from the rear case.

    • This may not free the clip initially, but repeating the procedure for each clip will begin to loosen the piece.

  7. FO6nBD2Vb3KtxPEK
    FO6nBD2Vb3KtxPEK
    pswh3DSgXckVkQqN
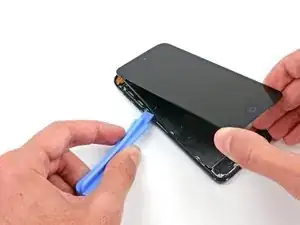
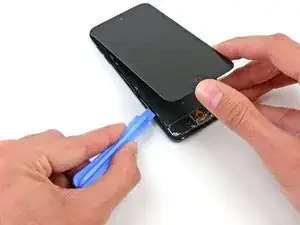
    • Repeat the procedure with the next two clips on this side.

    • You may have to go back and forth between the clips to free all of them. Take your time and be careful and patient, as the plastic frame is quite fragile.

    Take your time with removing this bezel… it’s so easy to get impatient which easily snaps it

    Gary Ayre -

  8. I2SkAMrpHjNdawDP
    I2SkAMrpHjNdawDP
    kCUVZVDdXnsJiDVt
    d6wlOTOZCBmBXOin
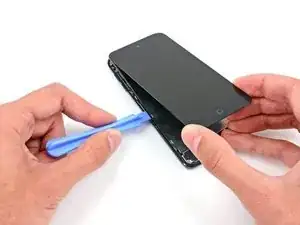
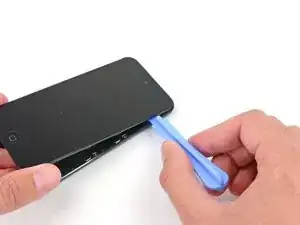
    • Moving on to the left side of the device, insert a plastic opening tool into the gap between the plastic frame and the aluminum rear case near the top.

    • Slide the tool down this crack, loosening the frame from the case.

  9. L6E3DRjQYIP1EUvQ
    L6E3DRjQYIP1EUvQ
    kZHgU1nXTKKe6aZQ
    • Insert the plastic opening tool between the frame and the rear case behind the first clip on the left side.

    • Rock the tool sideways, to spread the gap behind the clip and separate it from the rear case.

  10. F21hI3HZcDl6MAqY
    F21hI3HZcDl6MAqY
    4se2iOF6FoabcOOn
    • Repeat the procedure with the next two clips on this side.

    • Insert the plastic opening tool between the plastic frame and aluminum rear case behind the second clip.

    • Rock the tool sideways, loosening the clip from the case.

    Hello how are you? I don't know what happens when I go back and put everything I close and the home button doesn't work, I disarm it and check the flex and it works when I press it but with the home button it doesn't.

    Rafael Mata -

  11. wWl6viWlGPAVynXj
    wWl6viWlGPAVynXj
    JufatXVTvLh12RfO
    • Using the same procedure, loosen the last clip securing the plastic frame to the rear case.

    this looks more like a 5th gen instead of 6th gen :-)

    ifixshop -

    They have the exact same dimensions.

    Jayson Saavedra -

    do you think if i use reolacement scren of itouch 5th gen to my itou h 6th gen this would work? i cant find screen for itouch 6th gen so im thnking to use the screen of 5th gen pls help me

    alm yuwysha -

  12. AUssLBoNkKEJNRp6
    AUssLBoNkKEJNRp6
    ErPagjMPnDToe2wO
    wSJ2ElmLGVHB6OgB
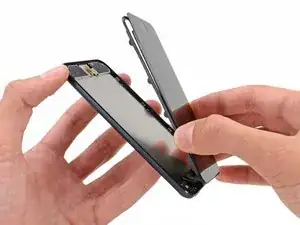
    • Insert the plastic opening tool between the display assembly and the rear case near the top of the iPod.

    • Slightly twist the opening tool to pry the front panel up from the rear case.

    • Separate the display assembly from the iPod.

    • Do not try to completely remove the front panel, as it is still connected by several cables.

  13. 2tXZTP4TtwnbkuXR
    2tXZTP4TtwnbkuXR
    GhYfQKVbxsh6NIyU
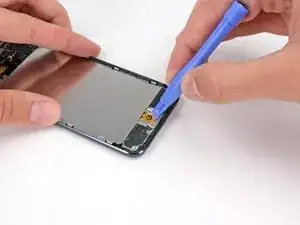
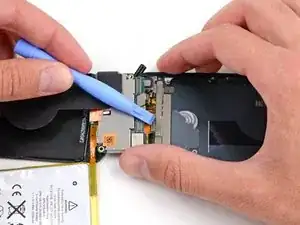
    • Gently fold the display over away from the rest of the iPod, taking care not to disconnect or break any of the ribbon cables. Set the two halves flat on a table or bench.

    • If your iPod has a black home button assembly rather than the orange one shown here, you can skip this step. The button is not attached to the LCD plate and does not need to be removed to complete the repair.

    • Use a plastic opening tool to pry the home button switch up from the LCD plate.

    • It may be necessary to use a heat gun or hair dryer to soften the adhesive on the back of the home button. Always use a low heat setting.

    • Do not attempt to remove the home button switch, as it is connected to components below the LCD plate.

    If you have trouble lifting the home button switch up with the plastic opening tool, you can try using an opening pick instead.

    matthew -

    Hi I just replaced my screen on my ipod touch 5th gen and i connect all the ribbon chords and every thing and when i connect one of the ribbons from the screen to the motherboard the motherboard starts to get hot! The screen isnt actually fully on, I wanted to make sure it turned on before I snapped it back in place. Any ideas? When I disconnect the ribbon the temp goes down. Screen is an OEM screen from Apple. I read somewhere, and i have personally have done it, that you can short the battery on the ipod touch 4th and it fixes it but im not sure on the 5th.

    Eddie -

    I have the same problem. I am going to change the battery. I let you to know if it solved the problem. Please let me know if you solve your problem. Thanks

    ismael452000 -

    Eddie, Did you ever fix this? I have exactly the same issue, Board gets hot and screen remains black. Although i did Hear Siri and iTunes recognises it.

    Dave -

    You need to make sure that all the adhesive covers for the battery and the board are on so that it isn't shorting with the metal cover, this may fix some issues with the board / battery heating up a lot and display not working. I just put some electrical tape over the batter solder and screen cables so that it's all in place properly and no shorting of electric terminal points on the board.

    Ben -

    With some newer versions of the gen 6 iPod, it seems that removing the home button from its adhered position is not necessary. I removed mine and then realized that it was adhered to the metal of the dock, not the actual LCD shield. Just something to keep in mind, might save you some grief later if you have to re-adhere it.

    The Stuff -

  14. KIEUvsnQt51fLMtY
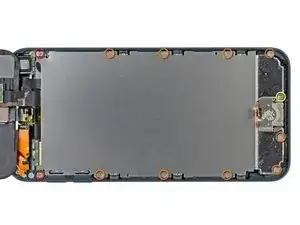
    • Remove the following screws securing the LCD plate to the rear case:

    • Two 1.2 mm #000 Phillips screws

    • Nine 1.6 mm #000 Phillips screws

    • One 2.3 mm #000 Phillips screw

  15. cZCROd3QGLPadDCk
    cZCROd3QGLPadDCk
    BpjQBrk3U3pUVsFf
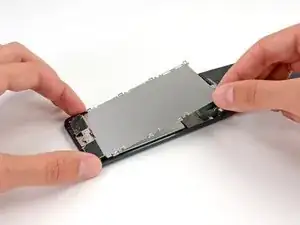
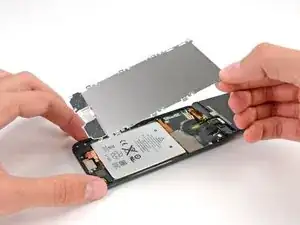
    • Lift up and remove the LCD plate from the iPod.

  16. smfOLc6Iw1nMcIFL
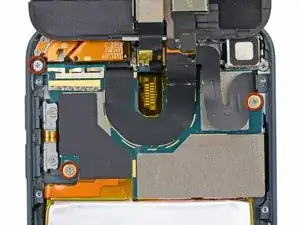
    • Remove three 1.6 mm #000 Phillips screws securing the logic board to the rear case.

    Hi, the MPN on that WiFi flex confirms this is not an iPod Touch 6th gen, it is 5th Gen. I am trying to source a 6th Gen WiFi Flex.

    Ricky Pohlman -

  17. DNBptMRXPLGdbc3U
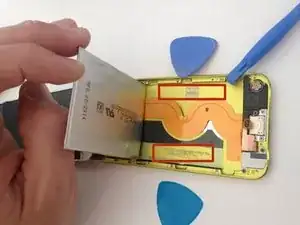
    • There are two strips of adhesive keeping the battery in place.

    • Turn the iPod over and heat the BACK of the aluminium iPod case. Do not heat the battery.

    • The aluminium case does not have to be hot; you should always be able to touch heated parts with your fingers at all times without it being uncomfortable.

    Instead of a heat gun or hair dryer, I used a rice sock (http://www.wikihow.com/Make-a-Rice-Sock) to apply heat evenly across the entire back of the case while the case still sat upright for me to work on getting the battery loose. It was a lot easier than trying to heat the back of the case, then flip the case over and work feverishly before it cooled.

    Eric -

    I'm sure this works, but it doesn't seem like the proper way to do this. I didn't like the feeling of prying on a flimsy battery at all. That's not practical. Instead get some molybdenum wire start it underneath the corners, then wrap the ends of the wire on like 2 pencils then tape them so u dont have to wrap the wire around your fingers because it will hurt lol. then apply heat, i went about 130 degrees is what my infrared gun said. I used a geat gun on low and a good distance away. Then just work the wire down the adhesive obviously lol. This worked out very easily for me and I felt safe and more confident about what I was doing. Good luck.

    taylor craig -

    First of all, one of the strips is accessible with a pair of angled tweezers (bottom right of device). Second, where can we get replacement adhesive strips for the battery?

    Ian Bogue -

    If you really don’t want to remove the battery, you may lift the mainboard slightly instead and disonnect display, back camera flexes and antenna connector. Then gently pull back camera module out of the seat. This gives you enough room to connect new display and back camera flexes. Back cam module would be hanging while you connect everything that got disconnected. Screw back the mainboard and push camera module to its seat.

    Slava Belkov -

    Removing the battery is absolutely unnecessary. Its very likely the battery would be damaged during the removal… Similar to Slava up above, just lift the freaking motherboard up, disconnect the cables, and install the new display, easy.

    Conrad -

  18. 5EZPQfvQNDxuKVrv
    5EZPQfvQNDxuKVrv
    VTJe4GUuiSk5CRRC
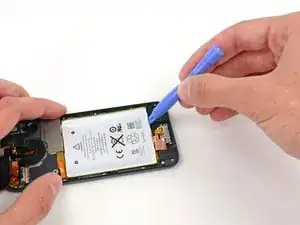
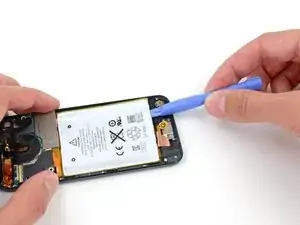
    • There are three notches on either side of the battery. In the next few steps, you will be using these notches to gradually pry the battery up from the rear case.

    • The battery is secured with large amounts of adhesive, so you'll need to go slowly and carefully to avoid puncturing or creasing the battery.

    • Insert a plastic opening tool into the top right notch and gently pry up on the battery.

    • Do not attempt to pry up the entire battery at this point; you just want to start to loosen the adhesive at each of the prying points, in turn.

  19. BVCuXxHoZC5CLVUA
    BVCuXxHoZC5CLVUA
    tCG5cZKiDQFDoat2
    • Continue with the lower right notch. Insert the plastic opening tool into the notch, and gently pry up on the side of the battery.

  20. DxfMBArClCbEpWOn
    DxfMBArClCbEpWOn
    MJk5dHvtrWYZQMKP
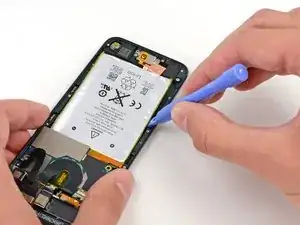
    • Continue prying the battery up from the bottom.

    • When prying along the bottom, be careful not to press down too hard against the speaker or headphone jack.

  21. qoajNaoATRCxOBx1
    qoajNaoATRCxOBx1
    pRQ2yExWXFWeOrEh
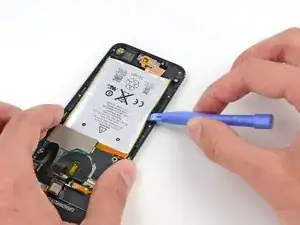
    • Pry along the left side as well.

    • You may need to move back and forth between the sides and bottom of the battery, prying a small amount at a time until the battery is entirely free from the adhesive.

  22. gcHWYZefXHQW4qmp
    gcHWYZefXHQW4qmp
    OYHfhEVnFxuEajMj
    YFu1IqKh16cu2GPk
    • Once all of the adhesive is loosened, lift the battery up from the bottom and swing it out over the left side of the rear case.

    • Be sure not to yank it out, as it is soldered to the logic board.

    • Flip the battery over to straighten its cable and set it down.

  23. jMMpXwVwoP2ropdP
    jMMpXwVwoP2ropdP
    XBqOSiL2cTksWSds
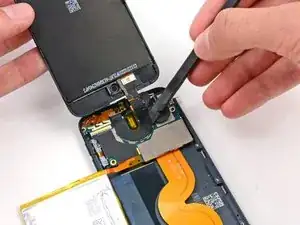
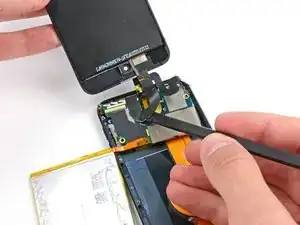
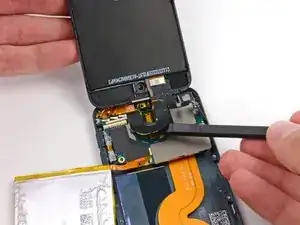
    • Use the flat end of a spudger to flip the front-facing camera out of its socket in the display assembly.

    • There is a small amount of adhesive securing the camera module to its socket, but this should not take very much force. Use the spudger to get in between the black plastic of the camera module and the black plastic of the camera socket and separate them.

    My camera ceased to work after this. Anybody have the same issue?

    JavierDiaz4 -

    A reboot can sometimes work. Once the camera is seen not to be working (say it was connected after the device goes to sleep), the iPod gives up trying to show any live images from the either front or rear cameras

    mark -

    How do you replace the front facing camera

    brandon landry -

    I have a similar issue, the rear camera doesn't work and the facing camera sometimes works but very slow...everything else works well.

    Any ideas on how to fix this problem?

    carlos lima -

  24. 3w4oq1BNuYsVfxQs
    • Use the tip of a spudger to peel back a small piece of tape covering a screw on the left side of the headphone jack.

  25. EVDO1Li4QJUdfQjO
    • Remove the following screws securing the headphone jack, Lightning connector, and speaker.

    • Three 2.6 mm #000 Phillips screws

    • Two 2.0 mm #000 Phillips screws

    The screw on the right that goes into the headphone jack is a little reluctant to come out

    Zach Heaton -

  26. DZxyZN2OZunRbQgr
    • Use the flat end of a spudger to pry the speaker up from the rear case.

    • Do not try to remove the speaker, as it is soldered to the Lightning connector assembly.

  27. 5oGU1cRr2koYODBG
    5oGU1cRr2koYODBG
    yIEmPNJsRe6MMc26
    • Grasping the large ribbon cable, gently pull the Lightning connector assembly out of the bottom of the case.

  28. NItOQYboPQUFencG
    NItOQYboPQUFencG
    KZBR1GgnYRW5aN4M
    • Flip the entire assembly over, exposing the back of the logic board.

    • Use a plastic opening tool to disconnect the digitizer cable from the logic board.

    When reassembling, the digitizer and display cable connections very easily come loose. Make sure you press them in securely then I held down the logic board with my left hand while rescrewing it down one handed with my right hand otherwise they would disengage. Took several tries to get it right.

    Raymond Rinaldi -

  29. hGtf2KllaqrT6gfu
    hGtf2KllaqrT6gfu
    23jdLuFPY6NTXrTG
    • Use a plastic opening tool to disconnect the display cable from its socket in the logic board.

  30. btSmofC5LnYvJs6n
    btSmofC5LnYvJs6n
    2g53FYotvRiyD5yl
    bcqaCIhbXHAqCsOF
    • Flip the Lightning connector/logic board assembly back over to expose the top of the logic board.

    • The display cable is lightly adhered to the top of the logic board.

    • Use the flat end of a spudger to peel the display cable up from the logic board.

  31. SNk12VYipaDwJqRD
    SNk12VYipaDwJqRD
    HL1hRIXCT2gKAUXs
    • Remove the display assembly from the iPod.

  32. nRWGOWtxkyFcJkDI
    • Flip the logic board assembly back over to expose the connectors on the back.

    • Use the edge of a plastic opening tool to gently pry the antenna connector off the back of the logic board.

    • This cable is very delicate; be careful not to stress the point where it connects to the antenna.

    where can I buy a new logic board

    Muhammad saad Waheed -

  33. rTCNAVb2mtelk2Rn
    rTCNAVb2mtelk2Rn
    CXQAGjBJHVZeF25H
    • Disconnect the button ribbon cable connector from the back of the logic board.

  34. ucgscmYWnK3fE51C
    ucgscmYWnK3fE51C
    sCegYCEFw5LNKYfK
    • Use the edge of a plastic opening tool to disconnect the display connector from the back of the logic board.

  35. N1f1UCrgFAcsrKFr
    N1f1UCrgFAcsrKFr
    LJvVuQYZ3eLGeoIq
    • Remove the logic board assembly from the rear case of the iPod.

  36. AWcCRJCWfCj5TYDu
    AWcCRJCWfCj5TYDu
    wOcP2AseysLUGYCF
    IuQoWEmuRbRvmAD3
    • Insert the flat end of a spudger between the rear-facing camera and its frame.

    • Gently twist the spudger to free the camera.

    • Lift the rear-facing camera up out of its socket, and remove it from the iPod Touch.

  37. DAxQdj4iJh4veccx
    DAxQdj4iJh4veccx
    exrAIqyfdHknRFVW
    T12ShIOdIbeinmvf
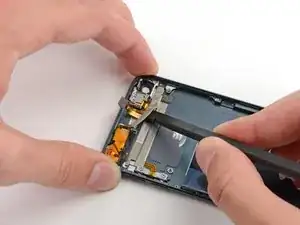
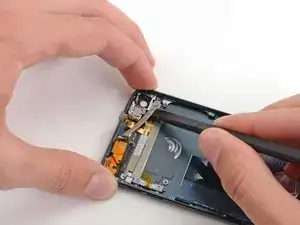
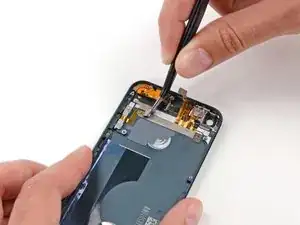
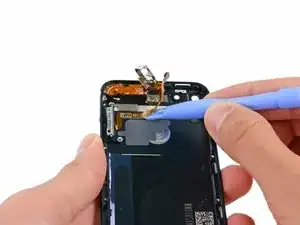
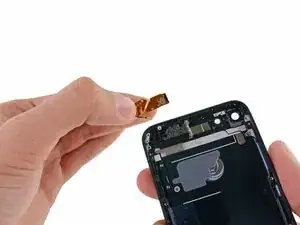
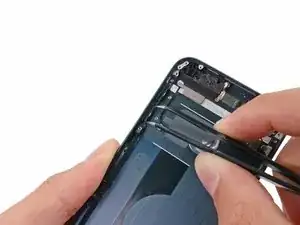
    • Gently slide the flat end of a spudger underneath the piece of foam tape covering the button ribbon cable.

    • Run the spudger along the full length of the tape to disconnect it from the rear case.

  38. ifnCaYNV25oqMp2K
    ifnCaYNV25oqMp2K
    rCAxCN5TVluYyrTW
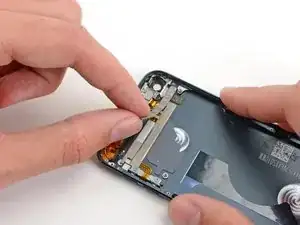
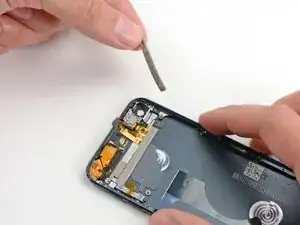
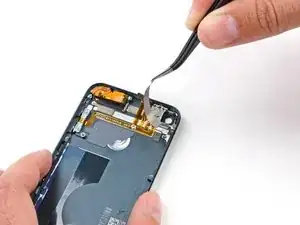
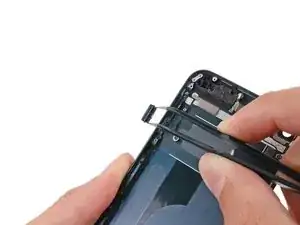
    • Peel and remove the foam tape from the rear case of the iPod.

  39. AkTTqKDPyNyCyNrI
    AkTTqKDPyNyCyNrI
    lWfsYmMrC1B1jfpJ
    mgeQruUcmKvByIcU
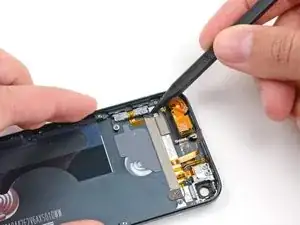
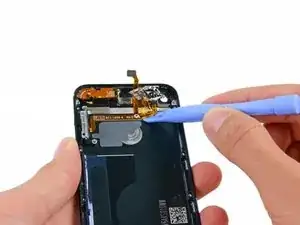
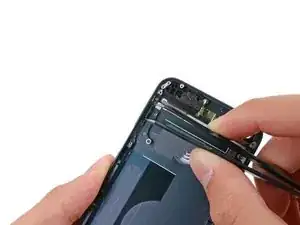
    • Use the tip of a spudger to peel up the edge of the tape covering the button ribbon cable.

    • Use tweezers or your fingers to peel the tape up from the rear case, and remove it from the iPod.

  40. JKKLK4mIMEHOebdL
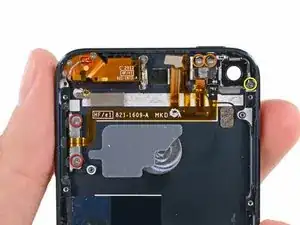
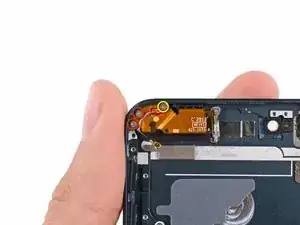
    • Remove the following screws securing the button ribbon cable to the rear case of the iPod:

    • Two 2.0 mm #000 Phillips screws

    • Two 2.3 mm #000 Phillips screws

    • One 1.6 mm #000 Phillips screw

  41. lJvcakqg6qX3k2NM
    lJvcakqg6qX3k2NM
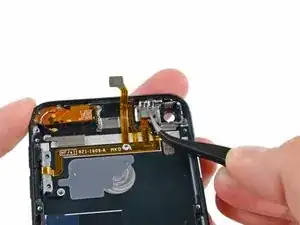
    6KETbBLDdMUnwehP
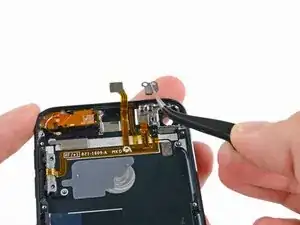
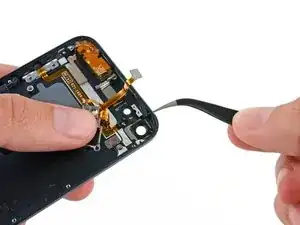
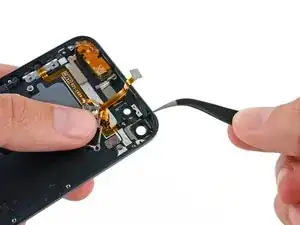
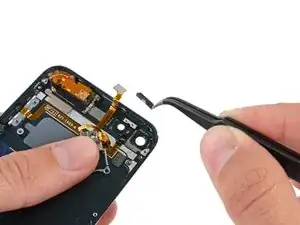
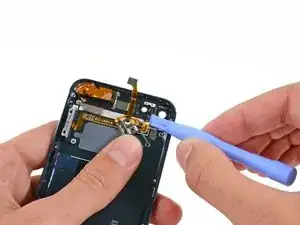
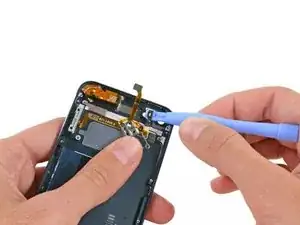
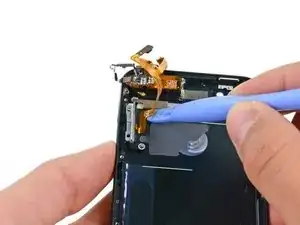
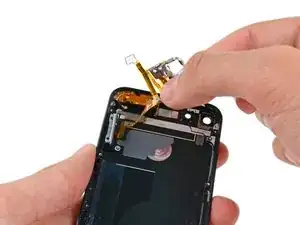
    • Use tweezers to remove the small metal backing plate from the power switch section of the button ribbon cable.

  42. TMJ3Ydc23kDJV1VS
    TMJ3Ydc23kDJV1VS
    dVAcHJybnk3jL6d3
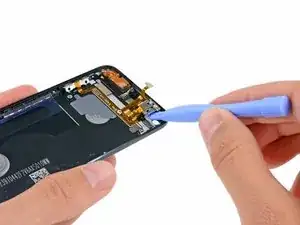
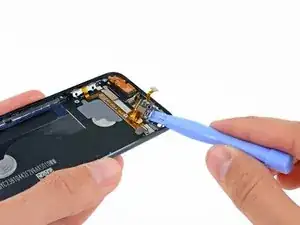
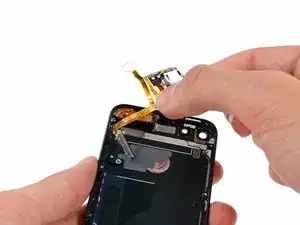
    • Insert a plastic opening tool into the rear-facing camera frame and pry up against the rear case.

    • Twist the plastic opening tool slightly counter-clockwise to pry the camera frame up from the rear case.

    • Only pry enough to lift the camera frame from the rear case; the rest of the cable is still adhered to the rear case and may break.

  43. hD5S6kOhmVGqSdKH
    hD5S6kOhmVGqSdKH
    CsD6UWuBLKAbm3cH
    RhgMOSATZETSVl3W
    • The power/sleep button may fall out of the rear case and should be removed at this point.

    • Use the closed tip of a pair of tweezers to push the power/sleep button into the rear case.

    • Use tweezers to remove the power button from the iPod.

    Were would I get a power/ sleep button

    Louise Ireland -

  44. Up5VAIb6jaE4hD1u
    Up5VAIb6jaE4hD1u
    ExrMGtuac6sHQWRq
    • Use a plastic opening tool to pry the microphone up from the rear case.

    • The ribbon cable attached to the microphone may be under a long strip of foam insulating tape. Remove this tape and retain it for reassembly before prying up the microphone.

  45. 64BoWYQOkmvfaQbx
    64BoWYQOkmvfaQbx
    abAC2gpbvOy2tILJ
    FHJ6TOoOhHHbOx2d
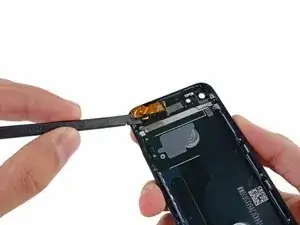
    • Slide a plastic opening tool from right to left underneath the horizontal section of the cable, separating it from the adhesive securing it to the rear case.

  46. tSoZfgo1FgZSNABo
    tSoZfgo1FgZSNABo
    elkGDhc4SpJbOIfU
    • Gently peel the rest of the cable up from the rear case.

    • Remove the button ribbon cable from the iPod.

  47. bNxYZDouiBHhJH3I
    • Remove the following screws securing the antenna to the rear case:

    • Two 1.3 mm #000 Phillips screws

    • One 1.5 mm #000 Phillips screw

  48. krd3FEVK244XYJi5
    krd3FEVK244XYJi5
    UWERWEdc6amaLwR2
    • Use the flat end of a spudger to gently pry the antenna up from its foam adhesive backing.

  49. sqPveRnuAacnqZMA
    sqPveRnuAacnqZMA
    1URdMarVpNeNxqXH
    • Use tweezers to remove the volume-down button from the iPod.

  50. R2ROeXBwU2mjWgrY
    R2ROeXBwU2mjWgrY
    YlJF5NkWf6IdeVxR
    • Use tweezers to remove the volume-up button from the iPod.

  51. 1EKNhKKkhYLNHa3E
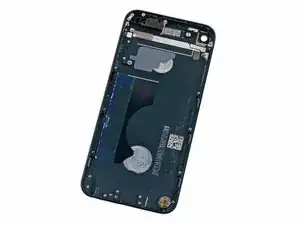
    • Rear case remains.

Abschluss

To reassemble your device, follow these instructions in reverse order.

Andrew Optimus Goldheart

Mitglied seit: 17/10/09

493949 Reputation

5 Kommentare

I have problem with the loop . Can i screw it out

zeroacn23 -

Any idea on how to transfer the loop button? Replacing the rear case is useless without the loop button...

Trayton -

It took me forever to figure out how to remove the loop button! I removed the button by pushing down on the both sides of the button (especially pushing down from inside the case) and turning clockwise. This should hold down the retaining ring so the button can turn freely and the ring not move.

Hamilton Beach -

Does anyone know how to adjust the housing so the frame will fit. This one is off just enough so the screen won't fit back into the housing. I've tried to shape it. Any tips? I don't want to replace the whole housing. It's off on the corners and near the power button.

Kristin -
This guide was awesome I changed the rear case with ease and put everything back with no screws left over bonus!! Have the right tools did help so a 20 piece mobile phone repair kit from eBay was definitely the way to go

Alex Fountain -