Einleitung

This is an easy guide. It should only take a few minutes to complete. It doesn't require any tools.

  1. ctAXlag42YVI4IEs
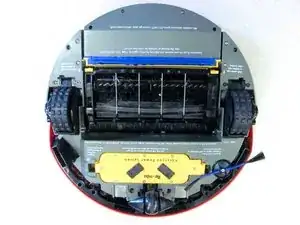
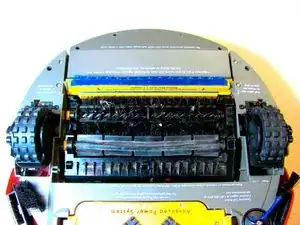
    • Lay the Roomba upside down on a flat surface with the blue strip away from you.

  2. VyaCRNAhaZiyhnVv
    VyaCRNAhaZiyhnVv
    TuKdaONlsbZZHHsl
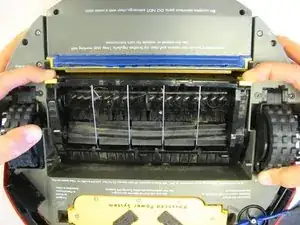
    • Use your index fingers to pull the yellow tabs towards you.

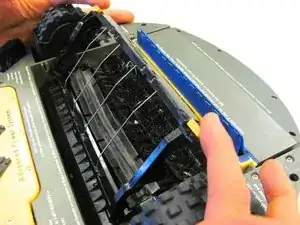
    • While still pulling the yellow tabs with your index fingers, tilt up the brush guard.

    • For reassembly, make sure to push in the brush guard until it clicks into place.

  3. KT2CESDiCHfuExTG
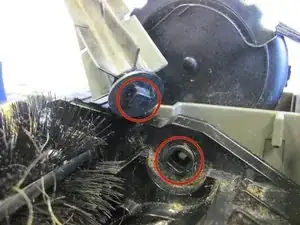
    • Pull back the brush guard to unhook it from the latches.

    • Remove the brush guard by lifting it up and out of the Roomba.

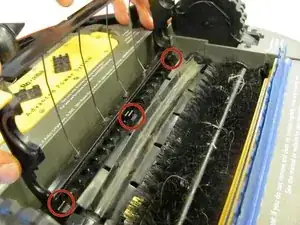
    • This picture has a change in orientation to illustrate the latches. Continue disassembling the Roomba with the blue strip away from you.

  4. ZWcS2S6LbBOXe3hx
    • Set the brush guard aside.

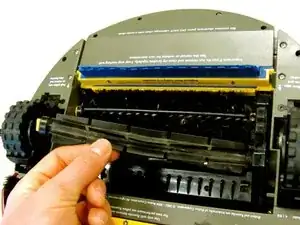
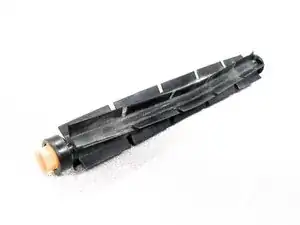
    • The flexible rubber brush is the smooth, all-rubber brush that is closest to the yellow battery.

  5. LtsfVTvwDAwBZdji
    LtsfVTvwDAwBZdji
    PXtHb3R5K4vG1MFV
    • Remove the flexible rubber brush by grabbing it and pulling it up and out of the Roomba.

    • For reassembly, orient the Roomba with the battery closest to you:

    • First, insert the black end of the flexible rubber brush into the black square opening on the right side.

    • Second, lay the flexible rubber brush back into place.

Abschluss

To reassemble your device, follow these instructions in reverse order.
Samantha Barrett

Mitglied seit: 14/01/14

501 Reputation

0 Kommentare