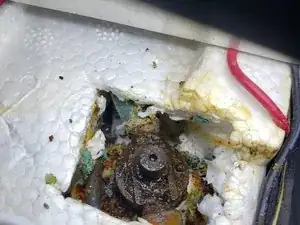
Einleitung

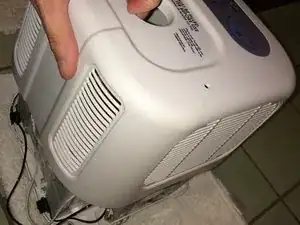
You will learn about how the unit is engineered, and how to do a partial disassembly. Note: This describes the heating/cooling which is part of 2nd generation ChiliPad / ChiliCube system (introduced in 2014(?), and not the first generation unit (mostly sold pre-2015) which was more squat, and had a handle on top.

  1. blvoEoF3iXh4d4fN
    blvoEoF3iXh4d4fN
    f4F2GIKSTGG3dUDL
    JxrUcMxGcWSBUPHF
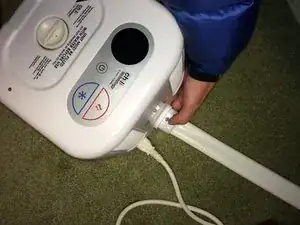
    • Unhook the cube from power and from the circulating tubes connecting it to the mattress pad.

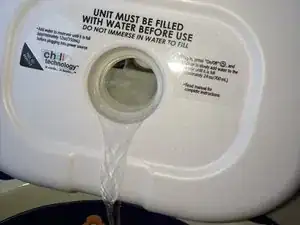
    • Drain water from the cube. (not completely necessary if a little dribbling is OK.)

  2. p2StnUHoZmuRBG5i
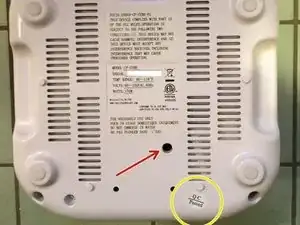
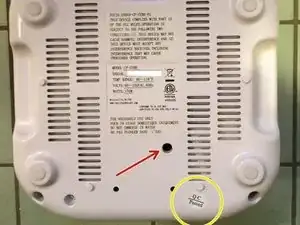
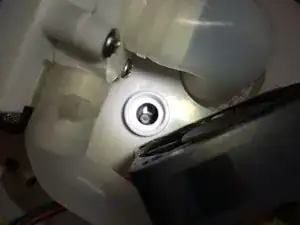
    • Note that one of the screws we need to remove is under the "QC Passed" sticker. If you are still under warrantee, and you don't want ChiliTechnology giving you grief for messing with something you own, slide a razor under the "QC Passed" sticker, and "store" it by parking it on one of the other stickers on the cube.

    • Since 2 out of 2 of your editor's ChiliCubes needed to go back for repair during the first year, You'd better treat that sticker nice!

  3. JImUsIOV31nTySnb
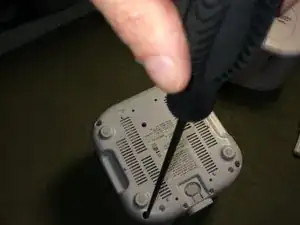
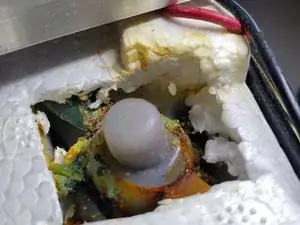
    • Notice hole with red arrow pointing to it. This is the reset for what is probably a thermal breaker. According to ChiliTech support, you stick a (very long) pencil down here to reset the breaker, do this if the heater on your cube does not work. (or works poorly.)

    • Resetting the thermal breaker might take several tries, its hard to tell if you did it right. It seems to be a mechanical thing, and not a microswitch like you might use to reset your router.

    • You need that heater, because ChiliTech has changed the instructions for the cube since 2014. Now you need to be able to turn the heat up to high (even if you only use your cube for cooling.)

    • Every month, they recommend 1/4 cup of hydrogen peroxide and run it at 90º for 20 minutes.

    • Every 3rd month they want you to put 1/4 cup of hydrogen peroxide in, and run the cube on high for 6-8 hours.

    • Better invest in stock in peroxide and distilled water companies!

    • This is all to cook the bacteria that grows in these things. Don't tell your spouse if they are squeamish about that sorta stuff, just tell 'em you are experimenting with a new way to brew beer.

  4. IpBWkBtr3swQnCEx
    IpBWkBtr3swQnCEx
    eBalX3nGyHhbeEek
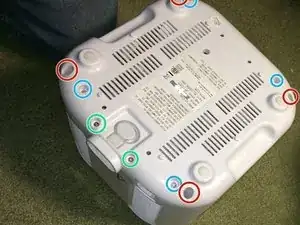
    • Remove 10 screws. Four of them are in deep narrow holes which presumably are intended to prevent casual disassembly like this. You will find most regular #2 philip's screwdrivers are not long and/or narrow enough.

  5. eUXC6aLGE6iGiyex
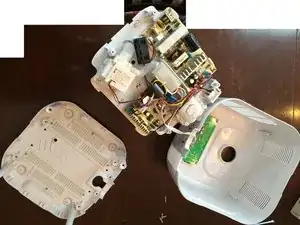
    • Once unscrewed, you can lift bottom part of case off cube.

  6. OcwLaxxxRCaKAbCA
    OcwLaxxxRCaKAbCA
    WCchBJBcIpXuxtrt
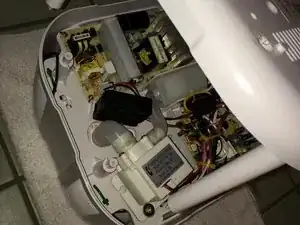
    • Unhook connector for small ribbon cable which connects control board on top of cube with circuit board on bottom of cube.

    • Flip cube over (carefully supporting the inside mechanism--its not attached to the case anymore) and then lift case off. Don't go yanking it away brusquely, that control cable may have gotten pinned underneath even though you disconnected it.

  7. IBZVpfGIqPWoWtu3
    IBZVpfGIqPWoWtu3
    W436HTeU6ZGASVZe
    D2sJvjvXSBTAiQNo
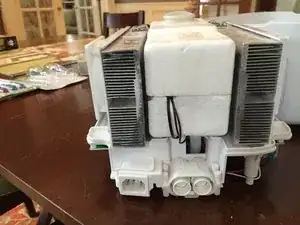
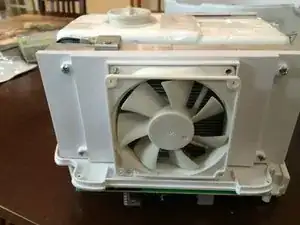
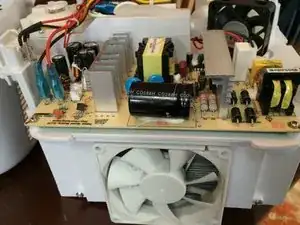
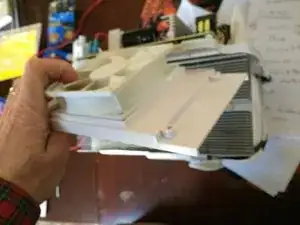
    • Here is what cube looks like from back, side and front.

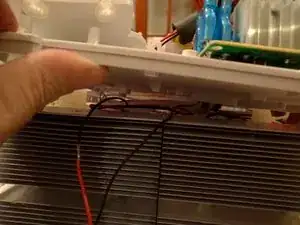
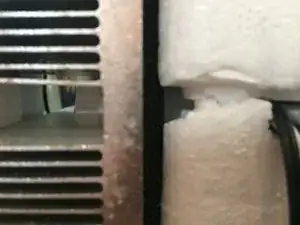
    • From the back, you can see the ports for the circulation hoses at the bottom, the water reservoir above, surrounded by insulation foam, and heat sinks left and right. Its not clear if you can remove the heat sinks without damaging the reservoir.

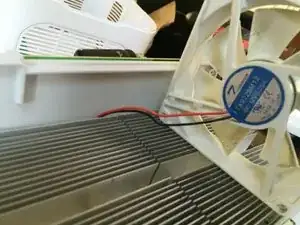
    • There is the left-side fan. Noisy! Look to my guide to fan replacement to make your unit quieter.

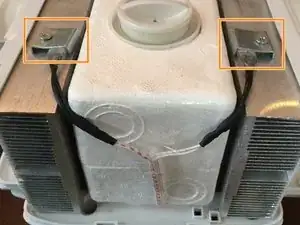
    • Those are probably thermostats on top of the heat sinks.

  8. SniPjPAGreLrPeet
    SniPjPAGreLrPeet
    J6dcHHWaFVCeTZC4
    UPeVgvOHE4bPMWr5
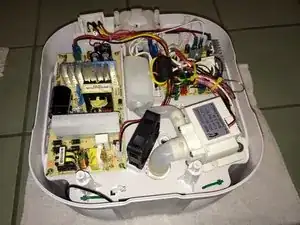
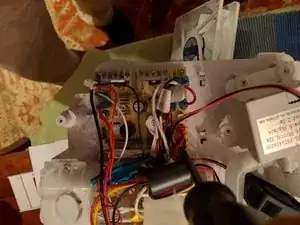
    • Underneath, where most of the electronics are located. This hangs upside down during normal use.

    • Note that there is actually a third fan in every unit to cool the power supply (and pump?). Luckily this fan is quieter.

  9. UhYbHwYyHxFtQbWN
    UhYbHwYyHxFtQbWN
    3Qk53FOuD6ZpiEFY
    fHPSORye6o5skjIZ
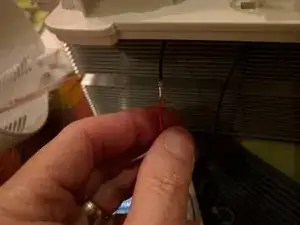
    • Your author's cubes both had this thin red cable floating with one end loose. This is the antenna for the wireless control. (Radio as opposed to infrared like your TV wireless control, because you may not have good line-of-sight.)

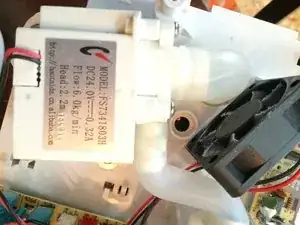
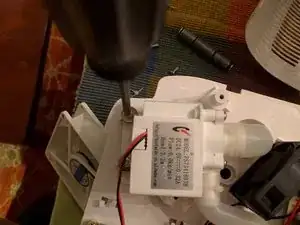
    • Water pump, and small fan.

    • Power supply.

    The red wire is the antenna.

    stevengpreston -

  10. t5WiFmM4M2Y4JNkO
    t5WiFmM4M2Y4JNkO
    KQT3OmbWBsBYF2xs
    wLy4fj1EdccFABqF
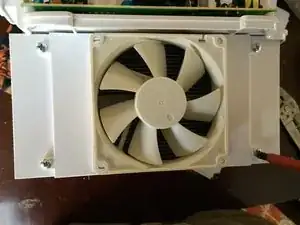
    • As you will see, the fans in this unit are not designed for easy removal or replacement

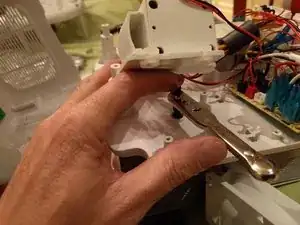
    • The 2 screws supporting the fan are on the heat sink side of the bracket/shroud, so we remove the bracket first, so we can get to those screws next. Remove four screws holding the bracket/shroud to the heat sink.

  11. DkrZr5EsYjClSorT
    • The fans are connected in series to a single header on the main circuit board. You can not do a tool-less (or even splice-free) replacement of the fans.

    • The fans are connected to one another, and to the circuit board via a path under the "deck" (actually above, when right-side-up.) There are cable ties way underneath, and to get to that, you would need to disconnect almost everything else on the cube, including the pump and all of the circuit boards.

  12. mXwCiVjMSw44Hxso
    mXwCiVjMSw44Hxso
    n5mLAoes6dZnWLYD
    YnrKK2FVLjh5PPDA
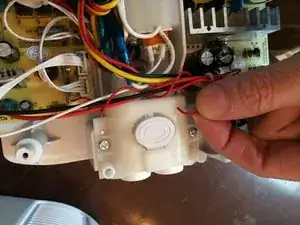
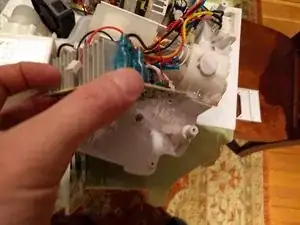
    • Unwilling to disconnect the pump, your author instead has just demonstrated what would be removed next. You must remove 3 screws anchoring the pump.

    • There is a bit of play with the silicone tubes connecting the pump to the resevoir once the deck is disconnected

    • The pump has got some stand-offs and silicone grommets to isolate vibrations from the rest of the cube to keep things quiet.

  13. KKJZRo5wbPQJ5p3S
    KKJZRo5wbPQJ5p3S
    2CcuF4nHMQsnJYAv
    PuSX2cSCp2EyqgyA
    • Remove 4 screws apiece from the main circuit board, and the circuit board for the power supply.

    • Once the pump and those boards are removed, you can access the 4 screws attaching the deck to the heat sinks and reservoir.

  14. dEVPoa5f2fPb1YWt
    • Once the deck is loose, you can lift it a tiny bit to see the wiring harness underneath. The pump above the deck is still connected to the reservoir below the deck through holes in the deck, so there is not much play.

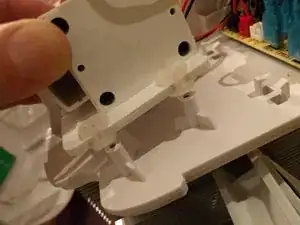
    • Notice that the "deck" has a flange at the edge, and surrounding each of the penetrations to the deck. When this is right-side up, these flanges will supposedly capture any water which happened to spill between the filler neck and the case, or slight internal leaks elsewhere, thus preventing the water from getting to the electronics.

    • Mind you, the splices for the fan harness would be sitting in any puddle captured by the deck (but at least that would only be low voltage DC.)

    • The fans must be connected together and their wiring cable tied together before the pump is attached in the factory, meaning you are forced to cut the wires to replace them unless you completely disconnect the deck and the pump.

  15. c4CAMsDGxTvtVqrt
    c4CAMsDGxTvtVqrt
    u3NF4N6cFMHBDsoH
    pBpmFeDkOWu63T5I
    • Your author was unwilling to disconnect the reservoir from the pump or heat sinks, so there are some parts of this cube which will remain unseen until it dies for good.

    • The best view possible for the thermal breaker reset switch.

    • Connectors to main circuit board, black is pump, red is small fan, white is harness for two large fans.

  16. vTo6CIZmXe4HtxLs
    vTo6CIZmXe4HtxLs
    iUpOlXmUJhL6JYfD
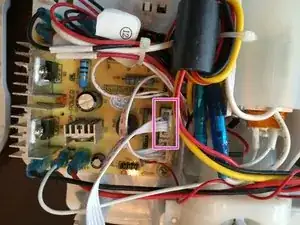
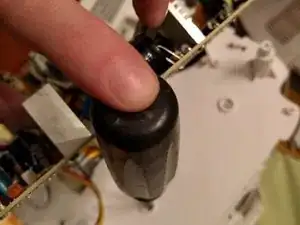
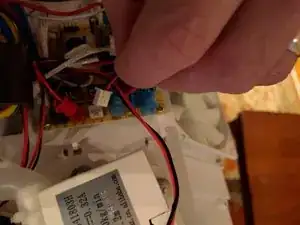
    • Added a couple of pictures of the elusive thermal breaker. There are two black wires connected to the thermal breaker. The wires are connected together under normal conditions (closed circuit) and separated (open circuit) when the breaker detects a thermal issue.

Netmammal

Mitglied seit: 30/04/15

2111 Reputation

79 Kommentare

where can i gey replacement pump ? Thanks,Art

art838 -

where can i get replacement pump ? Thanks,Art

art838 -

I haven't needed to replace my pump, so I do not have that info. I would 1st suggest contacting Chili, but according to an Amazon reviewer for the previous version of their cube, they were completely unhelpful.

Based on the markings on the pump in my photos, I came up with the following requirements to find a pump:

o 0.24 Amps at 24 V DC, which means it should not consume much more than 10 watts 24 DC

o 6 Liters/Minute, which is 1.5 Gallons/minute, 360 Liters/hour, or 95 Gallons/hour (GPH). I think that measurement is taken with a head of 2.2Meters or 7.2 feet (head means the vertical distance water is moved)

o A centrifugal pump which has mounting pads and can be rigged like ours. You will have to disassemble the pump I found and rotate the inlet/outlet cap 90 degrees. I hope it goes in right direction...

This from amazon may work:

http://a.co/392FAtj

Reply & let us know what happened (I'll write it up if you want), tell us if that part worked!
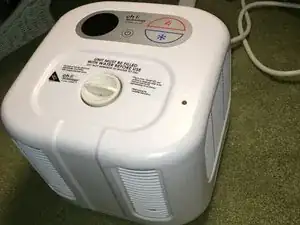
Netmammal -

Do you have an idea how the unit actually cools the water? What I gather from your pics is that it's just conductive heat transfer to the large heat sinks (somehow) as the water warms up? Mainly does it actually have a mini A/C compressor in it or anything? Or does it just cool by pulling ambient air across the heat sinks. Thanks!

Jason Perez -

It isn’t just cooling to ambient, it is using thermo-electric (Peltier) cooling.

Matthew Tillman -

You are right. This system does not cool the water below ambient. As it turns out, this is usually just fine, unless you happen to be sleeping in a room which is above 95°! I found that even on hot nights, I found it too cold if I selected the lowest temp. My understanding is that most waterbeds have heaters in them because it would be very uncomfortable to be sleeping on something that was even 80°. That carries away a lot of heat. We are used to having things gradually adjust to our temperature. When they continue to carry away the heat from our body instead of warming up slightly, it eventually feels pretty cold (think about sitting on a metal seat on an old-school chairlift when you are skiing, thats why the new ones are plastic.)

Netmammal -

Great guide. Thank you for the insight.

In step 9, the red wire is the antenna for the remote control.

Steve Preston -

Regarding cooling: I would assume that it has some kind of peltier device between the reservoir and the heat sinks. Did you see any wires indicating such? If not, this is really an awful waste of a design opportunity...

nathan.corbett -

I would disagree. This is already an overly expensive and overly complicated device with reliability problems. No where is any owner claiming that it does not keep them cold enough, if you owned one, you would understand why you do not need anymore cooling than what is already provided. Why make an expensive complicated device more expensive and more complicated?

Netmammal -

Says who. I'm tearing mine down to improve the heating because my girlfriend and I regularly run too hot (1 Cube 1 Ooler).

moatze 333 -

Any idea what causes an F1 error?

I have two units... the first can be healed for several days by just unplugging for an hour and restarting.

The other is hard-broke...

Thanks!

Kert Jans -

Kert,

I would try calling Chili Technology first (even if your warranty is up, they might give you advice) failing that, if you have not tried resetting the thermal breaker as I describe in step 3 above, give that a go. I had to do it several times to get it to "take". When you are fishing around with a pencil or whatever, its sorta hard to tell if you have found the button or not, and then it requires more pressure than I expected, as it is NOT a tiny micro-switch.

If you have not run the thing through the hydrogen peroxide 6-hour on high treatment, give that a go, its probably just gunked up with growth.

Good luck!

-Dave

Netmammal -

Since both of my Chilipads are out of warranty, I decided to see if I could find the cause of the F1 error.

I made some extension cables and connected sensors from my "good" Chilipad to the "bad" one until the bad one started working again. The sensor connected to the NTC connector was the cause. I followed the wires and they go into the water tank. It appears to be a thermistor or equivalent. The good unit's sensor measured 13K ohms, the bad units sensor measured 500 ohms. If the cable is disconnected, the display indicates an F5 error. I inserted a 20K potentiometer in place of the sensor, the resistance value directly corresponds to the temperature indcated on the display.

Here is a table of temperature values vs resistance:

Temp Resistance

Hi < 6000

109 6000

108 6200

100 7500

90 8800

80 10000

70 12000

60 14500

56 16000

Lo > 16000

Continued in the next post...

Kert Jans -

If one can find an equivalent thermistor with these characteristics, replacing the existing one with it will in-theory fix an F1 error. Temporarily replacing my sensor with a 10K ohm resistor made my unit operate. But...after testing, the water in the tank of the good unit was ice-cold and the repaired units water was ambient temperature (it does not chill the mattress).

Regarding the existence of Thermo Electric Cooler (Peltier) devices in the unit.I actually emailed Chills customer service and they confirmed that there are four Peltier devices which touch the water tank. If you follow the red/black wires from the TEC connector on the circuit board you can see they go deep inside the unit to the Peltier devices.

Measuring the resistance from the TEC connectors on my bad unit indicates an open circuit, therefore there is also something wrong with them. I am going to send this unit back for repair since I don't want to dismantle it to the extent that would be required to access the peltier chips.

Kert Jans -

On a side-note: I tried an experiment to make my own Chilipad cooler...at least until my other unit comes back from being repaired. I purchased the following components:

Amazon:

TEC1-12706 Thermoelectric Peltier Cooler 12v 92Watt

SUPERNIGHT DC 12v 360Watt Power Supply (could be smaller)

ZJchao 200ml Acrylic Water Tank Cooler

Youbett Aluminum Water Cooling Block

Anself Mini 4.8W DC Micro Brushless Water pump

Food Grade Vinyl Tubing 10ft 5/16 ID 7/16 OD

DC12v Heat Cool Temp Thermostat Control Switch

Frys:

Enermax ETS-N31-02 CPU Air cooler

Total cost, about $50...

It doesn't cool as fast as a Chili unit...but works...

adding one or two more Peltier devices with heat sinks should make it cool faster.

Kert Jans -

I replaced the water pump on a CP-100 Model with an externally mounted 12 volt magnetic drive aquarium pump. Took out the impeller from the Chilli pump and extended the hoses outside the box. Works better than new. The new pump is powered by a 12 volt power pack. Pump doesn’t get hot as I think it is cooled by the water flow. I also cut out the grills on the air outlets. Pump details” Brushless Magnetic Drive Submersible Water Pump 350L/H 4.5M 12W DC12V Bob Pendrey Australia

Bob Pendrey -

From Bob Pendrey:

After about 5 months the plastic of the rotor on the replacement pump I fitted became soft. I think it was attacked by the hydrogen peroxide.

I have replaced the pump with the same one again but have stopped using hydrogen peroxide and I am now using waterbed conditioner instead. It is also cheaper than hydrogen peroxide.

The hydrogen peroxide may had also caused the failure of the original Chilli Pump .

So far so good.

Bob Pendrey -

I need a new hose?

Julie Lilly -

It would be nice if we could collectively figure out what F1-F5 errors mean. One of mine has F3.

freedml -

same here. F3 error once it cools past ambient temperature (72-71). It seems like it’s getting too hot and the big fan up top never starts.

nicu -

Well I have one piece of intresting news! I disconnected the fans so that I could externally power them (fans turning on/off is bad for sleep) constantly and no errors so far! I’ve taken it through a heating/cooling cycle once. I used quiet noctua fans, which will probably reduce the cooling speed/power of the unit a little… but probably not much. The cooling peltiers are so under-powered that it doesn’t take much from a fan to keep up.

nathan.corbett -

Oh, I think F2 error is something to do with the pump. While I was running some CLR through the circuit it gave me some trouble until I diluted the cleaning mixture quite a bit. Might be a pump airlock error.

nathan.corbett -

Has anyone found the exact replacement pump for the cube?

Chuck B -

Has anyone tried silencing the beeps with either the cube or remote?

Anne -

I had an F2 error.

Support told me “The heat sink is too hot and the system is going into protection mode.“

Guy Tristram -

I've been using a 50/50 mix of pink antifreeze for over a year now. No worries about mould or having to clean it out. As a bonus it lubricates the pump and keeps all the seals in good condition, just like it would on a cars system.

LE55ONS -

Any updates on your cube, did the antifreeze continue to work? or did it break?

Rebecca Hamilton -

Anyone have specs on o-rings? I have a unit that was purchased in 2016 (old model) and the o-rings on the end of the hose as well as the ones on the unit where the hose connects are disintegrated and the company will not give out that info. Instead they want me to send it back and pay $129 to replace them themselves. I’ve looked around myself but because they are so damaged I’m having trouble finding the perfect match. Thanks

mcawood -

Ever get the specs on the o-rings? I got the same spiel from them. Absolutely ridiculous that they ask for $129 to replace it.

I wrote a 2-star review on their website about it, but they filter out reviews <4 stars and Amazon only lets you review it if you’re a verified purchaser. Very unhappy with this company right now.

christopherjjustin -

christopherjjustin , THANK YOU! I have been searching for this info for WEEKS. They refused to give me the sizes as well. Do you know which are which? Mine were so mangled i couldnt tell the right sizes. I need the ones just inside the unit, and the ones just on the tip of the hose connector.

Pete Giella -

My ooler is leaking from the rear pad quick connect. I measured the I ring that are on the quick connect from the Ooler unit. I got 7/16 od, 5/16 id and 1/16 rhickness. I am ordering g a silicone o-ring kit from Amazon to see if this works.

BRIAN F -

I have to add about 1 oz of water or Hydrogen peroxide about once a week. Does anyone else have this ? Only using it on cooling down to lowest temp for about 8-10 hrs/night. I’m also trying to build in a wireless control for the remote control. The remote that comes with the cube doesn’t have enought range from the family room to the bedroom, and we like to let it start cooling about an hr before bedtime so we have to run upstairs.

I have 1 Ver2 unit I bought from Chili and under warranty so I don’t want to open that cube so that’s why I’m trying to build something into the remote.

I have another unit I bought on eBay for $100 but the RF doesn’t work.

ron klo -

Any luck with the RF control?

Dan Bowen -

I was able to extend the range of the remote substantially by adding a wire to the antenna on the receive module in my chillicube unit. In my unit there is a green circuit board attached in top of the controller board that has the 2ghz radio. There are at least two versions of the controller and power supply cards as mine don't match the original post at the top. So the radio may not be the same in all units. On the radio card one end has a zigzag trace that is marked "ANT". Soldering a foot or two of insulated wire to the end of that trace closest to the center of the card and wrapping it around the inside of the cube base before re installing the bottom works well.

shawn -

I have spent a few hours looking for a way to control the cube not by the remote control provided. I understand from the manufacturer that the remote control operates on 2.4GHz RF. I originally intended to use existing products like the Broadlink RM pro to control the cube since it operates on RF.

But sadly 2.4GHz is not available using these options. I was thinking to get a device that can clone 2.4GHz RF signals. However there is no such device on the market for some reason.

I came to realize that it is possible to build something with Raspberry Pi and a RF transmitter. Combined with “home automation” we can actually control the cube with Alexa or Google Home but they may take quite a lot of work on the hardware and software end. It is probably easy for people who know how to do that…but it is just too complicated for me.

Artichaut Blossom -

I just bought a used one. Came with two cubes and a queen pad. One of the cubes leaks. It appears to be one of the fittings at the base where the hose plugs in. The spring has failed and is not closing the valve like it should. I emailed support to see if I could buy just that piece but they said no and that I’d have to send it in for $129. Anyone have a parts cube they’d want to sell me that piece?

rjjone2 -

My Chili Technology system has a leak. This is from the mattress pad, at the opposite end to the hose connection. Although we thought the warranty was 18 months, now the company says only six months on the mattress pad, and not the cube which is still under warranty ‘til September 2019.

Anyone repaired the mattress pad? Seems straight forward - a single tube that runs back and forth from the junction with the external hose.

Thanks In Advance,

Peter Stonard -

I had two leaks in my pad. One was where all the tubes connect together at the top of the pad. The other one was in the middle of the pad. I had to make a cut in the pad to expose the tube in the middle of the pad. It was just a small pin hole. I used Rust-Oleum Leakseal to stop the leak and wrapped the tube. It has worked for about a year now. For the leak where all the tubes meet up at the top of the pad I cut the pad again to expose the connection point. On my pad there are 5 individual hosed that run in the pad. The connection point is a splitter. You have water that is pushed into the pad on one side and water pushed out of the pad on the other side. I then pulled the tube off the connector and cut the tube where I had a hole and placed it back on to the connector.

C Mad -

One of my tubes completely broke. I managed to find a drinking straw that perfectly matches the diameter of the tube. I inserted the broken tube into each side of the straw - used some silicone but I’m sure it would’ve worked without it because of how snug the straw was. done!

nicu -

You nailed it. I have an Ooler unit and noticed recently that I had to refill it every night. I disassembled the entire unit, and there were no leaks. The leak was coming from the hose that goes from the unit to the mattress pad.

I’m not sure how this occurred given that the tubing is encased in foam insulation. It makes me think that the tubing was damaged from day one. My problem is that the tubing was scratched, and therefore, tiny leaks began to form.

I bought a can of flexseal and flex tape. Flexseal alone did the trick. It essentially acted as a second rubber coating over the hose. Once I add flex tape to the hose, I’ll be good to go.

I have a California king bed. Replacement mattress pad would cost over $400. I fixed the issue for $56.

Harry Ragsdale -

I had this unit since 2012 at it worked without any issues. I never ran the cleaning cycle in all these years - there was a considerable amount of bacteria growth in the reservoir when I started getting these F3 errors… Now I ran it with hydrogen peroxide for 48 hours and it looks really clean. I know the pump works because on 117 HEAT it heats up the entire pad. However on COLD it still gives me this F3 error. The big fan at the top seems to never start now (although it worked fine when I started getting this error). It cools fine up until 72-71 but once it reaches that point it gets too hot and gives out that error.

Any ideas? Thank you so much guys!

nicu -

The pump suggested above (++http://a.co/392FAtj++ ) is 12V one, the Chilicube requires a 24V one.

One of these items on Amazon would be a better option: ASIN B08HWBX2RH or UPC 738680103352

ronkloiber -

I posted a reply on how to repair the pump to someone’s comment about trying to find a pump last night. I can’t see my reply now. What I found was the one end of the shaft had worn down to only about 25% left. I posted removing the shaft and cutting it, then flipping the shaft to put the worn end back inside the impeller/magnet housing. I did this on my original Chilipad and works fine. I just looked at my 2nd Chili Cube and found the shaft in the pump on that one is plastic or some other type material, maybe Ceramic ?? The original one has a stainless steel shaft. BTW, the shaft is 2mm x 56mm. If you’re in Canada, Sayal.c o m electronics sells a back of 100 of these stainless steal shafts but a bit longer, for under $4.00. At least 100 is what the web site says.

ronkloiber -

Any idea how to connect disconnected tube in the pad ? They told me I have to buy a new pad. I can feel one tube got disconnected but not sure if there is an easy way to connect one tube.

Lori Cirruto -

Did anyone find a replacement pump? The link provided above no longer works.

Scott Kelly -

B10-A Circulating Pump - B10A 24V 7L ussolarpumps.com. Use silicon to hold in place

Guy Carthel -

Has anyone seen a teardown for the Ooler? I am curious how different they are. Ie. Is the pump more powerful?

Scott Kelly -

Awesome article. My device no longer turns on. I’m assuming a power supply issue. Any suggestions? If I take the unit apart, Is there an easy replacement for the power supply circuit board?

Anthony Shields -

Hey Anthony, did you ever figure out a way to resolve your power issue? I have run into the same issue with my device and cannot figure out any solution. Thanks.

Thomas Flynn -

Pump has been the problem for me. This is a replacement pump that can be used. Just use silicon to secure in place of the mounting. The pump is from us solar pumps model number B10-A Circulating Pump - B10A 24V 7L

Guy Carthel -

Added a couple of pictures of the elusive thermal breaker (step 16). There are two black wires connected to the thermal breaker. The wires are connected together under normal conditions (closed circuit) and separated (open circuit) when the breaker detects a thermal issue.

TBYBRUTF -

Hello,

This is a great write up. I’ve done the fan upgrade and things worked great for months. Anyone have any experience with timer circuit within the unit? I believe its a 12 hour timer in case one forget to turning it off. Mine has started turning off with 4-6 hours of starting the unit before bed.

I have extra unit for parts if I need a whole board.

Thanks in advance for your assistance

valtvife -

I've replaced my pump but still have a lack of circulation. I have a newer pad that has never worked (thought it was pad and chili replaced it). Water is cooling in unit. Seems to go into pad somewhat because when I connect the water fill comes on a couple times.

Ryan Brandt -

I am looking for the clip that holds the hose in the cube. Mine snapped.

mak3324 -

My clipped also snapped because I forced pulled it, instead of pressing the bottom button. Sad Face..

Try Im -

I am as well, any luck? Mine is the Cube 1.0. Thanks in advance.

Don Lovato -

Hello, has anyone figured out the fix when your unit will no longer power on? The fan runs non stop but the power doesn’t work to turn on any settings. I have the chilipad CP-100.

Thomas Flynn -

On our pump there is a web address of the manufacturer.

We thought ours was going out but turned out that I did not have the tube connector pushed in far enough.

Might check that.

Daniel -

Hello, I’m trying to replace the release button, it broke during our move. Any ideas how I can obtain one? Their customer service isn’t helpful at all. Thanks in advance.

Don Lovato -

For those that were asking about the cooler -- it's inside the silicone sleeve between the pump and the pad connector. The circuit board has a connector labeled "PTC" which I would guess is "peltier cooler". The themo sensor is also wedged into that silicone sleeve.


For those who say their unit is working but the water isn't flowing -- mine was doing that and it turned out that the metal peltier cooler was completely jammed with sediment from my tap water. When I got the thing I used distilled water like they suggested, but then I got lazy and started using tap. It took about 2 years for it to get completely blocked and stop working. I was able to clear some of it with a drill (but be careful -- there are fins inside the cooler) and then get the rest by soaking it in vinegar for a few minutes.

Alex Botti -

Well my Ooler Sleep System is still under warranty but Ooler wants me to pay $20 in shipping and then be without it for 2 to 3 weeks after they get it. I'm in search of a water pump as well. The pump from Alibaba appears to be no longer available. Your link to Amazon appears to be dead as well.

Chris -

Asking the manufacturer of the pump about purchasing their response is "No online sales, only online transactions". Both my Ooler pumps have been making a whine, the 1st unit that started whining has stopped but now the 2nd has started whining much more.

Chris -

Is there a fuse inside that would need to be reset/replaced? My cube wont turn on anymore. Nothing changed between uses, just attempted to turn it on one night and it wouldn't respond. Tried unplugging it, tried different plugs ect. no change. Any help would be very appreciated.

Rebecca Hamilton -

Clarification, when I plug it in it lights ups in the display and the buttons, and then they fade out. Buttons unresponsive. I have now opened it up, cleaned it, no change.

Rebecca Hamilton -

Just ordered 2 replacement pumps from US Solar to see how they work. Funny thing about everyone saying Kryo told them their unit is out of warranty is I have a chat record that their representative told me that they would fix any issues even out of warranty, you just had to pay the shipping cost. Mine are still under warranty but I'm not willing to send it off for 3 to 4 weeks to have another cheap Alibaba pump installed in it. If anyone is interested in the details I can try to take pictures or videos, I have the Ooler.

Chris -

I broke the clip that locks in the hose for Cube 1.0, can’t seem to figure out how to repair or replace that part. Any ideas, please? Thanks in advance.

Don Lovato -

Got any photos? Maybe we can figure something out. I have the Ooler unit but maybe able to think up something to secure it.

Chris -

Okay, I can verify the replacement pumps work. I have the Ooler unit, it has the same cheap Alibaba pump on the unit. For a replacement pump order, the B10B 24V 7L from https://www.ussolarpumps.com/catalog/cir... ask Mike to swap the pump heads to the style A barbed fitting to use in the Kryo unit, these fittings are roughly 11mm and 18mm which will fit the hoses on the Ooler/Chilipad system by Kryo.

I have two units less than 2 years old, unit one started making noise several months back but has now stopped, and unit two started making an awful noise. Kryo wanted me to pay $17 for a shipping label to send them the unit, they wanted to keep it for 2 to 3 weeks and then wanted me to pay to have the unit shipped back to me. I purchased two pumps with shipping for less than $110 and they have a better-built pump installed now. If anyone has any questions feel free to ask ctroxtell at gmail dot com

Chris -

Here are side by side photos for anyone interested. The pump has the same footprint.

Chris -

My cube heats but will not cool. Is there any hope in fixing it myself? Out of warranty.

Jane Kettering-Bryant -

According to Kryo you can pay for shipping and they will fix anything on the unit. This is the conversation I had with their rep before I purchased my unit.

(05:57:30 PM) Taniza : If it burns out we can bring the unit in for repair , you would have a 2 year warranty

(05:58:43 PM) Chris: What about after the 2 year warranty though? Is it a bulb that can purchased from you or purchased online? My biggest concern is spending the money on something that cannot be repaired after warranty ends.

(05:59:30 PM) Taniza : We use a certain type of light, and we do have them in stock , but we do not sell them, after the 2 year warranty you pay for shipping the unit in and we repair at no cost to you.

(06:00:58 PM) Chris: So does that apply to any part of the unit such as the pump or fan? Just have to pay to ship it to you and can get it repaired at no cost?

(06:01:59 PM) Taniza : You would only pay shipping after 2 years

I have the Ooler unit, so mine is different. But are you sure your pump is pumping the water still?

Chris -

Chilipad unit works well while cooling but will not heat up above ambient. Tried pushing reset multiple times and still get it to heat. Took it apart since it is mentioned that the heating reset is difficult to press and made sure it was properly being pushed down to reset. Still no heating.......any suggestions?

M Lawry -

Hello, awesome write up. I need to source the tubbing that comes out of the cooler on top. Anybody know where to get replacement tubbing?

BRIAN F -

Hello everyone. I replaced leaking rubbing with the spring that goes from the pump to the cooler in my Ooler system with

High Temp Silicone Tubing Hose - Food Grade Silicone tube, size (3/8" ID x 1/2" OD, 3 Feet). it fit perfectly and looks like better quality than the original. Got it at Amazon. https://www.amazon.com/gp/product/B08K8T...

BRIAN F -

I had an issue with my Ooler system after about 2-3 years. The fan seized up and couldn't keep the water cool. Instead of paying $130 for the manufacturer to fix it, I found the exact fan on eBay for $21.50 and replaced it myself. It works like new again. The only caveat is that the connector on the new fan wasn't the same, so I just cut the wires off the old one and soldered it to the new one. Here's a link to the fan if anyone is in the same situation. https://www.ebay.com/itm/125401606126

The fan is model FD1238SL DC 24V 0.17A

Jason M -

(Ooler repair, but should apply here as well.)

Thanks for the pump recommendation from ussolarpumps.com. The B10A 24V 7L was out of stock, so I ordered the 9L instead on Mike’s recommendation and it works perfectly even with the slightly elevated wattage requirements. These pumps aren’t cheap but they are extremely well built. There’s nearly zero noise when operating. There’s nothing to mount the pump, so I used the foam block from the old pump to add some vibration dampening and then zip tied it to the old mounting bracket. It’s pretty solidly attached even without screws.

I did run into a really weird problem during install worth mentioning. When I first powered it on, it didn’t work at all despite connecting the red / black wires exactly as they were on the old pump. My multimeter read -24V from the board indicating that the polarity was reversed! I flipped the connector and everything worked perfectly. Make sure you check your the voltage on the mainboard before connecting the new pump to sanity check the polarity.

ficusfactor -

My used chilicube recently stopple pumping so i took the bottom cover off. I dismantled the pump to investigate its problem and found the impeller and shaft were stiff and would not rotate easily. The motor is a single coil brushless design that uses permanent magnets in the armature. The armature appears to be in the wet side of the pump. With that design if the armature stops in the wrong position the motor will not restart. I flooded the area under the impeller with hydrogen peroxide and worked the impeller with my fingers and it loosened up bouncing back and forth to where the magnets held it easily after a few minutes. I suspect lack of maintenance cleaning with hydrogen peroxide allowed some algae growth around the armature and kept it from turning easily. There were small amounts of algae growing in the tube attaching to the pump. It ether stopped in the wrong position or was too stiff to start. This seems to have corrected the issue with the pump and it is working correctly now.

shawn -

I took apart my unit because I was hearing a loud angry noise, expecting the pump bearings to have worn out and to need a new pump. My issue turned out to the the little fan next to the pump. I bought a new fan on Amazon and the noise went away. This tear down helped me immensely!

Joanna Anderson -