Einleitung

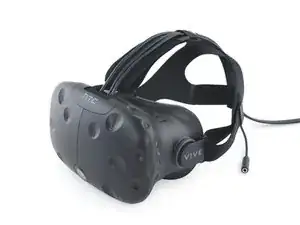
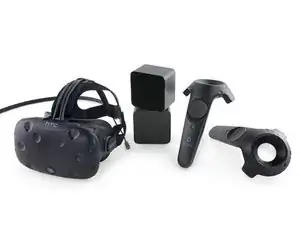
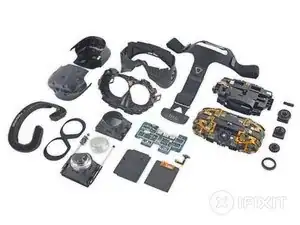
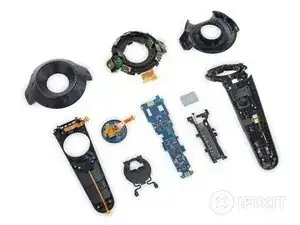
Around here it's all about gadget guts. With VR becoming all the rage, we couldn't wait for a little Vive-section. What does HTC have hiding right before your eyes? Strap a black box to your head, 'cause we're about to find out! It's time to tear down the Vive.

Looking for more virtual fun? Follow us on Instagram, Twitter, and Facebook for all the latest repair news.

  1. dZiihF6WQXlqCW2T
    dZiihF6WQXlqCW2T
    pu5ifTlVkjJTmUnb
    r4YklkkyQiA165QM
    • It's been a long time coming, but 2016 seems to be the year when virtual reality finally becomes an actual reality. How does it work? Well, here are the specs:

    • Two 1080p AMOLED displays with a combined resolution of 2160 x 1200

    • 90 Hz refresh rate

    • Built-in front-facing camera and microphone

    • Accelerometer, gyroscope, and laser position sensor

    • 360-degree headset tracking via Lighthouse IR emitters

    • 110º horizontal field of view

    • This all compares pretty favorably—or in some cases, identically—with the Oculus Rift CV1 we tore down a few weeks ago.

  2. MRBmJgHZLODNiB15
    MRBmJgHZLODNiB15
    BOYQGB3h2xyiKjiU
    4wECimZiCBRdiIdy
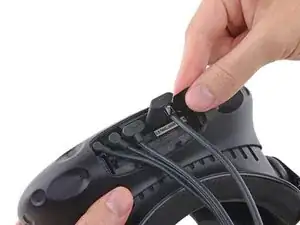
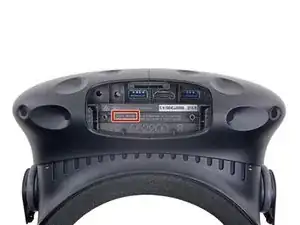
    • After unplugging ourselves from the Matrix the four headset cables, we spy the headset's model number: 0PJT100.

    • We also spot a standard 3.5 mm audio jack, DC barrel jack, and a single HDMI port flanked by two USB 3.0 ports.

    • Interestingly, HTC left the rightmost USB port open for third-party accessories.

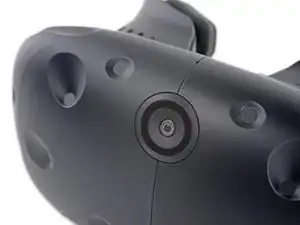
    • Bottoms up! We flip the Vive and go eye-to-eye with the front-facing camera. This unblinking cyclops also provides AR for the Vive. What's it running on? Let's get inside and find out.

    I like how they just start with the cable entrance cover off with no explanation whatsoever of how that comes off at all. &&^&^$^ !&&*.

    fischjeanpaul -

    That's because this a teardown/hardware analysis—not instructions. However, if memory serves, the cable cover removal is explained in the owner's manual. You simply push/slide it toward the front of the headset, and then you can easily lift it open.

    Jeff Suovanen -

    Also would like to know before I snap something off my $800 headset while installing the wireless upgrade kit.

    David -

    my vive headset cable is not working when i play headset gets switched of instantly kindly help in resolving this

    asad ali -

  3. ArlgUFSZtEpWD3j5
    ArlgUFSZtEpWD3j5
    A4DREFe4ovXsvhBc
    Udh6qtE3nEVdw2iP
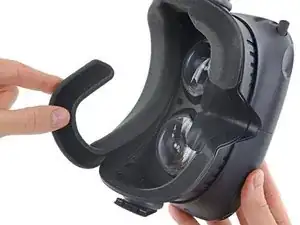
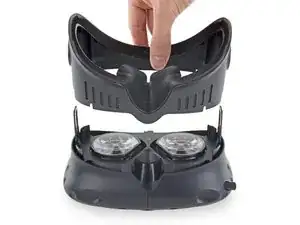
    • First to go is the interchangeable foam insert, velcroed to the headset for our convenience.

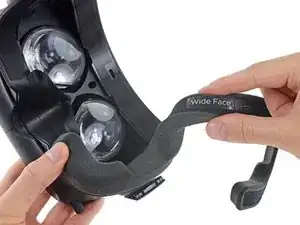
    • We peel back the velcro to reveal a hidden message.

    • Who're you callin' wide face? Huh?

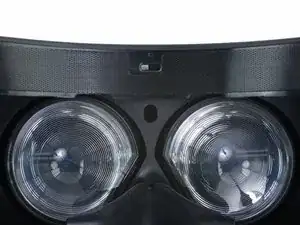
    • Nestled in a nook between the eyepieces is a proximity sensor that detects when the Vive is actually on your face—presumably to shut off the displays, conserving power and processor resources.

  4. 6elRMHyiVgfvVyqo
    6elRMHyiVgfvVyqo
    6nO44jZbtyxlFYKp
    iwYiogT3MDOpUBiZ
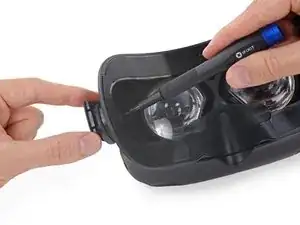
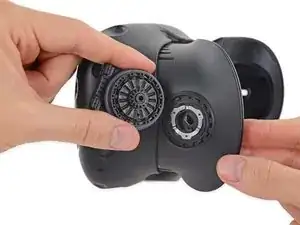
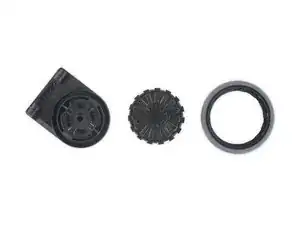
    • Cog-zooks! We've got our gears turning as we remove the eye relief adjustment on the Vive headset.

    • Not to be confused with IPD, this adjustment actually controls the distance from the headset's optics to your eyes.

    • The Rift CV1 doesn't have this feature, probably because its asymmetric lenses allow you to adjust focus by simply pushing the headset higher or lower on your face. Is this confirmation of a different approach to optics in the Vive? Only more teardown will tell.

    What size torx?

    Jameswh -

    The Torx screw is a T6.

    Nicholas Halderman -

    When you reassemble the eye relief mechanism, there’s an important protrusion on the gear wheel (center piece in the third photo). The center gear is raised on a smooth circle; there’s a small protrusion on this circle that acts as a stop. It’s barely visible at the 3 o’clock position in the third image here, and in about the 1 o’clock position on the second image. The socket it meshes with, visible in the second image, has a corresponding raised ridge that limits the wheel to only a half turn overall, just enough to get it from the minimum relief setting to the maximum. When you’re reassembling it, it’s best to slide the piece to the minimum eye relief setting (since gravity will keep it there) and align the protrusion with the bottom edge of the ridge in the socket. If you don't pay attention to this and just slap the thing together, you’ll have a reduced range of eye relief adjustments.

    Nicholas Halderman -

    When reassembling, go ahead and add some Loctite blue threadlocker, as was factory, and tighten well but be careful not to over-tighten. They have a tendency to back out and then fall to the carpet to be lost forever if not not firm and threadlocked.

    cuth_bert -

  5. ePUxPrMGFM1cVWu5
    ePUxPrMGFM1cVWu5
    awZXErmsaWwfaXBC
    lvLkAtklUm2mXMGH
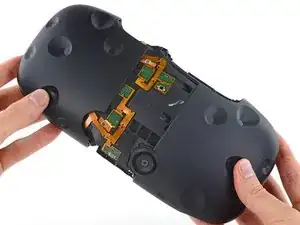
    • We can't help but experience a little déjà vu as we unmask our latest subject.

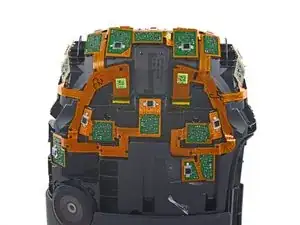
    • Pulling back the outer shell on the Vive reveals a number of sensors—32 in total, according to HTC.

    • These photodiodes take in IR light from the two Lighthouse base stations as they flash and sweep light across the room. This enables a connected PC to calculate the headset's position and orientation in space as a function of the time between receiving the flash and the following IR laser sweep.

    • This method is the exact opposite of the head-tracking technique found in the Oculus Rift. In the Rift, the desk-mounted camera tracked the IR emitters in the headset, whereas in the Vive, the headset sees light from the mounted IR emitters without actually "tracking" its location.

    Pulling back the shell is considerably easier said than done. If you can stick a spudger under the front just above the midline, you can break the grip that some glue has on the shell, which makes it much easier to remove. I got pretty nervous pulling these sections off, given the array of delicate ribbon cables hiding under them.

    Nicholas Halderman -

    Good points, the ribbon cables are much stronger than they appear fortunately…

    cuth_bert -

    PSA: There are four screws you need to remove that are covered with small black stickers (two on top, two on bottom)

    Oscar Kosar-Kosarewicz -

    What types of cables/material used here(Yellow color)? Is that flex PCB? If yes, what is the material used for it?

    sabiha patan -

    Oscar, thank you for the very important tip about the stealthed Torx screws, two each side, hidden under EZ-Tear no-peel labels on my unit.

    Mark Hennessy-Barrett -

    Should have show where those slips to release.

    Zorg -

    Thank you for not showing hidden screws on sides

    Zorg -

    Pay attention to a very small piece of metal that might come off when taking off the front shell.

    Steve Sciberras -

    It would be great to have a picture of those screws - thanks Oscar and Mark. Upon removing the shell I found lots of corrosion on my diode web. Cleaning with a cotton swab and alcohol - a couple just came off!!

    John Butman -

  6. kNXevCeYBuDdUo4D
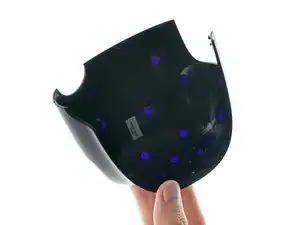
    • A closer look at the outer shell reveals that each divot on the surface holds a small IR filter.

    • These IR windows give the photodiodes beneath a clear view of the lights and lasers emitted from the Lighthouse base stations.

    • More on those later.

  7. TsXMDAUnDBS6VSLQ
    TsXMDAUnDBS6VSLQ
    ZvJL2nOUYQeTyLEB
    teroQPKEAFaCPGDR
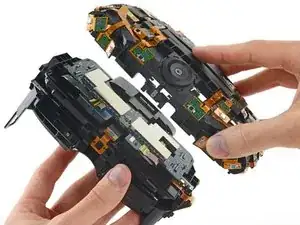
    • With the outer sheath removed, we flip the switch on a few ZIF connectors to disconnect the IR photodiode webbing from the motherboard.

    • For those of you keeping score, everything thus far has been super standard and easy to take apart. It seems that this apple fell especially far from the tape-and-glue tree.

    • After deftly dispatching a hidden press connector behind the front-facing camera, the whole sensor array lifts off. Easy peasy.

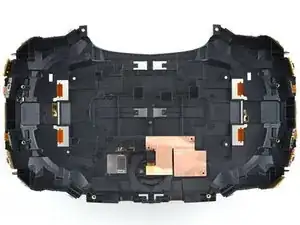
    • Hiding in the back of the assembly, we find a couple spring contacts that deliver power to the whole setup—and behind that swath of copper tape, the camera.

    The sensor array is held on by 13 phillips screws: 8 around the perimeter (see the brass inserts in the third photo), one dead center, and four sort of half way between the corners and the center. The ones around the perimeter are accessed from the lens side of the headset; the other five are accessed from the sensor shell side. There are also two plastic tabs to press down while removing it; these are at the bottom, near the microphone. You can barely see them at the bottom of the third picture. When you are looking for the perimeter screws on the lens side of things, there will be two phillips screws visible near these tabs--these should *not* be removed at this time. The perimeter screws on the bottom are further out. There are only two perimeter screws on the bottom to remove now.

    You will not be able to remove the press-fit connector until the plate is partly removed, so be careful while you lift it off. It should come gently; if it doesn't, you've missed a screw or tab.

    Nicholas Halderman -

    You also should not yet remove the two screws on the top of the lens side that are slightly further out than the ones connecting the shell. The ones you need to remove on the top side are quite far forward; the ones you do not are roughly on the same plane as the near side of where the cable covering clips on.

    The screws you need to remove at the sides on the perimeter are quite recessed, behind the sensors that stretch back from the front shell. There are indentations in the plastic near these screws to accommodate your screwdriver, which should help you find them.

    Nicholas Halderman -

  8. iyeHD11EAdUaCU1j
    iyeHD11EAdUaCU1j
    ZFPDJ6mww6ckNdDl
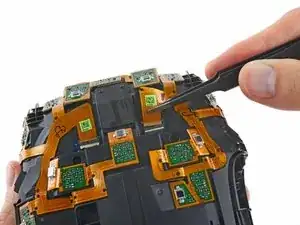
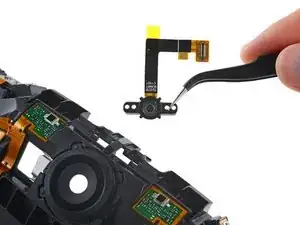
    • With tweezers in hand, we pluck the front-facing camera out of the Vive. Manufactured by Sunny Optical Technology, it reads: TG07B C1551

    • That name might sound familiar. We've also seen Sunny camera modules in the OnePlus One and Project Tango phones.

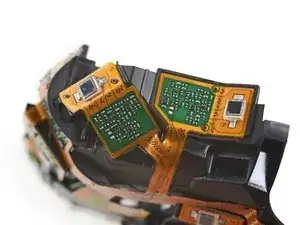
    • Working our way around the sensor net, we note that each of the sensors is individually numbered (photodiodes 18 and 19 in the photo).

  9. Dejnl3tRniTTqQMv
    Dejnl3tRniTTqQMv
    ULhEjUni161GXAvb
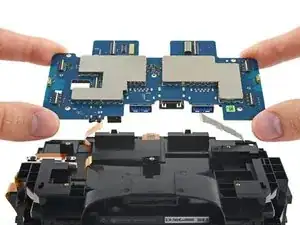
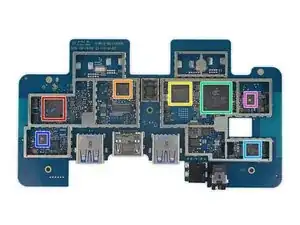
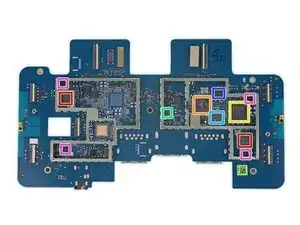
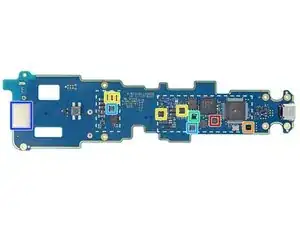
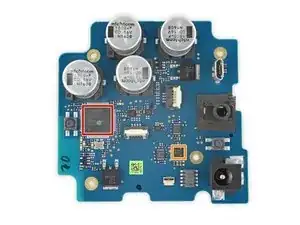
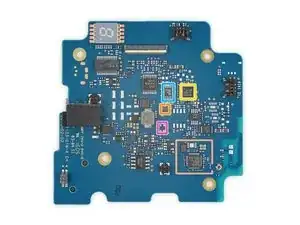
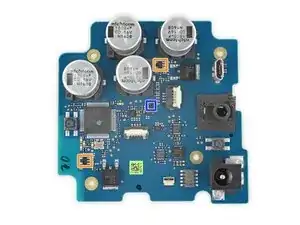
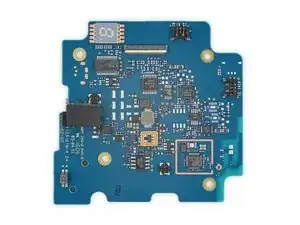
    • We have liftoff—of the motherboard, that is. Let's see what sort of silicon is lurking beneath those huge heat EMI shields. On the front side of the board:

    • STMicroelectronics STM32F072RBH6 32-Bit ARM Cortex-M0 Microcontroller

    • Toshiba TC358870XBG 4K HDMI to MIPI Dual-DSI Converter (Also found in Oculus Rift CV1)

    • SMSC USB5537B 7-Port USB Hub Controller

    • Alpha Imaging Technology AIT8328 SoC With Image Signal Processor

    • Cmedia CM108B USB Audio SoC

    • Micron M25P40 4 Mb Serial Flash Memory

    • Micron N25Q032A13ESE40E 32 Mb Serial Flash Memory

  10. JcYPb2M4VRcqvq6B
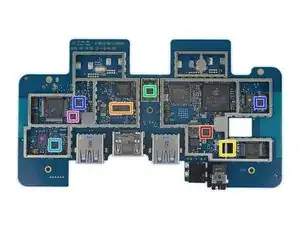
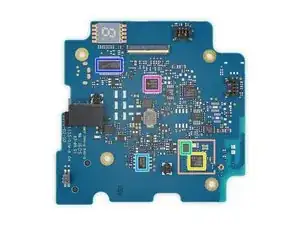
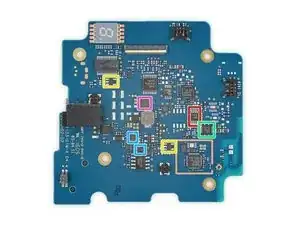
    • Even more chips on the front:

    • Texas Instruments TPS54341 Buck Converter

    • Texas Instruments TS3DV642 12-Channel Bi-Directional Multiplexer/Demultiplexer

    • Cirrus Logic WM5102 Audio Codec

    • Pericom Semiconductor PI3EQX7841 USB 3.0 Repeater

    • Lattice Semiconductor LP4K81 Ultra-low Power FPGA

    • Texas Instruments display power management (likely)

    • Texas Instruments TS3A5018 4-Channel SPDT analog switch

  11. dB1rwTX6ewnfu2m5
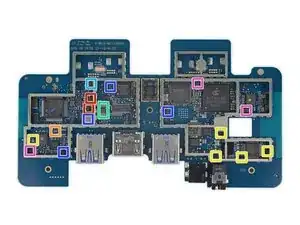
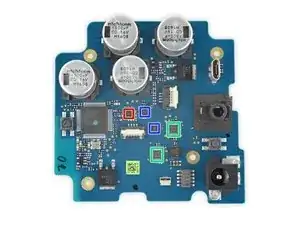
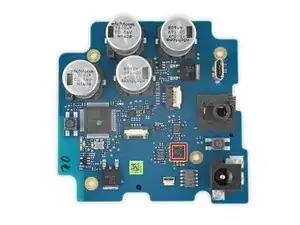
    • Even, even more chips on the front:

    • Texas Instruments OPA171 operational amplifier

    • Texas Instruments TXS0102 2-bit bidirectional voltage-level translator

    • Texas Instruments TXB0104 4-bit bidirectional voltage-level translator

    • Texas Instruments LM2682 voltage doubling inverter

    • Texas Instruments LM2665 voltage converter

    • Texas Instruments TPS62290 1 A step-down converter

    • Richtek RT5795A 2 A synchronous step-down converter

  12. AJb6NwdfkVQ1DwfU
  13. YGenBs1s3PLu2cti
    YGenBs1s3PLu2cti
    5JtquSi5cOcqMRd4
    xPorHSfCDZoH3TGn
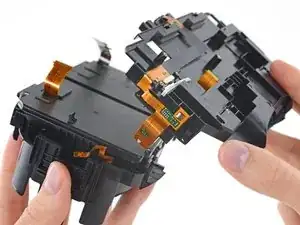
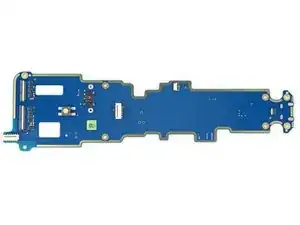
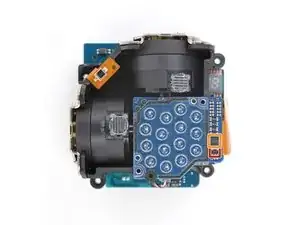
    • Next out: the midframe that housed the motherboard. Clinging to its side we find a small ribbon cable that plays host to the headset button.

    • There are many Texas Instruments TLV70233 300 mA / 3.3 V LDO Regulators on the flex cable around the midframe.

    • A closer look at the midframe reveals a slot for the little black nub on the back of the left display panel.

    • This slot allows the nub to peek through and slide along that white Teflon strip, activating a linear potentiometer, used to track IPD position as you adjust the displays.

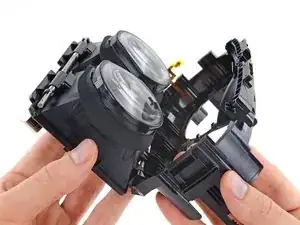
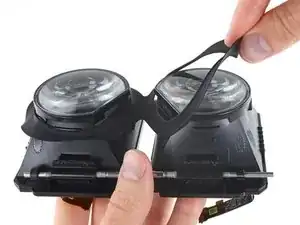
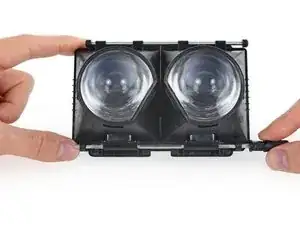
    • Ready to go deeper, we remove the twin lens-and-display assemblies from their housing and peel off the rubber light-gasket from around the lenses.

    Hello, I need a spare Part. Looking for the potentiometer for the ipd setting. Anyone know what type it is?

    synschnappse -

    note to anyone else going this far, you will need to remove the teflon strip to take off the midframe. This is because there is a plastic nub that makes contact with the sliding potentiometer. Removing the teflon strip allows the nub to pop off the potentiometer and you can pull the “midframe” off to get to the oled’s. During disassembly , if i did not remove this strip, I would have broken the sliding potentiometer.

    Tim Claridge -

  14. O5ZYbeKZKAREtbcZ
    O5ZYbeKZKAREtbcZ
    SCRKMgtEOTvAnqqV
    • Open! Close! Open! Close!

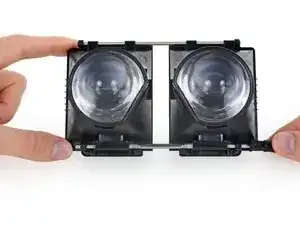
    • Speaking of interpupillary distance adjustment, here's the mechanism that makes that possible.

    • It's a simple threaded rod with a slider at the top. It couldn't be simpler, really—just give it a twist.

    • We saw something similar on the Oculus Rift CV1—although the Rift packs a more sophisticated (and more complicated) dual rack-and-pinion system.

  15. wHrgOVWtVXxMD1Th
    wHrgOVWtVXxMD1Th
    WvLa2SRcJh6IjGU1
    6SDaCEErErtvwqgi
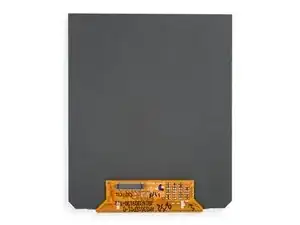
    • After adios-ing four Phillips screws and doing a little investigative prying, we lift away the display cover for access to one of the twin Samsung-branded AMOLED panels.

    • Each display measures ~91.8 mm diagonally, which translates to ~447 ppi. For comparison, the Rift CV1 has ~456 ppi due to a slightly smaller display (90 mm) that still packs the same resolution as the Vive.

    91.8mm diagonally but can we get exact measurements including the chamfered corners and the height and width of the active area too?

    Aaron Shelham -

  16. XL2LB3CgbPXUQlfS
    XL2LB3CgbPXUQlfS
    uOVgKWywH2KuYhVK
    kVnrqLwV3SqiErDd
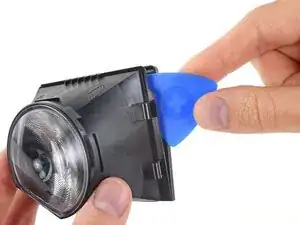
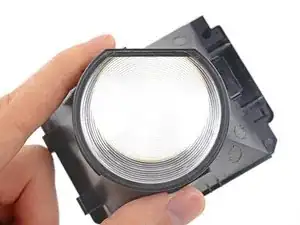
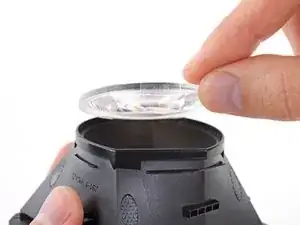
    • A bit of adhesive secures each lens, but it doesn't take much to pop them out.

    • We note a set of concentric rings in each lens—the familiar indicator of Fresnel lenses.

    • Unlike the hybrid lenses we encountered in the Oculus Rift, the Vive's lenses appear to have a uniform contour. It seems that HTC opted to control focus through adjustment of the eye relief.

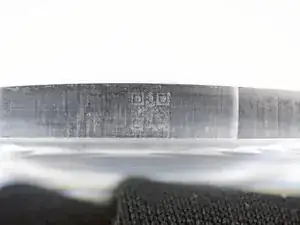
    • Etched right into the side of the lens, we find the smallest QR code we've ever seen. Despite our best efforts, we can't get it to scan.

    • Maybe we just need a smaller phone.

    What is focal length of lens?

    alexmartian -

    Are the lenses glass or plastic?

    Anna Morales -

  17. EOmZ3DLqtGbFTKaJ
    EOmZ3DLqtGbFTKaJ
    Ytt1rHbosyACq365
    xsLinXPrw6WFq2da
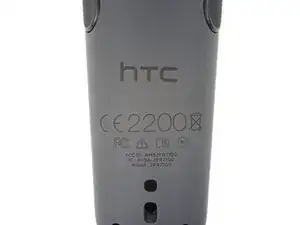
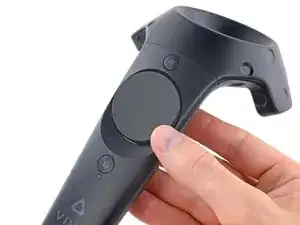
    • With the headset completely disassembled, it's time to move on to the controller. A quick inspection reveals the model number: 2PR7100.

    • The Vive is manufactured by HTC, but it's quite evident that Valve had plenty of input on the design process. The controller touchpad is very reminiscent of the ones we found on the Steam Controller.

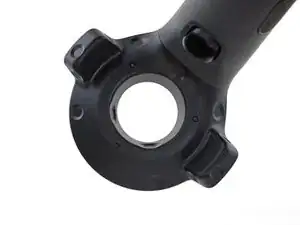
    • In addition to the touchpad and buttons, the controller comes packed with 24 sensors (including two inside the ring!) that allow it to accurately track the its position based on the two Lighthouse base stations.

  18. nZk2KMnIWZ4WZefl
    nZk2KMnIWZ4WZefl
    ZT1UCGXPGvRERQau
    uVVensULnfxLR1Hd
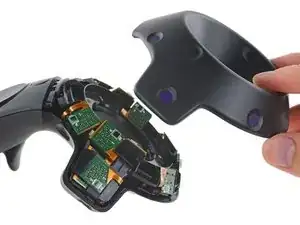
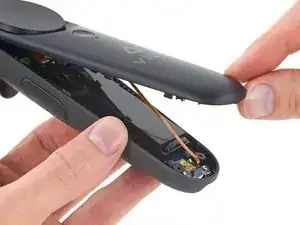
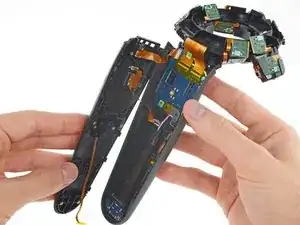
    • A few Torx screws and some tough plastic clips keep the outer case and IR filters shut tight, but it's nothing we can't handle.

    • As we work our way down the controller, we find a ribbon cable booby trap, à la iPhone 5s and iPhone SE.

    • Trap defused, we pop open the handle and take a closer look.

    Way too few explanation concerning casing removal. “We pop open the handle”

    Colin Jonathan Lavanchy -

  19. uoa1Tr5fBsJZZRbq
    uoa1Tr5fBsJZZRbq
    Tq2SUG4tZpLICrUE
    Mnk45LtyfeWwUbuk
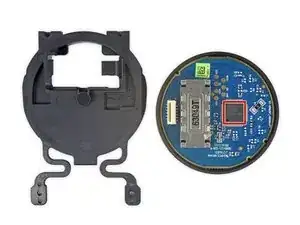
    • After removing the touchpad assembly from the controller, we immediately notice that the daughterboard is near-identical to the one found in the Steam Controller.

    • Just like before, the touchpad is driven by a Cirque 1CA027 companion MCU.

    • As with the Steam Controller, the PCB also features seven well-labeled test points that make it easy to directly interface with the board for testing.

    • Up next is the 3.85 V, 3.69 Whr, and 960 mAh Li-poly battery. After giving it a good looksee, we spot the model number B0PLH100, and a large QR code.

    • Unfortunately, scanning the QR code doesn't reveal a secret message, just the serial number: 3SMA2638404214.

    • Amazing! We've got that same combination on our luggage.

    Hello! I would like to know that spring brings the touch panel controller htc please lives , I think I have some broken !

    I can not press as a whole, not if it leads dock or some other type of mechanism.

    http://i68.tinypic.com/eai7fb.jpg%5B/IMG...

    Sergio -

    Its a little bit late but i had the same problem the cause of it is that this tiny sticker in the middle of the springboard shiftet a little bit.

    Just reattatach it with some super glue and this problem wont occur aigan.

    The_Psycho -

    Something I'd like to point out for other users.. you have broken the haptic feedback function of your controller. The tiny ribbon cable coming off of the silver box on the back of the touchpad powers it. It's very easy to do if you're not careful and is nearly impossible to repair, so a warning in here might be nice.

    Evellyn Hoskins -

  20. PpLJAF1Qu1xTpSq3
    PpLJAF1Qu1xTpSq3
    b2mnQj2T6JDphv1O
    • There are a few common chips between the controller and the headset, as well as a few new ones:

    • NXP Semiconductors LPC11U37F 32-Bit ARM Cortex-M0 Microcontroller

    • Lattice Semiconductor ICE40HX8K-CB132 Ultra-low Power FPGA

    • Invensense MPU-6500 6-axis Gyroscope and Accelerometer Combo

    • Micron M25P40 4 Mb Serial Flash Memory

    • Texas Instruments (formerly National Semiconductor) LP38798SD 800 mA Linear Voltage Regulator

    • Texas Instruments BQ24158 Battery Charger IC

    • ON Semiconductor FSA3000 2-Port USB 2.0 Switch

    nRF24LU1P in the metal box?

    Marc Pignat -

    What on-board is responsible for creating the power on/off beeps and can those be accessed?

    Tim Lobes -

    This could be sound from the vibrator not a speaker

    Zach -

    Any information about

    Tact switch?

    I have to replace it but

    dont know which size

    or model I have to buy.

    nucrifle -

    Have the same problem with switch for HTC Vive. I can see text 45 and 1905 on it

    danilin.me -

    What makes the vibration? is there an actuator? and if so where is it.

    Hektor Gzz -

    Hello, i broke thith plug http://joxi.ru/D2P086qCd0pDj2, how can i fix it or where buy new chip?

    Controller works only with USB cable now, powe LED and OFF/ON function is not awaylable

    Many thanks

    Alex -

  21. MPVFPirNO2sAFhJW
    MPVFPirNO2sAFhJW
    dPxk3DIkeeLkIkVY
    • Even more ICs in the controller:

    • Dialog Semiconductor (formerly Silego) SLG46110 Programmable Mixed Signal Matrix

    • Texas Instruments TCA6418E 18-Ch. GPIO Expander

    • ON Semiconductor NCP380HMUAJAATBG adjustable load switch

    • Richtek LDO Regulator (likely)

    • Richtek RT5795A 2 A synchronous step-down converter

    • Bluetooth Transceiver Circuitry

  22. XMWTmJqYU2KyhZC2
    XMWTmJqYU2KyhZC2
    IdRg1OLUrIVqLXm4
    GidSPIjHRr3effvE
    • With the headset and controllers torn asunder, we move right along to one of the Lighthouse base stations. What secrets does it hold? Let's find out!

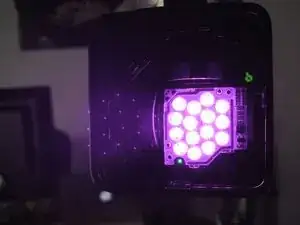
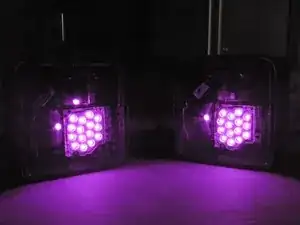
    • Firing up our IR camera, we get a glimpse of the internals through the IR-transparent front panel—an array of bright IR LEDs, and a pair of motorized lasers make the Lighthouse shine bright.

    • While the Rift works with an IR camera and some fancy machine vision software to follow the Constellation IR LED array, the Vive uses an entirely different system for position tracking.

    • Each Lighthouse flashes its IR LED array, signaling the start of a cycle. Vertical and horizontal lasers then sweep across the room, and all of those fancy photosensors on the headset and controllers start looking for lasers.

    • The tracked headset or controller can then determine its position based on the order its sensors receive the laser sweeps.

  23. JqKUqunGyurP1jnt
    JqKUqunGyurP1jnt
    UCZxSCqEt1BL4r4a
    grF1AH11HeeEDDVF
    • Time to crack the Lighthouse open and check how the system matches our science.

    • The base station sports the model number 2PR8100 as well as a Class 1 Laser Product regulatory label.

    • This rating means that the IR lasers contained inside the base station are within the maximum permissible exposure rating established by the CDRH. In other words, the lasers can be shined on the eye or skin with a negligible chance of damage.

    • With a trusty iOpener and opening pick in hand, we quickly dispatch a few clips and some sticky gasketing that secure the base station's front panel.

  24. EEVWDvkfGnNkIGwQ
    EEVWDvkfGnNkIGwQ
    eZTkHEeHIqIZiYJn
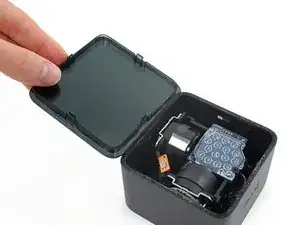
    • The front panel removed with relative ease, we prepare for the harrowing task of extracting the complex internals from this optical tech marvel.

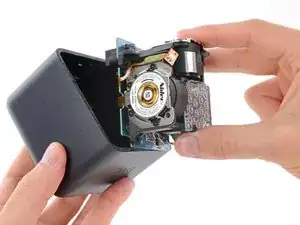
    • Aaaand we're done. Lucky for us, the whole unit is installed as a single assembly within the Lighthouse base station housing. Just remove the four Torx screws, and it falls right out.

    • With the cover off, we get a look at the array of IR LEDs and spinning motor-mounted laser emitters, as well as a single IR photodiode that allows the device to sync up with its counterpart.

    • IC identification:

    • ON Semiconductor FAN3111E MOSFET Driver

    • MOSFET

    I was wondering whether you know the wavelength of the IR-lasers?

    simonpelle -

    i have problem

    one of base station channel button doesn’t come out so i wanted to open it

    But in side the lighthouse there are 4 bolts i used L-wrench(inch and mm type)

    sadly it doesn’t match

    please tell me how did you open it?

    which size tool did you use?

    shorty2 -

    They are Torx screws. Size T6.

    Adam Sambuco -

  25. SeM3B6DUj2HaoNca
    SeM3B6DUj2HaoNca
    eWDtMPxwdDOUUhh1
    • Let's shed some light on what sort of chips are powering the Lighthouse:

    • NXP Semiconductors LPC11U37F 32-Bit ARM Cortex-M0 Microcontroller

    • Texas Instruments (formerly National Semiconductor) LP38798SD 800 mA Linear Voltage Regulator

    • Broadcom BCM20736 Bluetooth Smart SoC

    • Macronix MX25L1006E 1 Mb Serial Flash Memory

    • STMicroelectronics ST1480AC 12 Mbps RS-485/RS-422 Transceiver

    • Texas Instruments TLC59284 16-Channel LED Driver

    • Texas Instruments SN74AHCT595DBR 8-Bit Shift Register With 3-State Output Register

    Less than 24 hours into owning a VIVE and refining the setup, one of the base stations became unresponsive. Turns out while 'improving' the mounting position I had also pressed the channel button next to the power jack, and it had gotten stuck in the down position. A little prying with a pushpin got the button back up so the base station will power up, and all seems to work fine - but the needle marks on the button probably will offend any warranty.......

    vbob -

    Thanks for making that comment. Same thing happened to me. Was just about to pull off the front glass when you made me reach for a push pin instead.

    thorhenrikson -

  26. kqE2LGvKtQPKCIaK
    kqE2LGvKtQPKCIaK
    solkQkQKMhhtXJin
    • Lighthouse IC identification, continued:

    • STMicroelectronics LIS2DH12 3-Axis MEMS Accelerometer

    • Dialog Semiconductor (formerly Silego) SLG46120 Programmable Mixed Signal Array

    • Renesas (formerly Intersil) ISL58303 800 mA Triple Output Laser Diode Driver

    • Texas Instruments DRV10866 3-Phase BLDC Motor Driver

    • Analog Devices (formerly Linear Technology) LTC6904 Serial Port Programmable Oscillator

    • ON Semiconductor FSA3000 2-Port USB 2.0 Switch

    • ON Semiconductor NCP305LSQ30T 3.0 V Voltage Detector

  27. k2OrpWAUHjVOOTEs
    k2OrpWAUHjVOOTEs
    ItGEcLmmlYb4pIkd
    • More Lighthouse IC identification:

    • STMicroelectronics LMV358 Dual Operational Amplifier

    • STMicroelectronics LMV321 Single Rail-to-Rail Operational Amplifier

    • Diodes Incorporated AP331A Single Differential Comparator

    • Texas Instruments SN74LVC07A Hex Buffer/Driver

    • ON Semiconductor NCP380HMUAJAATBG Power Distribution Switch

    • Texas Instruments TPS22920 4 A / 3.6 V Load Switch

    • Texas Instruments LMR12020 2 A Step-Down Voltage Regulator

  28. paN6TMtsnKRGORWe
    paN6TMtsnKRGORWe
    OYmBXavFxUqMcS5d
    • Even more Lighthouse IC identification:

    • Texas Instruments LP38798 800 mA LDO Regulator

    • Diodes Incorporated AP2127K-3.3TRG1 300 mA / 3.3 V LDO Regulator

  29. Yw2tlbf3i5fbx6rE
    Yw2tlbf3i5fbx6rE
    6MPKOlFLZTsgboVT
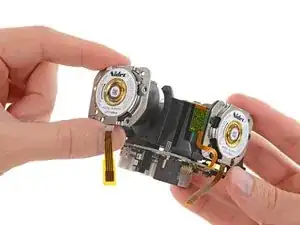
    • All of our repair wishes are coming true today! Each laser motor mounts to the Lighthouse emitter assembly via four T5 Torx screws, and connects to the motherboard with a single ZIF connector.

    • Nidec may not be a household name, but we've seen their DC motors before powering fans in the Xbox One Kinect, as well as the Mac Pro Late 2013. These particular motors read: B2044N01.

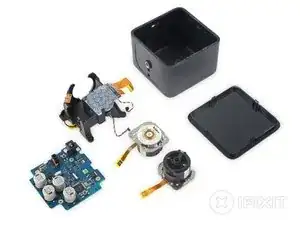
    • With the Lighthouse parts laid out for inspection, this teardown is adjourned.

    ndtec is a japanese Electric machinery manufacturer

    vere -

    oh, about 20 minutes ago i was playing the Vive game called`Holoball, which warns you the straps sometimes break when playing this "racquetball" type game, and they did break as i let loose of the controller in a power swing...and flung rather hard against the wall in the room. now it doesnt recognize. still play some games requiring only one controller but would like to see if i can fix it. you think a hard impact on the wall would permanently damage something in there or with opening it up and looking for issue a big waste of time. found this site on the web..what a great resource for tons of things. never knew it existed.

    Rocky Power -

    Anyone know the laser diode used behind the motors?

    James -

    Hey James, Im wondering the same thing. My Vertical laser diode is dead and Im out of warranty. But since its just a laser diode, think any one would work?

    A'Murica -

    Update:Found this reddit page, hope it helps. He shows the part number and whatnot. https://www.reddit.com/r/Vive/comments/c...

    A'Murica -

  30. i54n5A1oTZqcYlnN
    i54n5A1oTZqcYlnN
    KTfSBlpNnvSEMyWJ
    DIDckkW6fMl6EZDi
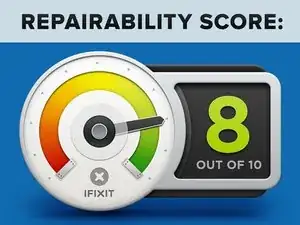
    • The HTC Vive Repairability Score: 8 out of 10 (10 is best):

    • Although it's a complicated bit of kit, the headset breaks down readily and without damage.

    • The head strap and face pads are removable and don't incorporate any sensors or electronics that might be prone to failure.

    • Standard Phillips and Torx screws are used throughout the headset, controllers, and base stations.

    • Reuse of the touchpad hardware from the Steam Controller means some replacement components are likely already available.

    • The large number of components, many of them quite delicate, means you'll want a service manual before attempting repairs.

    • Adhesive is used sparingly, but secures the lenses, Lighthouse base station covers, and sensor arrays.

Brittany McCrigler

Mitglied seit: 05/03/12

88148 Reputation

79 Kommentare

Please let us know if you will be tearing down the headset connector cable as well. Thanks.

nixyrus -

It might be important to note that removing the face plates or even touching the motors breaks the factory calibration and will produce tracking errors in the future. Currently there is no way for the consumer to re-calibrate the sensors.

Jose -

I'm hesitant to agree that merely exposing the sensors "breaks" tracking. I (very carefully) disassembled one of the controllers to re-seat a loose haptic motor and notice no difference in tracking accuracy or precision. The controller may be offset by some minute, imperceptible amount but it hasn't produced any problems. I think you would be fine attempting minor repairs with the appropriate amount of caution.

Michael Stinton -

@ Michael Stinton, That's a controller... he's talking about the HMD itself.

Jason Elmore -

This seems doubtful, as merely picking up the base stations causes the laser motors to visibly jiggle and rotate. At any rate, we reassembled our Vive after the teardown and it seems to be working fine. I can't swear there are no tracking errors as there were occasional glitches when we first unboxed it and there are occasional glitches now—but for whatever it's worth, I can't tell any difference.

Jeff Suovanen -

@jeffsu Alan Yates, the creator of the lighthouse tracking system: "About 50 micron, yes they are post-assembly calibrated. Dismantling invalidates the calibration, so you should not remove the front covers unless you really need to. There is a small chance you can get it back together close enough you won't notice for the HMD and controllers, but the base station is more sensitive. If you unscrew the motors from the frame or touch the lenses it will need cleaning and recalibration to track properly." Parent link: https://www.reddit.com/r/Vive/comments/4...

I may have exaggerated a little, but the multitude of Reddit tracking wobble threads and experience with my own Vive indicate the lighthouse system may be more fragile than it looks. The motors' own vibration produces tracking wobble, I wouldn't recommend touching the motors and possibly adding to it. In practice it's not very noticeable, but look at your screen vibrate when you put the headset down.

Jose -

What's in the link box?

AJ Henderson -

I was hoping I'd learn more about whether eye relief could be reduced even more than what is possible stock. My friend, who wears glasses, was able to use the closest setting just fine (i.e. no need to create more clearance). I don't wear glasses. When I've removed the foam surround and placed the Vive to my face I've noticed the BEST image -- least blurriness / largest sweet spot and widest perceived FOV. It's not comfortable to do this with the straps on but someone modded a nightmask as an even smaller foam surround than the Wide Face (stock) one. It shows that getting those lenses even closer to naked eyes could have benefits.

Anyway, it seems A) there's room between the lenses and my eyeballs and B) getting the lenses closer would be beneficial. I was wondering if they erred on the side of caution (with regard to glasses wearers) with the eye relief adjuster but that the chassis could actually handle less distance. Maybe a plastic tab artificially governing how close you can get the lenses?

Thoughts?

Kevin White -

The problem is your eyes not the hardware. Go to the dollar store and get a couple pair of cheep reading glasses is various strengths. Note that many people need different corrections right and left. Once you determine which lens works best for each eye order a set of glasses from an online prescription glasses place. Be sure to get the anti-reflective coating.

Modding your new toy to is a bad idea.

Dave Adams -

See this thread for a mod that replaces the foam gasket with some thin material from a sleep mask:

https://www.reddit.com/r/Vive/comments/4...

Mechanically reducing eye relief doesn't appear to be possible without heavy physical warranty-ruining modification.

Michael Stinton -

Dave Adams, I have very good eyesight, but thank you. The Rift, for example, is quite clear. Why do you think the closest distance the lenses can currently go is the optimum? Why do you think that's the optimum for all faces?

Michael Sinton, yes... I mentioned that when I wrote "someone modded a nightmask as an even smaller foam surround than the Wide Face (stock) one." But I suppose you're right about the heavy / breaking mod. It's just a shame. The screens / optics can clearly do with being closer and there's clearly enough room to move them closer (as evidenced by my glasses-wearing friend having plenty of room even at the closest position).

Maybe something will get figured out at some point. I think there's some additional clarity and perceived FOV wideness waiting to be unlocked while using the stock comfy surround pad.

Kevin White -

See this video I had made with similar concern. It is not using stock , but there are options while you try to sort out more risky mods.

https://youtu.be/bY9eEG9efpw?list=PLBeUk...

GameMaker04 -

According to my experiments with paint.net, the QR code translates to "3YVA-60320-36130"

Rich Woods -

QR Code on Lens: 3YVA-60320-36130

Edit: Rich beat me to the punch by 4min. So, consider this confirmation of his results.

Patrick Hall -

Bugger, an hour late even!

I guess confirmation 3 for the QR code, with proof: http://imgur.com/jiRh3Iw

Ethan Palmer -

What about the module you didn't open in the controller? What secrets does it hold?

Seems like something connected to an antenna :)

Body Double -

Step 22 says that the lasers are spinning with the motors, but aren't they actually shining along the axis of the motor and hitting some sort of mirror?

Note in second photo of step 24 that there are what I'm guessing are laser diodes mounted co-axially opposite the motors, and that the top view of the motor barrel looks hollow. It would make sense to do it this way there is then no need to get power to a spinning component - the spinning part is entirely passive.

Steve Baines -

I reconstructed the lens QR code. It decodes to the text string '3YVA-60320-36130'

Mathieu Morissette -

Any chance of a mechanical drawing of the lenses?

adrianhcyuen -

You didn't open the link box thing, the one with 3 cables coming out both sides. I'm interested to know what's inside. Also I think it would be valuable to comment on how easy/hard it is to obtain equivalent third-party replacements for the base station and link box power bricks. It appears at first glance that they all use the same power brick delivering the same output, which is very sensible.

dcipub -

Glad it wasn't just me who decided to have a go on that QR code, 3YVA-60320-36130 it is.

jonathansmith2410 -

Which is heavier and by how much Oculus of Vive

macman1519 -

I also managed to get 3YVA-60320-36130 with my mad excel skills.

zeeZ -

How can this have a better score than the Rift, when it has twice the internal parts and complexity? What about the dozens of ribbon cables and sensors on this thing??? You didn't take those off... <_<

nipponnights -

How about some more science time digging into the differences in the panels? We know they're different sizes, can we get a good look at the sub-pixels with a magnified picture of each displaying a white background?

Andrew Bakke -

"This rating means that the IR lasers contained inside the base station are within the maximum permissible exposure rating established by the FCC. In other words, the lasers can be shined on the eye or skin with a negligible chance of damage."

This is incorrect, MPE is set by the CDRH a division of the FDA, not the FCC

Frank Echanique -

Whats the model SKU number on the screens. Curious if we can replace them on our own if we get dead pixels

GameMaker04 -

This is great, one of my controllers trackpads came in defected on arrival. So I'm planning to take apart my controller to figure out what's wrong with it.

gnathen w -

How did this turn out? Did you manage to repair your controller? The system button of mine does not respond anymore and i am thinking about opening it up... as soon as i get my hands on a T5 xD

Roland Hof -

My cat bit into the hdmi side of the 20 foot hdmi cable i replaced it with the short 3 foot one that goes to pc from breakout box and used a normal hdmi from pc to breakout box wow had a signal again now heres the problem its only 3 feet long Now i found a 15 footer hdmi cable from home depot thatwould fit into vive headset it would not work. My question is are the hdmi cables with the vive a special made propietory cable please help

Jeffery F Wright -

You have to purchase what is called an Active HDMI cable. These are the ones that we use in our studio: http://www.amazon.com/Cable-Matters-Ultr...

harveydesu -

Hi! I have a question. I would like to use the sensors only, as a positioning system for a drone. To minimize weight, how much of the controller could actually be stripped off for it to still work? How much does it weigh when stripped down? Thanks for a great article!

georgio -

Is the touchpad a single button? It seems to be based on the pictures. I ask because I can't get a button press when I press down on the right side of one of my controllers. It would be an easy fix if it is because it would just be a plastic piece.

Hugh Van Auken -

Same issue here. Would love to know the part number for the button under the track pad

patholdenchicago -

I too would love to know the button. I tried to fix mine with some super glue and accidently got some in the button. I detached the button from the board to try and fix it but it fell apart. Would love to know a good replacement button I can solder on as it would be a like a 50 cent fix as opposed to a 150$ one.

mikekan13 -

I believe Himax Technologies supplies this: Two 1080p AMOLED displays with a combined resolution of 2160 x 1200

Can anyone verify this?

Richard Smatt -

You expected they would use other than Samsung panels?

Young -

Curious. I have a nonworking HMD and a working one with a dead pixel. Does the sequence above represent the exact steps until you get to the screen portion? Or can you shortcut to just the screen? I ask as I would like to replace the screen from the non working HMD with the dead pixel screen of the working one but would rather want to avoid mucking around with all those ribbons and sensors in case I pooch something. I realize this may void the warranty thus me asking up front!

Apshai -

I'll bet a few bucks they never got it back together or working again.

jack smith -

Hey Jack! It's actually fully working..Job Simulator is a ton of fun on it:D

Geoff Wacker -

Turn down for what!

rogermorac -

I'll bet they never got it together again or working.

jack smith -

We actually did! And the whole process didn't seem to throw off the calibration too terribly—Job Simulator and Valve’s The Lab still run perfectly.

Evan Noronha -

Yep, we've actually taken it completely apart three separate times. Still works great!

Jeff Suovanen -

I, too, thought I'd be terribly clever and unique and solve the QR code without checking to see if it had already been done. 3YVA-60320-36130.

https://drive.google.com/open?id=0B2dLMc...

Matthew Ewer -

lightbase motors seem to be breaking a lot - mine already gave up twice, any idea where can I get replacment motors?

Leszek Grzyl -

Salut, on peu changer les lentilles je pense non ?

mxvrinfo -

Do You know the type and Wavelength of the lasers and leds ?

captainjeffo -

Are you sure this is the LED? The LED in my base-station looks similar, but it’s not an exact match.

mcmayer -

and lasers also at 850 nm wavelength ....

captainjeffo -

Laser diode replacement?? 850mn and ......mw??????? Thanck you

assobaio -

What is focal length of lens of headset?

alexmartian -

Laser diode replacement?? 850mn and ......mw???????

assobaio -

there is an online shop who sell htc vive base station laser diode replacement

https://www.vr-part.com/product/htc-vive...

lido -

What no linkbox?
morphemes -

Hi! The camera plastic cover of my Vive came broken. I already contacted HTC but I wanted to know if its possible to remove it somehow and replace it.

Thanks in advance!

Felipe Cabargas -

Kudos for the DIY spirit, but if your brand new Vive arrived broken, you should probably just let HTC handle it.

Jeff Suovanen -

I have a hive bought second hand with no receipt. Unfortunately one of the oled screens has a pixel constantly stuck on (orange) in the bottom right which is then blured slightly due to the lens i think. Is it possible to purchase a replacement oled screen to repair?
Jason -

where can I find a replacement Proximity sensor with ribbon. fell for the booby trap and torn mine. HTC aren't being very helpful.

Chris Thorley -

Need help, guys!

Where can i find display (Samsung AMS361EP-01)?

My friend faceplanted on my HTC Vive T_T

kintush777 -

Is there a ribbon cable in the headset that might come loose and cause no display in left eye... but right eye and tracking working fine?

Teresa -

Is there a trick to opening the two halves of the shell? Mine doesn't want to pull apart.

Teresa -

It’s a bit tricky. You definitely need a more substantial tool that the pick he used (imo). I have a cell phone repair tool kit and it has quite a stout, but thin/non sharp metal pry tool. I started at the bottom and torqued slightly, the clips will give away. In their video it shows each side sliding off. It will only do that when all the clips are released. It wasn’t terribly bad, you just need to work that seam and start on the side they started on in the video…I did. From there, the other side also releases from clips and lets go. I got the entire unit apart undamaged. Friend of mine has a nephew who spilled something all over it and it’s dead. I’m going to do a cleanup inside, then reassemble and hope for the best. I don’t see anything obvious, other than some connections that are fouled by the dried drink substance. Hoping to get lucky.

RC000E -

There is one important omission; you need to remove the bottom cover of the photodiode array in order to reach three additional torx screws. This finally allows you to remove the handle’s top cover.

hachidori106 -

I wish I saw this earlier…almost found out the hard way.

rojo8399 -

What are the size specs on the controller screws please. I need to replace them. sizes of both he long and short torx screws. or a link please? thanks?

michael christmas -

hi,

Which plastic material is used for molding htc vive controller parts.

kondiparthy dheeraj -

I bought one whole HTC VIVE system that says it “shuts down after 5 minutes” on the box; anyone know what that means or how to fix it? Mike at [mailto:memphistech@hotmail|memphistech@hotmail] email

Mike -

Hello! I bought a HTC VIVE system that says on the box: defective, shuts off after 5 minutes" - and I want to fix it., What’s going on and how do I go from here?

Mike -

Can you buy replacement parts? My headset, where the strap connects to (step 4) where you are removing the t6 torque spit, literally the small external peice that torque spit screws into, i need that. Any place to get it?

Marc V -

Is there a place or way to purchase spare parts? Where the head strap attaches to (step 4) the small piece that is hold together by the t6 torque screw broke when trying to remove the strap, I have it disassembled and all i need is literally the external piece that the t6 holds on the exterior. Any idea’s?

Marc V -

what is the benefit of the rectangular silver steel or ironic metal ,that iside the htc vive hand controller.?????

is it to solve some issus with the Mpu6500 sensor ??

or related to get rid of interferrences ??

the rectanguler metal piece is near to the mother board and the battery in the following image :-

https://d3nevzfk7ii3be.cloudfront.net/ig...

Thanks in advance!

Moatazzu993 -

@moatazzu993 Just a weight I believe. No special function other than to make the controller feel a little more balanced in your hand.

Jeff Suovanen -

What types of cables/material used in this product (STEP5 -Yellow color)?

Is that flex PCB? If yes, what is the material used for it?

sabiha patan -

Free activities at home is awesome.https://renystimpy.com/

androidgames365 -

Hi, i am in india and having issues on my VIVE base station, light is coming blue it seems like diode is not working.I tried to search where to get it is not available in any of the website, Please advise.

is there any other way to repair??

Ashutosh Khare -