Einleitung

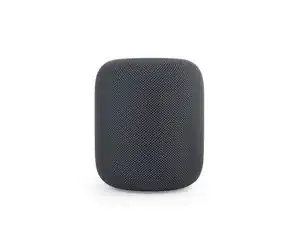
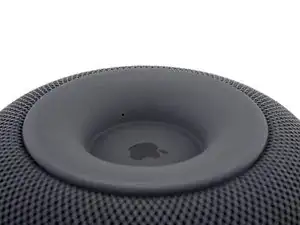
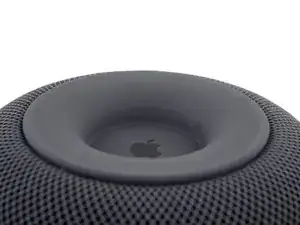
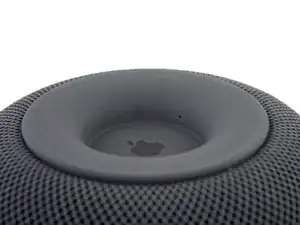
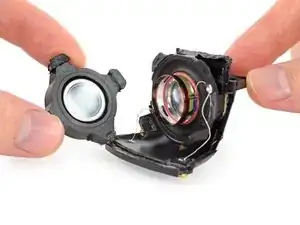
Apple’s beloved voice assistant is back again, this time in the form of a toilet-paper roll Mac Pro wearing a jacket. Siri can now (attempt to) answer your questions with 360°, high-fidelity sound. How did Apple fit such big sound in such a small space—and what took them so long to do it? We might just have to take it apart to find out!

Hey Siri, where can I get more teardown news? Check us out on Facebook, Instagram, and Twitter. If you'd like your teardown delivered, go ahead and sign up for our newsletter.

  1. oSLZDDFaVLni6jvE
    oSLZDDFaVLni6jvE
    NsYEQ4RruO2oehgd
    • What kind of tech did Apple hide in there? Here's what they've told us:

    • Apple A8 processor

    • 4" high-excursion, upward-firing woofer

    • Beamforming seven-tweeter array

    • Beamforming six-microphone array

    • Low frequency microphone for real-time woofer calibration

    • Top-mounted touch interface

    • 802.11ac Wi-Fi with MIMO + Bluetooth 5.0

    Could you guys give a more in-depth review of the logic board and the inter connectivity of it with the other components? I am wondering if it’s hackable to get rid of Siri in fevour of snips

    Daniel Shapira -

  2. vlBnX2G5GmtpHohQ
    vlBnX2G5GmtpHohQ
    FKbIPZaTFyPUMIBw
    Po21NG2mWcceArXF
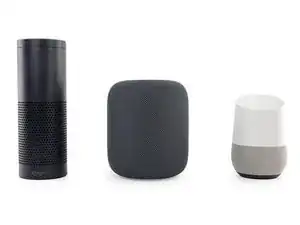
    • It's not the first smart speaker, nor the tallest, nor the most compact. But it's certainly the Apple-est.

    • Still, it keeps the basically cylindrical form factor typical of 360° smart speakers.

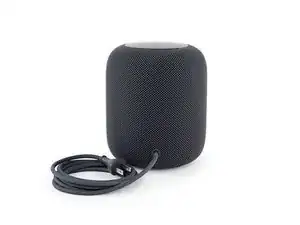
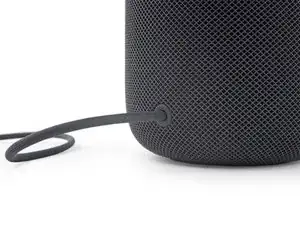
    • Perhaps the most apparent difference is that, unlike the Amazon Echo and Google Home, the HomePod packs an integrated power supply with a non-removable power cable. Update: Turns out it's removable if you pull hard enough.

    • No unsightly wall-wart transformer and Apple very well hid the fact that the cable is removable. (Or at least, it fooled us!) It does have a cool braided cord cover though.

    Have you determined what the cord covering is made of? Soft cotton or tough fabric to slow down dog and child chewing?

    plink53 -

    Power cord IS apparently removable if you pull hard on it., and you can plug it back into a proprietary connector. What else to expect from Apple.

    Peter Goedtkindt -

    The power cord is actually removable, it has (pretty tight) connector in it.

    apz -

    Actually, letting high voltage run along the power cord into the device without protecting earthing ground is a safety issue. Converting the voltage down inside the wart already fixes that.

    Christian Egger -

    Double insulation ftw! See Class II devices: https://en.wikipedia.org/wiki/Appliance_...

    hugostonge -

    Oy…I’m confused with the switching to top to bottom top to bottom… If one wanted to get out the main board with the A8 on it, what’s the least destructive and relatively easier path…work from the bottom or work from the top?

    hometech99 -

    You work from the top. I wrote up a disassembly guide, it’s on the device page. Remove the top touch surface cover, then the actual touch pad/LED portion and then the logic board is directly underneath. :)

    Nicholas Ouimet -

  3. uZYFd1FtfgJKHlPn
    uZYFd1FtfgJKHlPn
    U1CDmTrWgN3VWqk5
    vdBFu1Py3jkJGmVM
    • We spy a lot of regulatory information printed inconspicuously under the foot:

    • FCC, e-waste warnings, and EU, Australia and regulatory markings—despite the permanent US plug on our model—and a marker for being double-insulated.

    • Newly minted model number, A1639.

    • And a couple tiny holes.

    • Weird place for some microphones. Could these holes be for barometric purposes?

    What’s the FCC ID?

    Narasimha Chari -

    The tiny holes must be present to prevent a vacuum from forming when the base rests on a flat surface like a glass top.

    Leonard Peris -

    I am 100% agree with Leonard, this tiny little hole is to release vacuum.

    As everybody know, silicone is a super sticky rubber, it has to have special treatment to reduce stiction.

    The vacuum will not only appears on glass furniture any sealed surface will create this issue.

    As we see the “residue gate“ currently have on wood furniture. The silicone will release some oil or “blooming“ on rubber technology. These oil is intends to let the elastomer softer as an internal lubricant(an internal lubricant is to soften the silicone rubber) but they will gradually release over time.

    Howard -

    The Power Cord is actually not permanent. If you take a look close enough you can see it can be removed just has to be tugged hard enough!

    David -

  4. fcZ45I5DxHaFNLtH
    fcZ45I5DxHaFNLtH
    uUMqj5DAqjoyPgFS
    RTrBTT3fCGaASDYZ
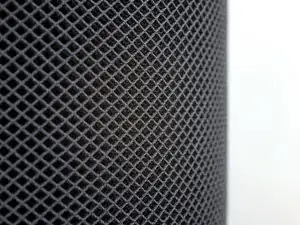
    • Next we take our first good look at Apple's seamless 3D acoustic mesh.

    • Apple engineers developed this mesh to be acoustically transparent while protecting the HomePod's insides from dust and debris.

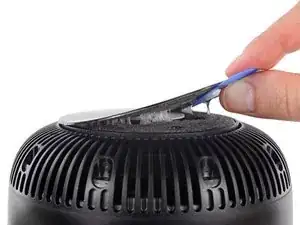
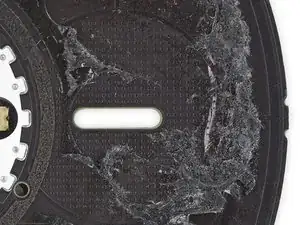
    • A sleek touch interface (in case Siri needs a break) and a rather familiar LED indicator sit atop the HomePod.

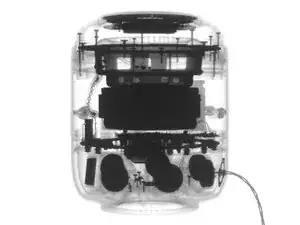
    • Thanks to Creative Electron's X-rays, we get a peek at the internals—and it looks like there are some enormous magnets in here (as shown by those dark spots).

    Remarkably similar ‘x-ray’-style illustration featured on the ''apple.com/homepod/'' webpage.

    Bob Laughton -

  5. kMAwsFnxkcHEtjhE
    kMAwsFnxkcHEtjhE
    PsUdHF5rPDZUtGC4
    Hg5pHVAHohkoCYX1
    • Our X-ray intelligence showed us some screws under the foot, so we concentrated our fire on the adhesive holding it down. Only after some serious heat-gunning were we able to slowly peel the foot up and off.

    • Even knowing the screws are there, we're prepared for the worst, after that gooey chore...

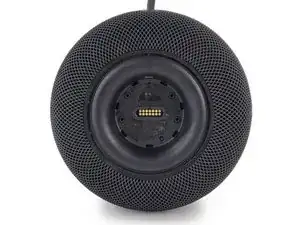
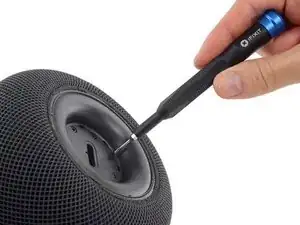
    • ...but are relieved to find those repair-friendly Torx screws ready to unscrew. Also under the glue-foot is a 14-pin port, probably used to test or program HomePods on Pogo pins during assembly.

    Where does the 14-pin POGO port terminate? It isn’t shown again after this step.

    joshshua -

    yes any news on the pogo pins connection? No leaked schematics? It might be helpfull to connect the homepod to a pc for a firmware update like it’s possible with the mini?

    Oliver Stepniewski -

    There is no way to downgrade them because the IPSW isn't public

    Mher -

  6. NRADbUXHXhONMclV
    NRADbUXHXhONMclV
    1gQgJPNGUqcC2o1R
    epFxDLevHoNCqLVB
    • Maybe those screws aren't as friendly as we thought. After removing them, the plastic plate they're holding in is ... still held in. Looks like the mesh is holding the access plate down.

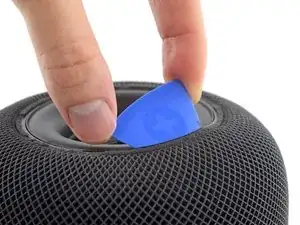
    • We really don't want to cut this mesh, so we slide a pick along the glued-down edge of the mesh and pull out the plate. Our prize? More impregnable plastic that doesn't go anywhere.

    • Hey Siri, what's it going to take to get inside this thing?

    Is this the t5 or the tr6 security screwdriver?

    Ramon -

    Those particular screws are T5. We didn’t encounter any security screws—just standard Torx.

    Jeff Suovanen -

    Mine has 3 smaller screws on the bottom as well

    phaseangle -

  7. PhBHmQLMgRWdcVRU
    PhBHmQLMgRWdcVRU
    bEyU5sD55jldHl6L
    6kldULhNXVyxbNgX
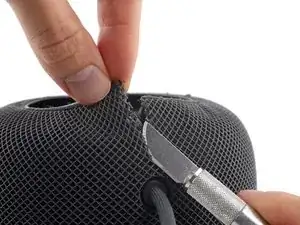
    • Probably something sharp. We tried our best to keep the mesh seamless, but to no avail. Well, this won't be the first time we've had to cut through some fancy fabric.

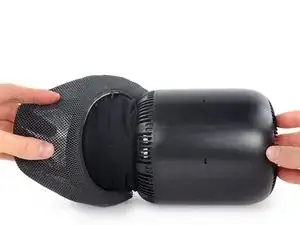
    • Slicing through the thick, wiry 3D mesh, we find a secondary, internal fabric sleeve.

    • This thinner, more flexible sleeve is trapped under the top, so it stays put for now.

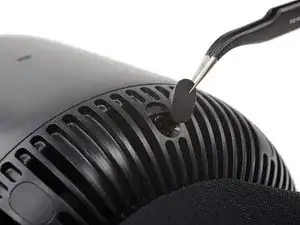
    • Thankfully, the interior body isn't as seamless as the mesh, and we find some more Torx screws hiding under (seriously fancy) rubber plugs.

    Before you cut the fabric you can remove the cable! It’s a snap-in design which you can see here: https://www.youtube.com/watch?v=gjxILSOf...

    Dan -

    If there’s a solid wall of plastic behind the mesh, why does it matter if the mesh is “acoustically transparent” or not?

    Drew Quinton -

    The mesh covers the openings for the speakers and microphones as well, they’ve just extended the mesh from those areas to uniformally cover the entire device except the touch controls area.

    Urname -

    Urname, but those slit openings appear to be only for the microphones, are you sure, looks like from the photos that the tweeters have to blast through the plastic which would very much explain the muffled sound the HomePod produces.

    White Hawks -

    Interesting question - anybody tested the quality of the sound without the mesh?

    Jan -

  8. CTjN2QkgDKVTHstT
    CTjN2QkgDKVTHstT
    dmETD14KxZSPlFsl
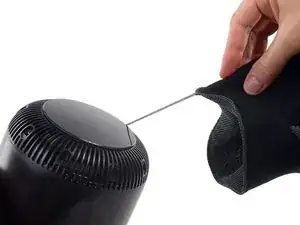
    • One benefit of our newly-made seam: we get to see just what kind of fiber magic went into this sleeve.

    • No magic, but we can see that the mesh consists of a net-like layer on the top and bottom, with tiny wiry coils in between.

    • This type of construction allows sound waves to travel through the fabric, with little to no reflection, while dust is kept out.

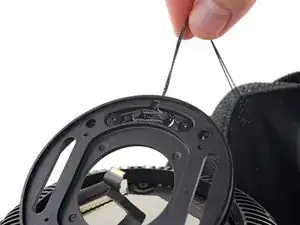
    • Now that we have the mesh off, we can see that it had a drawstring all along! Does this mean that there's a non-destructive way in through the top?

    Yes, the sleeve slides off as shown in Kelsey’s video above this guide. :)

    fastasleep -

    The outer mesh looks very similar to the paper based rope used in their retail bags.

    Tyler Selby -

    Yes, it has a drawstring! Oops!!!

    Sean Farrar -

    Thinking of dying this fabric, is that even possible?

    Karim -

  9. CnFXDuInpRl1fSmI
    CnFXDuInpRl1fSmI
    iygVb1vQSSksda2w
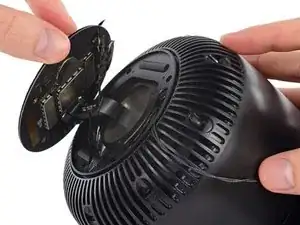
    • In pursuit of an entrance, we peel the glue-covered top up, only to find more screws that lead—well, seemingly nowhere.

    • What appears so simple on the outside really is a labyrinth to open.

    • After even more heat, and another glue pad, we dive another layer deeper and finally hit pay dirt.

    • Under door number three, we get: a well-shielded board, a wide ribbon cable, and the drawstring's mooring posts.

    How does the top plate respond to touch - it looks like a piece of plastic that isn’t connected to anything

    Paul Dale -

    Great question. We think there’s a capacitive grid on the board below—see Step 10 for some updated info. But you’re right, the touch surface itself isn’t wired to anything.

    Jeff Suovanen -

    Great teardown! I’m super interested in how the light gets passed through from the “+ -” symboles shaped holes in the pcb, all the way out of the cover plastic.

    I have a hunch that it’s a transparant part, where they used a black film on the back side, with the + and - marks cut out, but I’m not sure.

    do you happen to know if they used a multi-layered material for the cover plastic?

    johan.vn.hulle -

    The LEDs are mounted to the board and diffused through the clear plastic light guide you see to the left of the board in the first image in step 10, all the lights on the board shine through the semi-transparent plastic lid.

    Sam Goldheart -

    The LEDs are mounted to the board and diffused through the clear plastic light guide you see to the left of the board in the first image in step 10, all the lights on the board shine through the semi-transparent plastic lid.

    Sam Goldheart -

  10. DG4Alma1eZGcQkXQ
    DG4Alma1eZGcQkXQ
    gaWWS3QHMnFVomGT
    STt6mptZANZtt5PF
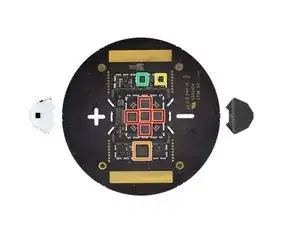
    • De-shielding that board shows us some of the fun that's running the light show up top:

    • Texas Instruments TLC5971 LED driver

    • Cypress CY8C4245LQI-483 Programmable System-on-Chip, likely tasked with touch control

    • ON Semiconductor FPF1039 slew-rate-controlled load switch

    • Texas Instruments TPS62135 4 A step-down converter

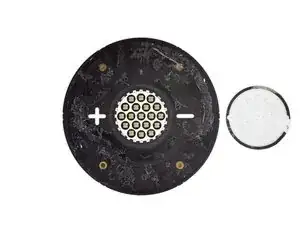
    • The flip side of the board houses the LEDs and the diffuser that gives the indicator its cloudy look.

    • The plus and minus symbols are cut straight through the board, and each has its own little triad of LEDs plus a light guide to aim the photons where they're needed most.

    • The top side of the board (second photo) sports a neatly organized pattern of tiny divots—possibly a capacitive grid, like on the Google Home, for registering your taps and touches on the surface above.

    it looks like the + and - buttons have their own lights on the bottom side of the board (those 3 led bars on each side). if they wre lit purely from the array, how are they lit when the array is off, and how do they turn off when the array is on?

    Gregory Young -

    I think you’re right about that! We didn’t look closely enough. The teardown has been updated to make that bit more accurate. Thanks for the tip!

    Jeff Suovanen -

  11. ned1LGSQdXlefxXG
    ned1LGSQdXlefxXG
    JV5OUbDgklAcJOQQ
    3XB2sbAuFdicf5Oh
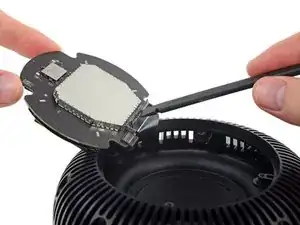
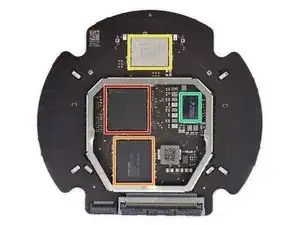
    • The next disc to come out holds those elaborate drawstring moorings—and behind it, the main logic board.

    • Chipwise, we spy:

    • Apple A8 APL1011 SoC (we’ve seen this before, but doing a different job), likely paired with 1 GB RAM (layered on top in typical PoP configuration)

    • Toshiba THGBX4G7D2LLDYC 16 GB NAND flash

    • USI 339S00450 WiFi/Bluetooth module, likely with a Broadcom BCM43572 trapped inside

    • Apple/Dialog Semiconductor 338S00100-AZ PMIC

    • Interestingly, the reverse has some unpopulated SMD pads, for a few chips and several passives. Maybe the HomePod underwent some last-minute design changes?

  12. pWjYMJGuaJ6BBgEP
    pWjYMJGuaJ6BBgEP
    yCMSFtJcPTFFn6Px
    D6vGieEDNvcpDk5Y
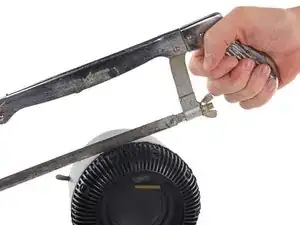
    • After a lot of fruitless goofing around with all manner of heat and twisting, we're stumped as to how to proceed from here. Finally we get impatient and grab the hacksaw (and our ultrasonic cutter) and release the super beefy woofer.

    • Update: An intrepid MacRumors reader had more success here. We tried approximately the same thing with no results, but maybe we should have kept trying! If you must pull one of these apart, give this method a whirl.

    • If the magnet on this woofer looks big for a speaker this size, that's because it is. Deep, dramatic bass notes depend on a speaker's ability to move lots of air.

    • While that's traditionally done by increasing the cone's diameter, Apple instead increased the travel of the voice coil (to 20 mm p-p in this case), which in turn requires a bigger magnet. That way the speaker diameter stays small, but it can still move enough air to deliver quality bass notes.

    Kinda disappointing that they cheeped out with a ferrite magnet and not neodymium.

    Adam Minter -

    What is the info regarding the woofer?

    Xx Xx -

    Could you tell us the DC resistance of the voice coil?

    TIA

    deckard -

    This guy manages to disassembly in a non-destructive way: https://youtu.be/3AnAy6HvlbI?t=634

    Thiago -

    il suffit de chauffer doucement , pour séparer les éléments

    Fafa pinto -

    Caution!!!
    This is not the way to open the lid.... There is an non destructive way look at Nic's Fix he has mastered it. https://www.youtube.com/watch?v=FfGiuh_Q... 7:52 in

    Peter Ekberg -

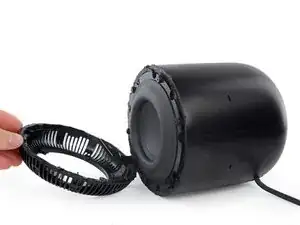
  13. After slicing and prying our way into this fortress of a speaker, we reach the final obstacle: a threaded ring.
    • After slicing and prying our way into this fortress of a speaker, we reach the final obstacle: a threaded ring.

    • We're forced to conclude that—at some point—the HomePod was able to be unscrewed to separate the control/woofer component and the tweeter/power supply unit.

    • But we don't feel too bad about getting hacky: judging by the adhesive you can see on the lower face of the tube, the threads aren't meant for the consumer—this thing was glued shut.

    • No wonder Apple's repair price is 80-85% of the device itself—this ain't easy. But if we got it wrong, by all means, share the magic procedure!

    Has anyone figured out a non destructive way inside? The fabric/mesh can be removed and reinstalled with out damage as can the brains, but there is no way I know of to access the speakers, power supply or amplifier board.

    Nicholas Ouimet -

    @ouimetnick Someone did! See the update to Step 12, above.

    Jeff Suovanen -

    This guy manages to disassembly in a non-destructive way: https://youtu.be/3AnAy6HvlbI?t=634

    Thiago -

  14. W2sqKIWscKPMPCFg
    W2sqKIWscKPMPCFg
    OhUnebLJQVxhnBay
    kuYM5Ke2vL2dPyEM
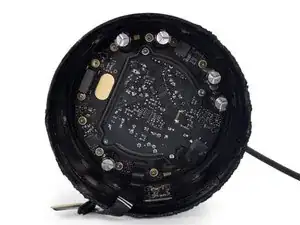
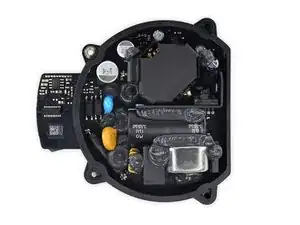
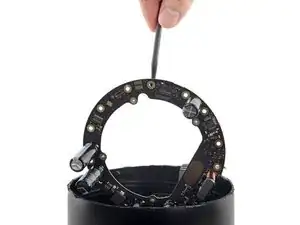
    • The next layer of our HomePod onion (or maybe parfait?) is the two-part power supply, composed of an inner block handling the AC/DC conversion, and an outer ring distributing power to all eight of the speakers.

    • The AC-in board's hefty hardware is flooded with epoxy, probably to keep the mad vibes from shaking it apart. It sends power to the ring board via conductive posts à la Mac Pro.

    How come you conclude “durability is not an issue” with a mofset GLUED, to a capacitor ?!

    How can you miss that ? This is why most electronic appliance fail after a few year.

    John Stewarts -

    Judging from the appearance of the surface, the filling between the components is probably Silicone not Expoxy. Epoxy is avoided nowadays because of the toxic base components, difficult curing behaviour, bad flexibility after curing and limited thixotropy.

    Moritz Kaiser -

    (For the uninitiated, like me): “thixotropy - the property of becoming less viscous when subjected to an applied stress.”

    jimwitte -

    Could you tell us the value of the big main black colored capacitor above?

    @jstew that glue doesn’t hold anything down. It damps vibrations to prevent failure of the legs/solder joints.

    deckard -

  15. y3fLChEwiTj1iITi
    y3fLChEwiTj1iITi
    lFhFAyeTE2ltsDWC
    aROoZEK12mPfVBSc
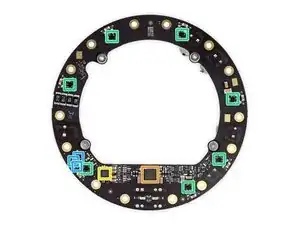
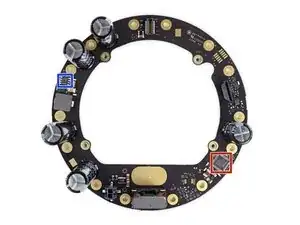
    • We've got part two of the power supply, the Stargate Halo power distribution ring, on the hook.

    • The capacitor-studded side of our intergalactic power supply board is home to a STMicroelectronics STM32L051C8T7 ultra-low-power ARM MCU.

    • And on the other side we find:

    • International Rectifier PowlRaudio 98-0431 audio amplifier

    • Cirrus Logic CS4350 stereo DAC w/ intergrated PLL

    • And around the perimeter, seven Analog Devices SSM3515B audio amplifiers—looks like these are the individual amps for the tweeters!

    • Maxim Integrated MAX9938 and Texas Instruments INA210 current sense amplifier

    • Texas Instruments TPS54560 5 A step down converter

    Stargate Halo

    They should have used this for some HomePod advertisement..

    jimwitte -

  16. XUFNWkbvdOJ1Fw3m
    XUFNWkbvdOJ1Fw3m
    lDSDXPltPGwsTGln
    5Xaj2pJel3W3EmPH
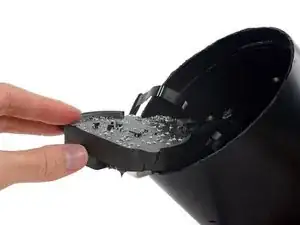
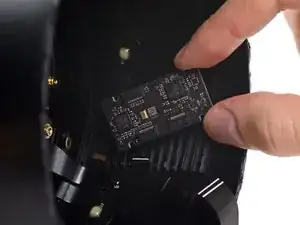
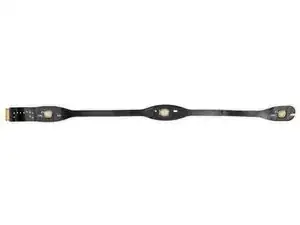
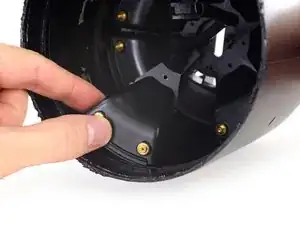
    • We wrestle a small board from the adhesive holding it to the barrel, and notice two Conexant CX20810 ADC chips by Synaptics for the microphone array.

    • Not to be outdone, the board has a microphone of its own—likely the low frequency microphone for woofer calibration.

    • This mic essentially listens to the woofer output and, through some fancy signal processing, fine-tunes the woofer to get the best performance possible while keeping bass levels in line with other frequencies.

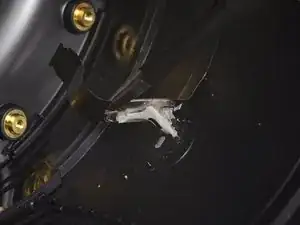
    • Back to the rest of the microphones: they come in two long strips of three mics each. Each strip is glued firmly to the inside of the case, with the mics positioned over funnel-shaped channels.

    Woofer mic probably does (real time) analog feedback to perform correction of nonlinear distortion. Not necessarily with DSP. AFAIK the first company to mass produce a product (subwoofer) with this feature was Velodyne in the 90s.

    deckard -

    can you also tell mic is from which company?

    Shweta -

  17. DPekDRcaSAxTSSLa
    DPekDRcaSAxTSSLa
    1m3KLSpGcHYQmIj6
    • We pull another threaded ring out of the HomeBody and finally gain access to snow white and the seven tweeters, complete with their conductive power posts.

    • That's right—those gold screwposts are delivering power to the tweeters.

    • Taking a look at a port, we've got a very bad feeling about this. Or maybe it's the tweeter that's nervous.

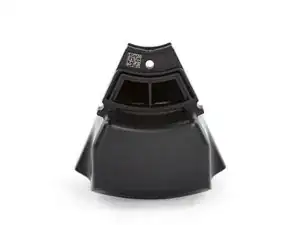
    • The tiny folded horn at the front of the tweeter is a trick that audio design engineers use to increase a speaker's efficiency and control the direction of its sound. It's the same concept used in the gramophone.

    • Time to break out the ultrasonic cutter and pop this unit open!

  18. PiluvkXy4LyujkRj
    PiluvkXy4LyujkRj
    Ea3DOxCnQgrLZwKC
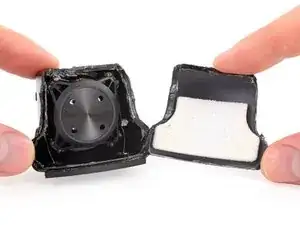
    • With the tweeter assembly open, we get a better look at the vented, horn-loaded tweeter that gives the HomePod its "precise" sound.

    • The vents on the sides of the voice coil bobbin and the four holes at the rear of the tweeter prevent air pressure from building up behind the tweeter dome as it moves.

    • Reduced pressure saves the dome—and the music—from distorting while the tweeter moves back and forth several thousand times each second.

    • So far we haven't seen any evidence of diamond tweeters ... Any answers for us Dr. Geaves?

    Is this oil at the edge of a voice coil?

    Anton Akusok -

    I think what you’re referring to might be the potting epoxy. The golden brown liquid-looking stuff on the coils?

    Ted -

    Also I’m baffled by a sentence in the post linked about diamond tweeters, what does “accurately reproducing audio above and beyond the limits of human hearing” even mean? Isn’t that a little paradoxical?

    Ted -

    I guess its for your dog who’s hearing is better than ours ;-}

    Dan -

    Maybe we have to update the adage “If a tree falls in a forest beyond the limits of human hearing, does it make a sound?” :P

    Sam Goldheart -

    the oil is probably ferrofluid to cool the tweeter and improve it’s magnetic properties

    ed -

    Ohh, right that makes more sense… It would sound horrible if it was solid the way it’s so thick and uneven on the coil. Scratch what I said about “potting epoxy”

    Ted -

    You gotta wonder though, with the vents on the other side of the driver, doesn’t this mean that the ferrofluid would degrade that much more quickly? Maybe it’s only meant to be used for 5-7 years, which is reasonable for laptops, etc, but if I’m going to buy a speaker, I’d want to get one that sounds great, and keeps sounding great for a long time…

    Ted -

    There is no oil in that photo.

    Slab Riprock -

    That is indeed ferrofluid. It doesn’t leak out because the magnetic field keeps it in place. Tweeter manufacturers have been using it for decades, and the tweeters live for decades.

    deckard -

  19. Rbb1qGdRGXlWWt4V
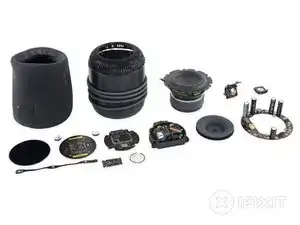
    • And with that: here are all the bits that make a Siri house a HomePod.

    • Do you know how Apple gets into these things? Did we miss a speaker nugget of wisdom? Let us know in the comments and be sure to check out our teardown video on YouTube.

    • Lastly, it's time to assign a repairability score. Despite many positives, if the opening procedure is truly not reversible, we're going to have to score it accordingly.

    Salut Apple,Je suis André!

    j’ai mon Home pad il s’allume mais il ne foctionne pas,ça arrive brusquement.que puis je faire?

    Andre Ejanuel -

  20. kyDNgAweQ3Xg6vaa
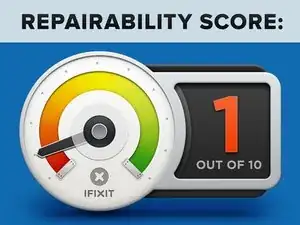
    • Apple's HomePod earns a 1 out of 10 on our repairability scale (10 is the easiest to repair).

    • The HomePod is built like a tank. Durability should not be an issue.

    • The outer fabric mesh, despite its lack of seams, can be peeled off undamaged thanks to a wicked cool drawstring.

    • All threaded fasteners are of the standard Torx variety—no annoying security screws here.

    • Extremely clever use of conductive screw posts minimizes the cabling mess across multiple stacked layers of components.

    • Very strong adhesives secure the touch input cover, microphone array, rubber foot, and (most annoyingly) the main point of entry on the top of the device—which otherwise looks designed to twist off without much fuss.

    • Even though it looks like there ought to be a nondestructive way inside, we failed to decode it. Without a repair manual, your odds of success are slim.

Jeff Suovanen

Mitglied seit: 06/08/13

407156 Reputation

81 Kommentare

Thanks guys, very interesting report!

Thomas Ungricht -

The power cable is actually user removable and replaceable. You just have to pull on it *really* hard. https://www.youtube.com/watch?v=gjxILSOf...

Andrew spoelstra -

Very good teardown! Thanks!

Juan Miguel -

Apparently the AC cable is replaceable, yet not meant to be user-replaced: https://9to5mac.com/2018/02/10/remove-ho...

coffee -

What is the DAC?

Wayne Wilmot -

My best guess would be Digital to Analog Converter :)

Rok -

I can’t seem to understand how the sound from the tweeters comes out. The whole thing looks like a solid plastic tube except at the top where the woofer is. I see the tiny holes for the microphones, but how is sound dispersed from the tweeters?

Nick McConnell -

I was wondering the same thing. I remember The Verge mentioning that the tweeters actually fire downwards and reflect off the table, but I can’t figure out how that works either…

Jared -

It does seem like they’re down firing out of the bottom. It’s just odd there’s so much “transparent mesh” all through the sides of the speaker and no sound actually coming from the sides.

Nick McConnell -

Look closely at the step 7, this thing has vents on the top and bottom

Gleb Kozinets -

In step 17 you can see two small trapezoid/squares at the bottom that match the vents in the tweeter, these are the only openings in the bottom (the test port being plugged by the rubber foot). I think Gleb is confusing the gaps in the top (to the left where the mesh is still attached) for the bottom.

Sam Goldheart -

“It does seem like they’re down firing out of the bottom. It’s just odd there’s so much “transparent mesh” all through the sides of the speaker and no sound actually coming from the sides.“

that is for the microphones…see the holes around the outside of the cylinder?

Benjamin David -

Did any previous Apple products use BMR speakers? There was some speculation with the 12” Macbook but I didn’t see confirmation.

tipoo -

Outstanding Teardown. Impressive tech but whose drivers is Apple using - both for the woofer and the tweeters - any branding or codes that can be decoded?

Thank You for sacrificing that poor HomePod to satisfy our curiosity.

Nikon1 -

It looks like if you had opened the top first you might have been able to release the draw string and not have to cut the mesh…

receng -

Yep! We did mention that in the teardown. ;)

Jeff Suovanen -

But the guide still says that you have to cut it. Might want to edit that out.

Zachary Canoy -

Hi Zachary! This is not a guide, and isn’t meant to be used to repair a device. Teardowns are just meant to be a look at our first attempt to disassemble something, rather than explaining the best way to replace a part like a guide would. In the interest of giving readers a genuine look at our experience, we like to leave teardowns as they are, mistakes and all.

Adam O'Camb -

Step 15: Think you should look for what amplifiers drive the tweeters; looking closely at the underside of that PCB there are some parts labelled “SSM” - which may be Analog Devices IIRC?

Tony Doy -

Good catch! Thanks for the tip. We’ve added a note to that step.

Jeff Suovanen -

I know ifixit wants everything to be repairable but I also want everything not to fall apart. Your comment about all the adhesive holding things in place is why I would consider getting this outrageous speaker. I suggest you add a second score for durability and give it at least a 9 until you can determine if the power cord can actually be removed and replaced for less than $300. I’d like to see how durable all the other speakers are. Just because you can repair them doesn’t mean everyone WANTS to have to repair them. Even if a couple of the tweeters fail, I’m sure you’ll still get some really good sound out of it.

plink53 -

I’m with you on this…seeing how well this is constructed, tightened and sealed up to prevent the many vibrations from loosening things up, that, if not done that way, could easily have caused this to make vibration noises or break over time. This is some pretty ingenious engineering —hardware, and, from what I’ve read, software — if I could, I’d run out and buy a couple of these right now!

Benjamin David -

Do you recall the 1 TB Time Machine?  I thought that thing was built solid, but it lasted exactly one day past the warranty expiration date.  Failed due to a massive design flaw (no fan).  With that much power going to drive the huge magnet on that speaker, I doubt it will last.  The epoxy will solidify with no way for the heat to escape, then break apart after repeated use of playing music.  You may say air will flow through with the movement of the cone, but I don’t think it will be static enough to properly cool over repeated use.  That thing will break one day after the warranty expires.

John Schafer -

Thanks you very much !

I think, we must be take care of our HomePod.

Kanon Shinya Yagami -

Would using a hack saw to open, pretty much basically make this un-repairable? I would think that would be a 0 for repairability

mcfarlandaaron1 -

It gets 1 point for the few things you can get at non-destructively. It only gets 1 point because that’s a small fraction of the total system.

Dan Neely -

You guessed that the epoxy keeps the speaker from rattling its power supply apart, but it might just as likely prevent buzzin/rattling sound from vibrating parts , since this thing seems to be quite the power shaker.

WaltFrench -

Is it really built like a tank? Wow!

junpei.futami -

The idea that everything has to be repairable is utter nonsense and needs to go away. Just stop it with that. 99.9% of consumers cannot repair things, for gods’ sakes so many people don’t even know how to cook! The reason things are hard to repair these days is because of 3 main factors:

1) They would be more expensive to manufacture if they used lots of nice machine screws all over rather than glue. This cost would be passed to us.

2) If they were built weaker to make it easier to take apart, unless they are designed in a more expensive way, they would be less durable and in the case of this speaker, you’d hear buzzing and rattling noises after a while. No thanks.

3) Repairing would require detailed repair manuals, spare parts that are packaged for individual resale, logistics of all that resale. And out of millions how many need repair before outdated? Have you taken these facts into account? Easy to just want want want, how about think through what that desire actually entails and how complex it would be!

JRX16 -

Horses for courses. I think 99.9% is way off. I have been tearing stuff apart since childhood and love to DIY. Curiosity is a huge factor. It does not always end well but iFixit has been invaluable and I consider it another tool in my repair kit! Another great job.

Troy Douglas Sutler III -

With respect, this is a ridiculous thing to say. You’re at a website called iFixIt. What do you THINK people care about here? If this were a random tech site, then sure— repairability is probably not a priority. But at a website dedicated specifically to repairing electronics… I think you’re in the wrong place, my friend.

Benjamin A -

This kind of attitude is why there are overflowing landfills, chemicals in our water, and plastic in our oceans. The unfortunate thinking of racing headlong toward disaster being averted by some new magic technology to reverse our foolish ways—or we’ll move to Mars—is a sad commentary on our society today.

1) When devices that are put together with screws already, and then glued or taped shut (iMac,) so as to avoid repair, 99.9% of the reason why is to force consumers to buy again.

2) No speakers I own cannot be repaired, and the drivers are easily more powerful than those on the HomePod.

3) Actually, this argument sounds like a direct plug for iFixit.com! Repairing isn’t for everyone, but many used to have this necessary skill and many still have an interest. Clearly, we are a consumer society who are not meant to be self-sufficient, lest our benevolent-overlord companies lose profit margins (aww, poor, sad Apple.) Planned obsolescence also goes against the very nature of we who would like to repair.

technicalmac -

I’m just tired of DIYers insisting that non-DIYers subsidize the extra cost of making everything repairable. If you want to repair something, figure out how to do it, but don’t ask everyone else to subsidize your tinkering hobby.

Benf -

Hey Benf! This isn’t just about hobbies and personal repairs! Every one of these devices will eventually need to be retired, either recycled and shredded, or put in a landfill. If the device is too hard open, it’s usually too hard to recycle, it’s not monetarily worth it to attempt it. That means the device, and all the manufacturing energy and materials are going to waste. Repairability means thinking about the full life of the device. Plenty of manufacturers are successfully building repairable devices—Apple included, with little visible cost to the user (Compare a Note8 $950 USD, score of 4, to an iPhone 8 Plus $800 USD, score of 6). Also as a note: I would guess that leaving the glue out of the threads is probably not a wild cost increase that requires customer subsidy.
Sam Goldheart -

Sam Lionheart, I agree with you. Sadly, I highly suspect the reason for the repair costs being as high as they are is because Apple won't even try to repair your old unit if it breaks. They'll just throw it in the bin and ship you a new one.

Anton -

It’d be fun to see how it is built!
FanMac -

It’d be fun to see how it is built!

I wonder if Apple could be “persuaded” to do that - to make “assembly videos” for all to see? Or maybe - given that it’s Apple - for a 1.99 Apple iTunes purchase. $0.99 if you just want to see one, $2.99 gets you six, $9.99 gets you the whole lot. Not sure how many people they could get to pay once the novelty had warn of though.

jimwitte -

I’m really curious what was supposed to be on the unpopulated SMD slot on the back of the main board. Also, the shieldings on the side hasn’t been opened in the shot.

Yang Jackie -

The tweeter firing direction is pretty clearly downward per the see-through picture on https://www.apple.com/homepod/

Tim Anderson -

I do see that, just seems like such a small area (per image in step 7) for all the sound to come out compared to the size of the speaker, but I guess that’s part of the magic of getting the mics to work while sound is blaring.

Nick McConnell -

HF sound doesn’t need a big space, the wavelengths are quite short, so the tweets flowing out the bottom seems logical. The horns will control dispersion somewhat, and possibly add efficiency (not much really), plus essentially they are there to change the direction of the sound.

Also re: getting mics to work while sound is blaring, that’s the easiest part to conceive of how to do. Since the sound is digital and it knows what’s playing, it should possible to “subtract” that sound from the incoming waveforms from the mic(s) in real-time, so it can “hear” you no matter what is playing or how loud.

ed -

Nice job, really enjoyed your teardown! Will look forward to learning of Apples disassembly voodoo.

johnarer -

You have it all wrong. There is no right to repair. Apple made it durable. JRX16, great comment. I find it far more dubious that a company that sells tools and repair knowledge is agitating for legislation that gives consumers repair rights than a company that uses adhesives to manufacture a durable and well made product. iFixit is the solution in search of a problem.

MojoFix -

Just a random person on the internet here: I want to be able to repair stuff I buy.

Repairability is good for the environment.

Benjamin Grunmaurer -

I think you’re on the wrong website. This site exists for those of us who DO believe that there is a right to repair, and who DO put value in products that can be repaired easily, whether that’s by someone with some skill, or by a layman who doesn’t want to fork out 85% of the cost of his product again to get it fixed.

While it is absolutely your right to disagree with this view, you are the one on this site, looking at this teardown, of your own free will, so if you don’t put any stock in what this site, or it’s many users think, then you are more than welcome to go, buy your durable adhesive secured speaker and not worry about us. But, please keep those views to yourself as the other 99% of the users here would very much like to be able to repair our speakers.

- Also, just an aside, the repair information on this site is available for free.

Joe -

Repairability is good for the environment only if the number of people willing and able to do repairs is high enough to offset the greater materials cost of building something both durable and repairable. Repairability has a cost of its own that can’t be ignored.

I’m very skeptical that enough DIYers exist to offset the higher cost, but it’s not an issue of opinions but simply a factual question that requires research.

The other aspect to consider is that DIYers are asking non-DIYers to subsidize the extra cost for them of making a repairable device.

Benf -

2 unanswered questions: 1st, is the power supply designed to work anywhere in the world with Apple only needing to plugin a different power cable before they ship it off? 2nd, what is the make/model of the tweeter or did Apple make their own?

oldtech -

A picture of a hacksaw, seriously? Why include a sensationalist picture of “hacking at the device to fix it”? That’s very misleading to those who miss the details that a hacksaw was NOT used. I understand that not everyone is going to have a sonic cutter; but that leads me to my next point…

iFixit was so rushed to get this article out on Monday that they just King Kong’ed their way into it without re-evaluating what was the correct way. Couldn’t you have heated the outer edge of the unit to loosen the glue on the thread of the sub? Couldn’t you have unglued the top to gain access to the draw string so that you didn’t have to cut the fiber mesh?

It sounds like the major complaint was use of adhesive everywhere; but I do not believe it is unreasonable to consider Apple would do that for a device that instead to have a high rate and amplitude of vibrations, like a multi-driver speaker.

People use these tear downs as guides for fixing their device. I hope iFixit redos this article with a more sane approach.

Eric Swanson -

This is not, in any way, meant to be used as a guide. That’s clearly stated in the banner right at the top. ;) If someone decides to take a hacksaw to their HomePod, that’s on them. Regarding the glue, unfortunately there’s no way to see where it’s located or even that there’s glue at all until you have the thing open.

Jeff Suovanen -

iFixit explicitly states at the top of each of their tear-downs: “This teardown is not a repair guide.” I for one love the humor iFixit exhibits in their tear-downs. Maybe you should take a look at one or two others, you will see various forms of this humor reproduced throughout.

Caleb Baker -

I’ve got a bone to pick, and it’s possible there’s a logical explanation to this I’m not seeing. Why did this score a 1/10, but the Surface Laptop scored a 0/10. I’m pretty sure both of these were destroyed to disassemble them. I don’t want to cry “fan-boy” but I consider both of these absolutely non-self-repairable and both are overpriced for their respective category. !&&* you cannot even replace a single component on this, at least the surface adapter’s AC cord can be swapped for a non-us plug (or vice-versa).

schnabel45 -

It had a few bits accessable without the hacksaw. They weren’t able to get at anything in the Surfacebook without cutting the fabric earning it an even worse score.

Dan Neely -

Great post! A question posed here rather than another site simply because there are smart folks here… Why are mics inside the unit being used to tune/modify the woofer? Why not instead do software-side processing before the sound is put out, based on analysis of the soundwave and clear understanding of the internal acoustics during hardware design? If anything, I would think once the sound is emitted from the speaker you might take into account external factors like specific room acoustics, or even air pressure(?) and then accordingly modify the sound. In that case, I’d think the mics are on the outside, not the inside. But what do I know.

Anthony McGhee -

somehow the speaker/microphone combination reminds me of the motion-feedback speakers that Philips promoted in the mid 1970’s.

Michael Frank -

Seems to me that the 6 Mics listen to the outside through little tubes in the housing. They are glued over little openings, which can be seen in the second picture of step 7.

Christian -

> Why not [tune/modify the woofer] software-side processing before the sound is put out, based on analysis of the soundwave and clear understanding of the internal acoustics during hardware design?

Is that really possible though? The acoustics I presume (might) be affected by whether it's sitting on glass or wood (or hung from the ceiling?!), whether it's next to a wall, maybe air dynamics (pressure, humidity, etc). And then there's maybe a "random factor" - most of us here have probably seen plots of the famous Lorentz Attractor.

But then, what exactly does "tuning the ["sub"]woofer" even *mean*? I would assume identifying whether it's creating some frequency that's making a buzz with relation to the case/table/whatever, and getting rid of it. But is there anything else going on?

jimwitte -

I don’t understand the comments about products not being repairable.

There does not need to be a conflict between product lifetime, ease to repair. IFixit compared the HomePod to a tank. Well in fact you can repair tanks. And you can repair comparable speakers - for example the Sonos 3.

In the past, basically all speakers have been repaireable. And I haven’t heard “buzzing and rattling noises ” being a problem. Also with more easy to repair high-end connected speakers eg from Sonos or Raumfeld, rattling noise is not an issue.

I indeed believe it ultimately comes down to cost. Cheaper production. And not wanting to stock spare parts. Apple want to maximise their profit - which of course is their right. In fact that is the goal of every company, I guess. Even though a gross margin of ~40% or ~88,000,000,000 US$ should allow for adding a few screws.

Joking aside - I think we have a responsibility for our children, reducing waste, by products repairable and recyclable - for both glueing is not the best choice.

Oliver -

There are pros and cons about product repairability against cost efficiency as well as build quality. We have seen the failure of modular phone (project Ara?) which is a clear indicator that modularity/repairability (since you can swap out any component) evidently not the best selling point. Consumer prefer a neat, smooth and well built product which doesn’t break when get dropped, bent when seated on than an average, highly repairable product. It’s just not ‘sexy’ to be repairable and we have to deal with it.

That aside, why do we want repairability in the first place? Actually we don’t… but the environment need it. Imagine top of the line product that is sold in number of 100 millions get depreciated and broken after 2-3 year because 1 hard to replace component is design to fail in that period of time (planned obsolescence), we’d get ~1,7 thousand tons of electronic waste every single year.

If you as a company design unrepairable stuff, step up your game with environmental responsibility.

cyber_lee91 -

Was anyone able to identify the maker of the microphones?

Claus Stetter -

I want to know the MIC brand!!

Nao -

Great tear down!

Super informative and humorous!

Justin Armant -

Very cool! Hopefully I will never buy one, so I will never need to fix it ;)

dave white -

Personally, I believe it is everyone right and responsibility to be able to repair just as its their right not to do so if they choose. The point in question is choice. If wr are not given choice then hardware becomes more like software and is only ever leased. In my view a slippery slope designed simply to extract more money and condoning poor or inadequate design.

David Newton -

A bit of an example from history on repairability …

The 1970s British TV manufacturers used to make fine TVs featuring a main chassis with daughter boards for the various bit and bobs - making them very repairable.

The Japanese manufacturers, e.g. Sony, competed making sets using as few boards as possible - not very repairable.

The British sets often experienced problems caused by issues associated with the various boards, those issues *required* repairs - which though easy to perform meant expensive engineer callouts and downtime!

There were, essentially, zero British TV manufacturers pretty soon, everyone wanted the cheaper, more reliable - yet less fixable - Japanese models!

YES repairability is GOOD, but surely not so if in achieving that repairability the kits becomes unreliable!

Guy -

^ this ^

Funny that the Japanese were at first bashed for being unrepairable!

Ahmad Rahmati -

The argument against repairability has added weight for a high-quality speaker. You really don’t want anything inside to move that is not supposed to move, least you get vibrational resonances that can cause buzzes or distort the sound. And you want everything to stay put during many years of service under lots of good vibrations. That is a compelling reason to eschew easily removable covers and fasteners and go for lots of glue and epoxy. Sounds like the HomePod is built to last, but $39 for the second year AppleCare warrantee may be a wise investment.

reinhold -

So I guess you should’ve started from the top-down instead of the bottom-up. Also, there are no pictures or view of the underside of the HomePod after you removed the access plate. Would like to have seen how the opening of the tweeters looked and how the sound is dispersed. I sort of see some fins or slots but that’s about it.

Player Onesix -

Apple claim that the rings from HomePod on furniture is the result of oil coming out of the silicone pad on the bottom. Does that pad appear to actually be made of silicone? There should not be any oil in silicone to have such a reaction. Some variant of SEBS rubber could. That is the over mold found on power tools or a hacksaw handle.

Kemal NottaTurk -

Replying to

[…]

The 1970s British TV manufacturers used to make fine TVs featuring a main chassis with daughter boards for the various bit and bobs - making them very repairable.

The Japanese manufacturers, e.g. Sony, competed making sets using as few boards as possible - not very repairable.

The British sets often experienced problems caused by issues associated with the various boards, those issues *required* repairs - which though easy to perform meant expensive engineer callouts and downtime!

There were, essentially, zero British TV manufacturers pretty soon, everyone wanted the cheaper, more reliable - yet less fixable - Japanese models!

YES repairability is GOOD, but surely not so if in achieving that repairability the kits becomes unreliable!

[http:///User/2379205/Guy|Guy]

“I repaired video games in the 1980s. The CRTs were from Japan and card based. Repair=card swap. This, the norm in commercial gear. Consumer gear is throw away.

Now the HomePod appears to be quite modular. One just can’t get into it in 15 seconds as it should be.

Kemal NottaTurk -

so there is only a tiny opening in the case in front of each tweeter, which seem to block the sound, then they put a mesh around the case to let sound move freely …

francoborgo -

Super random, specific question: where do you get replacement blades for your ultrasonic cutter??

Thx!

Greg -

So far we’ve not had to replace the blade on our unit, but, for the one we have, these blades should fit the bill.

Sam Goldheart -

Did you manage to reassemble it back and working?

Denis DS -

Great disassemble video. Could you re-assable it again and get it to work?

Jim -

Anyone figure out a non destructible way into this? No easy truck discovered 2 years later?

Nicholas Ouimet -

Is there a way I can get a replacement cable?

Ian Mak -

Any way to remove the brains, microphone, and amp and output to external speakers? I’d like to 3D print a smaller enclosure that forgoes the homepod’s speakers and leverages in-wall or in-ceiling speakers.

Matthew Bial -

Unlikely. The microphones in the enclosure work with the A8 to provide the best sound for the woofer and 7 tweeters. This is their adaptive EQ/spatial sound. This isn’t a dumb speaker like SONOS or regular Bluetooth speaker. If it didn’t have an adaptive EQ/Spatial sound, you probably could. What you are looking for is a HomePod mini with an AUX out jack, and they don’t exist. Closest thing is an AirPort Express, but it doesn’t have Siri or a touch surface. Basically Apple needs to make something like Amazon’s Echo Input device.

Nicholas Ouimet -

Hello everyone !  I am looking to buy power supply for HomePod.  Can you help me get one?  Thanks

Ihor -

Hello

mine is 110V and I was travelling in Europe and there is 220V , Which part should be changed ?

Thanks

Mazen Helwani -

Do you think it would be possible to disconnect the MEMS microphones to have a Homepod with all the features without any capability to listen?

Felancey MC -