Einleitung

  1. NJMPoNh3phlfVxDE
    • The IBM Model M is one of the best keyboards ever made.

    • Athrogh they're pretty durable, they may need some repair jobs done over time, especially cleaning.

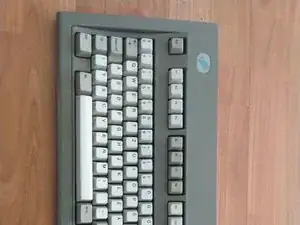
    • My keyboard is a 1391403, made in Greenock, Scotland, in 1992.

    • I've customized mine with a 1995 made industrial gray case, and with Hungarian keycaps made by Unicomp in 2020. Originally, the board had German keycaps, and the standard beige case.

  2. biKHmXHJKrVh3Dxb
    biKHmXHJKrVh3Dxb
    kHxTIQvO6nJmSiTH
    DdkFmOnoLdUjCEco
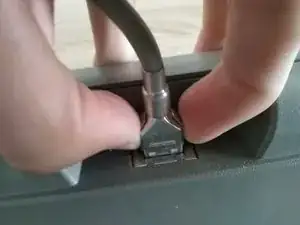
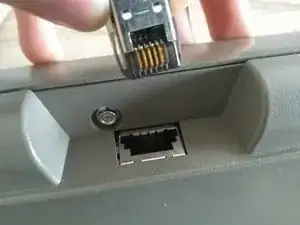
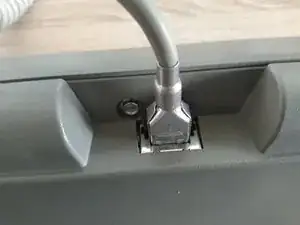
    • If your keyboard has a detachable SDL cable, it is a good idea to remove it now.

    • Press the two plastic tabs together with your fingers.

    • You should be able to pull the connector out. They maybe sometimes a little bit tight.

    • Some later models lack this feature. If your keyboard has a fixed cable, leave it alone for now. We will free it later.

    You should be able to pull the connector out. They maybe sometimes a little bit “tight.”

    Matthew Newton -

    Thank you, fixed.

    Marcell Várszegi -

  3. H2cHhKkfQlO3oZXy
    H2cHhKkfQlO3oZXy
    NJcQaE36wnfh3d3y
    ZrsGVnQdAccAEPyG
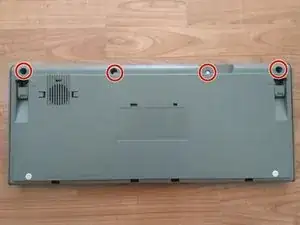
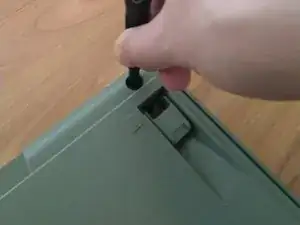
    • On the bottom of your keyboard, there are 4 screw holes as marked on the image.

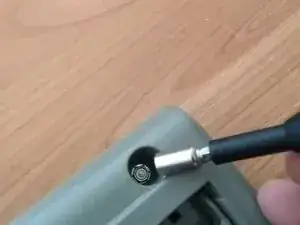
    • You will need a 5.5 mm nut driver to remove these screws. This kind of driver can be found in the iFixit Mako Screwdriver kit, which is part of every Pro Tech Toolkit.

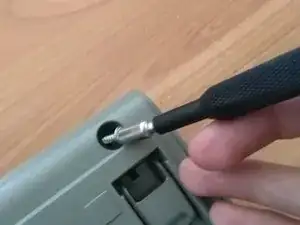
    • Turn the screws counter-clockwise to loosen them.

    • As you can see, my keyboard lacks the typical IBM birth certificate on the back of the keyboard. This is because I've replaced the original case of my keyboard with an industrial gray one. I left the sticker on the original case, so I can restore it's original state anytime I want.

    • In reality, the screw is 7/32" sized, but it is pretty uncommon size in Europe, and 5.5 mm is the closest metric tool to it. This size fits perfectly, and there is no risk stripping the screw head, using the metric tool.

  4. QDrPDNVEScwrc6DR
    QDrPDNVEScwrc6DR
    4drltEquugUoOoqL
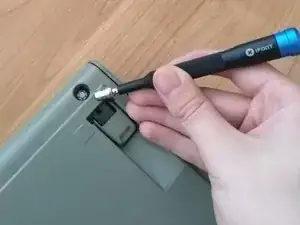
    • After loosening the screws, it is a good idea to use a magnet to pick them up.

    • I've used the Mako screwdriver kit's magnetic bit to pick the screws up.

    • Put the screws away in a container, where you can safely store them.

    • Since these screws are pretty uncommon, it will be nearly impossible to find exact replacement of them. Do your best to avoid losing these.

    • The lid of the Mako screwdriver kit is a perfect screw holder, as well as the magnetic plate under the screwdriver kit.

  5. ERCuGGuSA3GsJyqd
    ERCuGGuSA3GsJyqd
    G1m2UdUJ2S5laX4o
    DaAUcnwVtWQJNOnS
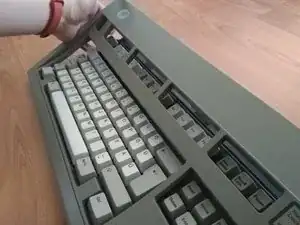
    • Holding together the bottom and the top of the keyboard, turn it around, so the keys are facing upwards.

    • Lift up the top housing of the keyboard. Raise the part above the F keys.

    • You can easily remove the top housing now.

  6. dqHS5EEeyJRJ1CyC
    dqHS5EEeyJRJ1CyC
    LIjVIRcQ1GqaLOTa
    sCeJwPImrpAK2LUF
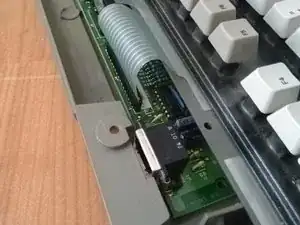
    • The case is disassembled now. But we need to remove some flex cables, in order to remove the keyboard assembly safely.

    • The small PCB is located on the top left side, where we'll work now.

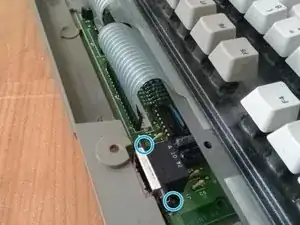
    • The PCB is held in place by two small plastic poles, on the left and the right side of the SDL connector, illustrated on the photos.

    • If your keyboard has a fixed cable, you will find a plastic cable reatiner instead of the SDL connector. This retainer is held in place by the same plastic poles, as the connector. You just have to lift off that plastic part to remove. The cable can be freely removed now from the case, but it will be still attached to the PCB, as it is soldered on.

    • Be careful not to break these plastic poles.

  7. xTSGUoWhthacZZnT
    xTSGUoWhthacZZnT
    RMuseAXgMaDvIhfa
    xiWmFSjCbPKULwxA
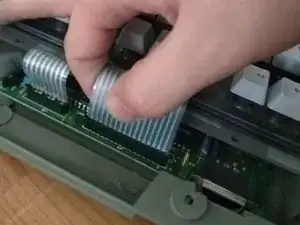
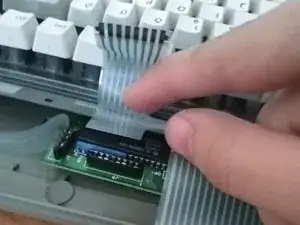
    • Grab the flex cables gently, and pull them upwards. We need to remove 3 flex cables in total.

    • Be extremely careful, as these flex cables are pretty fragile. If you damage the membrane, you'll have to replace it, which is not an easy procedure. (Bolt-mod neccesary in this case too.)

    • It is a good idea, to hold the PCB in place with your other hand. (Mine was occupied by my phone.)

    • In case of some older models, the indicator LEDs does not use a flex cable, but wires and a Molex connector instead. You have to pull the connector upwards when you remove it, but you don't have to be as gentle as with the flex cables.

  8. JSNR1EE2qyQxXJBD
    JSNR1EE2qyQxXJBD
    HHdMgHNSfiI6FVH5
    pPXqxMVcUYCyERZ1
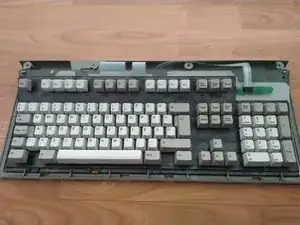
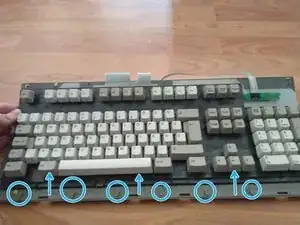
    • After we removed the flex cables, we can safely remove the keyboard assembly from the case.

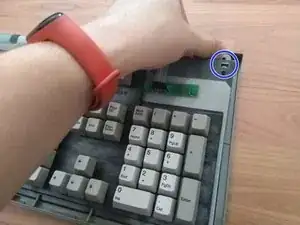
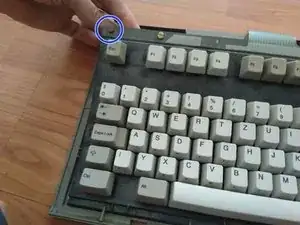
    • Lift up the top of the metal plate. Look out for the plastic stands.

    • Slide the metal plate upwards, so none of the plastic holders clamp the plate down anymore. (Look for the circles on the image.) The assembly should be free to remove now.

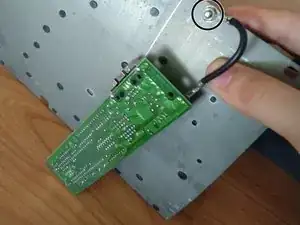
    • By lifting up the keyboard assembly, you will remove the PCB from the case too, as the PCB is connected to the metal plate with a grounding wire. The PCB will lift up simply too.

  9. uSIJcSpXUPBgi1OF
    uSIJcSpXUPBgi1OF
    HkBTPPLIPdBNR5hj
    • To remove the PCB, you just have to undo this screw. It is a flathead screw, secured by a 6 mm nut on my keyboard. It may be slightly different between models, but don't expect anything exotic here. It was handthight on mine, so I didn't even needed any tools to loosen this.

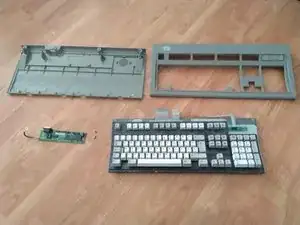
    • Your keyboard is now fully disassembled.

    • To remove keycaps, pull the keys upwards. I recommend using a wire keypuller. The process is the same as with any modern mechanical keyboard.

    • To assemble your keyboard, follow the guide in reverse order.

    • My keyboard will need a bolt mod in the near future, I will plan to make a guide on that too. Keep an eye out for that.

Marcell Várszegi

Mitglied seit: 29/05/20

204 Reputation

2 Kommentare

On my model M a key stopped buckling; it just feels soft. Do you know how to fix that?

Mark -

You can see, that on the back on the metal plate, there are dozens of these little pastic circles. These circles are actually melted plastic rivets, that are designed to keep together the barrel plate, membrane, metal backplate sandwitch. The buckling springs and their hammers rest in the barrel plate.

Over time, those melted plastic rivets are starting to snap off, due to the aging plastic becomes brittle. It’s not a big deal in the beginning, but eventually, if some areas has no rivets remaining, keys will start to feel off, not buckle, etc.

Your only way to restore the keyboard’s original state is to do a so called “bolt-mod”. You need to drill out all those little plastic rivets, and replace them by tiny screws. There are actually lots of great articles on the internet how to do it, check them out.

I have a Model M that may need this same treatment in the future, so maybe I will make a guide on Ifixit.
Marcell Várszegi -