Einleitung
We picked up the new Mac mini from our local Apple store and took it apart!
Werkzeuge
-
-
The Mac mini for this First Look was graciously provided by our friends at macminicolo, a Mac mini colocation service. They allow your Mac mini to be used as a surprisingly powerful and inexpensive server.
-
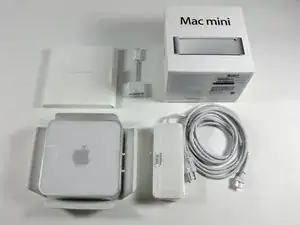
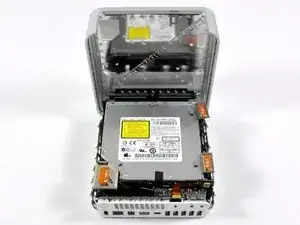
Ladies and gentlemen, without further ado, allow us to introduce the new and improved Mac mini!
-
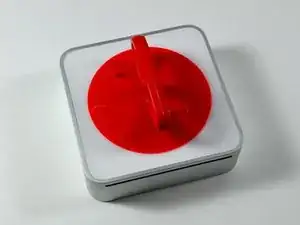
We immediately tried to open the mini using our iMac opening tool, used in yesterday's iMac First Look.
-
It did not work.
-
-
-
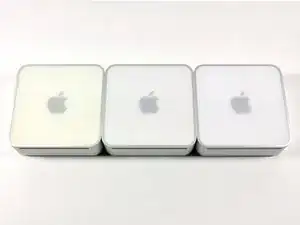
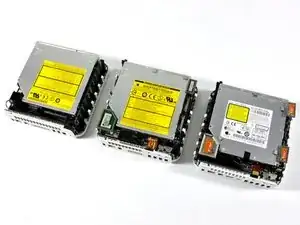
The beauty of evolution at its finest. From left to right: Power PC, Intel Core Duo, Intel Core 2 Duo.
-
Notable differences in the latest model:
-
-
-
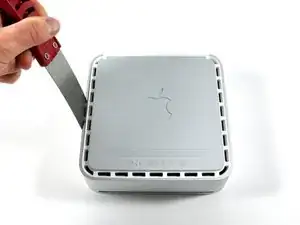
Let's rock this thing!
-
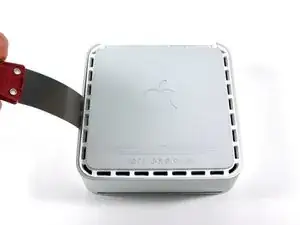
Carefully insert a putty knife into the crevice in between the top cover and bottom housing. Start on the left side first.
-
Gently enlarge the existing crevice by twisting the putty knife downward and away from the mini.
-
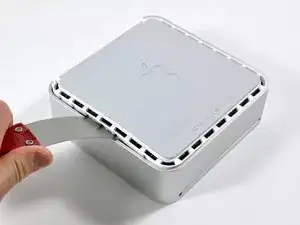
Repeat the prying motion until a portion of the bottom housing has been nudged upward.
-
-
-
Repeat the same prying procedure on the right side.
-
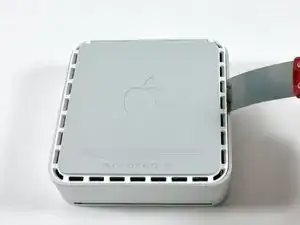
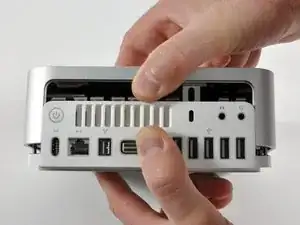
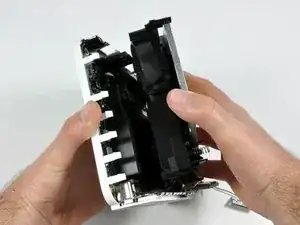
The top cover should now be marginally separated from the bottom housing. Use your fingers to completely separate the two, starting with the I/O side of the mini.
-
The top cover does not have any cables attaching it to the bottom housing; it should now be completely detached from the bottom.
-
-
-
A quick comparison photo of the three Mac mini generations (oldest on left) showcases their technological progression:
-
No antennas --> One antenna --> Two antennas (Airport card)
-
Desktop RAM --> laptop RAM
-
PATA --> SATA drives
-
-
-
Can you hear me now? Excellent.
-
The wireless board contains a Broadcom BCM4312KFBGH WiFi transceiver on it.
-
The new mini houses three wireless communications antennas, one for use with the built-in Bluetooth and two for the Airport Extreme wireless 802.11n card.
-
All three antennas need to be removed before accessing the hardware underneath.
-
-
-
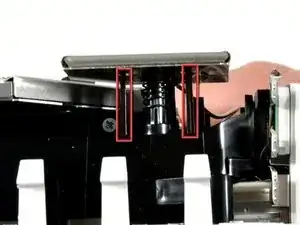
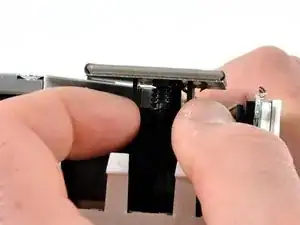
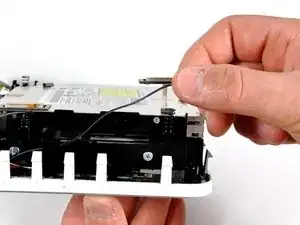
There are two black posts securing the Airport antenna board to the internal frame.
-
Squeeze both black posts together and gently lift the antenna board from the post.
-
-
-
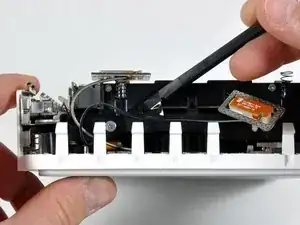
Rotate the mini 180 degrees.
-
Use a spudger to peel back the black tape and release the antenna cable.
-
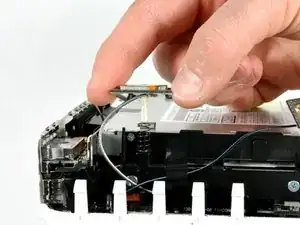
Carefully lift the remaining two antennas from the right side of the mini.
-
-
-
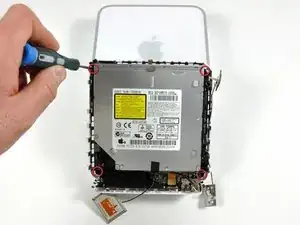
Remove the four black Phillips screws holding the internal frame to the bottom housing.
-
After the screws were removed, we separated the internal framework from the bottom housing.
-
-
-
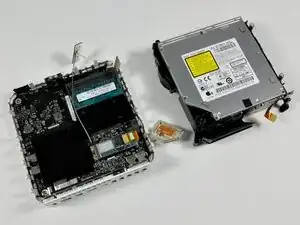
On the left we have the bottom housing, which includes the logic board, CPU, and RAM. On the right is the internal framework, which contains the SuperDrive, fan, and hard drive.
-
-
-
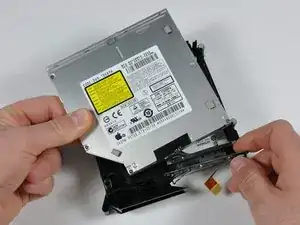
Remove the six Philips screws from the left, right, and back sides of the SuperDrive.
-
Unplug the drive from the interconnect board to completely remove it from the framework.
-
-
-
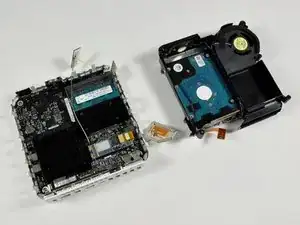
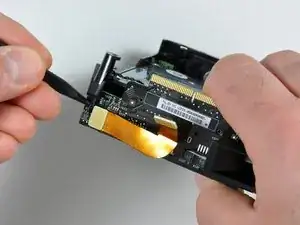
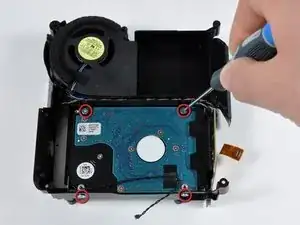
Next, disconnect the small black two-wire connector from the interconnect board and move it out of the way.
-
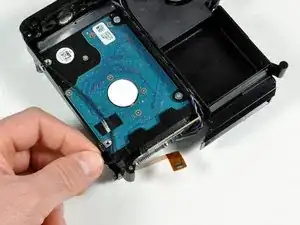
Remove the four Phillips screws securing the hard drive to the internal frame.
-
The hard drive easily slides out once it is detached from the interconnect board.
-
-
-
Remove the two screws holding the fan in place.
-
Disconnect the fan's blue/gray cable from the interconnect board. This should allow the fan to be removed from the framework.
-
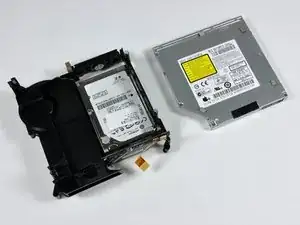
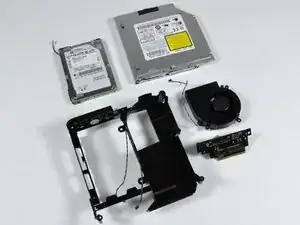
The top half of the Mac mini is now completely disassembled!
-
-
-
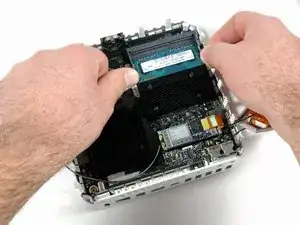
Now for the lower half...
-
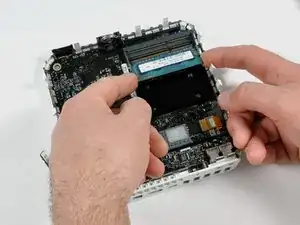
The standard quick pry with the fingers (and subsequent pull) frees the RAM from the logic board.
-
-
-
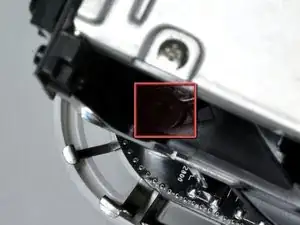
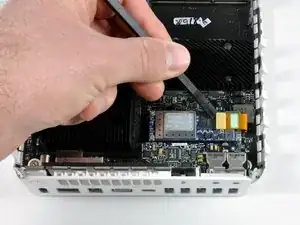
On to the AirPort/Bluetooth board removal. A couple of steps are needed to remove the board:
-
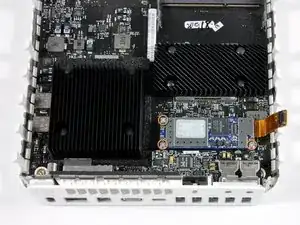
Disconnect the three antennas (marked in red).
-
Disconnect the AirPort/Bluetooth communication cable (second photo).
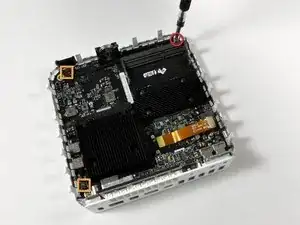
-
Remove three Phillips screws (third photo) and then completely remove the AirPort/Bluetooth board.
-
-
-
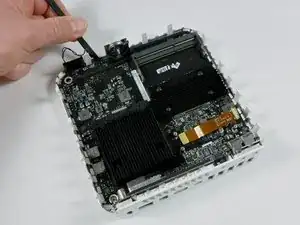
Once we had removed the AirPort/Bluetooth board, the only thing preventing us from taking out the logic board was two connectors and a T10 Torx screw.
-
Disconnect the power button cable and the power-on LED.
-
Use a T10 Torx screwdriver to remove the standoff screw.
-
-
-
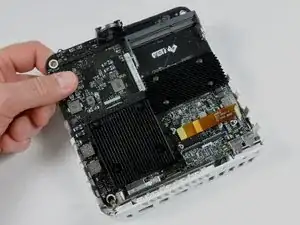
Use a spudger to gently pry up the logic board.
-
Grasp the logic board with your hand and pull it away from the I/O ports.
-
Voila! The logic board is free.
-
-
-
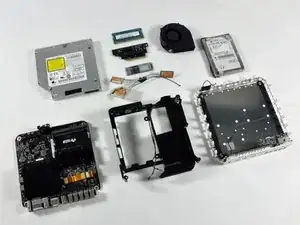
All the goodies of the disassembly in one place. Taking apart the Mac mini was a lot simpler than the iMac we took apart yesterday.
-
Putting the mini back together was easy too, it's running great. In fact, we've figured out how to add one terabyte of internal storage to our mini.
-
We also did these product teardowns recently:
-
-
-
-
Shameless plug: We sell both Mac parts, iPod parts, and tools.
-


Is there any difference between the power supplies of the old and new Mac Mini?
I would also love to see some comparisons of the power consumption, particularly since they are claiming the new one is the most power efficient desktop on earth.
radven -
I'm not sure that the mac mini is the most power efficient desktop, apple has made alot of claims on the mac mini, and the only one that i have been able to prove true it that the origional 1.25Ghz G4 mac mini was the cheapest mac ever(Runner up: Intel Mac Mini's, 2nd runner up: iBook )
Chris Green -