Einleitung

After having read this article and coming across the authors mention of having checked ifixit.com "was the first place I checked for the Magic Bullet instructions. Unfortunately, they don’t have that one yet. Maybe I’ll create it!" I thought may be we could beat David Lang to the punch:-) I finally got my hands on a non-functioning "Magic Bullet" and thought I start off with a teardown, so here it is.

  1. ouDtPVihWHoRxgbw
    ouDtPVihWHoRxgbw
    CWVxmuqtNH5ml2xm
    51BguDUQOENrMaO3
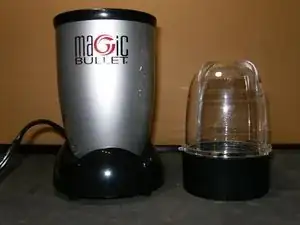
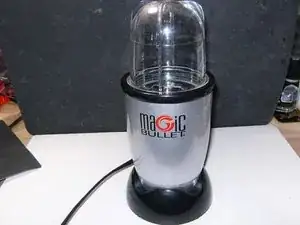
    • Okay so here is the complete Magic Bullet advertised as "high-speed mixing system chops, whips, blends, and more" This particular one had issues with the motor.

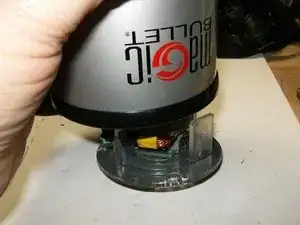
    • First remove the short bullet cup, with a quick twist and lift, from the power base.

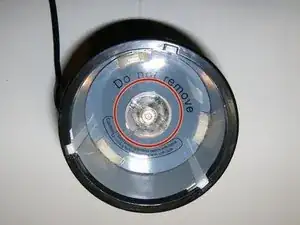
    • Here is the blade gear that drives the blades inside the bullet cup when the cup is mated with the base. We shall deal with the "do no remove" issue later.

  2. np1af63GOEyUEODN
    np1af63GOEyUEODN
    U5owg4lFWhsPaXJy
    rF5SBlfXxcDX6ELJ
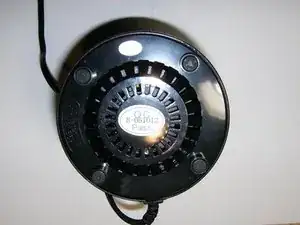
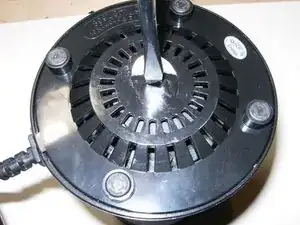
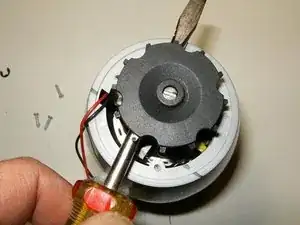
    • To remove the blade gear, turn the power base so that the bottom part faces up.

    • Remove the quality control sticker

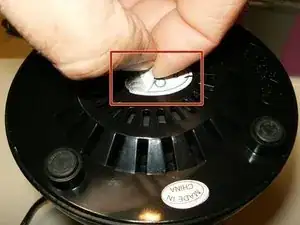
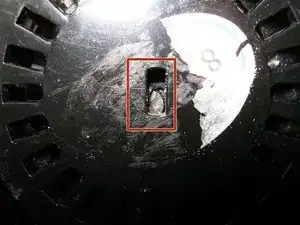
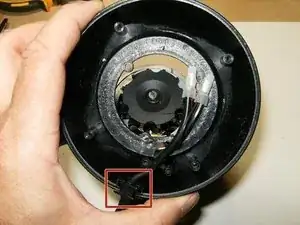
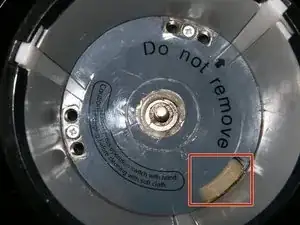
    • The sticker covers a rectangular opening. Within this opening is a slot for a flat tip screwdriver. It is possible that it is somewhat off center like in this picture.

    • This is caused by the motor not being properly centered within the base. This appears to be common (the motor does not have any bottom support within the base)

  3. 3euWgGRVSqBDnCwE
    3euWgGRVSqBDnCwE
    JVm1HFNH3rVECATQ
    uhAbWpfhPqKZETH6
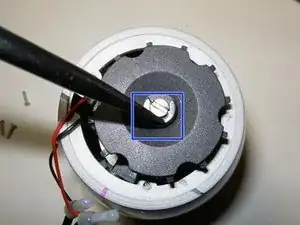
    • This can be resolved by inserting a screw driver and gently forcing the slot into sight.

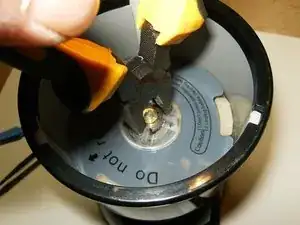
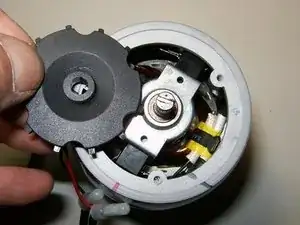
    • Next a pair of either combination or slip joint pliers are needed to hold the gear,

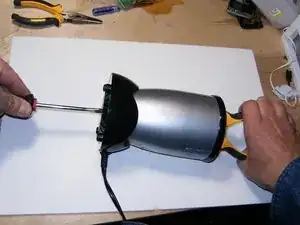
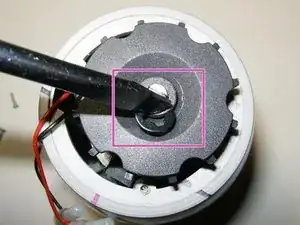
    • To remove the blade gear, turn the Magic Bullet on its side and use a flat tip screw driver on the bottom end, and the pliers on the base gear. Turn the blade gear in clock wise direction to remove it off the shaft.

    • The blade gear has a left-hand thread, which is opposite to the normal screw thread. So it will loosen when you turn clock-wise.

    • You may find it easier to remove the blade gear after the motor assembly has been removed from the body in Step 8.

    • If the blade gear refuses to budge, give it several sharp taps with a small ball end hammer directed at the center of the boss.

    • Note that the blade gear needs to be removed only if it is to be changed.

    I still can't get the blade gear to loosen.

    What else do I do?

    Patti Smith -

    @pandrsmith2 where are you stuck with it? You did recognize it is a left handed thread? If it is really stuck on it, it may be easier to remove the whole motor assembly and use a Dremel like tool to cut the blade gear…

    oldturkey03 -

    You might want to go to step 4 and remove the bottom cover. This will give you access to the larger fan to which the screw we are trying to set goes through. Holding this fan, gently, will give you the secure base to allow removal of the gear.

    James Panzer -

    The screw is stuck fast. Is this still a problem? My magic bullet motor is working but the blades dont turn. The gear doesn't look broken or damaged.

    Debbie McNicholas -

    replaced the gear wheel exactly following your manual! Thanks a lot! (by the way: the link to the manuals Magic Bullet Repair doesn't offer any manuals :-|. They don't seem to exist)

    Herman Radstake -

  4. F6QHeHo11G6pDPKo
    F6QHeHo11G6pDPKo
    w6dAeh1I3Rf2lKcM
    K4nZDws4PhXVJusk
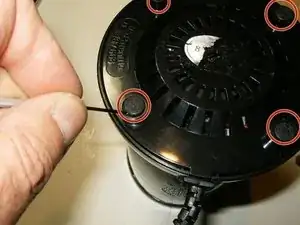
    • With the blade gear removed, it is time to focus on the power base. Use a small screwdriver or similar to remove the four rubber feet from the base. No glue is used, they are simply pressed in the openings

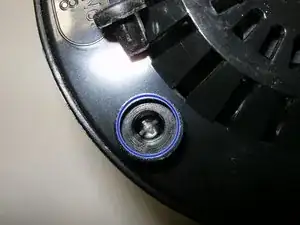
    • Underneath each one of the rubber feet is a screw that can be removed with either a Phillips or flat head screw driver.

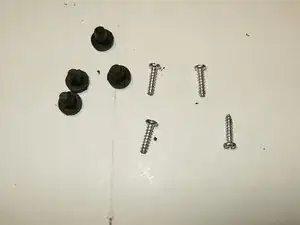
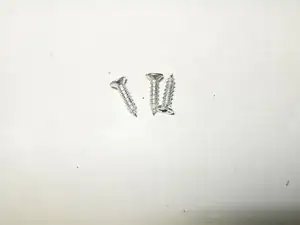
    • Here are the four screws and the rubber feet once they are removed. The screws are 1/8X1/2 self tapping.

  5. heJLwm1nX5w5ZUrK
    heJLwm1nX5w5ZUrK
    eQqgiiLOyeVQfiZV
    JSCylYxwLLBCTMwL
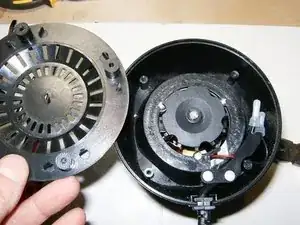
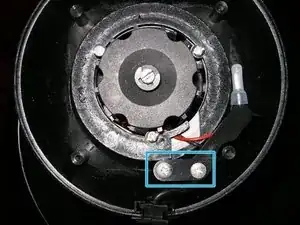
    • Once the rubber feet and screws are removed, the bottom plate comes off.

    • Remove the cable guide by removing the two Phillips head screws

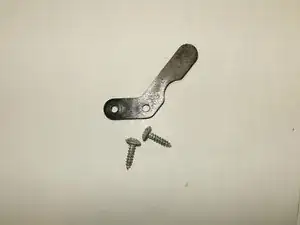
    • Here is the cable guide and the two 1/8 x3/8 screws

  6. 5Lf3GvWuK1WekEE2
    5Lf3GvWuK1WekEE2
    QaULDPNECELIGSD6
    LRtHJGOrrPhAVOF5
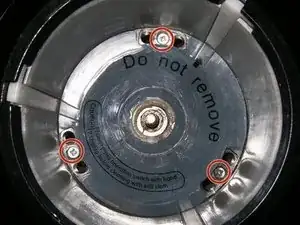
    • Remove the three Phillips head screws that fasten the body to the base.

    • The screws can be removed with either a Phillips head or a flat tip screw driver

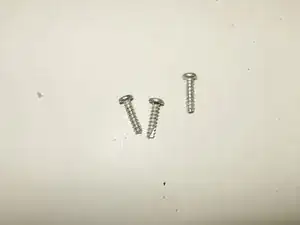
    • Here are the three 1/8 x3/8 self tapping screws

  7. ylZIbjDaJ3RxWTPp
    ylZIbjDaJ3RxWTPp
    EV1kZNtIlOsJ66ym
    2hr1yNKLod4Sye3M
    • With the screws removed, lift the base of the body. Remove the wire mount out of the base and guide the electrical wire through the base.

    • For this teardown, the fan blade on the motor shaft was removed. Remove the snap ring by inserting the corner of a flat tip screw driver.

    • Simply twist the screw driver so that the snap ring will come away from the shaft.

  8. 3vFNRZ2LnYIgXitx
    3vFNRZ2LnYIgXitx
    WCEAtTqUjApJyjWx
    VjwtPdywBfQ5YFIH
    • To remove the fan blade, use a screwdriver and place it between the body of the Magic Bullet and the fan blade. Then pull up on the screw driver.

    • It may be necessary to do this on opposite sides a few times since the fan blade is a pressfit on the shaft.

    • Turn the body of the mixer over and remove the three rubber spacers

    My magic bullet doesn't have a fan blade. Is this because its an old model?

    Debbie McNicholas -

  9. ILKCocpIR45P6CVn
    ILKCocpIR45P6CVn
    HFCDKGea4MB1DiNH
    nAfeOMBd6wJCiQqZ
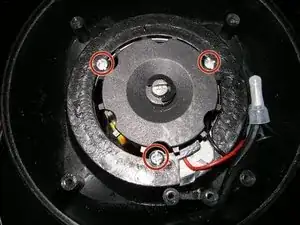
    • Remove the three screws below the spacer

    • Here are the three 1/8 x3/8 Phillips head screws

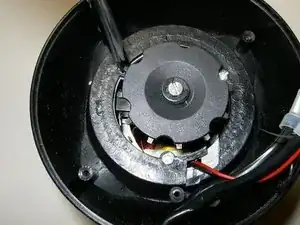
    • With the screws removed, turn the mixer bottom side up. this will free the electric motor out of the body.

    good afternoon

    I ask where can I get the plastic base that has the base of the engine that is gray that says DO NOT REMOVE

    GOOD AFTERNOON

    where I can get that plastic base that is stuck to the engine that is caught with three screws and says not to remove it. I need to buy it for my magic bullet

    my email is jubilado43@live.com

    I will thank you for the help

    THANK YOU VERY MUCH

    efrain -

  10. rDWNIwBvQwladwTI
    rDWNIwBvQwladwTI
    ukULtPkZ6Tw6pAMh
    dxjQTVQpT6Kvg1KN
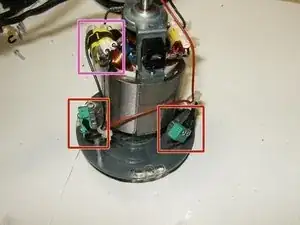
    • Here is the motor removed from the base. The motor plate list it as D.S.D. Motor Co. LTD Model 5443/125 M12

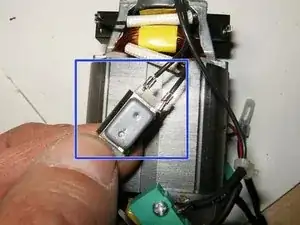
    • There are two single-pole, Subminiature Micro Switches Marking on those is: Donghai KW4-3Z-3 5A 250VAC

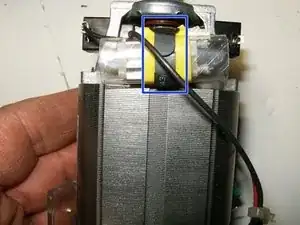
    • There is a thermal fuse wrapped to one of the switches leads.

    • Remove the metal tie strap as well as the rubber sleeve to get to the fuse.

    • Here is the thermal fuse. It is a Avertronics 17AMC 105deg Thermal protector.

    My magic bullet works perfect, but the black strip that is glued on to the body broke and I now have to press down on the cup and hold while spinning. I can not find a replacement. Seems wasteful to trash a perfectly working machine just for a broken piece of plastic. Any ideas on how to replace that?

    anna androsova -

    @tinyanya the black strip as in the one shown in step 11?

    oldturkey03 -

    Any idea as to where to get carbon brush replacements?

    Marco Magana -

    Measure the brushes and proceed to your local hardware store. You do not need original brushes, only some that fit. If you are like me and have collected all kinds of “treasures” you may find some that can be made to fit. You can file the brushes down and make them fit.

    oldturkey03 -

  11. T1JJ1KisHSCZUwIy
    T1JJ1KisHSCZUwIy
    j6T1v4oWpPhNDU2H
    EJqHdAgAGvTmossI
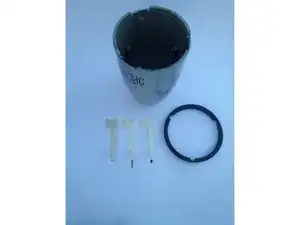
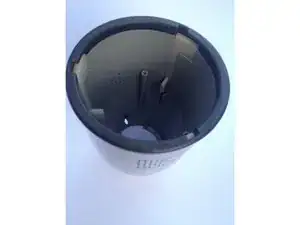
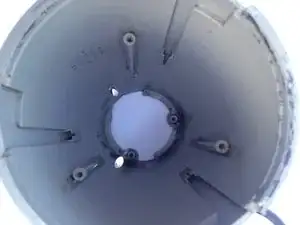
    • This is the empty body of the Magic Bullet with the motor removed.

    • There are three white plastic posts inside, which slide down when the jar is attached. There is a spring at the bottom of each post to push it back up when the jar is removed.

    • The posts have tabs on the bottom, one of which engages with the micro-switch on the motor.

    • The posts can get jammed if some liquid spills inside the body, since it is impossible to clean the sliding area of the posts.

    • To remove the posts, the black plastic strip on the top edge of the body has to be removed.

    • Since the black strip is glued on to the body, the easiest way to get it free is to dip it in boiling water.

    • Wait for a few minutes and then pry it off. Keep pulling up hard all round the edge and it will come off with a bit of force.

    • Here is the body with the black strip and the three white posts. The springs at the end of the posts in my Bullet were all rusted off.

  12. qLmBK56qa5kXDWWi
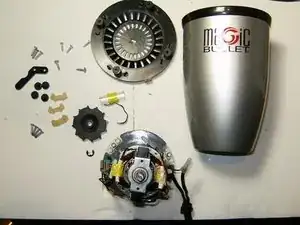
    • Here is the dissected Magic Bullet. Not a whole lot of parts and fairly simple to get to. The gear is not shown since it did not survive its removal. A royal PITA to remove.

oldturkey03

Mitglied seit: 29/09/10

734536 Reputation

27 Kommentare

Nice teardown.I recently received one of those as a gift from the US. However I live in spain and when I used an electric adaptor, the base smoked. I have looked to buy a 220v 50hz base good for Europe but they only have the 110v 60Hz for US. Is it possible to rewire what I have to work in Europe?

Joy Mwihia -

Now how can I put them together????? Help???????

peonyfairy -

I would also like to know how to put it back together!!!!!

Krista -

step 3 - I cannot get the blade gear off - it will not budge - any suggestions?

kris -

Turn the blade gear clockwise
Aubree Duran -

You don't have to take the gear that connects to the blender off for most repair jobs. You just need to take the screws off that are hidden under the silicon as in Step 9 and the whole motor slides off. I learned this the same way you did by mangling the gear and although I was able to repair the motor, the blender could no longer be used. Great teardown instructional though and the pictures are very clear. Thanks.

Brod Chato -

the blade gear dose not work, I used it just twice. what can i do? I turned it off. it was cool. but didn't work after turn on.

arez -

On my Magic Bullet the plate that says "Do Not Remove" came loose. There are 4 phillips head screws under a self adhesive label that hold it to the motor housing. For some reason they were not tight or loosened during use. The plate then made contact with the spinning blade gear with the resulting heat causing the two pieces to seize. This prevented the motor shaft and blade gear from turning. I fully disassembled my unit per these instructions. Using a channel lock pliers on the blade gear and holding the plate with my hand I was able to release the bond between the two pieces. I then removed the blade gear and tightened the 4 screws. Lo and behold the motor shaft turns. I removed some of the upset burnished plastic for both the plate and blade gear. Then reassembled the entire unit. The 4 screws are not visible from the top, because the blade gear covers them. Let's see how long it works now. BTW: I ordered a new base from Magic Bullet for $15.98 delivered and this beats a whole new unit.

John Ploof -

My old gear cracked and the gold screw seems stuck. I've tried the clockwise method with the flathead and pliers but it just won't come off so I can put the new gear on. It seems like it's melted on. Any suggestions or should I take to a mechanic to get a new one?
Expose Truth -

Mine is a little different but I just fixed the sticking switch. Thank you very much. Now I only need to keep my chocolate whey protein smoothie from spewing all over inside it when the gasket isn't sealed.

Top Cat -

i fixed the blades part now the motor wont work .is there anywhere i could take it to fix

ezbettyboo46 -

please give me a suggestion

ezbettyboo46 -

Can i use the motor and make a homemade Centrifugal Pump ??

Jen Marie -

Excellent write up. My magic bullet was all gummed up (too many drinks overflowed). I didn't bother removing the top ring - just boiled some water, soaked the plastic pieces, and used a tooth brush to clean out the gunk. After re-assembling in reverse steps - it's working like new again. Thanks!

bryantms -

My base gear broke into pieces and the remaining gold screw was nearly impossible to remove. After a lot of effort we did finally remove it. Now the replacement gear doesn't screw down completely. What do I do?

maryt212 -

Excellent description and photos of the tear down. You need to do the reassembly because it is not cut and dried. I replaced the armature inside the housing, put it together and of course it did not work. The second time I seated the armature and put in one screw and tried to turn it on without doing the whole assembly and it worked. apparently there is a certain way the armature must go back into the housing. One note make sure that you pull the wires tight and hold them against the housing or they will get caught in the gear at the bottom. By the way it looks like everyone is having problems removing the drive gear. Note that it has left handed threads, meaning that instead of turning it to the left as normal to loosen it you turn it to the right instead.

Ben -

The first thing I did before looking for this online was to remove the feet assuming there would be screws under them, but my feet cover blank plastic, not screws. I then suspected that the baseplate was just held on with tabs, but I have slid a spudger around and not encountered any. Is it possible they now just glue the baseplate on?

Joshua Hodas -

where can one purchase a replacement motor and/or fuse?

shaun winter -

EU version (one sold in Russia 15 yrs ago) is slightly different, kinda simplified. There's no fan blade at all at the bottom. Also, there's one switch only.

Electrically, the motor is wired thru pretty large 0.33 uf X2-type capacitor connexted in series with on of the motor's shoulder.

Thanks for decent teardown!

Dymbo -

Great detailed info, Eventhough my unit is a single shot+ it was the same basic disassembly as shown. But I have a question: Is it possible to buy the motor brush and holder for the Single Shot+? My unit fell off the counter and ceased to function after so that’s why I took it apart. and I found the brush holder broken off — they stick out like ears form the motor base. The holder itself it a squareish hollow tube ( made of a bakelite like material, and it shattered), that holds the brush in place, The holder is fashioned with the holder and a portion that gets rivited to the motor and this one is a bugger to remove anyway because of the blenders top plate. I have not found a non-destructive way to remove the top plate so I can get at he two long screws holding the bracket which housed the brushes in their respective holders. Is it worth it? I feel it’s worth trying to fix this even though it’s less that 50 bucks to replace the whole thng.

Awhilee Kyote -

Inherited one of these from a ‘friend’ - who neglected to mention how something had leaked into it and then molded slightly, then dried. Thanks to this teardown guide and some 3-in-1 oil and a bit of soap and it’s back up and running without shedding tiny flakes of crud!

Thanks!

Glenn Dixon -

.What is the size of the white posts springs and where can I purchase it

Premchand Baijnauth -

The top plate on my Magic Bullet under the gear and says “Do Not Remove” disintegrated. Can I get a replacement?

Barry Howards -

Great information thanks for sharing. <a href="https://www.panditramdial.com/black-magi...>Black Magic Removal in USA</a>

pandit ramdial -

Having the european version made for 230V~ i found the switches to be at fault after only three uses. They were rated 3A only, which seems a bit weak. i replaced them with 10A ones and added small 1nF X2 caps in parallel to avoid contact damage due to the inductive transient. To put it back together, carefully drop the motor assembly into the case while lining up the line vcord with its entry point and the the three screw holes with the spring loaded switch actuators. gently push it down until it sits on the screw mounts. With the help of a screw driver inserted into one of the screw holes, carefully rotate counterclockwise until the center screw holes line up with their respective mounts. Before screwing them back in, make sure you hear the switches clicking when manually actuating two of the actuator bars. There is no switch on the third. Turn the screws i the wrong direction until they fall into their thread before screwing them down. then replace the rubber grommets. => Done
TuX11 -

Thanks for this; I had to tear mine down for a good cleaning. Couldn’t have done it without my favourite website: ifixit.com! Who would have thought to turn something clockwise to loosen!
Richard Brooks -

Excelente!... Gracias por compartir. Me resultó de utilidad.

Luis Caceres -