Einleitung

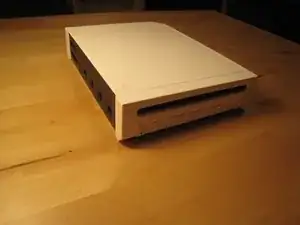
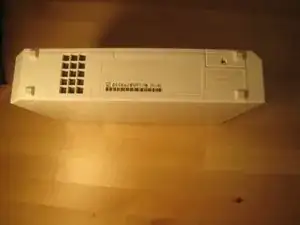
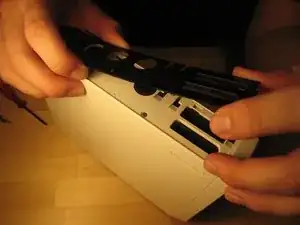
In diesem Teardown öffnen wir eine Wii bis zur Hauptplatine.

  1. unHnsKZaWIMIMEUP
    unHnsKZaWIMIMEUP
    hsjq1KwUCVUCmepd
    JZZTZMpXQkWe2A3T
    • Trenne alle externen Kabel von der Wii-Konsole.

    • Bereite alle benötigten Werkzeuge vor.

  2. DTTHDeSLkpioVpWM
    DTTHDeSLkpioVpWM
    vVq2YYS2PMatTXw6
    NVtGKlFdtZVdIcnJ
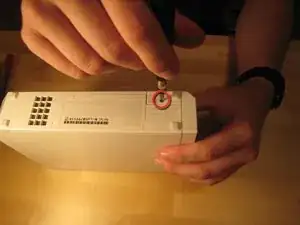
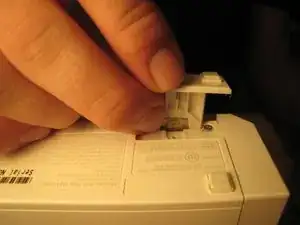
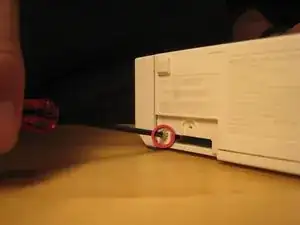
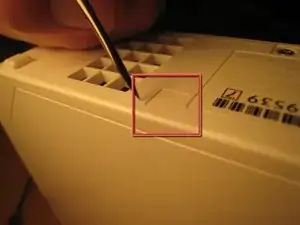
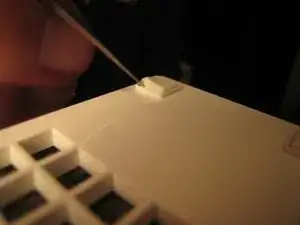
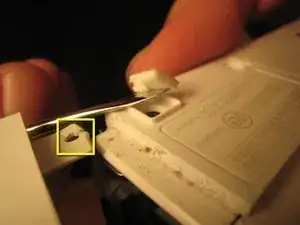
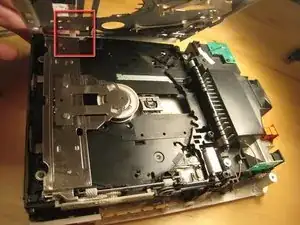
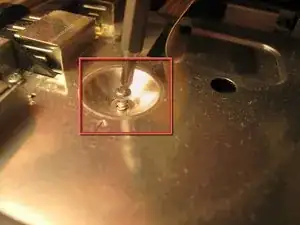
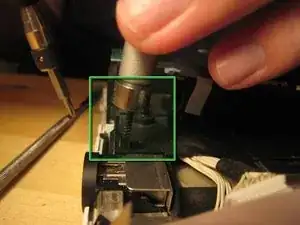
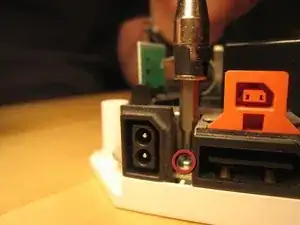
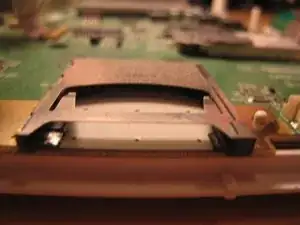
    • Die BIOS-Speicherbatterie ist mit einer kleinen Schraube befestigt.

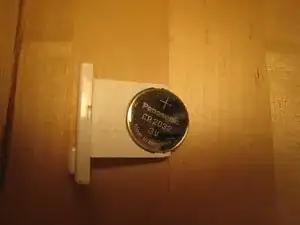
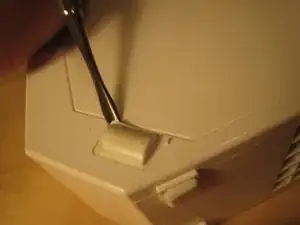
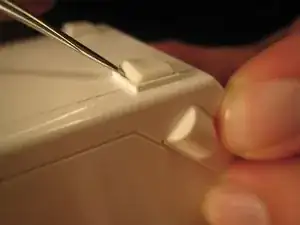
    • Sobald diese Schraube entfernt ist, kannst du den Kunststoffsteckplatz herausschieben.

    This doesn’t specify which screwdriver to use

    Kilo -

    I used a Philips Head 00 and it worked great!

    Foster Savitsky -

  3. qIGGjlI23SOLbUMw
    qIGGjlI23SOLbUMw
    6vLY2BxsyjsWer5X
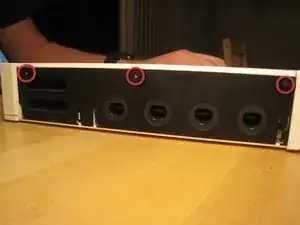
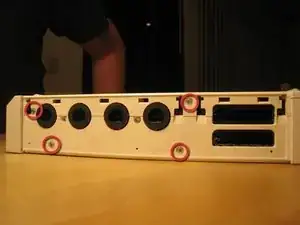
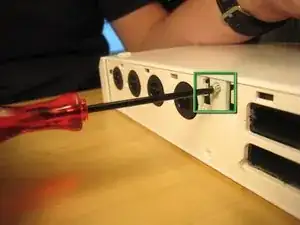
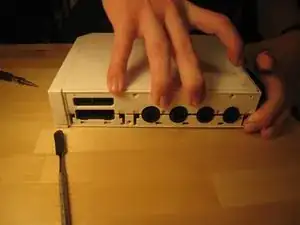
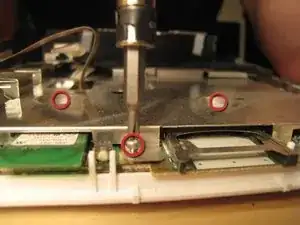
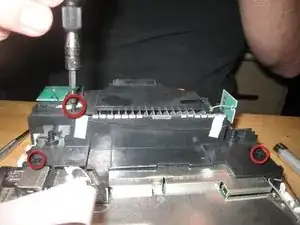
    • Entferne diese drei schwarzen Gehäuseschrauben. Die auf der rechten Seite ist ein paar Millimeter länger. Mit diesen Schrauben ist die schwarze Kunststoffabdeckung für die GameCube-Anschlüsse befestigt.

    Philips 00 worked

    Foster Savitsky -

  4. QvHBQwTcSGFNmVrA
    QvHBQwTcSGFNmVrA
    tfvPFmimBO1KCa6N
    • Hebe die schwarze Kunststoffplatte ab.

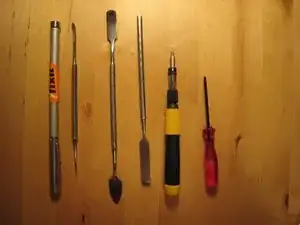
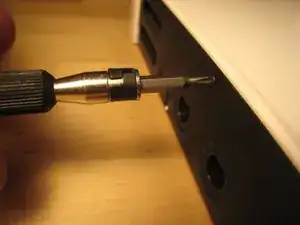
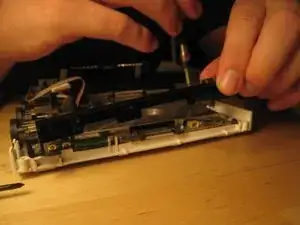
    • Es gibt vier Schrauben: zwei Kreuzschlitz #00 und zwei Tri-Wing.

  5. ecO2LKWTXkyooSXx
    ecO2LKWTXkyooSXx
    uKSAOFcEySugBGtV
    DPcEJNjUrp5ABuEl
    • Entferne alle Schrauben aus dem Gehäuse.

    • Einige Schrauben befinden sich unter Gummifüßen oder kleinen, quadratischen Schraubenabdeckungen aus Papier (rotes Quadrat). Ich habe ein scharfes Metallwerkzeug verwendet, um unter die Schraubenabdeckungen zu gelangen. Du kannst auch ein X-Acto-Messer verwenden.

    • Für einige Gehäuseschrauben benötigst du einen Tri-Wing-Schraubendreher.

    • Im nächsten Schritt findest du weitere Bilder zum Entfernen der Gummifüße und der darunter liegenden Schrauben. Die Füße und Schraubenabdeckungen sind selbstklebend, aber nicht jeder Fuß oder jede Schraubenabdeckung hat eine Schraube.

  6. nkokcneEvkgrRHDT
    nkokcneEvkgrRHDT
    L1BdMQj3BuyENGBa
    EWFsWc2p2EvErNVT
    • Wir entfernen die Gummifüße und Schrauben darunter.

  7. QO2CQ5LlBVwt524C
    QO2CQ5LlBVwt524C
    4p2JXCL6BPNQ4lbZ
    PkOWI4i3ROfOVWqT
    • Vorsichtig! Wenn du die Füße und die darunter liegenden Schrauben nicht entfernst, bevor du versuchst, die Frontplatte abzuziehen, kann die Lasche splittern!

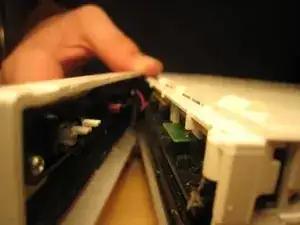
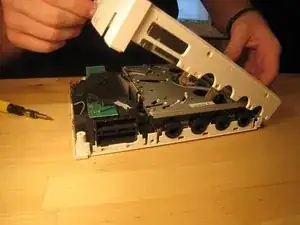
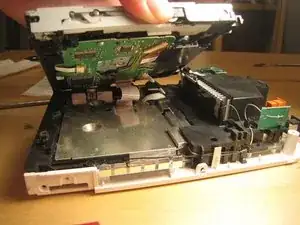
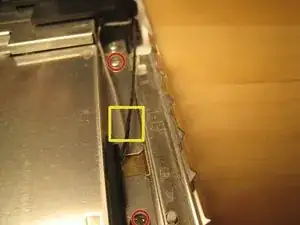
    • Wenn alle Schrauben entfernt sind, solltest du die vordere Laufwerksblende abziehen können.

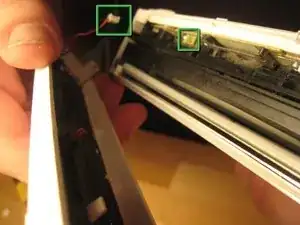
    • Der Draht, der die Frontplatte verbindet (grüne Quadrate im dritten Bild), kann vorsichtig von Hand oder mit Hilfe eines Spudgers herausgezogen werden.

    If you actually take the time to do this step It would not have a broken holder

    Walker wallace -

    I was not gentle enough in removing the plastic wire connector. The red wire broke off, with a small piece of the red wire stuck in the plastic connector. I really can't get the small piece of red wire out of the connector.

    Anyone know of anywhere that sells a connector, or at least what the name of kind of connector is?

    Bronze Owl -

  8. jeKYSNNIH2Y3YEo3
    jeKYSNNIH2Y3YEo3
    4WevAdL4utLPrhHm
    tOVCL4oBjmByVKNL
    • Jetzt kann das Gehäuse geöffnet werden.

  9. Gd25XvKBphbeDbxB
    Gd25XvKBphbeDbxB
    esOmlIMdV1huN1wc
    CH3ND6YONBAwFhAl
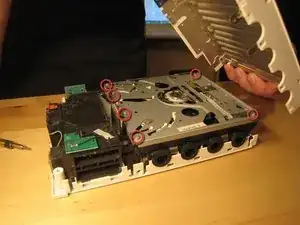
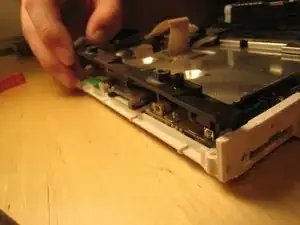
    • Wir haben die Abdeckung des optischen Laufwerks angehoben, indem wir die sechs Schrauben (Phillips #00) entfernt haben. Diese sind alle auf dem vorherigen Bild beschriftet.

    • Wegen eines gesicherten Kabels, das zum Laufwerk führt, haben wir die Abdeckung wieder angebracht, um das Entfernen der gesamten Laufwerksbaugruppe zu erleichtern, ohne die Elektronik zu beschädigen.

    • Es gibt eine Menge Teile im optischen Laufwerk, aber dieses Laufwerk ist im Vergleich zu anderen Slot-Loading-Laufwerken nicht besonders ausgefallen, daher habe ich es nicht komplett auseinandergenommen. Es gibt auch eine Menge von Zahnrädern und Hebeln, mit denen ich mich nicht beschäftigen wollte.

  10. ECb6mKIVQftAhvkT
    ECb6mKIVQftAhvkT
    HFFgxM6CTA62lQpi
    aCGbX1vYde6XW4XJ
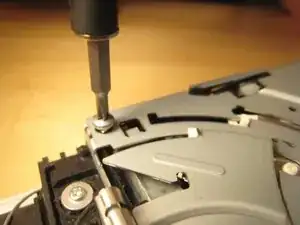
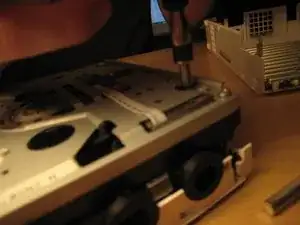
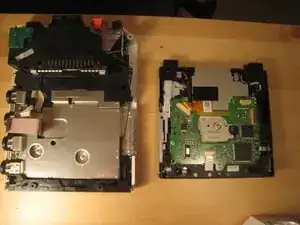
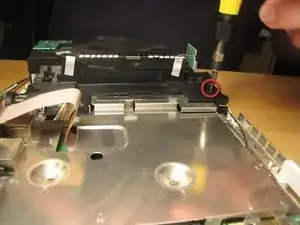
    • Die Schrauben, mit denen das Laufwerk befestigt its, befanden sich tief im Gehäuse.

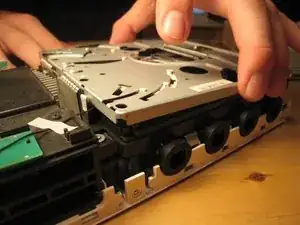
    • Sobald diese Schrauben entfernt waren, konnte das gesamte Gehäuse abgehoben werden.

    • Ziehe nicht zu fest! Es gibt zwei Kabel, die das Laufwerk mit der Hauptplatine darunter verbinden.

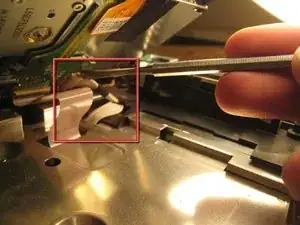
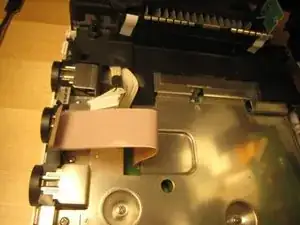
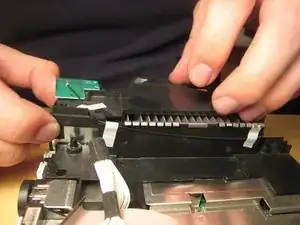
    • Dieses Kabel rutschte aus seinem horizontalen Schlitz heraus. Sobald es gelöst war, kam auch das Flachbandkabel heraus.

    The connector for the ribbon cable has a lock. The grayish/brown top to the connector can be flipped up from the ribbon side and the ribbon cable then falls out. It is not designed to have the ribbon cable just pulled out. You should definitely flip it up to put the cable back.

    Dan O -

  11. YW4KmKZCucUTUkP4
    YW4KmKZCucUTUkP4
    4ymAE4efGYYlBwrI
    • Sobald die Drähte abgelöst sind, lässt sich das optische Laufwerk komplett abnehmen.

  12. 4A1T4XA2kksJ4CEk
    4A1T4XA2kksJ4CEk
    pZGuQxLsgtOYKXMP
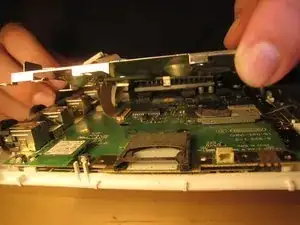
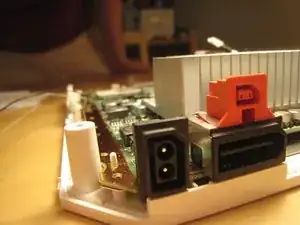
    • Wir beginnen mit dem Versuch, an das Logic Board zu gelangen, indem wir diesen kleinen schwarzen Plastikrand entfernen.

    • Im Inneren des Gehäuses gibt es nur Kreuzschlitzschrauben #00. Auf dem Logic Board sind Pfeile, Dreiecke, Kästchen und Kreuze markiert.

    • Soweit ich das beurteilen kann, bedeutet ein Pfeil, dass sie einfach durch die Logikplatinenabdeckung geht. Ein Dreieck bedeutet, dass es sich um eine längere Logikplatinenabdeckungsschraube handelt. Ein Kreuz bedeutet, dass sie an einem Kunststoffteil hält, und ein Kästchen bedeutet, dass sie an einem anderen EM-Schild / oder Kühlkörper hält.

    There is a small nut fitted snuggly on right side of the black plastic rim. Careful you don’t drop it and lose it.

    ghgomez1 -

  13. j4RQWMDxbJLZx6Lw
    j4RQWMDxbJLZx6Lw
    CiqmjHel65dtQXBN
    VndjpE5Hx4w1Nlhs
    • Entferne alle Schrauben der Hauptplatinenabdeckung. Zwei sind in der Mitte versenkt, andere befinden sich entlang des Randes. Weitere werden sichtbar, wenn andere Teile entfernt werden. Du kannst mit den Schrauben beginnen, die die schwarzen Plastikteile halten, aber ich habe mit den sichtbarsten angefangen und bin von dort aus weitergegangen.

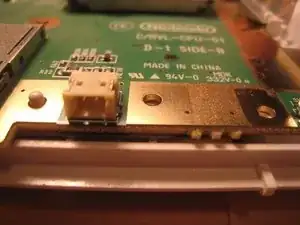
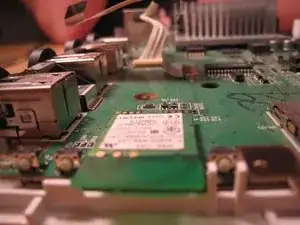
    • Es gibt zwei Drähte (im dritten Bild zu sehen), die von der Hauptplatine kommen und mit den Wi-Fi-Antennen verbunden sind. Diese sind empfindlich. Beschädige sie nicht.

  14. PdKsymS6YPWtrWjk
    PdKsymS6YPWtrWjk
    AOCOPrTZOvXTaLXq
    • Nimm diese Schrauben aus dem schwarzen Kunststoffgehäuse heraus.

  15. 1j6GuTKUsaXBTANj
    1j6GuTKUsaXBTANj
    1vxCXyD5L6othpEe
    • Löse den Gehäuselüfter. Er ist mit zwei Schrauben befestigt.

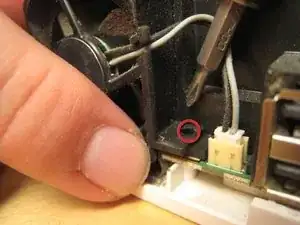
    • Du musst den Stromanschluss für den Lüfter abziehen, wenn du ihn komplett entfernen willst.

  16. LWt2fSpvlLFIOSLn
    LWt2fSpvlLFIOSLn
    g5dIQZCYOl5Y4Vty
    • Wenn dein Schraubendreher nicht magnetisiert ist, benötigst du einen Magneten, um einige der eingebetteten Schrauben herauszubekommen. Du kannst einen Magneten an den Schaft deines Schraubendrehers halten, um ihn vorübergehend zu magnetisieren.

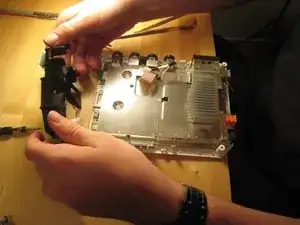
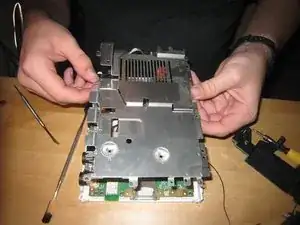
    • Wenn alle Schrauben entfernt sind, kannst du anfangen, das schwarze Gehäuse zu entfernen.

  17. KnMRwiAJqbOGwVp3
    KnMRwiAJqbOGwVp3
    DYxB2YWsS41WqBCU
    gdqYg1TZjawD3JMZ
    • Wenn die schwarzen Kunststoffabdeckungen entfernt sind, können wir alle Schraubenlöcher sehen. Die meisten Schrauben sind bereits entfernt, aber sobald der Rest entfernt ist, kannst du die Abdeckung der Hauptplatine abnehmen.

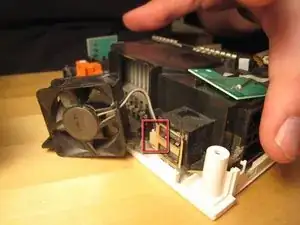
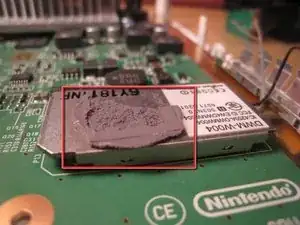
    • Beachte, dass mindestens ein Teil mit der Hauptplatinenabdeckung thermisch isoliert ist. Möglicherweise musst du dieses Wärmepolster ersetzen, aber ich habe es nicht getan. Ich habe sie einfach wieder zusammengeschoben. Nun gut!

    • Entferne alle verbleibenden Schrauben in der Hauptplatinenabdeckung.

  18. hcURPGipeusYNUP3
    hcURPGipeusYNUP3
    vBgU4LaevZdTRhki
    FDIuTWPJF1MDTMnE
    • Wenn alle Schrauben entfernt sind, hebe die Abdeckung der Hauptplatine ab.

  19. ewv3yZPOujCRpKEj
    ewv3yZPOujCRpKEj
    VbYIsqLnCjhNRTfF
    NCnsWFuHrKuw1QQO
    • Schau dir das an.

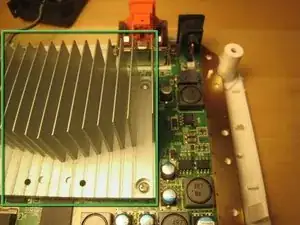
    • Dies ist die thermische Isolierung.

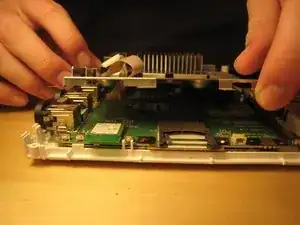
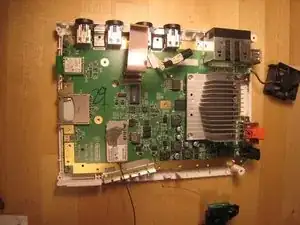
    • Wir haben uns entschieden, den Kühlkörper nicht von der Hauptplatine zu entfernen, aber er könnte sicherlich entfernt werden.

  20. SsIM5NFbf3VUYQIr
    SsIM5NFbf3VUYQIr
    fgHENtI21AyZJoGE
    MUfZHTEfUeduR2At
    • Mach' noch ein paar tolle Fotos.

  21. 6wEh4GneCZvKSMlg
    6wEh4GneCZvKSMlg
    Km2bVE4nHWx5sIfj
    EXCEqyCwMZUgIhJE
    • Und mach' noch ein paar Fotos.

  22. 6XhGqthv1FWe6mfU
    6XhGqthv1FWe6mfU
    HCNcvGJ5cOUOOB6V
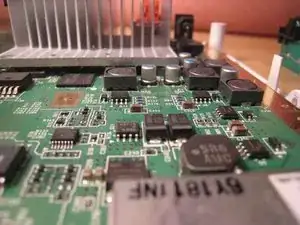
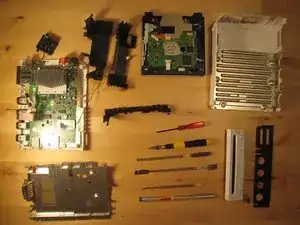
    • Dort haben wir aufgehört.

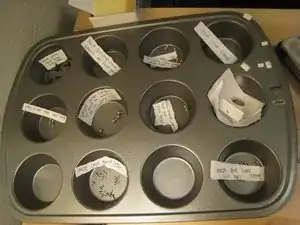
    • Eine Muffinform funktionierte wirklich gut, um alle Schrauben zu organisieren.

    • Das Zusammensetzen der Wii dauerte nur etwa eine halbe Stunde, und sie funktioniert perfekt. Wir haben Nintendos Design um drei oder vier Schrauben und eine Vierkantmutter verbessert, aber ihr Design um ein Stück Klebeband (um die Bios-Batterie festzuhalten) verschlechtert.

26 Kommentare

I was kinda hoping you would take apart the optical drive assembly, you said there is "nothing fancy" about it, but since Nintendo designed this drive to be able to take the "mini" discs from GameCube, they have to work out a mechanism to center the disc before loading it onto the motor, hence "a ton of gear and levers" and that's the exact thing I actually wanted to see, I really wanted to know how they made it work..

:P

Steven -

Maybe I can make a guide for you with it like that. I plan to replace the Hard Drive in my wii so ill make a guide.

ZeldaAwesome -

@zeldaawesome It is not a hard drive, it is NAND. In fact, that’s about as far away from a hard drive as you can get.

Xu Xian -

I have a dud drive, so i might just do this.

Nosh Ware -

Nice guide. I have one suggestion and one comment to add.

Suggestion: a different color circle in the pictures for the Tri tip screws would speed up re-installation.

Comment: the extra square nut holds in the BIOS battery cover which is quite inconvenient to discover as it is the last screw you reinstall.

AD Kocher -

Thank you! Helped a lot to change the casing. The only advice that I can give is to organize the screws properly to mount it up again.

Cheers!

Edgis Stankke -

Thanks for this. My Wii is now 9 and I need to do a good clean out of dust and what not. This will be really helpful.

Wizbang FL -

so i got off the first two triangle screws under the black plastic on the gamecube controller ports, and after, i went to take off the four on the side of the wii. i got the ones that were deep in the console, but as i tried to get the black triangle ones that are a little smaller i messed up the screws to much and i pretty much lost the threading on the two. what can i do to get them off. i can replace them if i can get the darn things off. also i was using a flat head that worked on all the other silver triangle screws.

Gage Bowser -

Hi one question you disassemble that only pcb stays you must unscrew heatsink but then it heatsink wont posture is it enough the i just screw or i need to clean and add new paste?

obregr -

Would you mind answering a question? My Wii was dropped on accident, and I thought I heard something come loose. Sure enough, little black chunks of plastic came out of the fan slot when I examined it. The Wii itself appeared to work, but I can't help but worry that somehow gameplay might be effected. Any ideas where the black pieces of plastic came from? Will this effect the Wii's performance? Please respond as soon as you can!

Megalodon -

Thanks for the 411. It was useful, with a few side notes:

1)I tried following your tool list on the cheap. Thinking that I had a ton of tool kits already, I skipped ordering the Phillips screw drivers. I panicked a little when I started my teardown, only to find all my drivers too big for the job....save one. The Phillips screw driver in the "Radio Shack 61PC Computer and Electrical Tool Set" handles all the Phillips screws on the teardown.

2)The notation about the hidden screws was a little misleading and a bit of an aggravation, as only a small percent of the feet actually covered screws (1, actually, IIRC). For a future edition of this teardown, please add some sketches to show the proper locations.The recommended "Pro Magnetic Project Mat" and my lame excuse for art skills saved me in this area.

gzapiec -

When I took the drive apart there was a small plastic part rattling around which i managed to retrieve. Black, circular with three curved arms. It says push on the top side. Any idea what it is?

gjwilder -

can anyone please post a pic of the loading gears on the opposite side that also show tge positions if the three springs. And the gears position with a disc loaded and not. Thanks

mon -

Thanks for the brilliant and well annotated tear down! A dab of no nails with a cocktail stick will make sure the rubber feet will stay sat when you reattach them.

ghost virus -

@gjwilder - that's the center piece out of the holder inside the game case, it probably broke off and got stuck in the center hole of the disk and loaded into the slot unnoticed.

Andrew Bowers -

I think a torx screwdriver works on tri-wing screws.

Lee -

I can't imagine how that would work; torx and tri-wings are shaped very differently. In any case, it's much better to use the right tool for the job, or you risk stripping screws and never getting them out again. Tri-wing drivers are pretty easy to get ahold of, so best not to take shortcuts ;)

Jeff Suovanen -

في منكم بتكلم عربي

luka abdo -

the hannah mareiMedlock

James newton -

misc parts (ie metal & plastic holdings) missing from the final picture. Could be useful to make sure you have all the parts when you try to put it back together…

Angello Gabriel Ioakimides -

We improved Nintendo's design by three or four screws and one square nut, but worsened their design by one piece of duct tape.

LMAO (good tutorial tho)

Jonathan Carrasco -

You missed the face and the screws for re assembling are super confusing …I stripped my case from that confusion and missing face

jack waller -

Hey guys, Here it is, I still have the original Wii. Still looks immaculate, and has no mechanical issues. The problem is… I wanted to play the Original Luigi’s Haunted Mansion. I picked up a memory card (Supposedly OEM Nintendo Brand), put it in the slot up top. Played the Game for a while. But, when trying to remove the card. It’s a no go. It is stuck. I used a strip of an old super thin laminated ID card. I Got in the slot to the side of the card, but now see that there is also prongs on the inside of the card too.

Any solutions, or is this going to need a complete tear down to remove?

Nicole Amy -

I wanted to see the CPU, but it still looks good inside.

joe hasligma -

Where is the wireless receiver that is inside the wii console

Dawn ROBERTS -

I need to remove it and put it in

The usb part of the wii console

In order for me to play spyros adventures

Dawn ROBERTS -