Einleitung

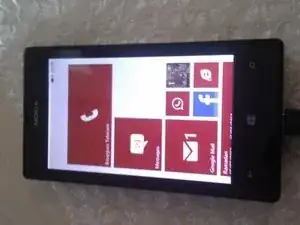
In this guide, we will show how to replace the touch screen on a Nokia Lumia 520. It’s the innermost part of the phone and requires disassembling the entire device.

  1. JvOFMAIyHFFXSxWC
    • Turn the phone completely off. To do this, either manually hold down the power button, or remove the battery.

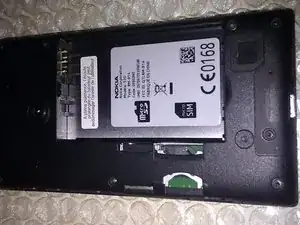
    • To remove the battery: At the top corner of your phone, put the nail of your index finger in the seam between the screen frame and the back cover. Press the middle of the back cover, and bend the cover to loosen the top hooks. Remove the cover and lift the battery out.

    • Do not use any sharp tools, because they will damage the screen.

  2. eDw1Z2sqQO15NBtU
    • Once the battery is removed, push the SIM card or memory card into its respective slot. The card will then pop out. Remove the card from the phone.

  3. IHchV6RRH2OJvlYQ
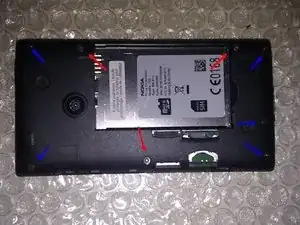
    • The phone is assembled with eight screws. Using the T4 Torx Screwdriver, remove all eight screws from the back cover. The three small thread screws (red arrows) are fixed on the LCD panel. The four big thread screws (blue arrows) are fixed on the touch screen's frame.

  4. DNEaJvNwOobditVi
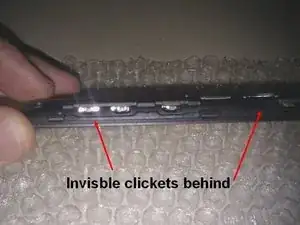
    • A plastic back plate lies beneath the external back cover. To remove this, place the Plastic Opening Tool between the plastic back plate and the clear plastic tabs on the side of the phone (designated by red arrows). Gently lift up and remove the plastic back plate.

  5. 14XBULZ4Bo2BIPV1
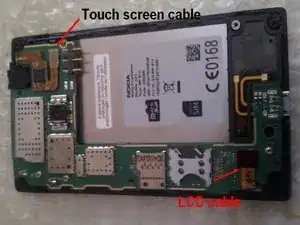
    • The motherboard is connected to the phone via the LCD cable and touch screen cable. To remove these cables, gently lift them up using the Plastic Opening Tool.

    • Using the Plastic Opening Tool, lift the clear plastic tabs (shown in Step 4) from around the motherboard. Now, you can gently lift the motherboard from the phone.

  6. YD21Xey1TTfWULe4
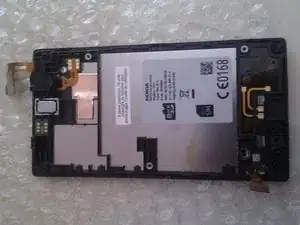
    • There should now be three pieces linked with plastic grips. Using the Plastic Opening Tool, carefully separate these pieces.

    • Take extra care in handling the LCD.

  7. fiuSq6Z2vjdfSecB
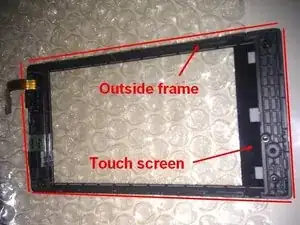
    • The outside frame is glued around the edges to the touch screen. Carefully separate the two pieces using the Cutter Blade.

    • If you are changing the digital screen, remove the glue from around the frame completely.

  8. OBpU4tFQwZK3kHTe
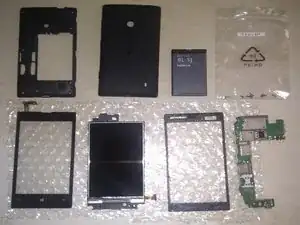
    • Your phone is now in seven main pieces that can be easily replaced independently.

    Usually, a teardown contains several clear panorama HD pictures of the mother board , indicating all the ICs.

    Frank Chen -

    I can't quite see from the pictures. .

    My sons Lumia has a headphone jack tip stuck in the headphone socket. .

    I've tried various methods of removal, to no avail.

    Is there a hole at the bottom of the headphone socket that would enable me to "poke" the stuck tip out ?

    Regards

    Josh

    Joshua J Macrae -

    Opened mine up today, 2 comments...

    The screws actually have T5 heads. A T4 will work, but fits loose.

    priorytools: There is no hole in the bottom of the headphone jack assembly.

    rjkthird -

    I bought a T5 screwdriver based on this information but found it was too big for the screws

    I ordered a T4 screw driver and it fitted perfectly

    williamcorney -

    Good Day,

    I would like to thank Nico and the iFixit-team for this very informative description. It helped me big time today!

    Yes, I can confirm that the screws are T5.

    There is a minor error in the text under Step 3 — Remove the Screws:

    "The phone is assembled with eight screws. Using the T4 Torx Screwdriver, remove all eight screws from the back cover. The four small thread screws (red arrows) are fixed on the LCD panel. The four big thread screws (blue arrows) are fixed on the touch screen's frame."

    Actually, there are *three* small thread screws and five big thread screws. The photo is correct. Sorry for the pedantry :-)

    Cheers,

    M.

    Der Schlappmacher -

Nico Gallaud

Mitglied seit: 17/07/13

548 Reputation

0 Kommentare