Einleitung

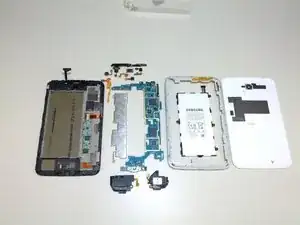
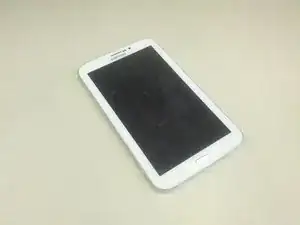
Galaxy Tab 3, tearing down just for the fun of it. Why? Because we can do it?

  1. oC1rnuRLSWojiuUV
    oC1rnuRLSWojiuUV
    BNkBpML2WfWZPlOS
    • Technical Specifications

    • 1.2GHz Dual Core, Marvell SoC

    • 1 GB of RAM

    • 1024 x 600 - 7 inch display

    • 16 GB flash memory

    • Before you begin, remember to place the screen side on a smooth surface (I got my screen scratched while opening it on a rough table (Ouch!)

    • Using plastic opening tools and a spudger, look for either the micro SD cover or the SIM cover and open it. You will be able to identify a tiny little gap just enough for the plastic opening tool (wedge) to go through

    • Go around the device with the tool gently. Your ears will be able to tell when the plastic catch detach itself from the main body by listening for "clicks"

  2. FCOLvo3Sj4MtBEIS
    FCOLvo3Sj4MtBEIS
    tHDcB6tjR6FoQ6OT
    bIxmjKGVZHawQxRQ
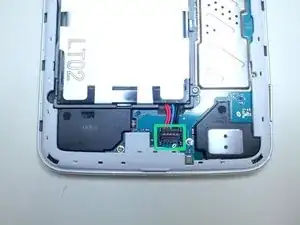
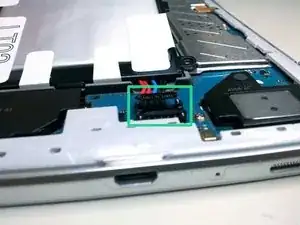
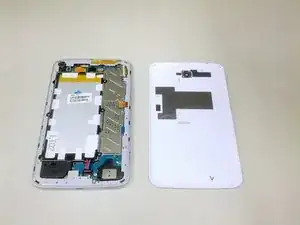
    • Once the back cover has been detached, you might want to detach the battery first to lighten the Tab's body when flipping around

    • Gently lift up the connector with the help of a tweezer.

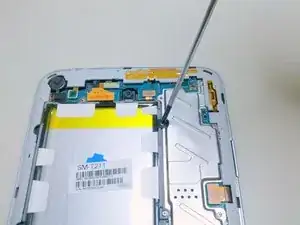
    • Unscrew the batteries with Phillips #00 Screwdriver

  3. UFdbggUKU1npMMcP
    UFdbggUKU1npMMcP
    56mHtG1buHcxiAGJ
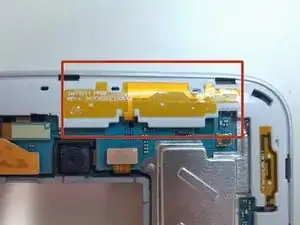
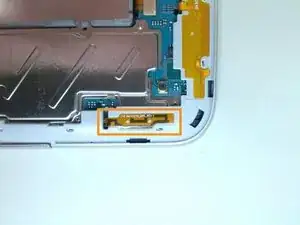
    • Removing the back cover exposes the PCB antenna on the plastic main body

    • 2.4 GHz flexible PCB antenna for WiFi and Bluetooth

    • GPS flexible PCB antenna

  4. h5tWQhLjpJ1Pbtol
    h5tWQhLjpJ1Pbtol
    nRvVIvVY2Od2Jrwq
    tIllZoeUViL1I16V
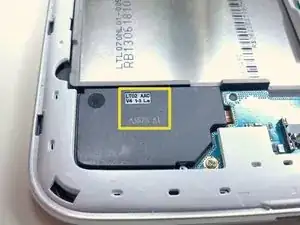
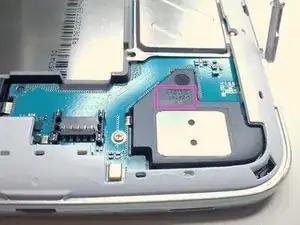
    • Opening the back cover reveals more secrets

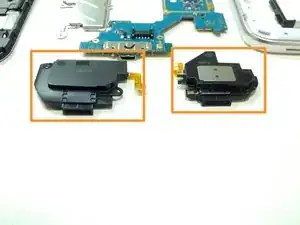
    • Right Speaker information: LT02 AAC V4 1-3 Le A3626 A1

    • Left Speaker information: AAC LT02 V4-2 #2-1 A3620 A1

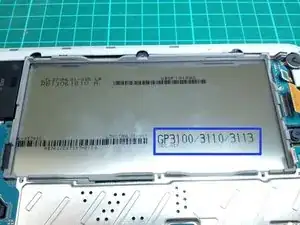
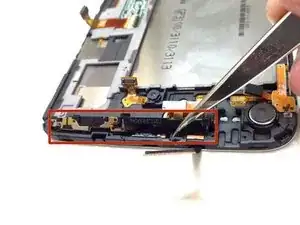
    • Removing the battery exposes the LCD-Shield pair manufacturing number GP3100/3110/3113

  5. gGXPqC6ffW1DLndj
    gGXPqC6ffW1DLndj
    f1hDKls66sRNsuOJ
    • Unlike the Tab 2 teardown, the motherboard on the Tab 3 isn't that easy to remove compared to its predecessor.

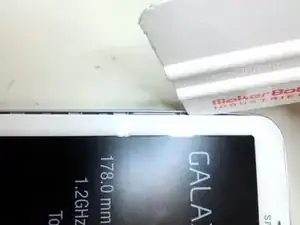
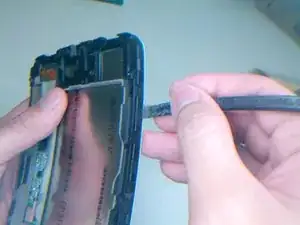
    • Using a Makerbot wedge (as my plastic opening tool), gently go around the corners of the screen to unsnap the side body from the main body of the device

    A plastic spudger from the back side of the screen seems easier than the front shown in Step5 picture. The light grey / white areas on Step 4 picture are where the clips are that you’re trying to pop.

    Dean Wright -

  6. goklyC6ovNDOPpZ2
    goklyC6ovNDOPpZ2
    2vwLFGLlwUUTK6G6
    gZGmINuqollkfjPf
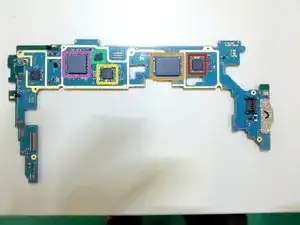
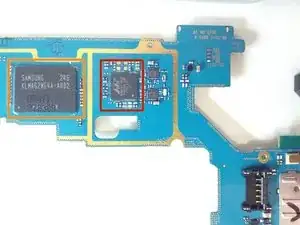
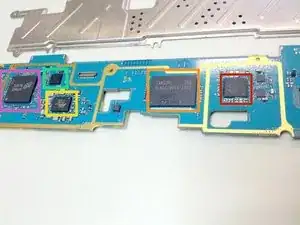
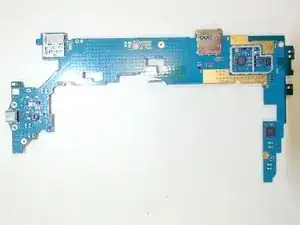
    • Unscrew the motherboard (shape doesn't look much different from its predecessor) and remove it from the main body (LCD's body). With the motherboard free, we get a look at all the chips onboard

    • Marvell Avastar 88W8787 WLAN/Bluetooth/FM Single-Chip SoC

    • Samsung KLMAG2WE4A-A002 16GB NAND flash & eMMC

    • Power Manager 88PM812 (1205-004832), Marvell part 812-00D0E-319AP

    • Unknown 09529 P47A1G CSSP AL3VX 1320 SG

    • DDR2 SDRAM MT42L256M32D2LG-18, Micron part 3JA78 D9QJX, possibly 1 GB

    • Marvell's PXA986 SoC (with dual ARM Core Cortex A9, GPU, Modem Processor, & DSP) possibly seats underneath this part just like its predecessor's design

  7. QvYsZoTWMAgbsPEi
    QvYsZoTWMAgbsPEi
    PdPLgFSkBFjesw6x
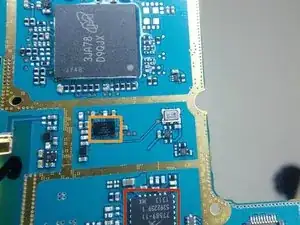
    • More parts unveil

    • Skywork's Front End Module, 77589-11

    • GPS-Glonass RECEIVER, CSRG05TA03, 60ST A03UJE K317BR18

    • Unknown part ASP01 AD152 1314

  8. HK1jsIpYL44FgVpT
    HK1jsIpYL44FgVpT
    iJLwEkSvMWPrQOVf
    phSngSoEYqgWsVmn
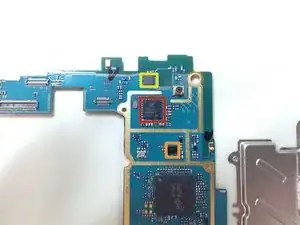
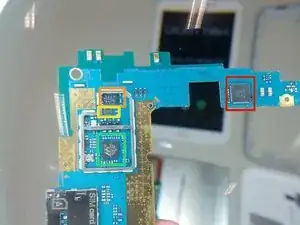
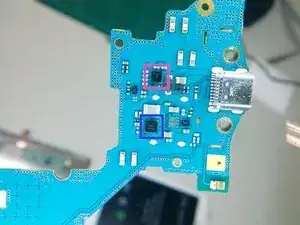
    • Charging IC SMB358SET-1939Y

    • C-touch controller (1205-004830) BT532 Q0HQ3 4N-000 1320

    • Skyworks Amplifier Module SKY77752

    • Skyworks 0.1–3.0 GHz DP5T Switch, SKY13397

    • Marvell's 3G Modem (part of the PXA986 platform solution) 88RF833

    • USB commutator TSU6721

  9. CfUWbfHbfDgWf1Zc
    CfUWbfHbfDgWf1Zc
    bbSjrvmjO6fJoQy6
    GC3sakIA1LSJ1y4l
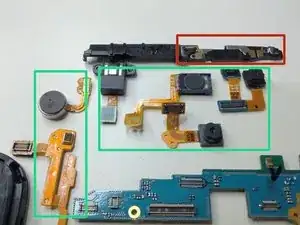
    • It's time to take off the rest of the peripherals

    • These parts are usually glued down to the enclosure, carefully strip it upwards with a good set of tweezers or sharp nails.

    • First stop, the 3G and GSM antenna

    • Next, these tiny speaker boxes

    • Then the side buttons, earphones jack, vibrator motor, earpiece speakers, back camera, front camera + IR + proximity sensor, noise cancellation mic+side buttons,

  10. lZoxhSTSuYKYh36y
    lZoxhSTSuYKYh36y
    eYJtnujC2NMvpbaT
    1HRyyQfUjVZtLSLQ
    • Here's some photos that I have missed out. My apologies to the chaps on the comments section below for being a little late for my reply :)

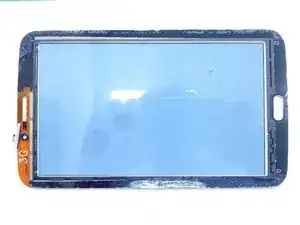
    • Taking out the digitizer was actually an easy feat. Preferably, use a heating element to quicken the opening process. Take note, it is glued around the sides

    • Now if you are lacking an iOpener tool from iFixit or a heat gun, you can improvise! Just fill a huge water proof plastic bag with boiling hot water; rest it on top of the screen for 2 minutes. [Credit goes to Felix Last for his advice]

    • My first attempt was without using a heating element (Big Mistake!), I used my finger nail to try to make an opening. Unless you have an already damaged screen, I would avoid doing so.

    • Shift the bag slightly to reveal the weakest point on the touch panel (usually at the middle) and with the help of a spudger, attempt to slot in gently for an opening. Just like the previous steps, go around it gently and once all the glue edges are up, lightly lift it up

    • Take note of the position of the home button

    • Last I check on ''this site'', there are good load of shipments available for order from China

    Just finished our first Tab 3 digitizer replacement. After removing back plate and battery, the digitizer wasn't too difficult to remove except the extra strong adhesive compared to iPads. With the iFixit bag or a nice professional heat gun (my preferred method) the screen comes off pretty easily in one piece and you just have to align it properly when replacing so there are no issues reassembling the frame and back.

    James -

    I replaced the Micro USB connector on the main board but in the process the heat and a little solder got across the one of the white capacitors closest to the Micro USB connector. While cleaning the part it sprung out of my spring loaded twezzers never to be found again. Does anyone know the value of the smd ceramic caps if that is what they are? none of them appear to be labeled.

    Ltank -

    Looks like a bypass cap to me. I measured mine. It is at approximately 1uF. Should be able to work even without it though.

    Denz Choe -

    I too, lost a couple of components (R/L/C ?) when I replaced the USB connector. They are part of the WiFi antenna circuit. I know that because the reception is terrible/non-existent over 20 ft away. Any chance you may know the circuit or component values? They are the left-most components on the board when looking at the USB connector. You can see a trace coming from the shielded IC area, and a trace to a clip on the bottom-left of the board.

    Dave -

    Ifixit! I Replaced the charging port on my galaxy tab 3 but in the process i managed to lose the 2 capacitors directly above the micro usb connector. Now the unit turns on but doesn't get past the initial "Galaxy Tab 3" screen. just restarts over and over. Can i source these capacitors somewhere or is there another alternative to fix it? (The small black and white capacitors)

    Ben Kettle -

    I am not sure which one you are referring to. Can you send me a photo link, I can help measure them for you

    Denz Choe -

    No opener I have done a lot of tablets ..I use an old tube sock filled with rice and heat in the microwave.

    poorish31331 -

  11. 2NX2WBx6WLoWGFsh
    2NX2WBx6WLoWGFsh
    X3noyp1GmxjihIMl
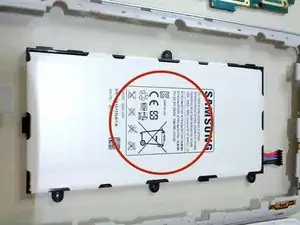
    • The battery reveals to be a 3.7 V, 4000 mAh type. Manufactured by Samsung SDI Vietnam

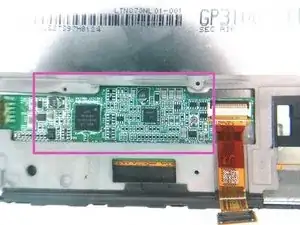
    • Display Controller Board. The LCD panel ID: LTN070NL01 registered on Samsung's Product Selection Guide . It seems that the entire LCD is replaceable (without the LRX4211 controller chip); according to this site, they do have stock for it.

  12. kjOBf15obg6Z1xiR
    kjOBf15obg6Z1xiR
    XOrYxwwTihVdZLOf
    qBQUjFjCNiUTl5LM
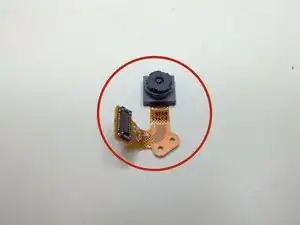
    • Rear camera from unknown manufacturer

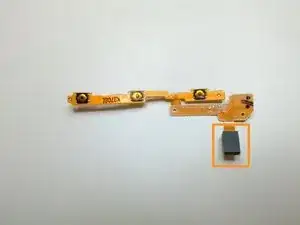
    • MEMS noise cancellation microphone and side buttons on flex pcb. Microphone and connector on underside. Unknown manufacturer

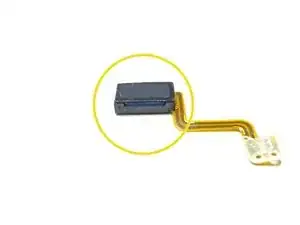
    • Earpiece from unknown manufacturer

  13. jQdQCSYCHGuWL4mS
    jQdQCSYCHGuWL4mS
    MOoQPQUUIcCgJXxn
    MOBP2oSMDyKt4JWB
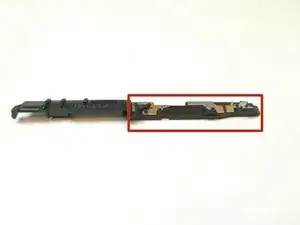
    • Sheet Metal and Plastic Carrier Antenna, unknown manufacturer

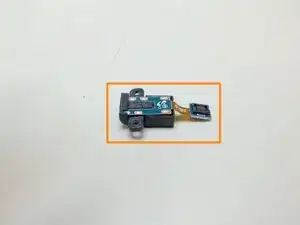
    • Headphones jack

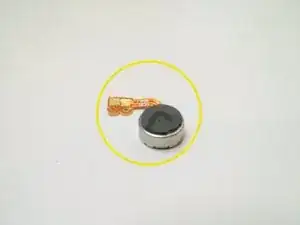
    • Vibrating motor

  14. eusmLWi6J2GRgVDm
    eusmLWi6J2GRgVDm
    cIJgCWoQtXue3EZM
    QFpXQHOPHwQO61cJ
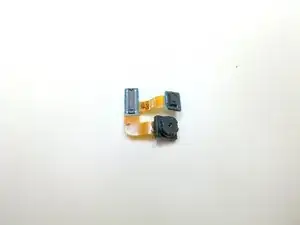
    • Front camera, with proximity and light sensor part

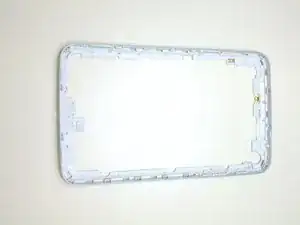
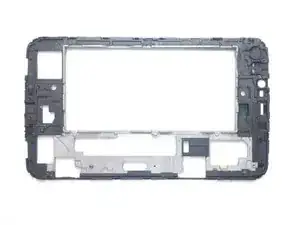
    • Chassis of the main body (front and back photographed)

  15. aJ4FIXpPFUWTceLZ
    • The Samsung Galaxy Tab 3 7.0 is an easy device to disassemble. Absolutely no hassle, just a lot of glue you have to really take note of (in case you may use too much force)

    • That's it, leave more comments below if you would like to have more additional details of the specific part you are interested in.

Denz Choe

Mitglied seit: 10/09/13

1333 Reputation

27 Kommentare

Thanks for this guide! There's not much information nor replacement parts out there for this one yet. Would you be so kind and add a guide on how to replace the digitizer of the Tab 3? Thank you very much in advance.

Felix Last -

I too am unable to find any documentation on the digitizer replacement for the Tab 3. This type guide is exactly what I need for a job like that. If you could make a guide on how to perform the replacement, it would be greatly appreciated. Thanks for all of your time and effort into developing such detailed and informative guides.

Justin Cooper -

updates to my teardown guide @step 10 ;)

Denz Choe -

That is awesome, thanks a lot! Will try that soon for my broken Galaxy Tab 3!

Felix Last -

It worked out well ;) Maybe a blow dryer or heat gun would have been a good idea to avoid that glue remains stuck on the edges, but I was able to scrub most of it off using benzine. Lacking a plastic opening tool I used both a plastic card and a screwdriver, which was okay. The screw driver damaged the case a little which is not a problem for me. Another tip I'd like to give to others finding this is to remember the position of the home button. I think I put it back the wrong way around and it's not working very well now. Not too big an issue for me, though, either. Thanks for making this post, it was veeeery helpful!

Felix Last -

Glad that it had served its purpose! Also thanks for the advice Felix. I've updated my steps and have given you credit for it ;)
Denz Choe -

who is the touch controller? is it MaxTouch?

rob -

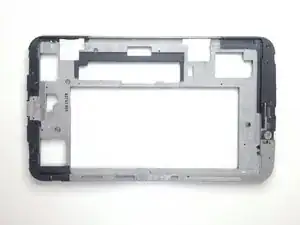
step 5 should be step #1, as removing the rear cover as you did actually breaks it. you can remove the rear cover and the side cover as one piece. the two pieces are glued together.

source: i work on them daily ;)
nitsujlip -

Nitsu, you are correct if the intention is to repair it. I wasn't :)

Denz Choe -

This has been informative. Is the charging port replaceable? Ours is broken and will not charge. Thank you.

Tom

Tom -

Hi Tom, are you sure the charging port (USB port) is broken? It looks pretty sturdy to me. It can me replaceable, but I doubt it is the port issue. It might be the charging IC instead

Denz Choe -

I agree it looks sturdy, but nothing my 6 year old can't break! I can see that part of the plastic and metal connector inside the port is missing, so I'm pretty sure this is the problem. I have a close up photo of it, if that is of any interest to you. Thank you for your help.

Tom -

I have the same problem - 6 y old decided it needed charging, stuck the plug in upside down or at a bad angle - either way, it wouldn't go in so she pushed harder. now the port will charge, but i have to place it just so, or it loses connectivity. I'd like to try and replace it myself, but i don't know what part to order. from the images above in step 8 pic#3 looks like it has 11 or 12 solder contacts on the rear. is this correct? the standard is supposed to be 5 pins wherever i look...

Chris Gover -

Yeah, looking back it appears so. 11 pins. I have got the marking, it marks "JNTC". Found it on the web, from here: http://goo.gl/6UHJFG

I can't help with where can you get them though. Maybe Tom can help?

Denz Choe -

Thank you very much! Very nice guide! Helped me to solve a battery problem in a tablet of this model! Recommended!

Carlos Trentini -

Step 11 On the Display Controller Board the ribbon cable to the right SM-T211. Is there a place I can purchase this or do I have to purchase the Display Controller Board?

Seth Melendez -

Plz help!!

Replaced the digitizer screen on my tab & my screen was perfectly fine before and now it is purple and only a qtr showing. Even without the digitizer screen on it.

Where is the LCD flex located so I can play with it??

Tiffany -

Good evening iFixit Staff,

In step 8 I need the part as shown in the larg image, can I get a replacement from your website?

brianthomast -

I don't think so you can find those here.. Well I am not a staff, but I am sure you can get it from Alibaba or Aliexpress

Denz Choe -

Can this tablet still be powered on if the back case is missing? Someone took the tablet without my permission, returned it, but it's missing the battery cover.

Danielle Coleman -

Tab t211 saya batrai tiba tiba 100 %kemudian tiba tiba 1 % apakah yang harus saya perbaiki atau ganti. Batrai sudah diganti tapi masalah masih berlanjut.

Muhammad Ali -

I have the same tablet and it won't charge or turn on even with a new battery. Someone said it can't be fixed because there is something wrong with the chip on the motherboard. Is this true? I mean can't that chip just be changed

Berry -

There could be multitude of reasons... Did you get the new battery checked that it's operational?

Denz Choe -

my charging port came out when i tried to pull out the USB cable one day. A tiny piece of metal that is now the way of the wind, was wondering if its an easy enough fix.

Tracy Kobzos -

So my device won't turn on.. I plug in the charger to device as well as connect device to pc and still it won't turn on. Even after trying to hard reset the device it won't turn on. When I plug it in the pc it states device malfunctioned. Im wondering if I am able to remove its hard drive somehow and put it on a different device of the same model if there isnt a way to fix this issue.

Juan on Juan -

Is it possible to remove this tablet’s lcd and controller board and reuse it in a differrent project? Or perhaps only the lcd and find another generic controller for the lcd. I can’t find any specifics myself on this controller board …

Jon -

Why does my motherboard look different

Albert -