Einleitung

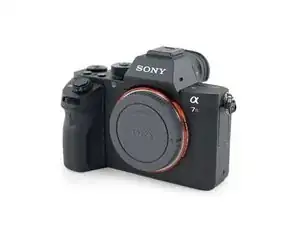
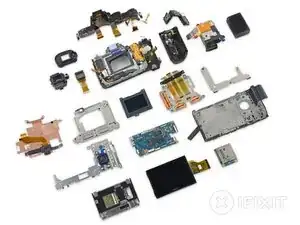
The a7R II is Sony's second shot at a professional-grade mirrorless interchangeable-lens camera, but this time, Sony claims it can keep up with any Canikon DSLR. While trial by fire may be the best way to judge a camera, trial by teardown is our specialty. With a $3,199 price tag and no reflex system, we hope this mostly-solid-state camera comes with an equally hefty repairability score.

Curious about what drives these new devices? Let us shed some light on them! Follow us on Facebook, Instagram, or Twitter to focus on the latest teardown news!

  1. SCSrgcLXC2eFkC6H
    SCSrgcLXC2eFkC6H
    FvTVKlsMKfYHM15E
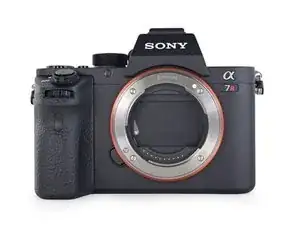
    • The a7R II has landed! Sony's much-ballyhooed second go at a pro-grade, mirrorless, interchangeable-lens camera has our full attention. Let's see what new tech makes this camera shine:

    • 42.4 MP Exmor R CMOS back-illuminated sensor

    • BIONZ X image processor

    • 5-axis in-body optical image stabilization

    • 4K video recording

    • Fast hybrid AF system with 399 focus points

    • NFC and Wi-Fi connectivity

    • The specs alone are enough to give us itchy shutter fingers—but, first things first. It's teardown time.

  2. qVS6mQJPjxoIf3Vd
    qVS6mQJPjxoIf3Vd
    PfwNSPvSvLTSMNv3
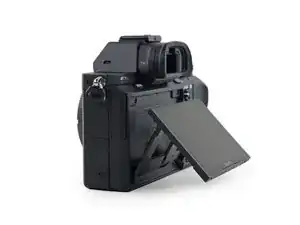
    • The rear of the camera is adorned with an articulating 3 inch LCD. This is a TFT LCD display with 1,228,800 dots. Dots? What are dots? TIL a dot is (usually) a third of a pixel.

    • Since nobody lists a measurement other than 3 inches for this display, we busted out the calipers and calculator. At 2.5 " x 1.75", and converting from dots to pixels, we came up with around 270 ppi.

    • In short, less than an iPhone (326 for the iPhone 6), but certainly high-density. And that's good, considering that no mirror means no optical viewfinding.

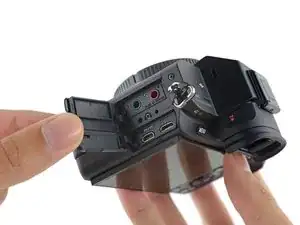
    • The left side of the camera body houses plenty of I/O options—an HDMI micro connector, 3.5 mm stereo microphone and headphone terminals, and a micro-USB connector.

    Does anyone make a replacement cover for the HDMI micro connector port? Does Sony fix this? Mine was torn off the camera completely.

    quinnps14 -

  3. ixlvgDXHkFrSpUGX
    ixlvgDXHkFrSpUGX
    rvHDByG1XaYdW2JU
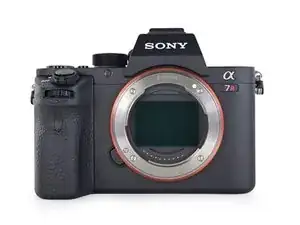
    • With the body cap off, we catch our first glimpse of the world's first full-frame back-illuminated sensor (BIS) and noiseless shutter.

    • Smile for the lensless camera! We got the basic package, which unfortunately meant no lens included.

    • Despite being a part of the "Alpha" series, the a7R II uses an E-mount system.

    • With an adapter, this alpha can stay true to its alliterative A-mount lenses.

  4. eg1e1SCcIykGeoEZ
    eg1e1SCcIykGeoEZ
    qpeNuIF6mIKV3RWe
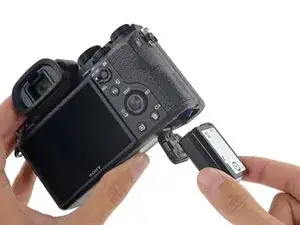
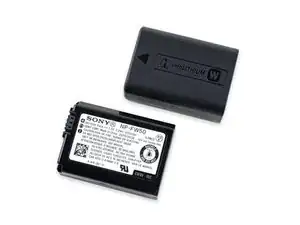
    • We find the same NP-FW50 7.2 V, 1020 mAh swappable battery pack as the original a7R and the rest of the Sony Alpha lineup—good news for anyone building a fleet of flagship mirrorless cams.

    • Sony advertises a 290-photo battery life (up to 340 without the electronic viewfinder), a minor increase from the 270-photo limit of last year's model.

    • Sony kindly included not one but two batteries. You can also charge the battery inside the camera (USB adapter included), and even power the camera entirely via USB.

  5. H31W4e2OEphcLGKr
    H31W4e2OEphcLGKr
    CUJKprqZTX5VPfM1
    eIQZ4AlgRoruMoGI
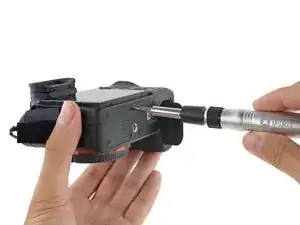
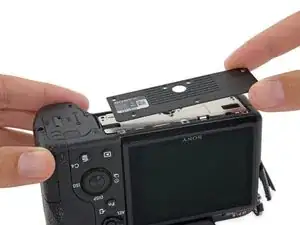
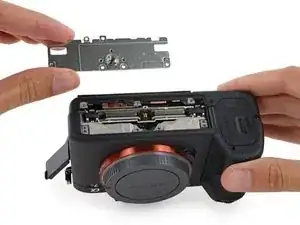
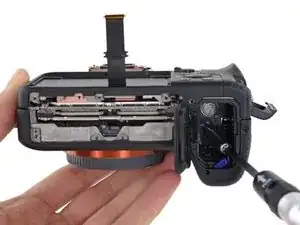
    • We turn our attention to the JIS screws securing the bottom plate, mouths watering in anticipation of the smörgåsbord of tech beneath...

    • ...And find the tripod mount plate.

    • It may not be glamorous, but the tripod mount slides out with ease, great news repairability. Tripod-happy owners can rest easy.

    • For those of you who were wondering, yes, the a7R II is FCC compliant.

    Where can I find the tripod mount part? Mine was scratched by a stabilizer, I would just like to replace that part

    anakalia -

    Whic size are the screws? I lost one of them

    Alejo Iglesias -

    @anakalia or anyone else. Has anyone had any luck on finding a aftermarket or original part number for the tripod mounting plate? Mine got stripped and I would love to replace it.

    Tony -

  6. o1xdQt4SRvsjTBWy
    o1xdQt4SRvsjTBWy
    SP2iBQAedEgDsi4Z
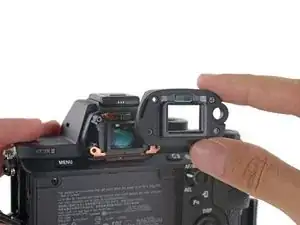
    • The bottom panel was a bit of a red herring so we investigate the LCD arm for weak spots.

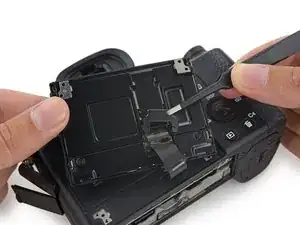
    • The rear LCD panel is connected by a thin ribbon cable that disappears into the back of the camera body. We'll probably have to deal with that before we can crack open this camera...

    • Luckily, a small door on the back of the display assembly opens the way to a tiny ZIF securing the cable.

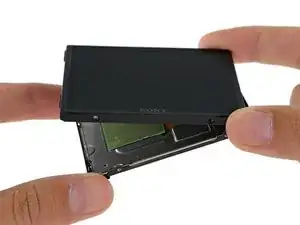
    • We allow ourselves a brief detour to investigate the display before delving into the camera body.

    How do you remove that ribbon cable? The connector does not seem to flip up or anything that i have seen before, any help?

    Riccardo Salamanna -

    Did you figure it out same issue don’t know if its like a zif securing top or bottom I feel like it will break off?

    Sandip Patel -

    Never mind figured it out its the slim grey tab on the top it looks like it won’t flip up but it does. however I found this out after breaking the black part thinking it was a tab.

    Sandip Patel -

    The grey tab is NOT supposed to lift/flip/move. This is a ZIF (Zero Insertion Force). That means you just pull the cable out or push it in.

    To remove the rest of the LCD, it can be destructive if you are not careful. Even after pulling the cable, it is glued down to various parts of the LCD metal frame. There are also many other faces/pieces of the LCD that can be removed.

    Jordan Banasik -

    This video for sony a7II helped me a lot: https://www.youtube.com/watch?v=urZbHlwG...

    I think it will mostly be similar for a7RII.

    I heated cable glue connection with simple hair drying fan.

    To disconnect the cable from ZIF connector I you need to flip up super slim nearly white (or very light grey) color tab. While it's connected - it's in horizontal poisition, so you need to flip it up. To connect it's in reverse from vertical to horizontal. For me it was very unclear how to unclip that connector. Cable itself is under grey/black plastic connector and were the end of the cable should be, i.e. "at the back" of the connector there's that very slim white/gray tab. It was pretty stiff, but I gently used my tweezers and lifted it from one side to another (the tab seems to be very flexible) - to close it I used the body of tweezers to press it shut all at once.

    trymas -

  7. 4QWqmHhUD62KXAJk
    4QWqmHhUD62KXAJk
    lWWfD6nPRU5LITUv
    uq2M2nE5TsH365ZU
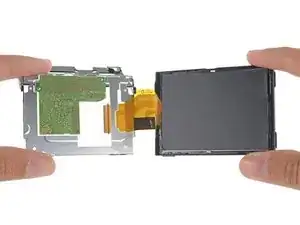
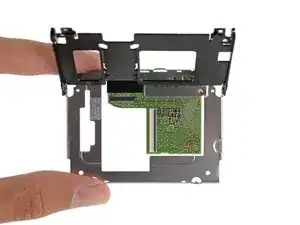
    • Peeling the LCD from the articulating bracket reveals a PCB packed with passives.

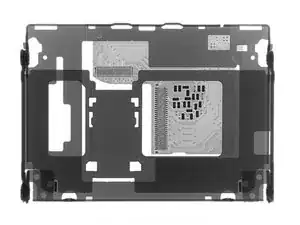
    • This little circuit board is probably a breakout board for the LCD, allowing for a thinner cable from the camera.

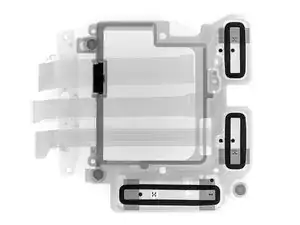
    • The capacitors probably reduce noise in the display; they're clearly visible as a little cluster of dark spots in this X-ray image, courtesy of our buds at Creative Electron.

    • Display technology is finally close to passing its Turing test: being indistinguishable from the mirror views in high-end cameras. This leap in tech has allowed for the viability of mirrorless cameras like the A7 series.

    • Apple bills these as Retina displays, but since a camera's display has to be much closer to your eye, the pixels have to be that much smaller to seem invisible.

    how do you get the LCD/ribbon cable off?

    michaeljensen22 -

    Hello, is the glass glued with the lcd or separate?

    Thanks

    Fabien Nikitjew -

  8. 3HieCSPwsJNHI3gy
    3HieCSPwsJNHI3gy
    QtYoqqFH2ywKDsnQ
    nMJQklgbAIHpIENs
    • Once we extricate the LCD and its delicate flex cable, the parts start flying.

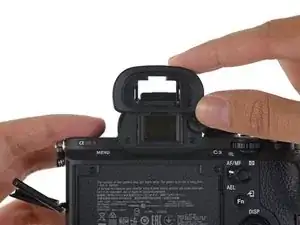
    • First up are the eyepiece and viewfinder frame. The eyepiece slides off for easy swaps; the viewfinder frame is held in place with a few screws.

    • As a mirrorless camera, the a7R II doesn’t have an optical viewfinder. Instead, the viewfinder uses an XGA (1024 x 768 pixels) OLED screen to provide the user with accurate previews of images.

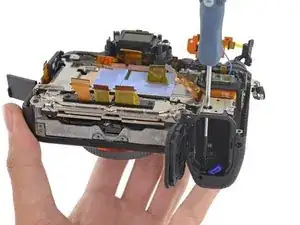
    • With some careful hunting, we find a few remaining screws hiding in the battery cavity. We're pretty stoked for a chance to use the telescoping driver handle in our Universal Bit Kit.

    I am looking for a viewfinder frame. I dropped my a7sii and broke mine.

    Malbert Einstein -

    Did you find one? Mine broke on its own

    Juan Irache -

    Wrong screw in the 3rd picture. It should be the silver one in next to the spring.

    kaworu_ray -

    how do i remove the screw on the viewfinder adjust dial?

    cliffkay -

    “dipterous dial”

    cliffkay -

    I am looking for the viewfinder frame as well anyone knows where to get this very simple part?

    shawn -

  9. iXTdaqFHkgNEnsOD
    iXTdaqFHkgNEnsOD
    1Ze5YMlNwcSuL5gZ
    C1w1EWAfyyGZlJ25
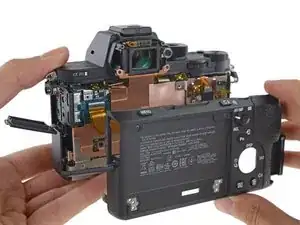
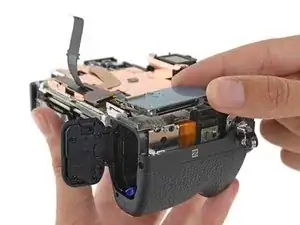
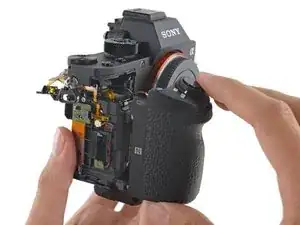
    • Now that the viewfinder frame and LCD panel have been removed, the rear housing pops right off.

    • All of the button's switches are mounted to internal components instead of the frame—so there aren't any delicate cables to worry about.

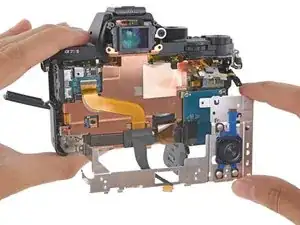
    • After disconnecting a single cable, we tease out that very mounting frame and the rear button assembly attached to it.

    • Next off is the multi-format card reader. It comes quietly.

    • We're secretly hoping this camera plays Nintendo DS games.

    Is there any secret to removing the "single cable" (assuming this is the blue ribbon from the ISO dial that inserts into the grey piece. I'm finding this super tight.

    Also once removed how do you re-insert it?

    adam -

    This video helped me with this: https://www.youtube.com/watch?v=urZbHlwG... (it's non-english and for a7II, but it a7RII is very similar).

    To disconnect ISO dial (the round dial with OK button, play/delete/fn buttons, that has blue colour ribbon) from the top (copper color ribbon where record and AEL/AF/MF flip dial is) - it's just friction fit.

    The cable ribbon is made of relatively thick plastic at the end, where it's plugged in and has plastic "ears" on the sides. I have used tweezers and just gently pushed blue ribbon cable from the connector by pushing on those "ears". I pushed it a bit on the left, then on the right, then left, then right, etc. until it slowly came out.

    trymas -

  10. RhJdUqdrfjRD6XIm
    RhJdUqdrfjRD6XIm
    PbZDom2vgU2HdRtZ
    rCjAJLEQ62qo5SQR
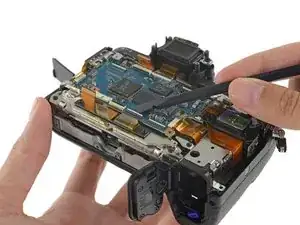
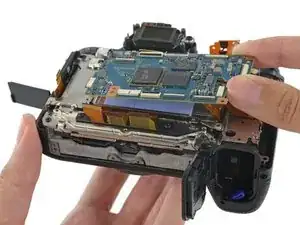
    • With the rear housing and button assembly removed, the motherboard shield comes out with very little resistance.

    • Getting our first clear view of the motherboard, we set to work disconnecting every ribbon cable created since the dawn of time.

    • Process note: We managed to get the motherboard out at this point, but we're pretty sure that's not as Sony intended. Had they deigned to give us a manual we would have known to skip ahead a few steps.

  11. gBqEgKiB4fmHyDCR
    gBqEgKiB4fmHyDCR
    D4IbOZ4A1YGXbgKA
    nRPPyNDsI2aOJAeJ
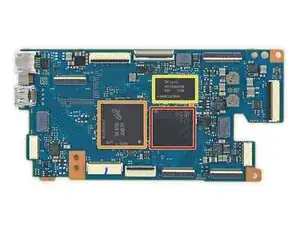
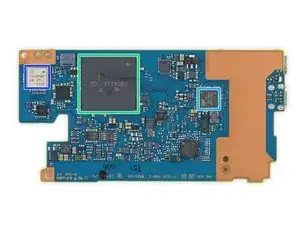
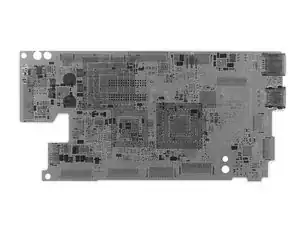
    • We hoist the motherboard out for inspection, finding:

    • Sony CXD90027GF SoC

    • Micron Technology 5FA98 JWB39 eMCP

    • SK Hynix H5TC4G63CFR 4 Gb DDR3L SDRAM

    • And on the reverse side:

    • Sony CXD4236-1GG, likely a newer version of the CXD4236GG image processor

    • Fujitsu MB9AF004 32-bit ARM Cortex-M3 processor

    • Murata KM5601002

    can I get a detailed mainboard scheme

    Service Kamera Tangsel -

    Are we able to find where is the Internal battery attached? What kind of battery this is?

    Alejandro Almeida -

  12. 5kiUgDOwRgZSPEAI
    5kiUgDOwRgZSPEAI
    lwi6hOYDcBVgJFcZ
    5EhpXd61Sb5JDRHD
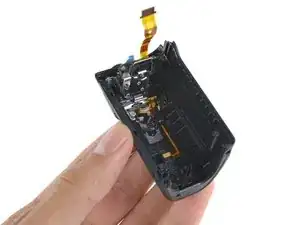
    • This is the part where we get a grip, a camera grip that is.

    • An access port allows us to remove the final screw securing the front grip to the body.

    • Camera brand-fans live and die by their adjustment wheels. The grip features the forward spinner and shutter button, as well as the Wi-Fi antenna.

    When can I buy a new grip with all of the electronics in it?

    justin snailum -

  13. 43nQLi2U2QTNEQCI
    43nQLi2U2QTNEQCI
    GAFbXDDUlL3Blsxy
    kEPJC6KorqsFHKkG
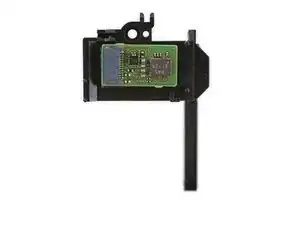
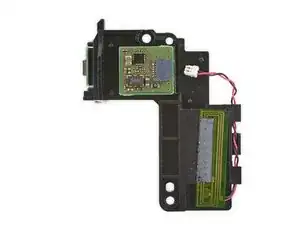
    • We find a trio of boards hiding behind the grip, supporting a couple of chips and what looks like an NFC antenna.

    • Perfect for Sony's Playmemories Mobile application, the NFC chip will allow interactions between smartphones the a7R II when Wi-Fi is not an option.

    • Funny how our smartphones are becoming more like cameras and our cameras are becoming more like smartphones, huh?

  14. ZeoLyFvuEk2WlQpL
    ZeoLyFvuEk2WlQpL
    OyaNCxye6UT5BGwc
    LEYyTufJvflq6lFh
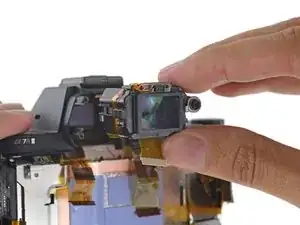
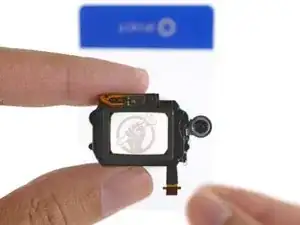
    • Back to the viewfinder—turns out we can pull it straight out of its cavity. With its frame previously dispatched, it was only held in place by a gummy thermal pad.

    • Why the thermal pad? Might have something to do with the 1.3 cm XGA OLED. With 1024 x 768 pixels in half an inch, that's 2,560 ppi. Wowza.

    • After removing the OLED, we take a peek through the lens assembly. A set of four optical lenses improve the field of view while minimizing distortion.

    • The lens assembly even works as a standalone upside-down-maker! Aren't optics cool? That logo sure is.

    I am having the worst experience locating the XGS OLED Viewfinder Mech and I find it fustrating and this is why I stick with Canon as my go to workhorse in the field. If I had to depend solely on my this Sony A7sii, I would be belly up right now. I purchased the camera this way at a discount and I have only dropped a camera once in 20 years and it was on carpet. Do you know where I can get this part?

    jahspeed -

  15. qudZV5DOe1ma6vSA
    qudZV5DOe1ma6vSA
    3drjbNA5owmTXtCP
    Lu1ZmjVWtNOKQcMK
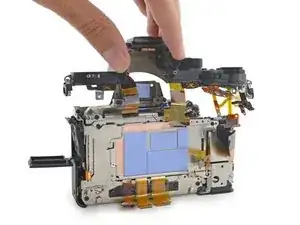
    • Hats off to you Sony! You've got our teardown engineer tired, but not beat. The upper case assembly pops off and steps aside for a glimpse at the goods.

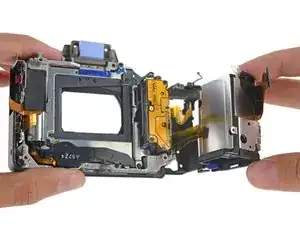
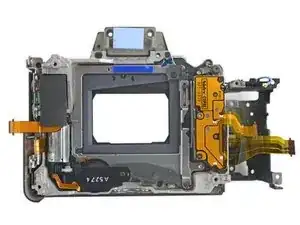
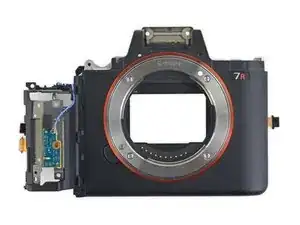
    • Eager to get our first look at the new Exmor R CMOS sensor, we extricate the entire sensor assembly from the camera. The rest of the body feels like an empty husk without the hulking sensor and stabilization cradle.

    • For more information on the a7R II's sensor-shift stabilization mechanism, continue scrolling.

    How did you detach the covers on the audio and video ports on the left side?

    Daniel von Seckendorff -

    Can the “frame” of the camera strap loops come off? I know you can take the loops off, but was wondering if the actual frame (frame hole?) could be unscrewed, or taken off somehow?

    Isaac Rojas -

    Can the frame of the strap hooks be taken off or are they built into the frame??? I know the loop hooks can be taken off, but can the actual frame they attach to (frame hole?) be unscrewed or taken off somehow?

    Isaac Rojas -

  16. In today's episode of <em>iFixit Teardown Cinema,</em> we see the sensor-shift stabilization mechanism in action.
    • In today's episode of iFixit Teardown Cinema, we see the sensor-shift stabilization mechanism in action.

    • That's a pretty smooth action there. Probably powered by magnets. Or miracles. Most likely magic. Or unicorns. Most definitely unicorn magic.

    • The CMOS sensor rests on a light tray, floating between two hefty plates.

  17. n2qGNg2aogRLVnm6
    n2qGNg2aogRLVnm6
    gNJvHtBc5oANfrRY
    tBqc1DRPNpeUXsWl
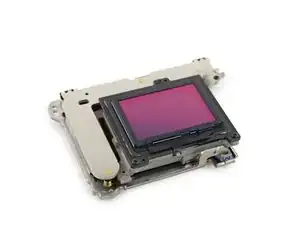
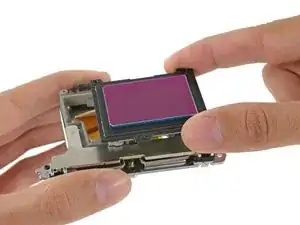
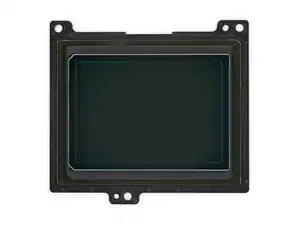
    • A quick detour before we proceed to the magnets: we pluck the a7R II's 42.4 MP image sensor from the stabilization system.

    • With the CMOS sensor in the wild, we get a clearer view of what's been touted as the world's first back-illuminated 35 mm full-frame sensor.

    • According to Sony, the photodiodes on this new sensor are much closer to the on-chip lens than in previous designs, allowing it to collect light more efficiently.

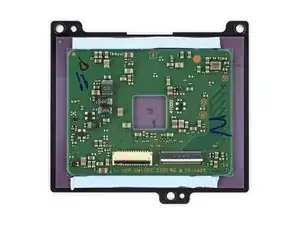
    • The square hole in the sensor's PCB also hints at a tricky assembly process—it's likely a cutout used to accommodate the vacuum nozzle that holds the sensor during assembly, as evidenced by the small patch of scratches at the center of the cutout. A peek with the X-ray reveals the array of solder balls that sandwiches the whole thing together when it's done.

  18. uVlyTmYprwfZgnEq
    uVlyTmYprwfZgnEq
    5RGmwajTt2nZvInx
    gSNUOsLTE5sULhaa
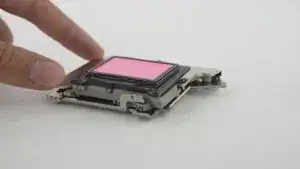
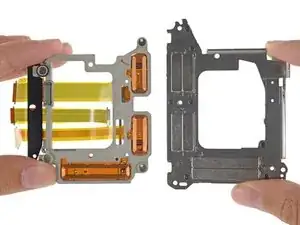
    • Is that a Force Touch trackpad? No, it's an exposed view of the a7R II's sensor-shift stabilization hardware. Sony's marketing team named this the 5-axis SteadyShot. Fancy.

    • The central tray of the stabilizer holds the image sensor, and is home to three electromagnets, each a component of a voice coil, an electromechanical device used for incredibly fine positioning.

    • Voice coils are also found in platter hard drives, controlling the read/write arm.

    • These coils live in the magnetic fields of their permanent magnet buddies—which means slight variations in power to the three coils generates forces in a variety of directions. Enough variety to adjust the sensor on five distinct axes. Not a small feat for a full-frame camera.

    This is a wonderful teardown article, thank you, but there’s one important thing which you got wrong. It’s a mistake made by lots of people, including myself until recently. The sensor does <not> adjust on five axes. It’s adjusts <for> five axes. It moves in <three> ways only: up-down, left-right and rotate (as you can see by looking at the X-ray). But by doing only those three things, it can offset five kinds of camera movement, with varying degrees of success: yaw left to right, pitch up to down, roll clockwise or counter clockwise, Rise/fall up-down and shift left-right. Pitch aims the camera up or down but rise-fall moves the camera up or down while keeping it aimed at the same distant point, and so on. If the sensor were to tilt or swing, the image would go horribly out of focus. This idea that the sensor moves in 5 axes flows from a natural misinterpretation of the Sony 5-axis diagram. Think about it!

    Joseph Holmes -

  19. hxgoLWqHwL1aVGmR
    hxgoLWqHwL1aVGmR
    JH5cKWJIWJwgpCB2
    I2PRRljCaGWuPIcn
    • We've struck our sensor and magnet gold, and now it's time to clean up and let the teardown team get some sleep. It's been a long day!

    • After removing the battery cavity, not much remains—the noiseless shutter mechanism, a few stray cables, and on the front of the body a spring contact leading to that Wi-Fi antenna we found earlier.

    • Gazing at this once mighty feat of modern engineering, we can't help but wonder one thing: how the heck are we gonna put this thing back together? Answer: most likely unicorn magic.

  20. RJuvSDTMQPd1gJ2M
    RJuvSDTMQPd1gJ2M
    oN3uLeOYtNGIZDVx
    e65jULkeZeNJSwrB
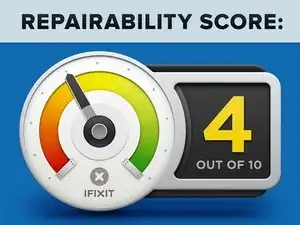
    • A7R II Repairability Score: 4 out of 10 (10 is easiest to repair).

    • The battery can be easily replaced without tools.

    • The tripod mount and viewfinder can be replaced without disassembling the camera body.

    • While very difficult, the rear LCD panel can also be removed without disassembling the camera body.

    • Accessing anything inside the camera requires removing the complex rear LCD panel first.

    • Internal components are very intricately organized; repair without a service manual would be very difficult.

    • Lastly, a hearty shout-out to our friends at Creative Electron for their X-ray imaging wizardry. Thanks guys!

Evan Noronha

Mitglied seit: 06/02/15

219164 Reputation

34 Kommentare

Did you find any seals for weather proofing?

jtorral -

no weathersealing found…

Jo Mariën -

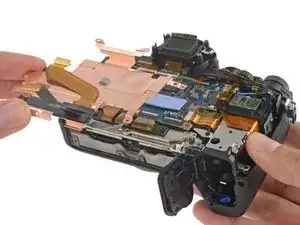
Looks like the extra weight over A7 goes to the SR mechanism and the resulting bulkier hull. Looks like a lot copper cooling stuffs also involved, must due to processing pressure from the high pixel count. Wondering if Canon 5Ds has even heat pipes built-in...

Azure -

Yeah, Wondering also about weather sealing.

Tarek Ahmad -

+1 to knowing more about the weather sealing

Sean Oh -

+1 about weather sealing

harleycin -

I took mine apart after I dropped it in a waterfall. Zero weather sealing.
rowdytxn2000 -

Wow! Thanks so much for this! Much appreciated!

Am hoping somebody may be able to provide me with some information regarding adding a 5:4 masking frame to the EVF of the Sony A7 series of cameras?

I currently have the Sony A7R and am potentially going to purchase the newer A7RII.. I come from a large format and medium format background and have never quite got my head around the 3:2 format found in most digital cameras..
I much prefer the 5:4 aspect ratio (or 67 or similar). With my A7R, I have been able to get around this by taping off the rear LCD and then attaching a "video style" viewer to the rear LCD (like a LCDVF or Zacto). This works absolutely fine except that it adds unwanted additional bulk (one of the advantages of shooting with the A7 series) and I hear that in the new A7RII that the EVF is of better quality than the rear LCD (this may be the case also for the original A7R).

wallpaperviking -

Am just wondering if there was anyway that you could see of somehow attaching a 5:4 "cropping frame" to the EVF on the A7RII?

I hopefully see this as a short term solution and am hoping that Sony introduce different cropping modes to the 3:2 and 16:9 ratios in the future..

Nearly every other camera manufacturer has this now.. Ideally 1:1, 4:3 and 5:4. Ever better would be the ability to shoot in these ratios (through a blacked out area in the EVF) but actually retain the whole sensor (3:2) image area. That way there is room for additional cropping in post

O.K, thanks so much, if you had the time to reply back to me, it would be greatly appreciated!

wallpaperviking -

Could you guys do A7II teardown?

NASA -

Really interesting to see it dissembled, but what was the point of taking it apart? What was fixed? Is this just to sort of help out those who want to try fixing their cameras themselves, like how to access certain parts and stuff?

thechristophershow -

Do you know how to replace the battery cover? I lost mine- contact me! maryfaith497@gmail.com

maryfaith497 -

Same thing! I lost my battery door to the A7ii and can't find anyting specific online. The closest thing I found was this: https://sony.encompass.com/item/10237844...

rscottcarter -

Nothing is sealed as you can see from the tear-down. Water got into the LCD panel of my camera leaving some corrosion on the little circuit board and make the display unit dead. Water also got behind the bottom panel and the view finder. I got splashed from a boat. I will have to replace both the circuit board (see Step 7) and hope it works because water damage is covered by the warranty. Once corrosion is found in the camera, all warranty got nullified. This tear-down will be very useful for me. Thanks.

Thien Vodai -

A flicker user, is reporting, that the copper heatshield, being used as viewfinder bracket, allows for condensation spots and thous corrosion could anyone confirm https://www.flickr.com/photos/125233350@...

federicolite -

Great guide, sadly it is for the A7R2 and I have to repair A7R. I can see from the guide that they are rather different to take apart. Never the less your guide helped me a bit on the way. What I am missing from guide it is not explained if the flex band cable connectors have a slide lock or if cables are just pull out and squeezed in. I give plus point to Sony for making all screws same simple Phillips type. But very complex interlocking of parts that have to be disassembled in specific order, and many flex band cables makes camera difficult to service.

Foersom -

Hi ,

i've bought a A7R2 about a year ago, now suddenly its just won't stay on, it goes on and off even if the switch is set to off.

can anybody tell me what might be causing that.

mervynmarie -

I'm looking for a new SD Card door for my A7II. Anyone know the part number? Of the part number of the whole front assembly?

bento -

Where can I locate a replacement lens mount spring for Sony A7R?

Ron Fredericks -

Hi. My camera lost the time and date every time when i changing the external battery. I think the internal battery is the problem, must replaced. Can you show me where i find the internal battery?Thank you!

Barni Buslig -

It seems to be mounted behind the frame behind the motherboard (the bit with all the thermal pads on it) and connects with a ribbon cable to the top right corner of the back of the motherboard.

Phillip Olson -

My a7rii shutter is stuck closed , how do I fix it and where could I find spare parts online?

Bander -

I would love to demount the viewfinder and cut out the top housing (where the viewfinder is within). I don' use evf and want the cam smaller. Curious if it works without.

Nick -

Yes Just set the viewfinder sensor to off before doing this mod!

Roedolph Louw -

Can someone say if the video gunlock feature can be enabled on the A7ii, A7S ii or A7R ii cameras? It is present on the Sony UMC S3CA, which uses the sensor of the A7S ii. Also, if anyone knows how to do this and is prepared to make the modification, I’d like to hire you.

Thanks!

Mark Blum -

I had some specs somewhere inside the camera, creating spots on pictures. Sensor was clean. Blew out the camera body numerous times, but only moved some spots. What or where do I have to remove parts to clean the dust lost somewhere inside the camera?

Gary Burg -

replace body and knobs… how much would that cost

Anurag Mitra -

Can anyone comment on how difficult it would be to change the exposure dial? This tear down did not remove it so I can’t tell.

petergharib -

Manglam Electronics supply versatile electronic equipments in and around Bhopal. They vouch for guarantee as well as reliability. Their priority is customer satisfaction. They are known for their quality in Bhopal. They believe in value for money and try to provide a hassle free shopping experience. They are located across all posh localities in Bhopal, Madhya Pradesh. They keep appliances of companies like Sony, Samsung, LG, Onida, JBL, Godrej, Morphy Richards, Vivo, Canon, Bajaj, Kenstar, Daikin, Micromax, Orient electric and many more. They deal in all kinds of appliances like home appliances, kitchen appliances, cameras, mobile, laptop, computers, air conditioners, water purifiers and LED TV’s. They believe in providing the best deal with the best of the dealers.

For more details, contact: <a href:” http://manglamelectronics.com/”> Electronic Appliances Shop in Bhopal</a>

Simran Tharani -

If a motherboard is replaced, how will i be able to install its firmware

Edgar Allan Icawalo Jr -

Any easy way to replace the Sony a7rii hotshoe?

Brian Balloon -

Important !

the tutorial is good, but for dismantling the motherboard, I advise you to first remove the top cover (flash shoe and top button) before removing the motherboard, it's easier and less risky .

This is valid for the A7sii and the A7ii which are both almost identical.

Paul J -

This teardown manages to show every inch of the camera except the part I'd like to replace lol.

Phillip Olson -

how can i replace the HDMI port?

chetan singh -