
Einleitung
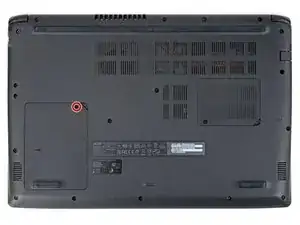
Benutze diese Anleitung, um die SSD in deinem Acer Aspire A515-51G zu ersetzen.
Bevor du diese Reparatur durchführst, solltest du, wenn möglich, eine Sicherungskopie (Backup) deiner vorhandenen Festplatte erstellen. Wenn du die SSD Festplatte ersetzt, auf der dein Betriebssystem installiert ist, mache dich mit einem Dienstprogramm zum Klonen von Festplatten vertraut, damit du in der Lage bist, deine Daten auf die neue SSD Festplatte zu migrieren.
Stelle unbedingt sicher, dass dein Notebook vollständig ausgeschaltet und der Netzstecker nicht mehr eingesteckt ist. Stelle sicher, dass dein Notebook sich nicht in einem Energiesparmodus oder sonstigem befindet!
-
-
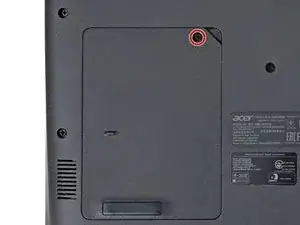
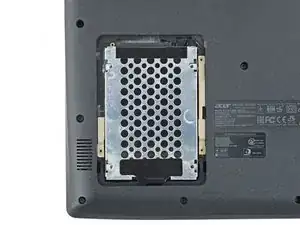
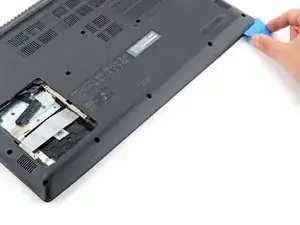
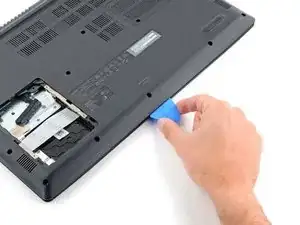
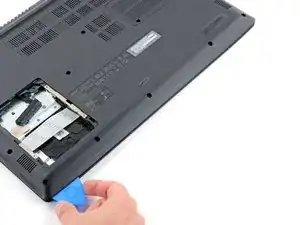
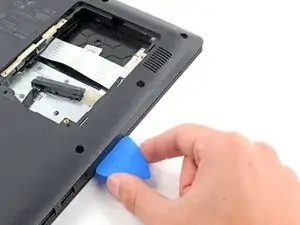
Verwende einen Kreuzschlitzschraubendreher, um die Schraube zu entfernen, mit der die Festplattenklappe unten links am unteren Gehäuse befestigt ist.
-
-
-
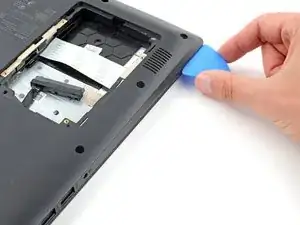
Setze einen Spudger mit dem flachen Ende unter den Ausschnitt in der oberen rechten Ecke an der Klappe über der Festplatte und heble sie hoch.
-
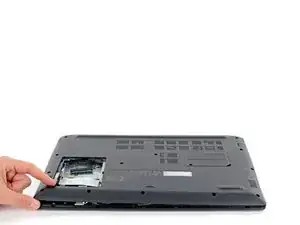
Entferne die Klappe über der Festplatte.
-
-
-
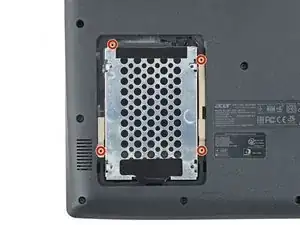
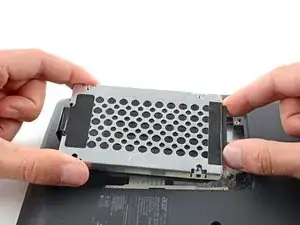
Entferne die vier Kreuzschlitzschrauben, mit denen die Festplatten-Baugruppe befestigt ist.
-
-
-
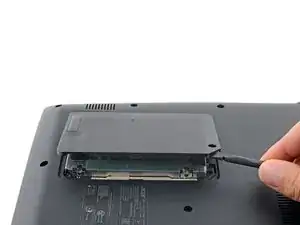
Halte die Festplatten-Baugruppe und den Festplatten-Kabelsteckerkopf gut fest.
-
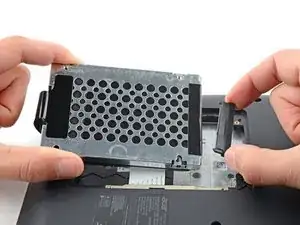
Ziehe den Festplattenstecker aus seinem Anschluss heraus.
-
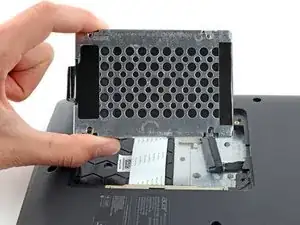
Entferne die Festplatten-Baugruppe.
-
-
-
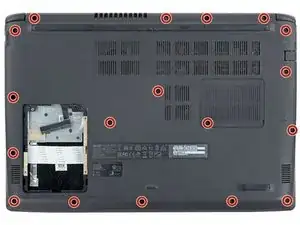
Entferne die achtzehn 6,6 mm Kreuzschlitzschrauben, mit denen das Gehäuseunterteil befestigt ist.
-
-
-
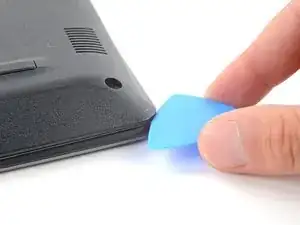
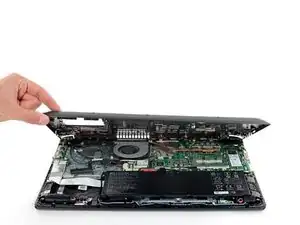
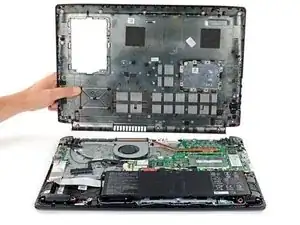
Setze ein Plektrum an der rechten Vorderkante zwischen das Gehäuseunterteil und den Rahmen ein.
-
-
-
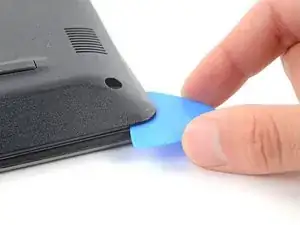
Das Gehäuseunterteil ist mit Clips befestigt. Schiebe das Plektrum zum Lösen der Clips an der Vorderkante entlang.
-
-
-
Schiebe das Plektrum um alle Kanten des Gehäuseunterteils herum, bis alle Clips gelöst sind.
-
-
-
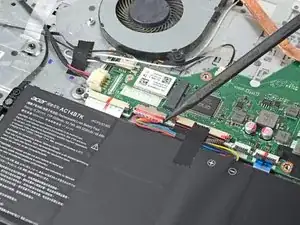
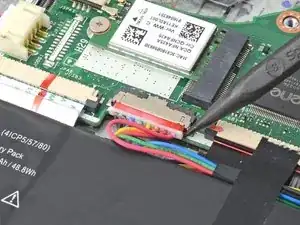
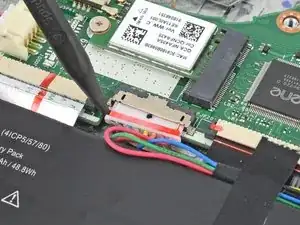
Drücke mit dem spitzen Ende eines Spudgers auf jede Seite des Akkusteckers, bis er sich aus dem Anschluss löst.
-
-
-
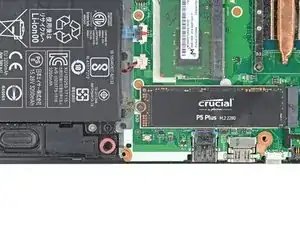
Benutze einen Kreuzschlitzschraubendreher, um die 2,8 mm Schraube zu lösen, mit der die SSD befestigt ist.
-
-
-
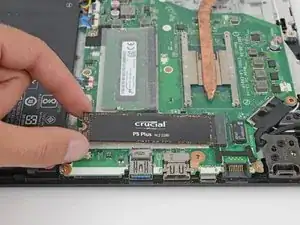
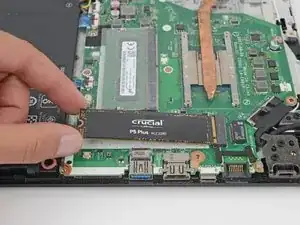
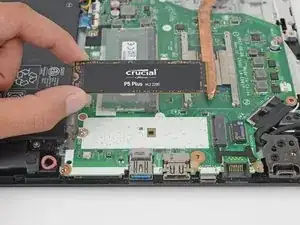
Hebe die M.2 SSD Festplatte etwas an und ziehe sie vorsichtig aus ihrem Anschluss und entferne sie. Versuche sie beim herausziehen so parallel wie möglich zur Hauptplatine zu halten.
-


Um dein Gerät wieder zusammenzubauen, befolge einfach diese Anleitung in umgekehrter Reihenfolge.
Entsorge deinen Elektromüll sachgerecht.
Hat die Reparatur nicht ganz geklappt? Versuche es mit ein paar grundständigen Lösungen, ansonsten findest du in unserem [Troubleshooting Problems After a Repair|basic troubleshooting|new_window=true]], or ask our Forum Hilfe bei der Fehlersuche.

2 Kommentare
WARNING, WARNING WILL ROBINSON!!
Before you remove the lower case, you MUST remove the HDD as it is attached to the lower case. If you pull the lower case up with HDD still attached you will rip the HDD cable off the motherboard. So ...
Unscrew the HDD hatch.
Pull HDD hatch on lower right off carefully.
Unscrew the four black screws holding the HDD assembly to lower case.
Carefully pull the HDD cable off the HDD (careful here, you could rip cable off motherboard).
Carefully pry HDD assembly upwards (with spunger) and remove HDD.
Now proceed with rest of remining steps.
Would someone be able to attach photos to these steps. I don't have the ability to do so, easily.
I used exactly these instructions today to replace the M.2 SSD. Everything worked perfectly. Many thanks for the instructions.
Regarding
@davoesq note - in step 4 of the instructions it is described that the second hard disk, which you can reach directly, must be removed. Care must of course be taken when removing the connector.