Einleitung
- iMac-Tastatur zerlegen
- PCB-Membran reinigen
- Fehlerhafte Verbindungen reparieren
- Tastatur wieder zusammenbauen
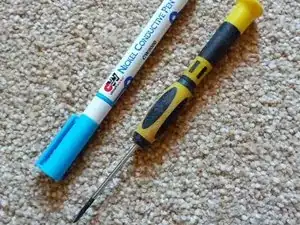
Werkzeuge
-
-
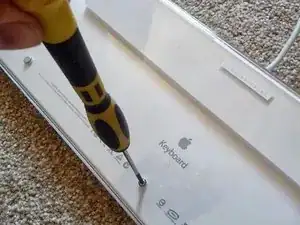
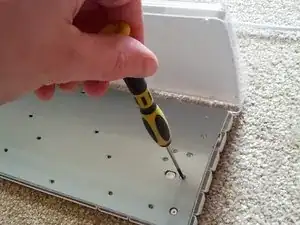
Drehe die Tastatur um und entferne alle Schrauben auf der Rückseite.
-
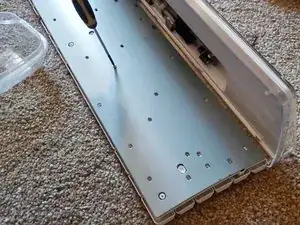
Heble den Boden der Tastatur auf und entferne vorsichtig die Schrauben aus der Metallhalterung.
-
-
-
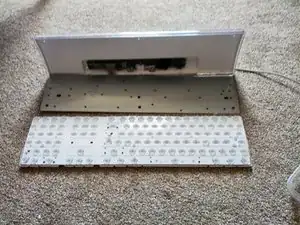
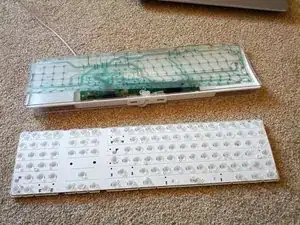
Sobald du alle Schrauben aus der Metallhalterung entfernt hast, hebe vorsichtig alle oberen Elemente der Tastatur an und ziehe sie gemeinsam nach hinten, sodass der weiße Tastenhalter auf dem Boden liegen bleibt.
-
Lege den weißen Tastenhalter vorsichtig zur Seite. Kippe ihn nicht, da sonst einige der Tastennoppen verloren gehen könnten.
-
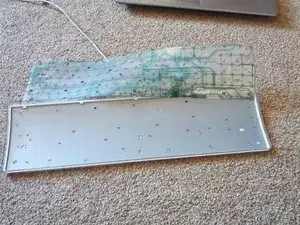
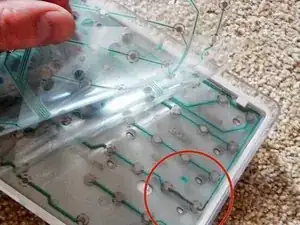
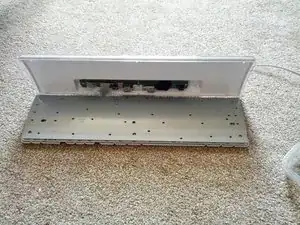
Setze die Metallhalterung wieder in den Tastaturrahmen ein, wie in Bild 2 gezeigt. Falte anschließend die Membran vorsichtig zurück an ihren Platz.
-
Falls du zu diesem Zeitpunkt Flüssigkeitsreste oder Schmutz auf der Membran siehst, verwende ein leicht feuchtes Tuch oder ein paar Babyfeuchttücher, um sie zu reinigen.
-
Sobald du denkst, dass du den Schmutz oder die Rückstände von der PCB-Membran entfernt hast, lasse sie trocknen und fahre mit der Reparatur der Tasten fort.
-
-
-
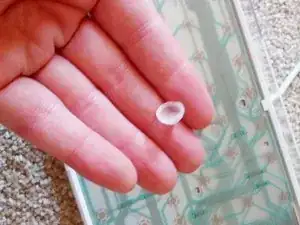
Nimm eine der gummiartigen Noppen von dem weißen Tastenhalter, den wir zur Seite gelegt haben.
-
Schließe die Tastatur an einen PC/MAC an und benutze die Gummi-Noppe, um sanft auf die verschiedenen Tastenpunkte zu drücken und einen Tastendruck zu simulieren.
-
Drücke jede Taste rund um die defekten Tasten, um herauszufinden, wo das Problem liegt.
-
-
-
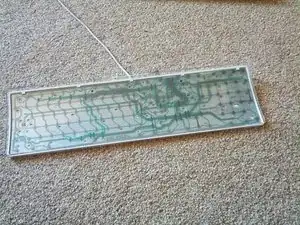
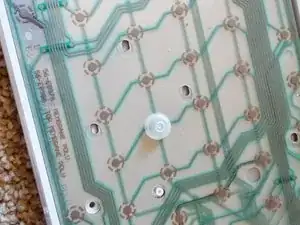
Es gibt drei Kunststoffmembranen. Die Tastenanschläge entstehen, wenn die Punkte der oberen Schicht gegen die Punkte der unteren Schicht drücken.
-
Zwischen der oberen und der unteren Schicht befindet sich ein transparentes Kunststoffstück.
-
Der Schlüssel zur Reparatur defekter Tasten besteht darin, die defekten Tasten zu finden und dann die grüne Linie jeder defekten Taste bis zur nächsten funktionierenden Taste zurückzuverfolgen.
-
Sobald du eine Taste gefunden hast, die auf derselben grünen Linie wie die defekte Taste funktioniert, kannst du ...
-
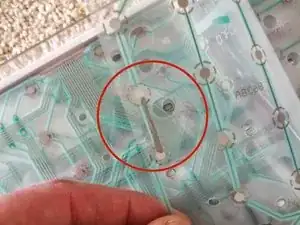
... eine Linie mit deinem leitfähigen Stift zeichnen, um die defekte und die funktionierende Taste zu verbinden.
-
Denke daran, nur auf derselben grünen Linie zu arbeiten. Wenn du Linien überschreitest, werden die Tasten nicht richtig funktionieren.
-
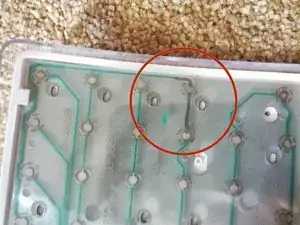
Du kannst die dunklen Linien auf meinen Bildern sehen, die die defekten Tasten verbinden. In einigen Fällen habe ich vorsichtig die grüne Abdeckung abgekratzt, um den darunterliegenden Draht freizulegen, und die Tasten direkt damit verbunden, anstatt eine lange, unordentliche Linie zu zeichnen.
-
Oft funktioniert die Taste nicht, wenn du nur auf einer Seite der PCB-Membran zeichnest. Beide Seiten verwenden leicht unterschiedliche Routen, daher ist es wichtig, die grünen Linien genau zu verfolgen.
-
-
-
Sobald du sicher bist, dass du alle defekten Tasten repariert hast, bringe den weißen Tastenhalter zurück. Überprüfe vorsichtig, ob alle kleinen Gummi-Noppen an ihren Plätzen in den Tasten sind.
-
Setze den Rest der Tastatur vorsichtig auf den weißen Tastenhalter und lege die Membran über die Tasten.
-
Lege die Metallhalterung vorsichtig auf die Membran und überprüfe, dass keine der Gummi-Noppen verschoben wurde.
-
-
-
Beginne, alle kleinen Schrauben wieder an ihren Platz zu schrauben.
-
Vergiss nicht, die Vorderplatte des weißen Tastenhalters wieder festzuschrauben.
-


20 Kommentare
Nice description, thanks!
At step 6, I think it is worth reminding to not forget to put back the tiny LED device before bringing the membrane and metal holder,
as one may very easily either fall down at step 3... or forget to replace it before screwing back all the 30 screws!
Doing and un-doing is always working, I know...!
Jean Luc -
And between the LED leads and the white plastic there should be an even tinier conductive pad, which serves to improve electrical contact between the LED and the membrane. The pad sits in a small recess in the white plastic and the LED leads fit into two grooves on the membrane side of the pad. This part is easy to lose during disassembly, so be mindful of it!
I have this keyboard and decided to clean it. Unfortunately I did clean the main plastic key holder under sink water. That was a bad idea as water soaked the entire menbrane. Now only the keypad and some other keys works, the rest is dead. Any chance to recover it fully?
just open it again and dry it out and then try again. the water is causing shorts between connections
This is a very good guide. I had one spill after another and a few keys on left side no longer worked. I cleaned the keyboard and left it disassembled to dry out for a week. I was hoping a simple cleaning would help. It didn’t. Since conductive pens are a bit pricey in Canada I decided to test by using tiny bits of foil where I knew I had a faulty key or break to be sure a pen would work. With the foil I can get most of the keys to work but not all. Do you think a pen will produce better results or is it done ?
El Pa -
I think the pen should work. Note what the author said about possibly needing to scrape the insulation off a lead before connecting. Try that and the foil should give a positive indication.
Note the author’s comment about possibly having to scrape off the insulation on a lead before applying conductive ink. Same advice should make a difference on your foil test.
Broken leads or dirt accumulation are the most likely reasons for this keyboard to fail. Other failures (decoder chip, USB interface) would show much more drastic symptoms than a few lost keys.
You mentioned that conductive pens are a bit pricey in Canada. I found a CAIG Circuitwriter Conductive Pen on the peg at MicroCenter @$19.99. Price tag covered instructions. Once I was ready to try it, I downloaded instructions, first for the Chemtronics CircuitWorks Conductive Pen (5 minutes dry tack-free, conductive in 30 minutes). Realized my attempt wasn’t tack-free, so I looked further and found the instructions from the package online. Allow 24 hours to dry, cure with 40W bulb @6” 4 hours. Not the same! Also noticed the store UPC covers a Radio Shack UPC. If this has a shelf life of up to 2 years before purchase, how fresh is it?
Just now I tried to find the item online at MicroCenter in order to give this information and the only ink they advertise is Bare Conductive Electronic Paint — $11.99. Much better price, and shouldn’t be much more for you.