Einleitung

Diese Anleitung beschreibt, wie du die SSD eines Lenovo ThinkPad X1 Carbon 6th Gen ausbauen und ersetzen kannst. Dies kann nötig werden, wenn deine SSD kaputt ist und dein Computer nicht mehr startet.

Wenn du Probleme mit deinem Computer hast, lies als Erstes unsere Hilfeseite, bevor du die SSD ersetzt. Versuche das Gerät einzuschalten, indem du das Netzteil anschließt und den Einschaltknopf einige Sekunden gedrückt hälst. Schaue dir auch auf der Seite zur Fehlersuche den Abschnitt Akku an, um sicherzustellen, dass die SSD das Problem ist.

Bevor du beginnst, solltest du den Laptop ausschalten und von der Stromversorgung trennen.

  1. NFtYMIq2pIVe1NLS
    NFtYMIq2pIVe1NLS
    f3HPZLtAIooGCgUh
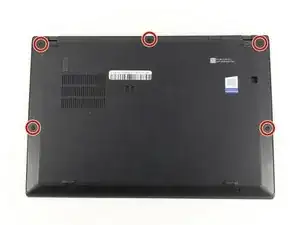
    • Benutze einen Kreuzschlitzschraubendreher #0, um die fünf Schrauben zu entfernen, mit denen die Rückseite befestigt ist.

    • Die Schrauben lassen sich nicht komplett aus der Rückseite entfernen. Lockere sie also einfach soweit es geht.

  2. HKMFZVKrjam3PWWH
    HKMFZVKrjam3PWWH
    6ZP1DMLSvgYbwIhX
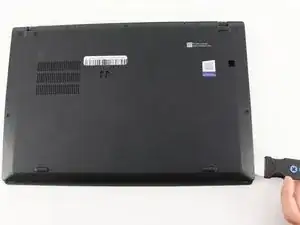
    • Benutze einen Jimmy, um die Rückseite direkt an den Fixierstiften anzuheben.

    • Auch wenn im Bild ein Metallwerkzeug zu sehen ist, empfehlen wir ein Öffnungswerkzeug aus Kunststoff zu verwenden, um eventuelle Schäden zu minimieren.

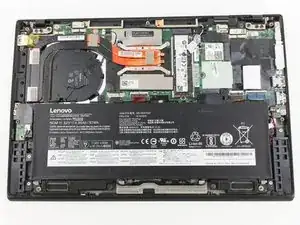
    • Entferne nun die Rückseite.

    • Falls du beim Anheben der Rückseite Widerstand spürst, kontrolliere die Schrauben und stelle sicher, dass sie komplett gelöst sind.

    I thank you for these instructions. They were quite helpful and I successfully replaced the fan. There is one thing however. Your instructions stated the following: "Be sure to pull on all of the cables at the same time."

    I disagree. One should never pull the wires. I was able to nudge the one part of the connector loose from the other part that it fit into." I then put the new fan in and gently and carefully pushed the connecting parts together.

    Otherwise, your instructions were clear and to the point. Thank you very much

    ALAN L SILBERLIGHT -

    The image shows prying the cover open at the bottom right. In fact, there are tabs securing the bottom edge to the frame. The cover needs to be pried open at the top edge. Once the top edge is released, the cover can be shifted slightly toward the top of the image to disengage the tabs at the bottom.

    This error, along with the similar error about removing the battery in step 4, suggests that the instructions were written with the laptop in the opposite orientation than what is shown in the images.

    EatCroc3 -

    I also don't believe that the iFixit Jimmy is necessary - in fact, it might scratch up the exterior paint of the X1 Carbon Gen 6. Instead, I find the triangular iFixit picks are more appropriate for the task: iFixit Opening Picks (Set of 6)

    Also, at least for my unit, the lid comes off easily and I only use the plastic picks if there's any resistance and I don't want to risk breaking any of the clips.

    Tai Lam -

  3. phBZOIOe6BCaMvWQ
    phBZOIOe6BCaMvWQ
    UYHSEUXPDUXWbGvi
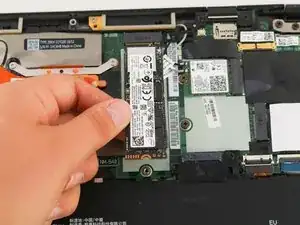
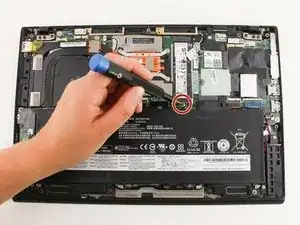
    • Benutze einen Kreuzschlitzschraubendreher #0, um die einzelne Schraube zu entfernen, mit der die SSD am Motherboard befestigt ist.

  4. UmlDe3GRyxI6321E
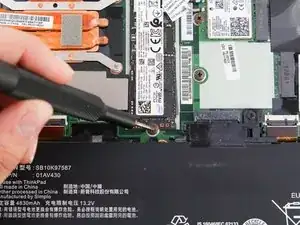
    • Entferne vorsichtig die SSD, indem du sie leicht anhebst und dann in Richtung des Akkus aus der Halterung herausziehst.

  5. xUiDNvBLef5UlDT3
    xUiDNvBLef5UlDT3
    GxvPXnTgOvVvjawR
    • Ziehe das Wärmeleit-Pad vorsichtig von der Rückseite der SSD ab.

    • Wenn das Wärmeleit-Pad unbeschädigt ist, kannst es wiederverwenden und auf deine Ersatz-SSD anbringen.

Abschluss

Um dein Gerät wieder zusammenzubauen, folge der Anleitung in umgekehrter Reihenfolge.

Michael Megna

Mitglied seit: 23/01/20

1376 Reputation

0 Kommentare