Einleitung
Hier wird der Austausch der wichtigsten Tasten gezeigt. Vorher muss noch der Akku ausgebaut werden.
-
-
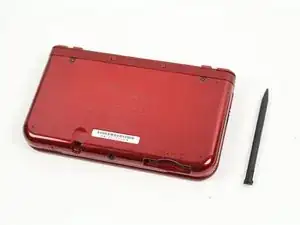
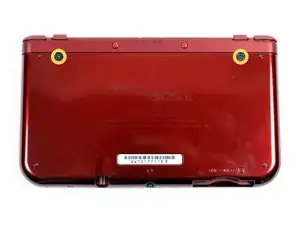
Lege den 3DS mit dem Boden nach oben. Entferne Game Card, Ohrhörer, Ladekabel, Stylus und was auch sonst noch verbunden ist.
-
-
-
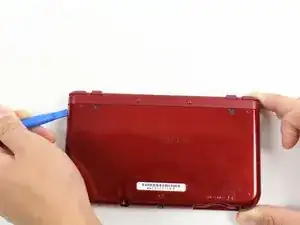
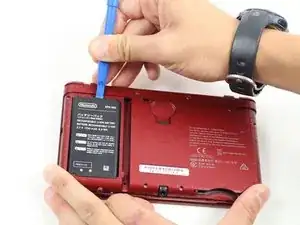
Der Akku befindet sich links. In der Mitte oben ist eine kleine Lücke, hier kannst du mit einem geeigneten Werkzeug (nicht aus Metall!) hebeln.
-
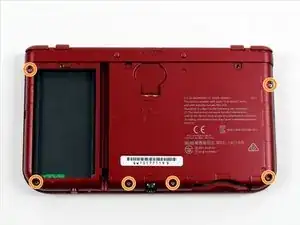
Drücke die SD-Karte mit dem Daumennagel ein, bis es klickt und die Karte teilweise herauskommt. Ziehe sie dann ganz heraus.
-
-
-
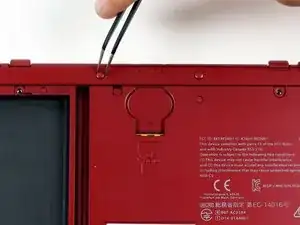
An der Oberkante befinden sich zwei Gummiabdeckungen. Ziehe sie vorsichtig mit einer Pinzette heraus.
-
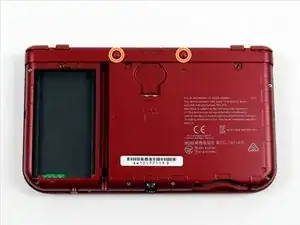
Darunter befinden sich zwei JIS #000 Schrauben die du ebenfalls herausdrehen musst.
-
-
-
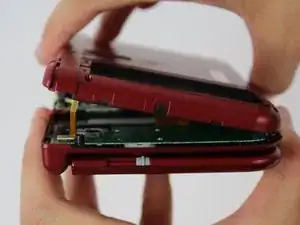
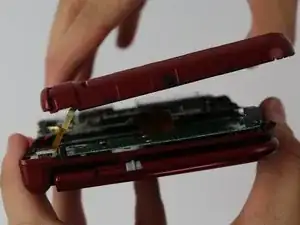
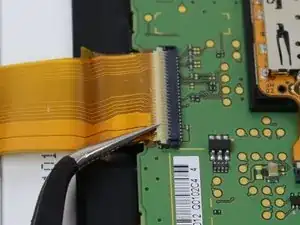
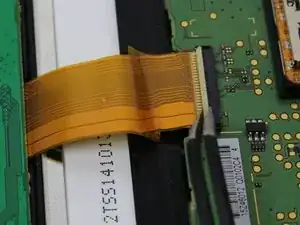
Finde den Verbinder am Flachbandkabel der linken Tochterplatine zur Hauptplatine (es ist das breiteste). Klappe den Sicherungsbügel am ZIF Verbinder mit einer Pinzette oder dem flachen Ende des Spudgers nach oben.
-
Ziehe das Kabel mit einer isolierten Pinzette aus dem Sockel.
-
-
-
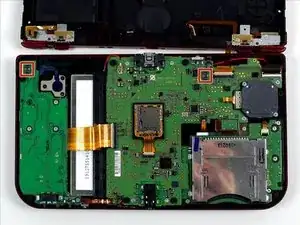
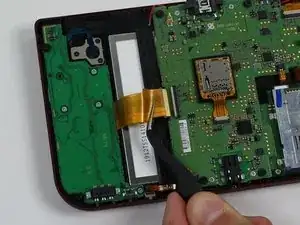
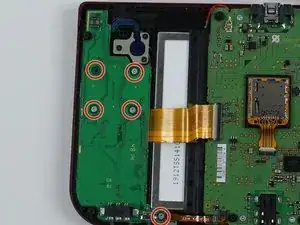
Drehe die Platine vorsichtig um. Entferne das blau-schwarze Flachbandkabel auf der Rückseite.
-
Wenn die ABXY Tasten nach der Reparatur nicht richtig arbeiten, kannst du den durchsichtigen Aufkleber abheben und die Kontakte darunter von Korrosion befreien, so wie in diesem Video gezeigt.
-
Wenn du ein scharfes Werkzeug, z.B. einen Cutter dafür verwendest kann es sein, dass dann die Richtungstasten nicht mehr funktionieren.
-
-
-
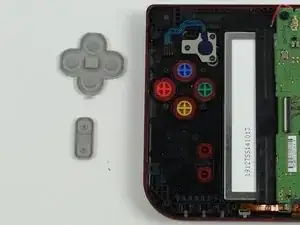
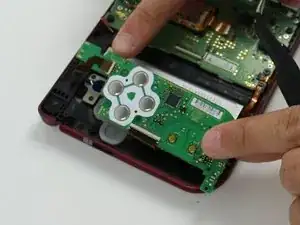
Entferne die graue Gummiabdeckung um die Tasten freizulegen, oder die graue rechteckige Abdeckung für die Start/Selecttaste.
-
Entferne die Tasten mit der Pinzette.
-


Um dein Gerät wieder zusammen zu setzen folge den Schritten in umgekehrter Reihenfolge.
16 Kommentare
do the smaller new 3ds colored buttons work in the new 3ds xl?
It will work, since the only difference between them is the size of screen and shell, but size of buttons and other pieces should be of the same.
If anyone else comes on this, I can confirm the small 3ds buttons do not quite work right they are slightly smaller and the cut outs that keep the buttons from spinning around are not the same
Demon09 -
Can someone provide further information about replacement of the entire C stick?
Or is it just as simple as pull the ribbon carefully, take the old one out and put the new one in?
There are two parts. The rubber bit, and the joystick assembly. The stick assembly is connected by 3 short screws, and inserted into the joystick board via zif connector. You need to unscrew the assembly to access the rubber bit.
The set of screws on the secondary panel are giving me trouble. I think I might be stripping them... Is it normal for them to be screwed on so tight? I don't want to pay 85 bucks just because I need to press my B button harder to make it work...
One of the screw of the second set was also giving me trouble. Just press firmly and turn very slowly. As they are not supposed to be touched by the consumer, I suspect they put a kind of sealant to make them harder to unscrew.
Mine were tight as well, make sure you're using JIS and not Philips and you should be fine. Since this is seven years later I hope you've fixed it though!
Isak -