Einleitung

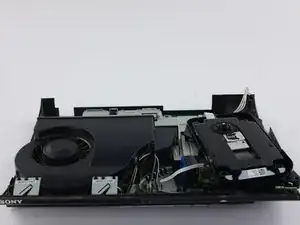
Die Reparatur beginnt mit dem Öffnen der Playstation 3 Superslim, anschließend wird das optische Laufwerk komplett ausgebaut. Wenn deine Playstation die CDs nicht mehr richtig ausliest, könnte das optische Laufwerk kaputt sein. Diese Anleitung zeigt, wie es ausgetauscht wird. Bevor du anfängst stelle sicher, dass du alle benötigten Werkzeuge (wie aufgeführt) parat hast, nimm dir genug Zeit und sorge für eine freie, saubere Arbeitsfläche. Sei vorsichtig bei der Arbeit an deinem Gerät und folge den Schritten genau, um sicherzustellen, dass du das Netzteil richtig austauschst.

  1. xbQGh6p1ZhTEI1AM
    xbQGh6p1ZhTEI1AM
    KtrEJIpoTyD6Dxns
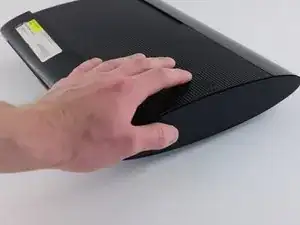
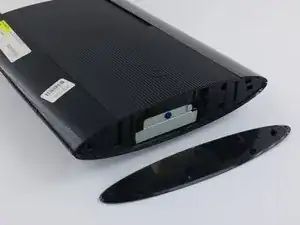
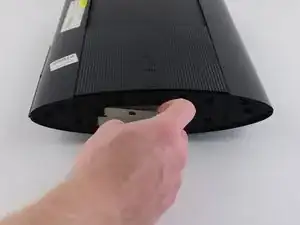
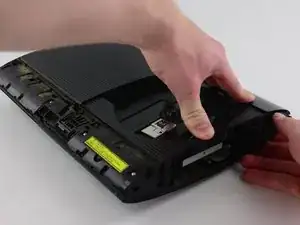
    • Schiebe die seitliche Abdeckung der Festplatte zur Rückseite des Gerätes hin und entferne sie.

    • Diese Abdeckung befindet sich auf der rechten Seite des Gerätes.

    Just wanted to add: the HDD bay cover isn't on the right all the time, it varies with each unit. The side without the rubber PS logo is the bay cover.

    Yash -

    I just wanted to add that the above is not correct either

    My PS3 Super Slim Mdel No. CECH-4004A has the removable PS logo rubber seal on the left side while the HDD is housed behind the right side (with no rubber PS logo seal)

    Eoin -

    My p3 just went off it goes on but then it just shut down

    Chadley Abrahams -

  2. plFIWwPRecFSCYtW
    plFIWwPRecFSCYtW
    aY24caeSlaSLeiSh
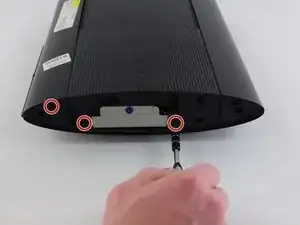
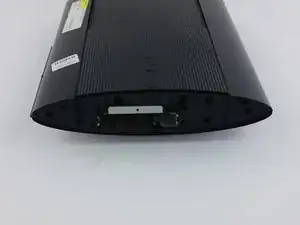
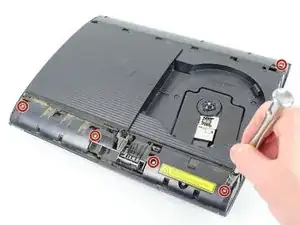
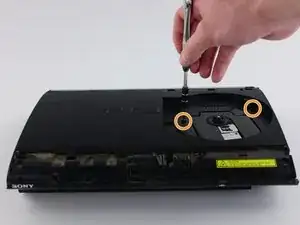
    • Entferne die drei schwarzen 9,8 mm langen Torx 8 Sicherheitsschrauben.

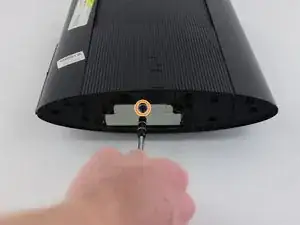
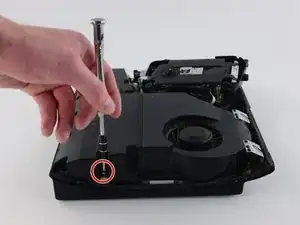
    • Entferne die blaue 7,9 mm lange Kreuzschlitzschraube #1.

  3. BI3LAQDYeBaY3rd6
    BI3LAQDYeBaY3rd6
    GE41y3D3UesWoFGO
    • Ziehe an der Lasche und entferne die Festplatte.

    • Sei vorsichtig, wenn du die Festplatte herausholst und bewahre sie sorgfältig auf.

  4. uamMjKCFEnb1yVAd
    uamMjKCFEnb1yVAd
    RcLG3QQDdCi3cHKO
    • Heble die drei Gummiabdeckungen der Füße mit einem Metallspatel heraus.

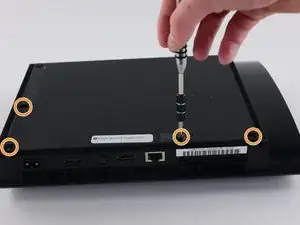
    • Unten sind vier schwarze 36,3 mm lange Kreuzschlitzschrauben #1. Drehe sie heraus.

    • Eine dieser Schrauben befindet sich unter dem Garantieaufkleber. Du kannst den Sticker abziehen oder mit dem Schraubendreher ein Loch hineinstoßen.

  5. uV3ohQT1OHHuYKKm
    uV3ohQT1OHHuYKKm
    Hu2abpWkZKkfDyx3
    • Löse die Raste ganz rechts hinter dem Panel an der Vorderseite, hebe das Panel etwas hoch und drücke darauf.

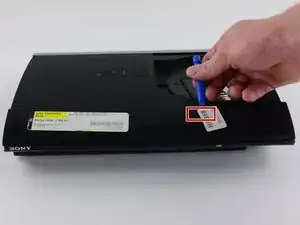
    • Schiebe ein Öffnungswerkzeug im markierten Bereich ein und löse die zweite Raste.

    • Schiebe das Panel nach links, um die weiteren Rasten zu lösen.

    • Dies ist wahrscheinlich der kniffligste Teil des Verfahrens. Wenn es dir nicht gelingt die Raste am vorderen Panel zu lösen, kannst du versuchen, alle Rasten aufzuhebeln. Sei aber sehr vorsichtig, sie gehen leicht kaputt.

    Getting these on is harder than getting them off.

    Jake -

  6. ETZALUAjLVb3QSpP
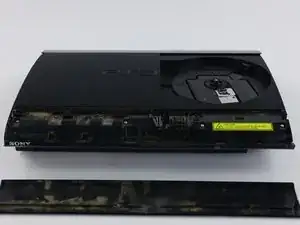
    • Drücke die Lasche an der rechten Seite des Gerätes nach unten und schiebe das Panel an der Rückseite nach links heraus.

    This tip and photo made me break this panel lmao there's a button top right of the disk tray you're supposed to push that not a "tab on the right side of the device" the mechanism to unlock the panel safely is in the top right of the inside of the disk tray

    maddestkhuntoutoften -

    You cannot really even see the bottom in this photograph but it is clearly visible in step seven please before trying to remove this panel look at step seven to see the button I have described lol

    maddestkhuntoutoften -

  7. 14ySA5tr4QOwXMli
    14ySA5tr4QOwXMli
    G5vooeSBbf642Z6a
    NRGGFxlrh5TjpOwj
    • Entferne die fünf silbernen 20,8 mm langen Kreuzschlitzschrauben.

    • Entferne die beiden schwarzen 9,9 mm langen Torx T8 Sicherheitsschrauben.

    • Entferne die obere Kunstoffabdeckung.

  8. Qr6kVceLZaiWjTqM
    Qr6kVceLZaiWjTqM
    HPo5mESxObkLXBII
    XteObUULZPtjx1mE
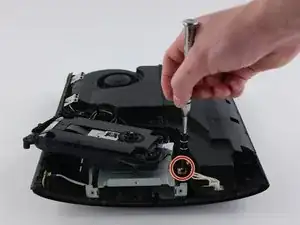
    • Bewege das optische Laufwerk zur Seite, so dass eine der silbernen 8,8 mm langen Kreuzschlitzschraube sichtbar wird.

    • Entferne die beiden 8,8 mm langen Kreuzschlitzschrauben an jeder Seite.

    be careful, the fiber-optic cables come out easily and are a pain to put back in

    tucker hartman -

  9. KYIxOow2iBFd3Pc4
    KYIxOow2iBFd3Pc4
    fyOJO3E4rKpl1mxm
    CrC3gLDSZsmGDnEc
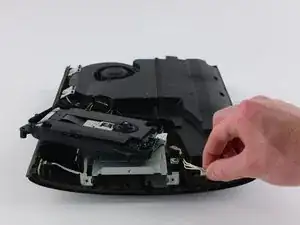
    • Löse das Kabel aus dem Anschluss und hole es aus den beiden Kunststoffhaltern heraus.

    • Ziehe zum Ablösen des Kabels am Stecker, nicht am Kabel selbst.

    • Entferne das Netzteil.

    The left side of the PSU sits on two long metal prongs so you may need to pull a little to get it lose but you should be able to pull the whole unit in an upward motion

    Matthew Symmons -

  10. ONIEuPpUIPrpCiCb
    ONIEuPpUIPrpCiCb
    g1XR3KBlPakDCWwB
    6iQejXF2NLfOfelD
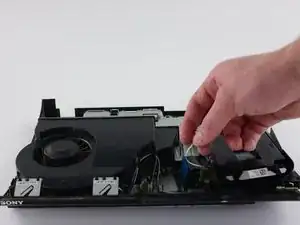
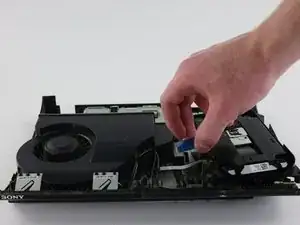
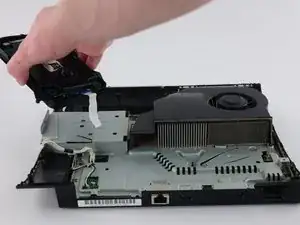
    • Ziehe das vordere weiße Flachbandkabel nach oben aus seinem Anschluss heraus und löse es ab.

    • Dahinter befindet sich ein schwarzes und blaues Flachbandkabel. Ziehe es an der schwarzen Lasche hoch und löse es ab.

    Para Que son esos cables flex

    Enrique Luna -

  11. H2DhKRwpkZKPogUN
    H2DhKRwpkZKPogUN
    VUjCTyKsZZM1JUiG
    Q3inBSX54UrOnvVE
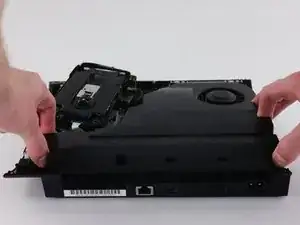
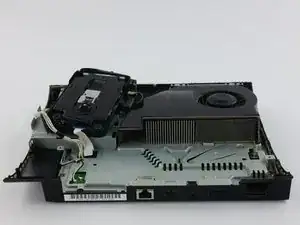
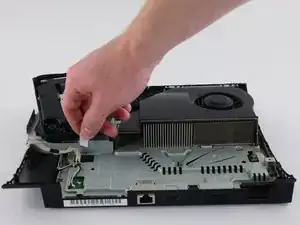
    • Drehe das Gerät um 180°.

    • Ziehe das hintere weiße Flachbandkabel nach oben aus seinem Anschluss heraus und löse es ab.

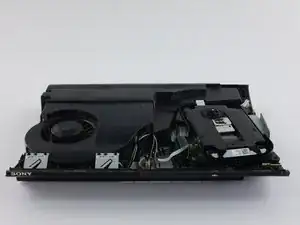
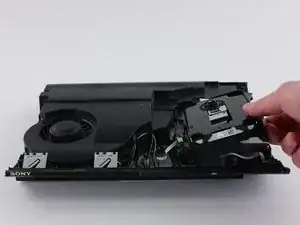
    • Entferne das optische Laufwerk.

Abschluss

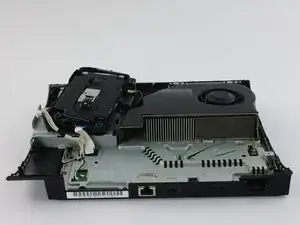
Baue das Ersatzteil ein. Folge dann den Schritten der Anleitung in umgekehrter Reihenfolge.

Joseph O'Connor

Mitglied seit: 14/04/16

2820 Reputation

7 Kommentare

It might be useful to have pictures of the super slim too since it’s in the title. I’m referring to CECH-3xxx / 4xxx mostly because the shell and disassembly looks a bit different. Great guide all the same. Thanks!

Sam Roney -

Hi i have a Question

I change the Optical Drive on my PS 3 Super Slim Named KEM850 PHA KES850 .But the new drive only play DVD not Blueray Game or Movie

An update was made without drive on board connected .can be this the problem. how can i fix them

Please Help

s

Karl-Heinz Schumacher -

How to pair a new optical drive with the old motherboard?

Tiago -

PS3s and PS4s have daughterboards on their disc drives. Put the daughterboard of your old disc drive on the new one and it may work.

Joe Drew -

I am replacing the optical drive in my console. But didn't note where the drive ribbon was positioned!? Every video I have found, they just pop right in...my original and replacement drives, have larger receptacles than the ribbon it self. There are at least 5 pins, that don't have (potentially) anything connecting them, to the ribbon. I don't want to randomly place the ribbon in one of the possible (7?) positions and fry something in the process...so where do I connect the smaller ribbon?!

Robert Shelton -

how to you connected the ribbion part to the blue ray disk drive i have a hard time with it goes in the middle part i dont see how to put the ribbon part in side

please help

Ryan Just -

Comment changer le lecteur cd d'un PS3 slim, le mien le lecteur cd ne fonctionne pas

Youssouf -