Einleitung

Diese Anleitung führt dich durch den Prozess des Austauschs der Rückabdeckung. Hinter der Rückabdeckung befindet sich das hintere Touch Pad.

  1. bXHPdJvmOqwnRZ5W
    bXHPdJvmOqwnRZ5W
    Kxh4sK2xMaaiHQtJ
    • Ausschalten und Speicherkarte entfernen.

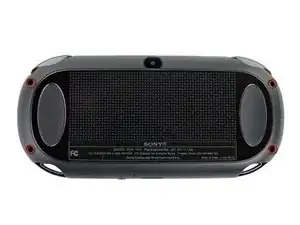
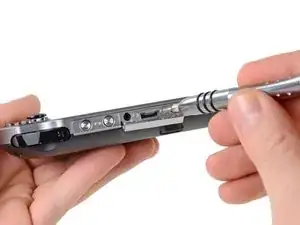
    • Die vier 6,4 mm Schrauben auf der Rückseite mit einem Phillips #00 Schraubendreher entfernen.

  2. WwpKNcKBHnx3iwJP
    WwpKNcKBHnx3iwJP
    36FYDevnAqBvbNY3
    mjh2iFATaa2BKMEs
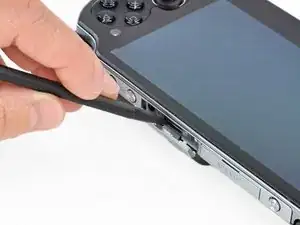
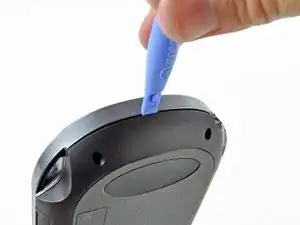
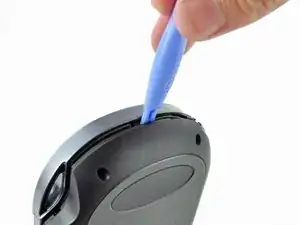
    • Öffne den Zubehörslot mit einem Fingernagel oder Spudger.

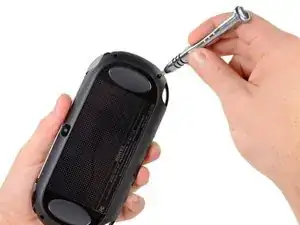
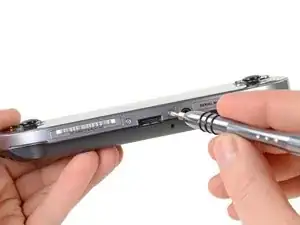
    • Entferne die zwei 5,4 mm Schrauben mit einem Phillips #00 Schraubendreher.

  3. AH6yWSkBJ4VWv3RB
    AH6yWSkBJ4VWv3RB
    aXih4BBWrQN2fmOK
    • Entferne die zwei 5,4 mm Phillips #00 Schrauben an der Ladebuchse.

  4. bEJVmiEky4mHiDcb
    bEJVmiEky4mHiDcb
    aQOOn4pkOrVFR3hw
    vEQhcA4OEHFKVYLS
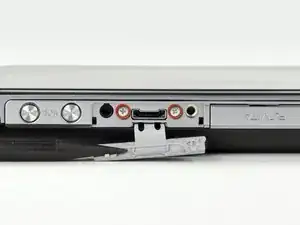
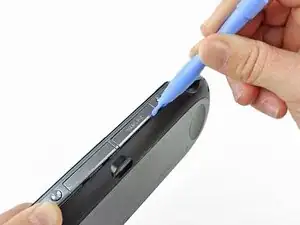
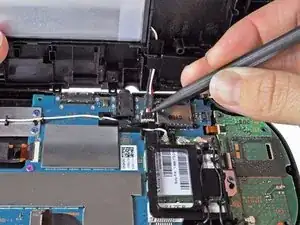
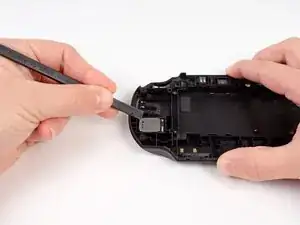
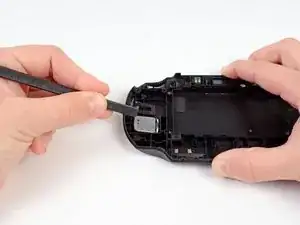
    • Trenne die Front- und Rückseite, indem du ein Plastic Opening Tool an der Seite des Gerätes einführst.

    • Vorsichtig um das Gerät herum gehen und aufhebeln.

    • Es sind immer noch Kabel vorhanden, die Front- und Rückseite zusammenhalten. Wenn du die Hälften auseinander reisst, wird dies das Gerät beschädigen.

  5. 3BBZJmwmjKVUDiJa
    3BBZJmwmjKVUDiJa
    EpjUlyY4L4GWcaLS
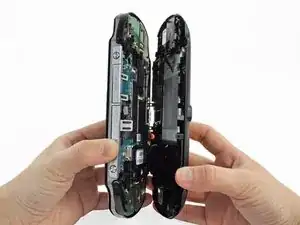
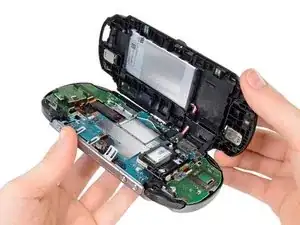
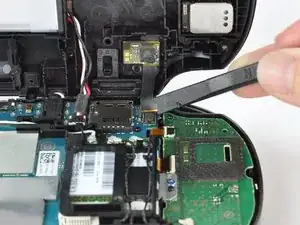
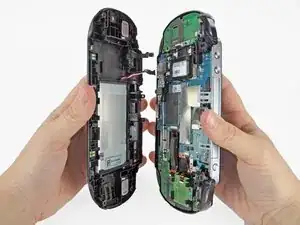
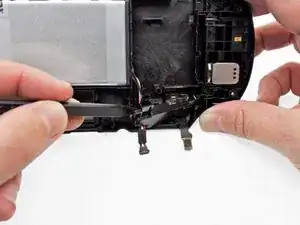
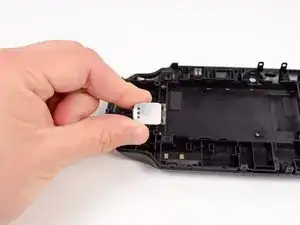
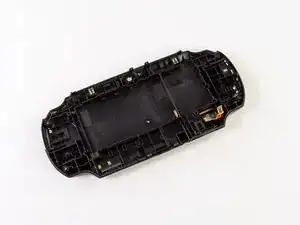
    • Vorsichtig die beiden Seiten trennen und auf die Batterie- und Touchscreen-Controller-Verbindungen, welche die Seiten zusammenhalten, achten.

    One of the shoulder buttons fell out when I was doing this step, along with the piece holding it in place. They go back in just fine when reassembling but make sure that they are oriented properly, of course.

    klung -

  6. NeowybD4slFqYmiM
    • Mit einem Spudger das Touchscreen-Controller Flexkabel vorsichtig lösen.

  7. DtebpV1FIAkm4AUj
    • Das Akkukabel vorsichtig mit einem Spudger lösen.

    Any idea what type of pcb header is on the board for the battery? I have a motherboard with a broken header but I cant source a replacement

    Jimbo Jones -

    This is where I screwed up so I recommend extra caution for other newbies. Only the black part is supposed to come off. Don't be an idiot like me and pry off too much...

    ylimakiminna -

    Yea I messed up there too. Is there a way to fix it?

    Alethia Henry -

    This component was far more stubborn than the screen connector when it came to removal. I opted for a smaller tool than the spudger (small flat-head) and managed to disconnect it after determining the best bit size for the job. Screwdriver is metal, obviously, so being gentle helps to avoid damaging anything.

    klung -

    broke the white part

    Benaya Miller -

  8. fkyIaVUrPDRIlhZV
    • Trenne Front- und Rückseite.

  9. VX2TaXVbYtwNHIKP
    VX2TaXVbYtwNHIKP
    EWlJuiUsM1DIWfPZ
    • Heble mit einem Spudger vorsichtig den Akkukabelhalter auf der Rückseiteneinheit ab.

    • Der Akkukabelhalter lässt sich am einfachsten an der Stelle erreichen, wo das Akkukabel herauskommt.

    • Du kannst auch die beiden kleinen Laschen an der Seite des Kabelhalters benutzen. Finde die Laschen und löse sie beide gleichzeitig. Sei vorsichtig, drücke nicht auf die Abdeckung, so dass sie gleich wieder einrastet.

    Using the tabs (I could really only see one) on the side of the retainer proved essential for me to remove it and release the cable. Unless that happened that cable retainer was not moving for me at all. It did come out once the tabs were pressed though they did prove somewhat uncooperative with clicking back into place once I had installed the new battery. Also, watch that the battery’s cable isn’t pinched when you’re putting everything back in place.

    klung -

  10. jWQeSRp1IvWd1Uk5
    jWQeSRp1IvWd1Uk5
    DreEZarQjH5flyTe
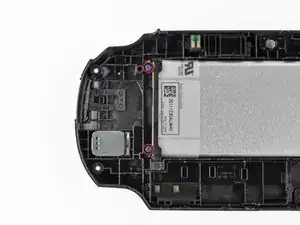
    • Entferne die beiden blauen 5 mm Kreuzschlitzschrauben #00 vom Akkugehäuse.

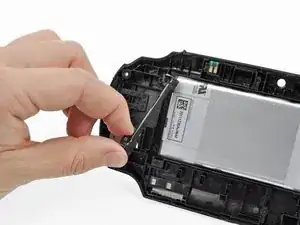
    • Entferne Kunststoff-Halteleiste des Akkus.

    When reinstalling the battery retaining bar, be sure to insert the bottom end (as shown in the photo) into the slot before driving in the screws. If you just lay it on top, you will crack the bar.

    Lee Johnson -

  11. xwePUQIY3U6KNvWS
    xwePUQIY3U6KNvWS
    NdNRLZVKwGAMGxKI
    nPB3YCMyWJOKYWrP
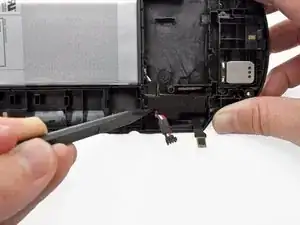
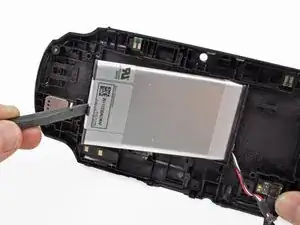
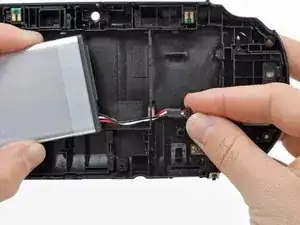
    • Hebe den Akku mit dem Finger oder einem Spudger hoch und entferne ihn.

    • Führe die Akkukabel beim Ausbau des Akkus durch die Öffnung im hinteren Gehäuse.

  12. aBlg2TFuRBIer3FX
    aBlg2TFuRBIer3FX
    ROVMYi6yNV2iUndP
    LTNVqNEXCiabeHbe
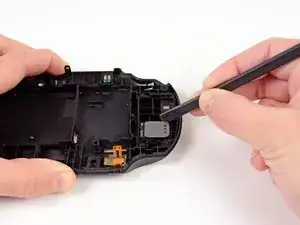
    • Schiebe den Spudger durch den Spalt zwischen dem rechten Lautsprecher und der Rückabdeckung.

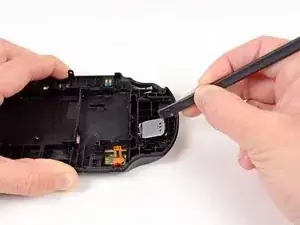
    • Hebe vorsichtig mit einem Spudger den rechten Lautsprecher aus dem Gehäuse und löse dadurch den Kleber.

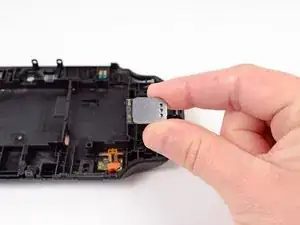
    • Entferne den rechten Lautsprecher.

  13. GsblJGJEpIMf6OIW
    GsblJGJEpIMf6OIW
    IQnOVgMqp2GeIuIN
    VpEjXPCSceSmbDKS
    • Schiebe den Spudger in den Spalt zwischen dem linken Lautsprecher und der Rückabdeckung.

    • Hebe vorsichtig mit einem Spudger den linken Lautsprecher aus dem Gehäuse und löse dadurch den Kleber.

    • Entferne den linken Lautsprecher.

  14. 2lHpSRejkKKFNtKj
    • Die Rückseite bleibt nun übrig.

Abschluss

Um dein Gerät wieder zusammenzusetzen, folge der Anleitung in umgekehrter Reihenfolge.

Brittany McCrigler

Mitglied seit: 05/03/12

90046 Reputation

5 Kommentare

I really enjoyed Your article ! I'm about to replace the touch pad, i got a Vita recently but it has some Heavy scuffs. I've seen the back touch pad has adhesive attached on it. I bought a replacement On Ebay. I'm not sure if the replacement has adhesive with it. If it doesn't what would be your guys Thoughts on what i should use?

Daniel -

lol you will need some kind of adhesive its called common sense if Sony use it you use it simple

TH3ORY -

I can't get pass Step 1. I can take out the bottom left screw of the rear touchpad but I can't take out the other 3. I bought a used Vita and there is a screw that turns but does not gout up. What should I do?

kken07655 -

In the part that remains after complete disassembly, what are the two double pins at the top for, which later come into contact with the motherboard? I already have a new panel, but it has absolutely nothing except this one contact in the lower right part ...

Kamil Dębiec -

Those are wifi antennas. You can get it out put it in to the new panel.

repairguy69 -