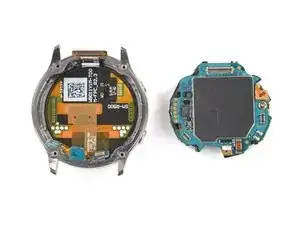
Einleitung

Folge dieser Anleitung, um das defekte Display deiner Samsung Galaxy Watch Active zu ersetzen.

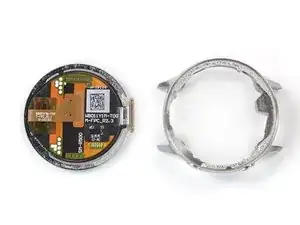
"Achtung:" Manche Ersatzdisplays kommen als ganze Einheit mit einem neuen Rahmen. Hier musst du anders vorgehen. Wenn du die ganze Displayeinheit austauschst, folge dieser Anleitung.


Du brauchst Klebestreifen, um dein Gerät wieder zusammenzubauen.

  1. RCApCkRPAgtqkLXV
    RCApCkRPAgtqkLXV
    qb4A4EIFaOI2MqEF
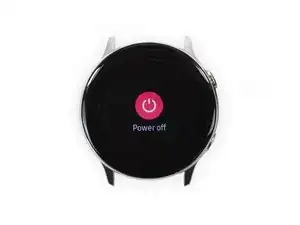
    • Schalte die Galaxy Watch Active aus, indem du den unteren Knopf etwa drei Sekunden lang gedrückt hältst. Du solltest ein kurze Vibration spüren.

    • Wenn das "Power off"-Symbol erscheint, tippe auf die Mitte des Displays, damit sich die Uhr ausschaltet. Du solltest eine lange Vibration als Bestätigung spüren.

  2. 1Jj2uF5cWgFAtF3r
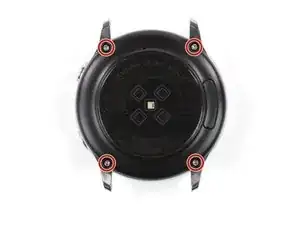
    • Benutze einen Tri-Point Y00 Schraubendreher, um die vier 4 mm langen Schrauben auf der Rückseite der Uhr zu entfernen.

    I'm having issues with getting the screws out it seems to be stripping them

    Alisha Kennedy -

  3. ksCYS2QHyDkHnEjh
    ksCYS2QHyDkHnEjh
    WWqrWonten1M6re6
    ggRiQmOIcuHNliuZ
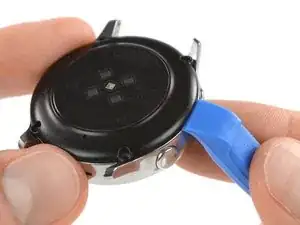
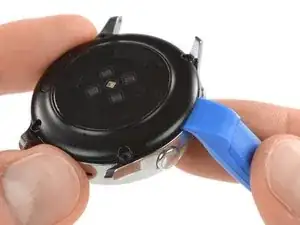
    • Benutze ein Öffnungswerkzeug und setze es bei den Knöpfen zwischen die Rückabdeckung aus Kunststoff und dem Metallgehäuse ein.

    • Drücke die Spitze des Öffnungswerkzeugs in den Spalt, um die Rückabdeckung vom Gehäuse abzulösen.

    • Entferne die Rückabdeckung noch nicht ganz, sie ist noch über ein Kabel mit dem Motherboard verbunden.

    Do i need heat for this? i can't get a pry tool in

    23william90 -

    EDIT: use a Rasor knife in the corner nest to the screw holes and it's a lot easier and less damaging to take off.

    23william90 -

    In my case there was quite a bit of glue on the edge of the back cover, and a knife was indeed the only way to pry it open. No way to get the first gap with a plastic tool.

    Marcus Groeber -

  4. sjEsBcJfgjGXLtui
    sjEsBcJfgjGXLtui
    LMRZBowcgZpA3DqF
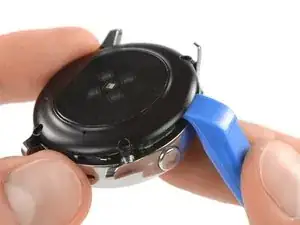
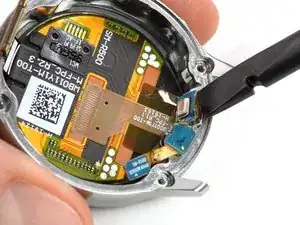
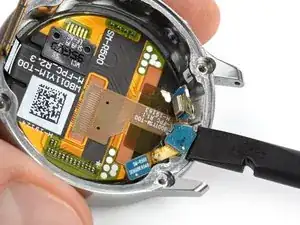
    • Hebe die Rückabdeckung vorsichtig etwa 2 cm an, um an den Stecker der Sensor-Baugruppe bei den zwei Knöpfen heranzukommen.

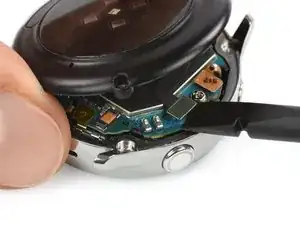
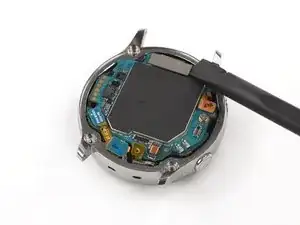
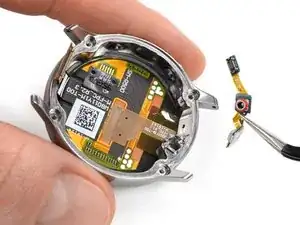
    • Benutze einen Spudger, um die Sensor-Baugruppe vom Motherboard abzutrennen.

  5. XQ1qXkBInRiA1uVd
    • Entferne die Rückabdeckung.

    Thank you very much. Nice job!

    Alvaro Grites -

  6. ZGVLCTNHPt6hHTDA
    ZGVLCTNHPt6hHTDA
    DFpCr3UJjYPTttg4
    sRvQ4XNolKIAmDIM
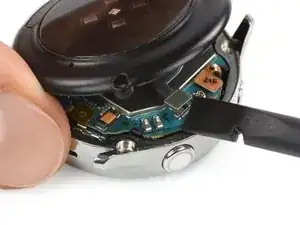
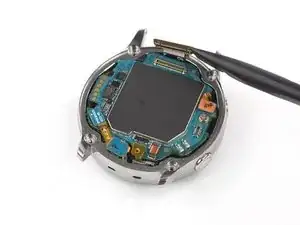
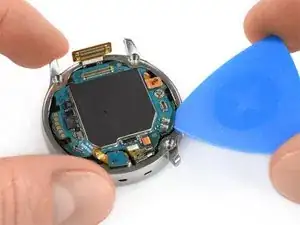
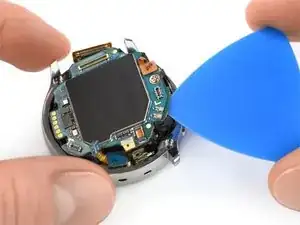
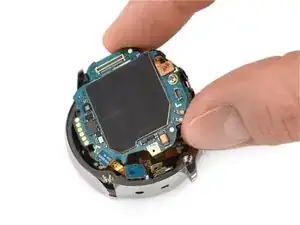
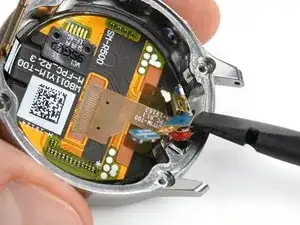
    • Benutze einen Spudger, um die Displayeinheit sowie die Mikrofon- und Drucksensor-Baugruppe abzutrennen.

  7. eZTwOTfsR4XhjwXp
    eZTwOTfsR4XhjwXp
    HqBqNdusil4POwvq
    rCRUeQ1GOQSyiSpj
    • Benutze ein Plektrum, um das dünne Klebeband der Mikrofon-Baugruppe abzulösen.

    • Achte beim Zusammenbau darauf, dass dieses Klebeband gut am Motherboard klebt, indem du es mit dem flachen Ende eines Spudgers festdrückst.

    What can I use if the glue no longer holds?

    Dominik Dittrich -

    Just make sure it lays flat and the counterpart on the back cover (the white thing at the bottom in the image of step 5) will press it down and hold it in place.

    Tobias Isakeit -

    What can I use to make it lay flat?

    Every time I press it down it just pops up again.

    Rosalie E. Morgan -

  8. nRHagQSSQCgBxIWD
    nRHagQSSQCgBxIWD
    mDNoIjCfAtLKprdJ
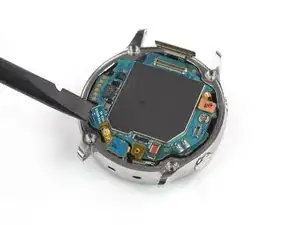
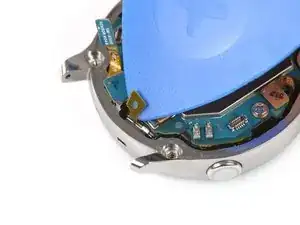
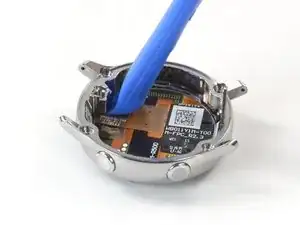
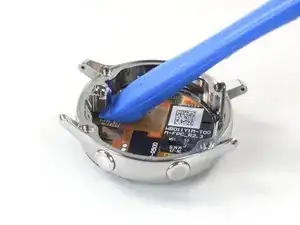
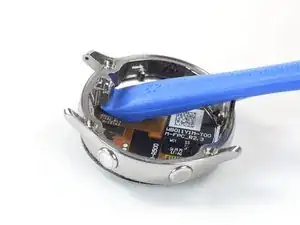
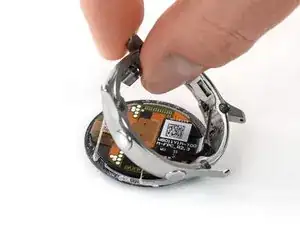
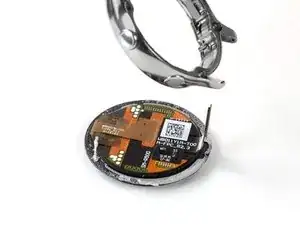
    • Setze ein Plektrum unten rechts zwischen das Motherboard und den Rahmen, um die Kern-Baugruppe hochzuheben.

  9. jwwDYN4Kb2xoEwKO
    jwwDYN4Kb2xoEwKO
    mnPNrRcallwY3oBC
    EQtZ2yrnFhyJ41d5
    • Hebe die Kern-Baugruppe heraus und entferne sie.

  10. AmUYSGPOpHXg1r63
    AmUYSGPOpHXg1r63
    dGqpvBTU3tM5LGFO
    • Das Mikrofon ist leicht am Rahmen festgeklebt, löse es mithilfe eines Spudgers ab.

    What can I use to stick this back on during reassembly?

    The leftover adhesive is not strong enough to hold it in place.

    Rosalie E. Morgan -

  11. bYqGpY1ajClV2iJ2
    bYqGpY1ajClV2iJ2
    DqKjK5sfv1AtiBCJ
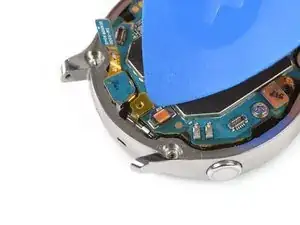
    • Benutze einen Spudger, um den barometrischen Sensor aus seiner Vertiefung im Rahmen herauszuheben.

  12. bQfbpGnxn5TFEady
    • Entferne die Baugruppe aus Mikrofon und barometrischem Sensor vorsichtig vom Rahmen.

  13. CVHwpOrSHDLxwVlC
  14. wBsok2YvDe5wTdHm
    wBsok2YvDe5wTdHm
    S5dFfqYsOHOrFYq2
    lJWnJkBrLatiUQwh
    • Setze ein Öffnungswerkzeug an die Stelle unter den Rahmen, wo der Sensor saß.

    • Heble nach oben, um das Display vom Rahmen zu lösen.

    Will this prying action damage a working screen?

    The screen on my watch needs to be glued back down, and this is the closest guide I can find for doing that.

    Rosalie E. Morgan -

    I needed to mark the inside of my watch on either side of the connector to make sure I put the face on with the cable centered properly so that it could reach the connector.

    Rosalie E. Morgan -

  15. 5UDb2MKqfPXixZ1F
    5UDb2MKqfPXixZ1F
    qwJ3EZoZO3l3pQkN
    ipNZOcTbQNuw3Yao
    • Ziehe den Rahmen vom verbleibenden Kleber ab.

    • Enferne alle Klebstoffreste vom Rahmen mit mindestens 90%igem Isopropylalkohol, bevor du das neue Display installierst.

    Any tips for cleaning the adhesive off the screen if the screen is still good?

    I accidentally scratched the black paint off the inside of the bezel trying to remove all of the adhesive.

    Rosalie E. Morgan -

    I used this instruction. Few tips:
    - You need to attack the backplate from the left or right side. I used a surgical knife to get between the plate and the housing.
    - Use some heat to remove the microphone ground tab sticker. It is made of a metal mesh and some kind of glue. In my case it didn't want to stick when putting it back together, so I needed to use some heat again to re-attach it.
    - align and mark the alignment with the screen housing and motherboard before glueing it, so the screen connector fits to the motherboard. I test-fitted the screen and the motherboard, then I used some tape across the screen and the housing. Finally cut the tape between the screen and the housing to remove the screen. When glueing it, I could now see the correct alignment with the housing.

    Darash -

Abschluss

Vergleiche das Ersatzteil mit dem Originalteil. Es kann sein, dass du vor dem Einbau des Ersatzteils fehlende Komponenten übertragen oder Schutzfolien entfernen musst.

Um dein Gerät wieder zusammenzubauen, folge den Schritten dieser Anleitung in umgekehrter Reihenfolge.

Entsorge deinen Elektromüll sachgerecht.

Hat die Reparatur nicht ganz geklappt? Versuche es mit ein paar grundständigen Lösungen, ansonsten findest du in unserem Forum Hilfe bei der Fehlersuche.

Tobias Isakeit

Mitglied seit: 31/03/14

125672 Reputation

3 Kommentare

What replacement adhesive is needed? I think my screen is ok, but it is falling out and I need to reattach it.

Rosalie E. Morgan -

Try searching on Ali Express or Wish, etc. I just completed a screen replacement, and the screen I got came with 2 adhesives for it.

Colm O'Sullivan -

How do I put the mic array back in?

Mason Thomas -