Einleitung

Dies ist eine grundständige Anleitung. Sie ist Bestandteil anderer Anleitungen und nicht zum alleinstehenden Gebrauch gedacht.

  1. VqcjPNEaoVZroUUX
    VqcjPNEaoVZroUUX
    oxLlt2g4CMIA12NV
    • Die LIDAR-Sensoreinheit ist mit der FaceID-Hardware gekoppelt. Damit FaceID weiterhin funktioniert, musst du die LIDAR-Sensoreinheit auf das Ersatzdisplay übertragen. In den folgenden Schritten siehst du, wie die Sensoreinheit entfernt und im Ersatzdisplay eingebaut wird.

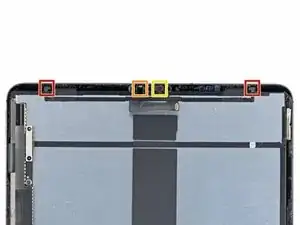
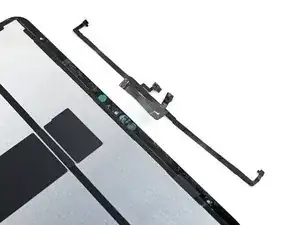
    • Die LIDAR-Sensoreinheit besteht aus insgesamt vier Sensoren:

    • Zwei Helligkeitssensoren

    • Ein Näherungssensor

    • Ein Mikrofon

    • Jeder Sensor muss einzeln vom Display abgelöst werden, bevor die ganze Einheit entfernt werden kann.

    I broke off the right most ambient light sensor. How much trouble am I in?

    imurfathersimba -

    why is this photo inverted?

    Ved Mo -

  2. u5C3BRJgFnqN3WIw
  3. iGVXOgT1MRNPhKAw
    iGVXOgT1MRNPhKAw
    1JitKLEEdZQCUj1u
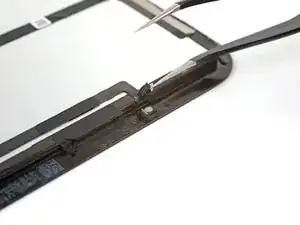
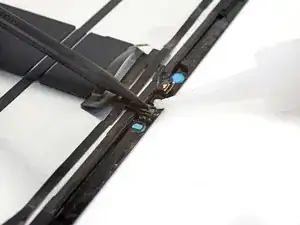
    • Setze eine Spitze einer abgewinkelten Pinzette zwischen den Helligkeitssensor und das Display ein.

    • Heble nach oben, bis sich der Sensor vom Display ablöst.

    • Eventuell brauchst du dafür ziemlich viel Kraft.

    • Wiederhole den Vorgang für den anderen Helligkeitssensor.

    The ambient light sensor system is constructed with a few component parts arranged in layers starting with its connection cable down to the last part that is attached to the glass.

    It is not super clear from the photos/instructions between which layers we need to pry to separate the sensor from the part that touches the glass. I'd like to see a straight on view of the exposed layer.

    I think I ended up separating the ambient light sensors incorrectly; my exposed sensor layers don't look the same as those you see of the stock part for sale on this site. Those have that layer with the small circle, but the instruction photos here show that layer left attached to the glass.

    My FaceID doesn't work and I suspect it may be because of this mistake I made.

    Chong Lee Khoo -

    Yes, the diffuser was a black film layer with a white milky circle.

    We broke one of the sensors off from the cable, and ended up just having one working ambient light sensor.

    FaceID however continued to work with that one sensor in the end.

    quak -

    Following the guide instructions left the diffuser layer of the ambient light sensor adhered to the screen. The use of an Exacto knife with a straight 6mm perpendicular blade, was used to separate this layer from the screen. All of the other sensors were separated successfully with the use of the Exacto knife.

    Dools -

    Thank you for that hint! A carefully applied Exacto knife worked much better than the original recommendation, for all of the sensors!

    quak -

  4. YiFNYvoSXvayqMsJ
    YiFNYvoSXvayqMsJ
    ZCd6BEIxjdgBc4EA
    WHyfa5NAlEtWyyIL
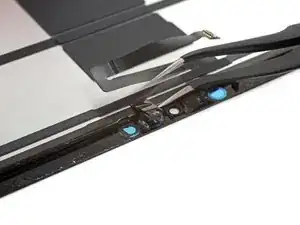
    • Setze eine Spitze einer abgewinkelten Pinzette zwischen das Kabel zum Näherungssensor und das Display ein.

    • Schiebe die Pinzette zum Display hin und heble gleichzeitig den Sensor vom Display ab.

    • Wahrscheinlich musst du mehrmals mit dem iOpener erwärmen und benötigst ziemlich viel Kraft.

  5. 2oRBUiPlMVfj5pKv
    2oRBUiPlMVfj5pKv
    OQNseJyHwbkx4UcV
    • Ziehe ein eventuell vorhandenes Klebeband vom Mikrofon ab.

    • Lege das Klebeband zur Seite, du benötigst es beim Zusammenbau wieder.

    Any hints on re-applying the tape? It didn't stick anymore properly.

    quak -

  6. QviiEs5G2NsIdL2P
    QviiEs5G2NsIdL2P
    q11DmSQAyjsHFiNT
    wO4PD4Q2OyQxsxm4
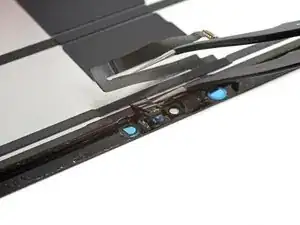
    • Schiebe ein Öffnungswerkzeug unter das Mikrofon, um es aus der Klebeverbindung zu lösen.

    • Heble nach oben, bis sich das Mikrofon vom Display ablöst.

  7. jQQQwYT4hL1c2qtu
    jQQQwYT4hL1c2qtu
    PnscDrUADoJ1lriR
    yWIVuaDDxciI4dq4
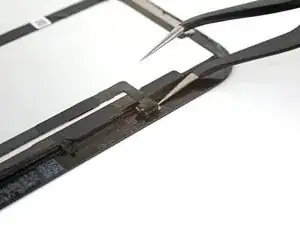
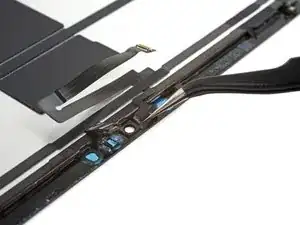
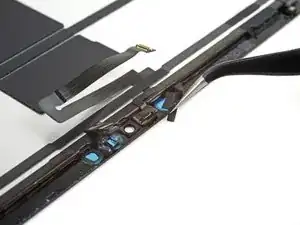
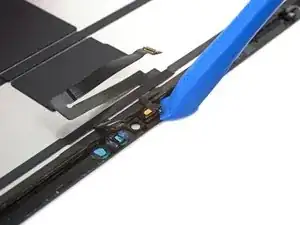
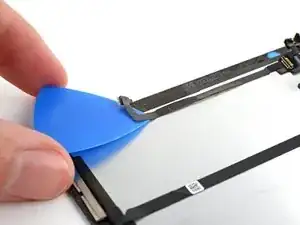
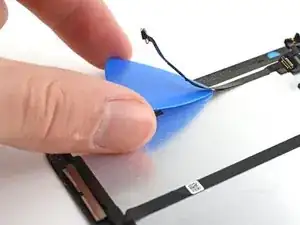
    • Schiebe ein Plektrum unter das Kabel zur LIDAR-Sensoreinheit und trenne es vom Display ab.

  8. FTXEEWMAUgbZNMEW
    FTXEEWMAUgbZNMEW
    UVdJT2xYVUfGoRUR
    T3jBiQcjvcioeDDT
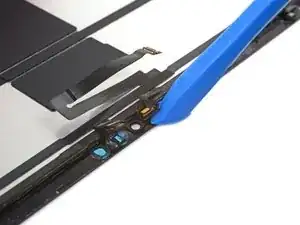
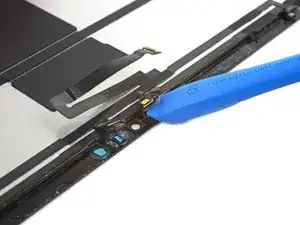
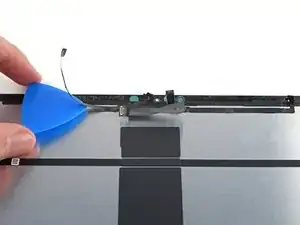
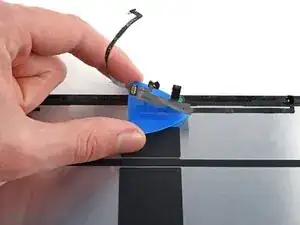
    • Schiebe das Plektrum weiter unter der LIDAR-Sensoreinheit entlang, bis sie komplett vom Display abgelöst ist.

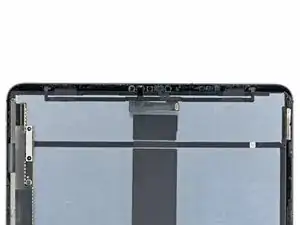
    • Entferne die LIDAR-Sensoreinheit.

  9. iXJGhKwaMUsPJxMT
    • So wird die Einheit wieder eingebaut:

    • Richte die LIDAR-Sensoreinheit auf deinem Ersatzdisplay aus.

    • Klebe die Kabel mit doppelseitigen Klebeband, wie z.B.Tesaband am Display fest.

    • Befestige die Sensoren mit geeignetem Kleber, wie z.B. E6000 in ihren Ausschnitten im Display.

    • Trage den Kleber nur an den Kanten der Sensoren auf. Wenn der Kleber auf ihre Vorderseiten kommt, gehen sie kaputt.

    Applying the E6000 was very cumbersome, as the cable was quite springy and lifted up the sensors. We needed to weigh the sensors down for some hours to really have them stick.

    quak -

    E6000 adhesives are not mentioned in the materials list at the top, I believe this should be included.

    Tijmen -

Abschluss

Um dein Gerät wieder zusammenzubauen, folge den Schritten in umgekehrter Reihenfolge.

Chayton Ritter

Mitglied seit: 21/08/20

23139 Reputation

0 Kommentare