Einleitung
Diese Anleitung zeigt, wie die Kopfhörerbuchseneinheit ausgetauscht wird. Die Einheit besteht aus der Kopfhörerbuchse und den elektronischen Standby-/Lautstärketasten.
-
-
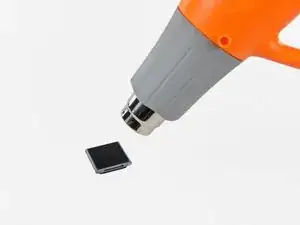
Nimm einen Haartrockner oder ein Heißluftgebläse und erwärme damit den den Kleber, mit dem der Rand der Frontpanel-Baugruppe am äußeren Gehäuse befestigt ist.
-
-
-
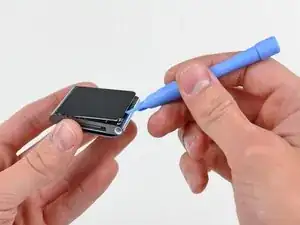
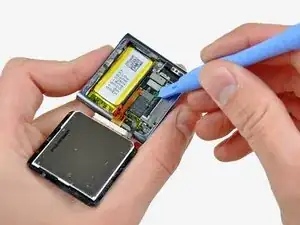
Heble die Frontpanel-Baugruppe - solange sie noch warm ist - mit der Kante eines Öffnungswerkzeugs von der Seite mit dem Kopfhöreranschluss vom Nano ab.
-
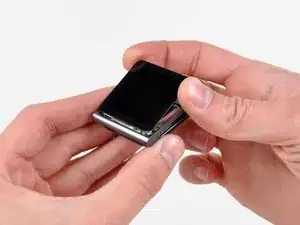
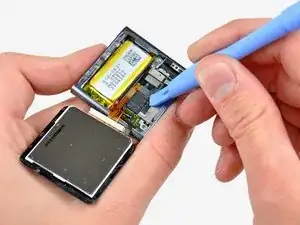
Fahre fort, die Frontpanel-Baugruppe am Rand vom äußeren Gehäuse abzuheben. Achte darauf, dass das Displaykabel an der linken Seitenkante nicht beschädigt wird.
-
-
-
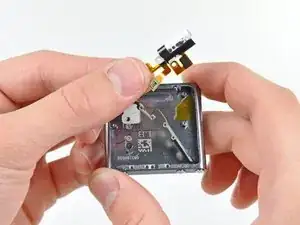
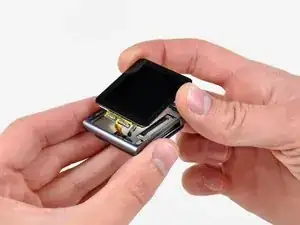
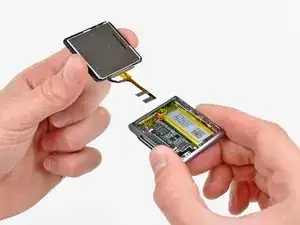
Hebe die Frontpanel-Baugruppe an der Seite mit dem Kopfhöreranschluss hoch.
-
Ziehe die Frontpanel-Baugruppe leicht von der linken Seite weg, um das Displaykabel freizugeben.
-
-
-
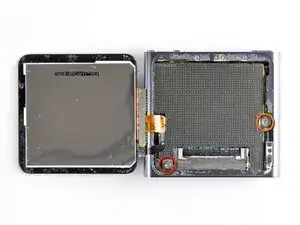
Lege die Frontpanel-Baugruppe neben den Nano.
-
Entferne folgende zwei Schrauben:
-
Eine 2,3 mm lange Kreuzschlitzschraube
-
Eine 2,6 mm lange Kreuzschlitz-Schulterschraube
-
-
-
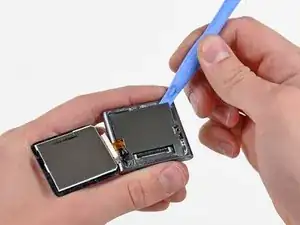
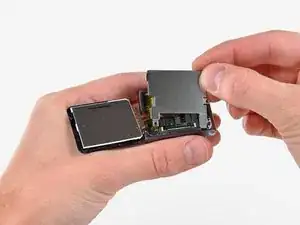
Heble die Metallabschirmung mit einem Öffnungswerkzeug von der oberen rechten Ecke her aus dem Nano heraus.
-
Entferne die Metallabschirmung vom Nano.
-
-
-
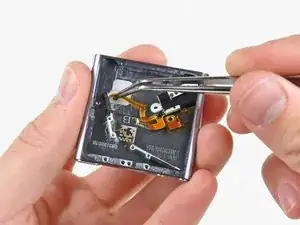
Heble die Stecker am Displaydatenkabel und am Touchscreenkabel mit einem Öffnungswerkzeug aus ihren Anschlüssen auf dem Logic Board hoch und trenne sie ab.
-
-
-
Entferne die Frontpanel-Baugruppe, achte dabei darauf, dass sich die beiden Kabel nicht verfangen.
-
-
-
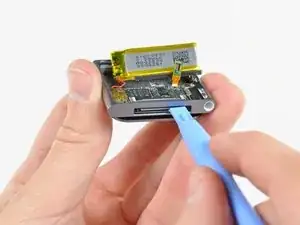
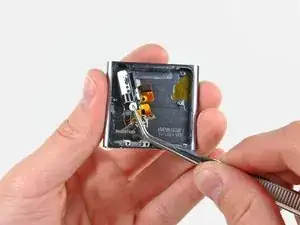
Nimm ein iPod-Öffnungswerkzeug und hebe den Stecker der Kopfhörerbuchse aus seinem Anschluss auf dem Logic Board hoch und trenne ihn ab.
-
-
-
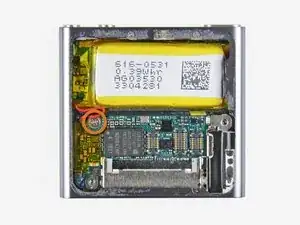
Entferne die einzelne 1,9 mm Kreuzschlitzschraube, mit der das Logic Board am äußeren Gehäuse befestigt ist.
-
-
-
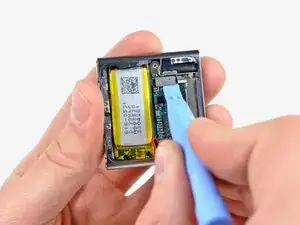
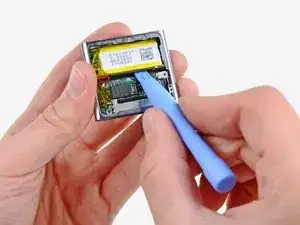
Heble den Akku mit dem iPod-Öffnungswerkzeug behutsam aus der Klebeverbindung zum äußeren Gehäuse heraus.
-
Ziehe den Akku mit dem Daumen zur linken Seite des Nano hin und heble gleichzeitig die andere Akkukante aus dem äußeren Gehäuse heraus.
-
-
-
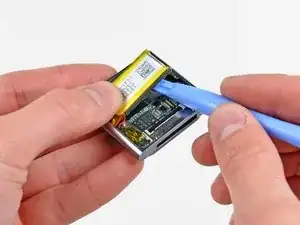
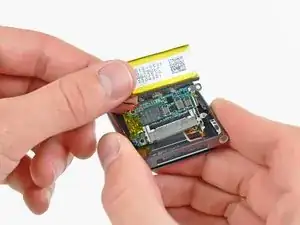
Nimm das iPod-Öffnungswerkzeug und heble behutsam das Logic Board aus der Klebeverbindung zum äußeren Gehäuse.
-
-
-
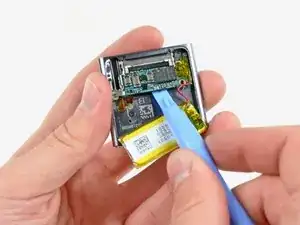
Schiebe den Dock-Anschluss vorsichtig mit dem iPod-Öffnungswerkzeug zur Mitte des Nano hin.
-
Entferne die Logic Board Einheit vom Nano. Achte sorgfältig darauf, dass das Kabel zur Kopfhörerbuchse nicht beschädigt wird.
-
-
-
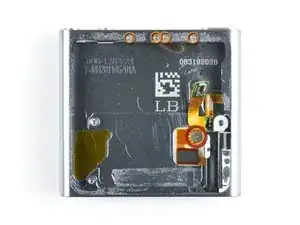
Entferne die folgenden fünf Schrauben:
-
Eine 1,7 mm Kreuzschlitzschraube
-
Vier 3,9 mm Kreuzschlitzschrauben
-
-
-
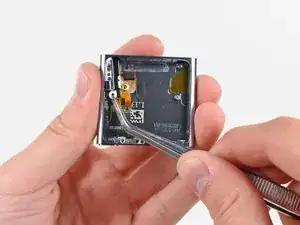
Ziehe das Flachbandkabel zur Kopfhörerbuchse sehr vorsichtig zu Dock-Anschluss hin, um die Standby- und Lautstärketasten vom äußeren Gehäuse zu lösen.
-
Entferne die Kopfhörerbuchseneinheit.
-

Um dein Gerät wieder zusammenzubauen, folge den Schritten in umgekehrter Reihenfolge.

13 Kommentare
Be aware, When replacing the on/off button, it is extremely difficult to get the rubber mould to fit correctly behind the power button. It will in all likelihood take you a good few times before the power button works properly, so make sure you test it first before reassembling!
Dave -
My problem was that there was a small plastic bit missing from the on/off-switch. I just glued it back on and now the device works again.
Here is a picture of the plastic bit and the switch where it belongs to:
http://i49.tinypic.com/14t62x4.jpg
And here is a video that helped me to find the issue:
if your problem is that your player is pausing randomly - maybe just try using some WD-40 or similar to clean the contacts will fix that. you can just spray some WD-40 into the headphone-jack without dismantling it.
don't use to much WD-40, and hold your player with the headphone-jack pointing down. otherwise it may happen that the display gets damaged(happend to me - my display now discoloroud because of the liquid / but is functional anyway).
hagl -
maybe just try using some ~~WD-40 or similar to clean the contacts will fix that. you can just spray some WD-40 into the headphone-jack
..that's because WD-40 is not supposed to be used to clean contact points on electronics. If you already damaged your own device why on earth would you tell someone to ruin their own?
Don't ever use WD-40 to clean any electronic device especially the audio contact points in the headphone jack.
There is plenty of audio contact cleaner available for electronics that is safe for your device to clean and lubricate the jack. I prefer Caig Deoxit for audio contacts particularly as they specialize in a number of contact restoring solutions for everything electronic whether it be mechanical metal structure or plastic surface circuits. www.deoxit.com
Do I need new adhesive to reassemble?
David Wallin -
Make sure to not break this cable even if your backlight is out, there can be internal corrosion that prevents the backlight from working. It may still work with the old display.
Matthew Borgholthaus -