Einleitung

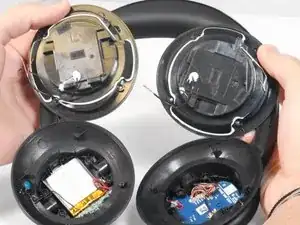
Diese Anleitung zeigt dir, wie man die Lautsprecher in den Anker Soundcore Life Q30 Kopfhörern austauscht. Die Lautsprecher sind das Bauteil, welches den Ton erzeugt, weshalb ein defekter Lautsprecher einen verzerrten oder überhaupt keinen Ton bedeutet.

Um den Lautsprecher zu ersetzen, benötigst du einen Ersatz und Werkzeug zum Löten.

Bevor du loslegst solltest du sicherstellen, dass die Kofhörer abgeschaltet sind und nicht mit dem Ladegerät verbunden sind.

  1. MFbPvrPJWnAafMKl
    MFbPvrPJWnAafMKl
    3fWaoYPfNiHr2bNv
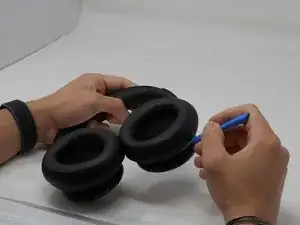
    • Richte die Kopfhörer so aus, dass die Lautsprecher vor dir liegen.

    • Stelle das Scharnier so ein, dass die Lautsprecher nach oben zeigen.

    • Stelle sicher, dass die Kante, an der das Ohrpolster mit dem Rest der Hörer verbunden ist, leicht erreichbar ist.

  2. Ch2fJ44SjHwaXasZ
    Ch2fJ44SjHwaXasZ
    56vVcntGuIU44hEq
    ViMNYRmXZTNi141i
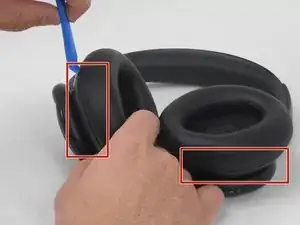
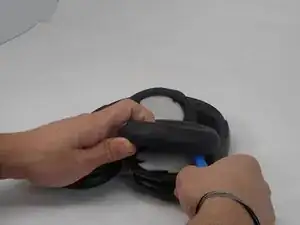
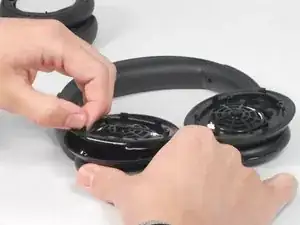
    • Halte die Seite mit dem defekten Lautsprecher mit der einen Hand so, dass du mit der anderen Hand das Hebelwerkzeug aus Plastik in die Kante am Ohrpolster führen kannst.

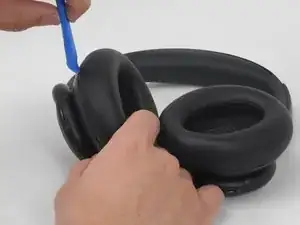
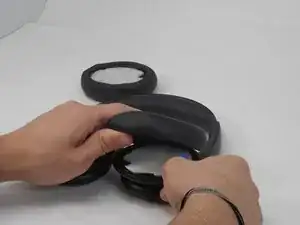
    • Hebele vorsichtig das Ohrpolster von dem Gehäuse ab.

    • Falls du die andere Seite auch reparieren musst, wiederhole den Schritt auf der anderen Seite.

  3. 1m6gCfhXHdenG3NX
    1m6gCfhXHdenG3NX
    YKopSMaC1EZ1tCKi
    pFcSbLXXMMYoJ6YT
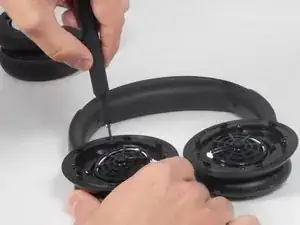
    • Entferne die vier 5,7 mm Kreuzschlitzschrauben #00, mit denen die Abdeckung befestigt ist.

    • Nimm die Lautsprecher von dem Gehäuse ab.

    • Wenn du damit Probleme hast, kannst du Pinzetten nehmen um besser zu greifen.

  4. NooXcLpcJlNTZOfI
    NooXcLpcJlNTZOfI
    3jXlLZifPOfpyfyU
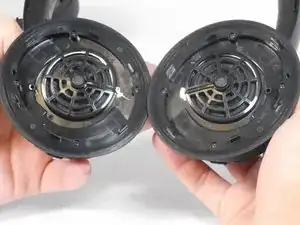
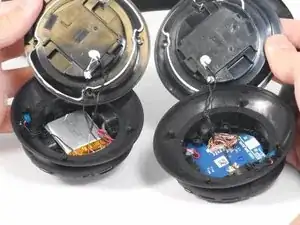
    • Hebe die Lautsprecher aus dem Gehäuse.

    • Löte die Kabel der Lautsprecher von der Platine ab.

    • Merke dir wie die Kabel verbunden waren, da du später den Ersatz wieder festlöten musst.

    Removing the wires from the circuit board seems to be close to impossible in my case. They covered all the solder joints in some special kind of transparent glue that doesn't really melt even when you apply 350°C. I'm pretty sure there is no technical advantage in doing so and this is purly to prevent people from easily swapping the drivers.

    Frieder Schrempf -

    I got rid of it with a 350°C heat gun and some pliers. It didn't melt, but got soft enough to be pulled out

    Sexy Dog -

    Thanks for these instructions. I'm very comfortable working on small circuits like these. One tip to future readers about to do this battery swap. The battery I used was from Aliexpress #503035 which is 30x35x5 mm.

    No wires need to be removed from the circuit board. The only wires you need to deal with are the 2 color coded battery wires. Simply cut the old battery wires about 10 to 15mm from the circuit board and cut the wires back on the new battery to about 20mm in length. Strip all 4 wire ends back about 3mm. Solder the battery wires (pre tinning is necessary on such small wires). Apply some small pieces of tape to the solder connections, any type of tape is fine, we're only dealing with 4v here. Put a small piece of double sided tape on the back of the battery. Reassemble... the disassembly requires removing a total of 10 small 00 Phillips head screws. The lower section is partially held by screws and plastic snap connections. If you don't have a plastic pry tool to remove the ear cup use a butter knife.

    JohnG -

Abschluss

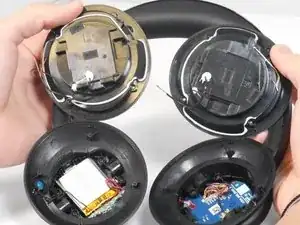
Löte den Ersatzlautsprecher an die Kontakte. Diese Anleitung kann dir Hilfe beim Löten geben. Wenn alles fest ist, kannst du die Schritte rückwärts befolgen um alles wieder zusammenzusetzen.

Jalen Juzeszyn

Mitglied seit: 15/02/24

561 Reputation

3 Kommentare

Where do I find a replacement driver?

Julen Hernández -

My Anker headphones have an issue where the left earbud isn't working. What diagnostic steps would you recommend to identify and resolve this problem?

Wellington Nunes -

This guide is incomplete. Replacing the driver involves removing the glue that can be seen surrounding a plastic cup where the driver lies.

In the images it's white, in my case it was dark-yellow. It's extremely difficult to open this up, I had to use a heat gun, screwdrivers and a knife, ended up severely deforming the plastic.

The driver is easy to replace after and just involves soldering.

Sexy Dog -