Einleitung

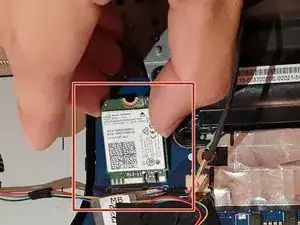
Dir Drahtloskarte stellt die Verbindung zum Drahtlos-Netzwerk (Wi-Fi) her.

Wenn dein Asus ROG G752V einen blauen Bildschirm "blue screen" zeigt oder die Drahtloskarte nicht mehr richtig funktioniert, muss sie wahrscheinlich ausgetauscht werden.

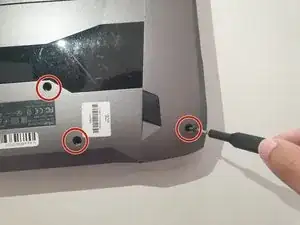
Schalte vor Reparaturbeginn das Gerät aus und ziehe alle Stecker ab.

Richte das Werkzeug, bevor du anfängst.

Folge dann den nachfolgenden Schritten.

  1. 5YHSEnLP1yKo1ybB
    5YHSEnLP1yKo1ybB
    B6wVqJQs5XgkqbWh
    • Ist das Ladegerät wirklich abgetrennt?

    • Entferne die elf Gummistopfen mit einer Pinzette von der Bodenplatte.

  2. pKALxPtXILtuIOo4
    pKALxPtXILtuIOo4
    TlnRlTiLeBUMfPJT
    • Entferne die zwölf Kreuzschlitzschrauben #0 von der Bodenplatte des Laptops.

    • eine dieser Schrauben befindet sich unter dem Gummistopfen in der Mitte.

  3. G1xCNZw2nYxYBZNK
    • Ziehe an der elastischen Dichtung, um die Serviceklappe zu öffnen.

  4. fR6JBPWovQdKmZdQ
    • Entferne die sechs 5,2 mm langen Kreuzschlitzschrauben #00 unter der Serviceklappe.

  5. GY1OnofIKxmnCNiN
    • Ziehe das optische Laufwerk mit der Hand heraus.

    After you do this there are 3 more screws under the optical drive that must come out, see the battery change guide for a picture

    steinomite -

  6. uTEQDdQZQKhDWkqo
    uTEQDdQZQKhDWkqo
    pDwJmCLPRZbtn3Ef
    • Heble die Bodenplatte mit einem Öffnungswerkzeug aus Kunststoff vom Computer ab.

    • Am besten geht es, wenn du am vorderen Rand beginnst und dann zu den Seiten übergehst.

  7. jXDEmbHUCMkSUGUU
    jXDEmbHUCMkSUGUU
    iNZkuXPfeFNYoHwY
    • Hebe die Tastatur etwas 2,5 cm hoch und ziehe sie gleichzeitig langsam heraus.

    • Die Tastatur ist noch mit Kabeln an der Hauptplatine angeschlossen, du darfst sie deswegen nicht höher als 5 cm über den Laptop heben.

  8. 16Tha1HQoLiDRYUa
    16Tha1HQoLiDRYUa
    HvyFK6D32TA4NqoA
    PVrdLyPlrwYTcOCV
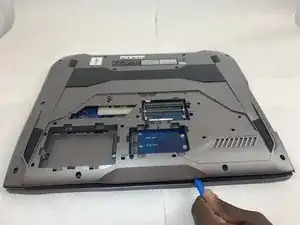
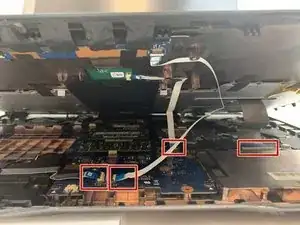
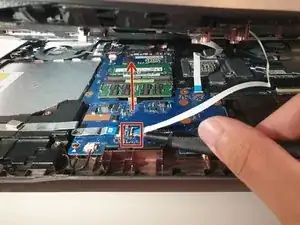
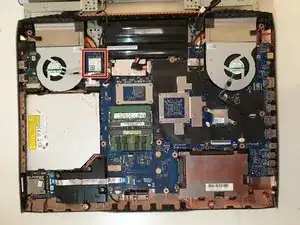
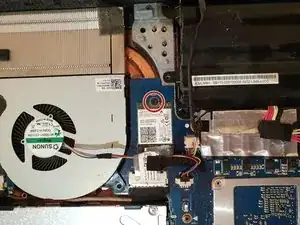
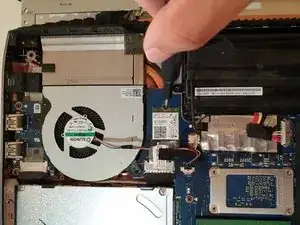
    • Hebe alle drei Flachbandkabel mit einem ESD-sicheren Werkzeug nach oben heraus und trenne sie ab.

  9. 5Vvsft4GYqsKp2Yj
    5Vvsft4GYqsKp2Yj
    eKGUnBIXV6c5oayZ
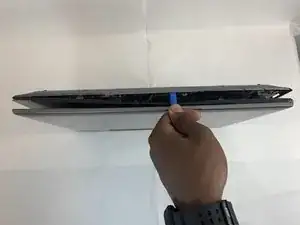
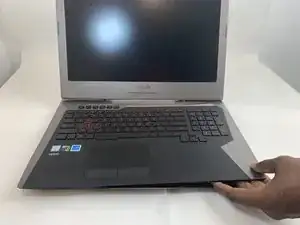
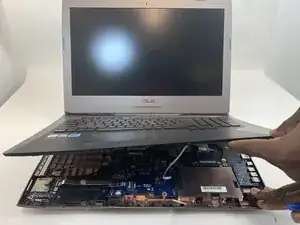
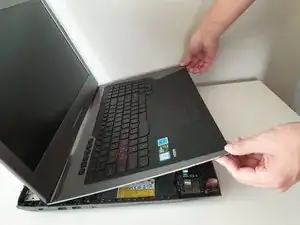
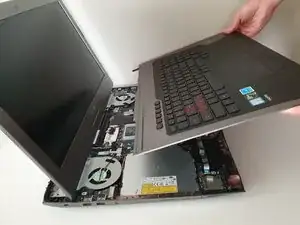
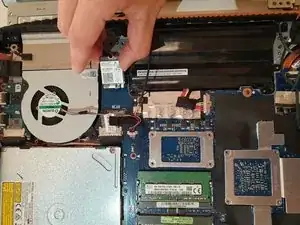
    • Wenn die Kabel abgetrennt sind, hebe die Tastatur etwas 5 cm nach oben und entferne sie vom Gerät.

    • Öffne das Display so wie auf dem Bild gezeigt. Du verhinderst dadurch, dass sich irgendein Bauteil verbiegt.

    What about the rest of the keyboard removal?

    Ken Johnstone -

  10. PPQCCKyCh3WHI5Uy
    PPQCCKyCh3WHI5Uy
    TQKS5IQCTkA3r6RA
    51RkPkcOwgFisnTm
    • Entferne die einzelne 3 mm lange Kreuzschlitzschraube #00 von der Drahtloskarte.

    Throughout guides, check to make sure the markup matches the bullets.

    Alex Watkins -

    Also, make sure to remove locate steps—what do you want the user to do with the wireless card?

    Alex Watkins -

  11. jHLJVPtBLfJGbtcq
    jHLJVPtBLfJGbtcq
    AsVL6164wTLqegB5
    • Ziehe die Drahtloskarte mit der Hand zum Display hin heraus, um sie zu entriegeln.

    • Wackle vorsichtig an der Karte, während du sie von der Hauptplatine abziehst.

    How should I use my hand?

    Alex Watkins -

    What card type is that? What can replace it?

    datsun vents -

    I replaced my M.2 wifi card with a new Intel AX210.

    Very good upgrade!

    I now have WiFi6 and Bluetooth 5.2

    You should probably go ahead and order new IPEX 4 MHF4 Antenna 2.4GHz 5GHz 3dBi Internal Laptop WiFi Antenna for M.2. - just so you have them. To replace the antennas, there are 4 screws at the bottom of the screen (hidden behind plastic covers). Once you get those screws out you will be able to pop the bezel off starting at the left and right sides on the top. After you get the bezel off, disconnect the camera module then unscrew the lcd mounts and fold the lcd away from the shell so that you can run the new antenna. Mind how they routed and taped the old antenna wires and do the same with the new antenna.

    Fred Sanford -

Abschluss

Um dein Gerät wieder zusammenzubauen, folge den Schritten in umgekehrter Reihenfolge.

Jeong

Mitglied seit: 16/09/19

1212 Reputation

0 Kommentare