Einleitung
Die Logitech M720 und andere Mäuse leiden nach einigen Jahren oft an Fehlfunktionen bei den Mikro-Tasten für die linke und die rechte Maustaste.
Das Problem kann oft mit dem Biegen der Feder im Inneren des Tastengehäuses behoben werden, doch manchmal ist die Feder zu verschlissen, um sie wieder zuverlässig funktionieren zu lassen.
Diese Anleitung führt dich durch das Auseinanderbauen der Maus und zeigt dir, wie man die Mikro-Tasten ersetzt, wodurch die Maus am Ende so gut wie neu funktionieren wird!
Werkzeuge
Ersatzteile
-
-
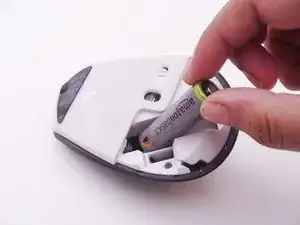
Beginne mit dem Auseinanderbauen, indem du die Batterie entfernst.
-
Löse den Aufkleber unter der Batterie, um die kleine Kreuzschlitzschraube freizulegen. Da meine Maus bereits auseinandergebaut wurde, fehlt der Aufkleber auf den Bildern.
-
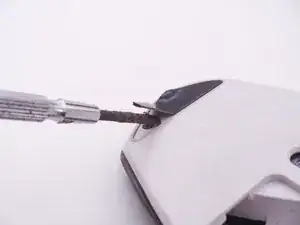
Verwende einen Schlitzschraubendreher oder ein ähnliches Werkzeug, um das obere Gummipad zu entfernen und so zwei weitere Schrauben freizulegen.
-
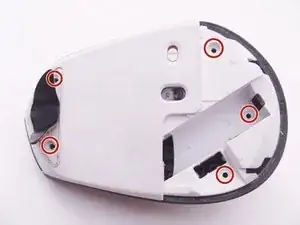
Löse die insgesamt 5 rot eingekreisten Kreuzschlitzschrauben.
-
-
-
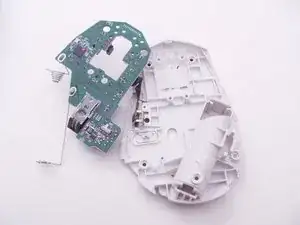
Trenne vorsichtig den oberen Teil und den unteren Teil der Maus voneinander und achte dabei darauf, dass du die beiden Gehäusehälften nicht zu weit auseinanderziehst, um so Schäden an den Flachbandkabeln zu vermeiden, die die Tasten in der oberen Gehäusehälfte mit der Hauptplatine verbinden.
-
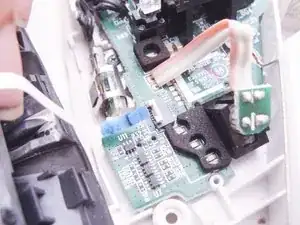
Öffne die Clips und stecke wie gezeigt die Flachbandkabel an der Hauptplatine aus. Die beiden Gehäusehälften der Maus sind nun vollständig voneinander getrennt.
-
-
-
Die Anschlüsse auf der Hauptplatine sind viel kleiner und fragiler als die Anschlüsse am anderen Ende. Es ist leichter, die kleinen Anschlüsse unberührt zu lassen und dafür die großen am anderen Ende auszustecken.
-
-
-
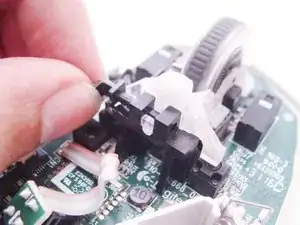
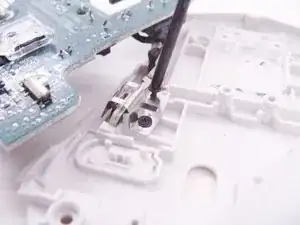
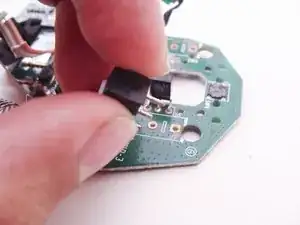
Öffne die Clips, die die durchsichtige Baugruppe des Scrollrades mit der Plastikplatte darunter verbinden.
-
Hebe die Baugruppe des Scrollrades nach vorne an und achte dabei darauf, keine der kleinen Federn darunter zu verlieren. Die Federn fehlen bereits in meiner Maus, aber ich habe ihre Positionen rot markiert.
-
Löse die beiden Schrauben, die die Plastikplatte halten, auf der zuvor die Baugruppe des Scrollrades montiert war.
-
-
-
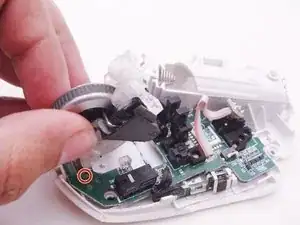
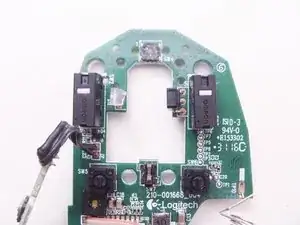
Hebe die Hauptplatine sorgsam heraus und lege sie vorsichtig bei Seite. Achte dabei darauf, dass du die Flachbandkabel, die immer noch mit den kleinen Tasten und der Baugruppe der Halterung verbunden sind, nicht beschädigst.
-
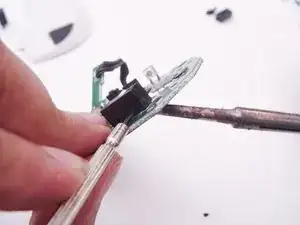
Löse die Schrauben und entferne die Metallhalterung. Das Flachbandkabel und eine kleine Platine an dessen Ende sollten nun freigegeben sein.
-
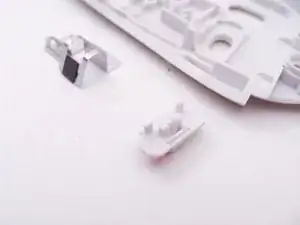
Achte darauf, dass du die kleine Plastikabdeckung des An- und Ausschalters nicht verlierst, der wenn du das Gehäuse umdrehst, nun einfach nach unten herausfallen kann.
-
-
-
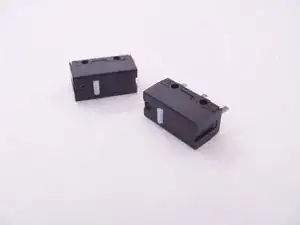
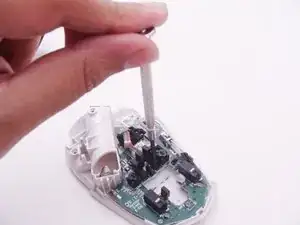
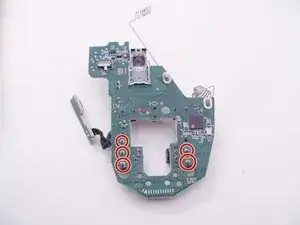
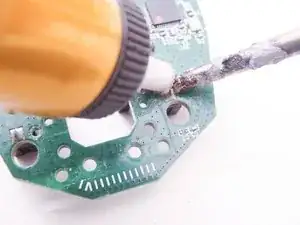
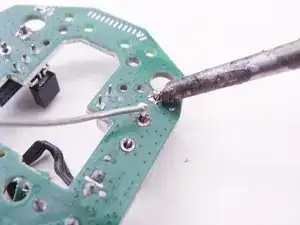
Suche und entlöte die Lötpads der Mikro-Tasten mit einer von dir bevorzugten Methode, wie zum Beispiel eine Entlötpumpe oder eine Entlötlitze. Deine Lötspitze sollte sauber und verzinnt sein, also genau nicht so wie meine ranzige Lötspitze aussehen.
-
Falls nötig, heble die alten Tasten mit einem Schlitzschraubendreher an, währen du die Lötpads erwärmst.
-
-
-
Baue die neuen Tasten ein.
-
Achte erneut darauf, dass deine Lötspitze korrekt verzinnt und sauber ist. Deine Lötspitze sollte exakt das Gegenteil von meiner verdreckten sein.
-
Um dein Gerät wieder zusammenzubauen, befolge die Anleitung in umgekehrter Reihenfolge.
11 Kommentare
Next time show ALL screws, type and position.
On this mouse screws are not all similar and if somebody forget that your “guide” don’t help
Thanks for the guide! It helped so very much.
thank you! i only needed to open and clean the dust inside and it clicks well again.
mine was double clicking when i click and hold.
was about to unsolder and swap the left and right switches but didn't have to go all the way there.
screws are fine i think. just be careful and put them on a safe place with the same relative positions to make it easier to put back, as with all other devices when disassembling.
UPDATE: mine is double clicking again 1 month later, and just found out recently from reddit that breathing humidity to the switches will often fix the double clicking problem with these Omron switches inside. it's magic! i tried and it really fixed it.
ted -
como has quitado los tornillos? lo estoy intentanto.. pero es imposible!!
Lucas Walkowicz -