Einleitung

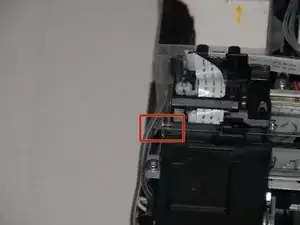
Wenn dein Brother MFC-490CW blasse oder Ausdrucke mit Streifen produziert, eine Meldung erscheint, dass der Druckkopf ausgetauscht werden soll oder der Druckkopf sehr oft zwischendurch gereinigt werden muss, musst du wahrscheinlich den Druckkopf wechseln.

Lies dir zunächst unsere Troubleshooting Seite durch, bevor du den Druckkopf tauschst.

In nachfolgender Anleitung wird Schritt für Schritt gezeigt, wie der Druckkopf getauscht wird. Du benötigst die richtigen Werkzeuge und etwas Zeit.

Trenne wie immer bei Reparaturen an elektronischen Geräten das Netzkamera ab, damit du keinen Stromschlag erhältst.

  1. GCBQ6eIWbknR63e4
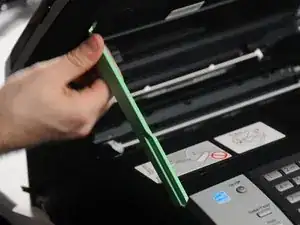
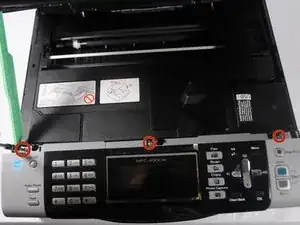
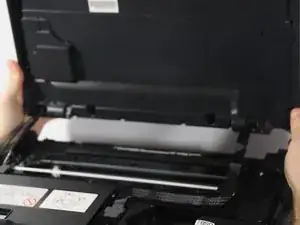
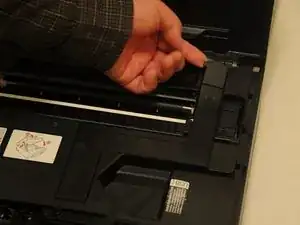
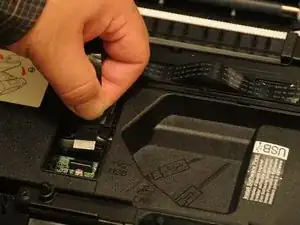
    • Entferne die drei 12,1 mm langen Kreuzschlitzschrauben #2, mit denen das Frontpanel befestigt ist.

  2. MrPrlZBX1tQROyxD
    MrPrlZBX1tQROyxD
    CIdaKfHqZXfMMnik
    YFUV2bsofqBLSIZD
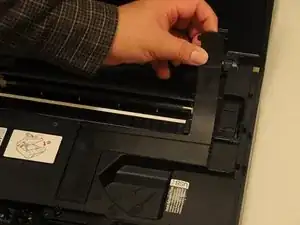
    • Hebe das Frontpanel vorsichtig vom Drucker ab.

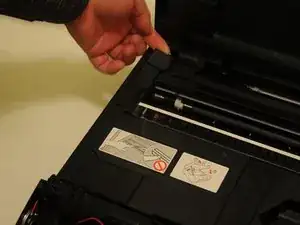
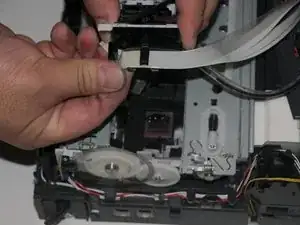
    • Hebe die Datenkabel behutsam nach oben und trenne sie ab.

  3. NV5Hd3OclvODNScD
    NV5Hd3OclvODNScD
    MfeUy5JDt5bebjys
    RFoKjJptLXcrduip
    • Klebe die Oberkante und Unterkante der Scannereinheit mit Klebeband fest, bevor du den haltearm entfernst.

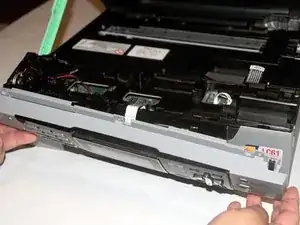
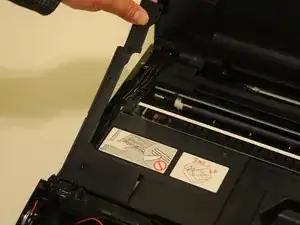
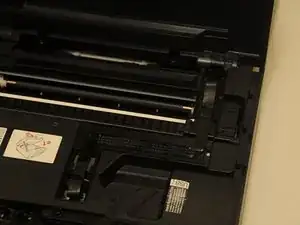
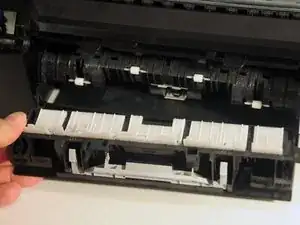
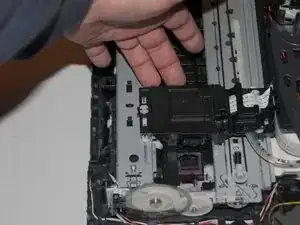
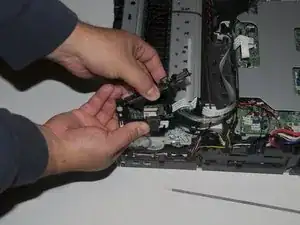
    • Hebe die Scannereinheit hoch.

    • Verdrehe behutsam das Oberteil des Haltearms.

    • Der Haltearm sollte sich oben aus der Scannereinheit lösen.

    • Drehe den Arm etwa 45°, um ihn unten aus dem Gerät zu lösen.

  4. Qhe2VQQKhxqtOIjv
    Qhe2VQQKhxqtOIjv
    i3yQY4qb4QHgKuEA
    rroeZ5eQDlSuqW3G
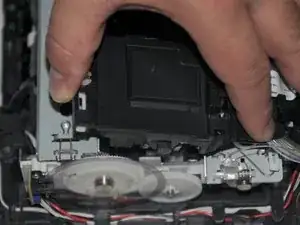
    • Schiebe die Einheit nach links oder rechts und drücke sie vom Gerät weg.

    • Wenn ein Scharnier frei vom Gerät ist, entferne genauso auch das andere Scharnier.

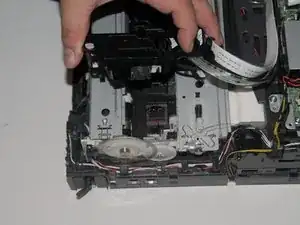
    • Lege die Einheit vorsichtig auf die Arbeitsfläche.

    • Ziehe nicht zu stark daran, zuerst müssen noch die Verbindungskabel abgetrennt werden.

  5. 6vqFZPjaR6TjQoTU
    6vqFZPjaR6TjQoTU
    LuWi1Ch2FcDCyJbm
    UdmZPU5VXLCHGQyv
    • Löse die Abdeckung mit dem Finger oder einem Öffnungswerkzeug ab.

    • Fange damit hinten am Drucker an und hebe die Abdeckung nach und nach ab.

  6. Zex2Ne6pH3ayikPP
    Zex2Ne6pH3ayikPP
    JEWPwsrbqQgp33LA
    6rbycgYyDvmXj5Tk
    • Löse die Abdeckung rechts in gleicher Weise ab.

  7. w6TWgiZgCeHPWkSE
    w6TWgiZgCeHPWkSE
    PZobyoqOCO4GCaAD
    25xZOxfV2F5QDlKq
    • Bevor du die Kabel abtrennst, solltest du sie für den späteren Zusammenbau markieren oder fotografieren.

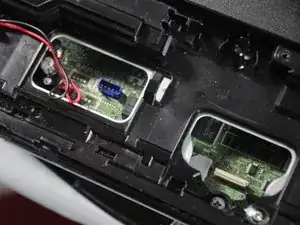
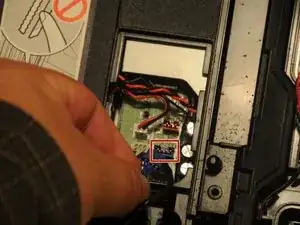
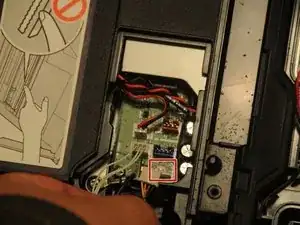
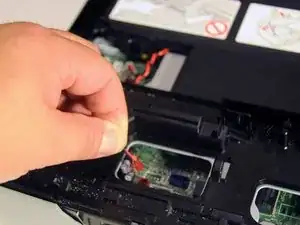
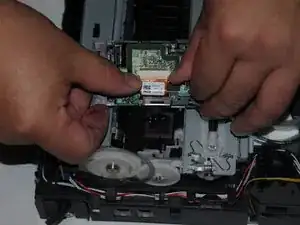
    • Entferne die drei Kabel, mit denen die Scannereinheit an der Hauptplatine angeschlossen ist.

  8. dHNIGfTtD4mcY112
    dHNIGfTtD4mcY112
    eGVX1AhIceOIuIdZ
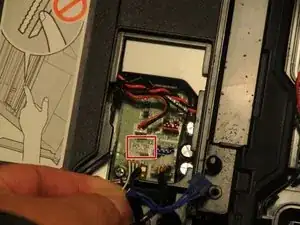
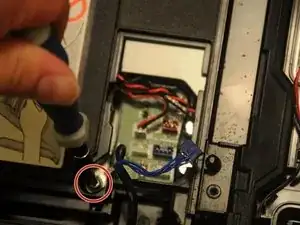
    • Nimm einen Kreuzschlitz-Schraubendreher #2 und entferne die 12,1 mm lange Schraube, die das Erdungskabel festhält.

  9. WY4EJaEWCUiytVJB
    WY4EJaEWCUiytVJB
    bVTaecDLgQYfGOin
    6UE6lOTjIxaB1kHa
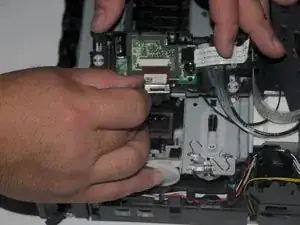
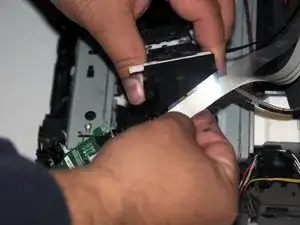
    • Ziehe das Datenkabel behutsam von der Hauptplatine ab.

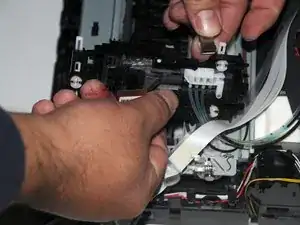
    • Ziehe das Kabel aus den Schlitzen heraus und entferne es vom Gerät.

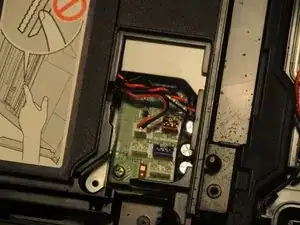
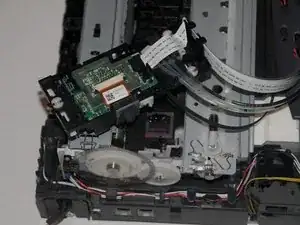
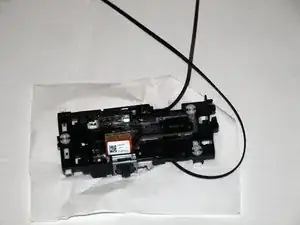
    • Nun ist die Scannerheit komplett abgelöst. Bewahre sie und die Erdungsschraube gut für den Zusammenbau auf.

  10. RYjETiU3HANcmHYL
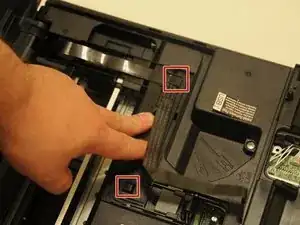
    • Entferne drei 14,1 mm lange Kreuzschlitzschrauben #2.

    • Entferne eine 12,1 mm lange Kreuzschlitzschraube #2.

    The diagram shows two of each size, but the instructions list (3) 14.1mm and "the" 12.1mm screws.

    Joseph Usher -

  11. UpLngOXEIAare4BD
    • Entferne die Papierschublade.

  12. 4LrRVjotYouxYjZL
    • Entferne die 8 mm lange Kreuzschlitzschraube #2 in der Mitte am Gerät.

  13. FLqBTwbYTEUScHOE
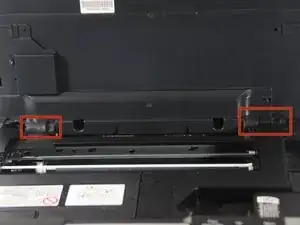
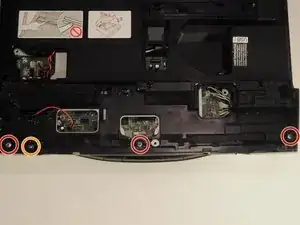
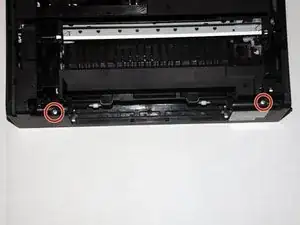
    • Entferne die beiden 14,1 mm langen Kreuzschlitzschrauben #2, mit denen das Rückpanel befestigt ist.

  14. ROjyatQTZVOUeWW1
    • Dieses Kabel muss entfernt werden, damit die Abdeckung des Druckers entfernt werden kann.

    • Löse das rote Kabel vorsichtig von der Hauptplatine ab.

  15. DYh2qQwbOZBSwoFB
    DYh2qQwbOZBSwoFB
    ifXqh1DCxVHwZd5I
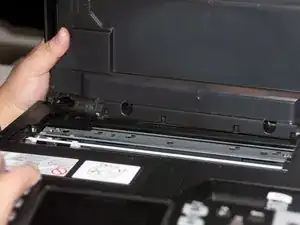
    • Drücke vorsichtig auf die Lasche oben links an der Klappe und löse das scharnierartige Teil der Klappe vom restlichen Gerät ab.

    • Wenn eine Seite frei ist, löse auch die andere Seite ab.

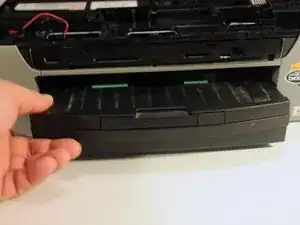
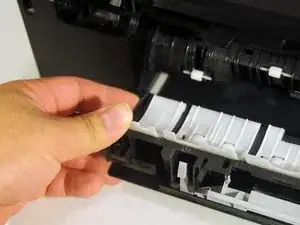
    • Ziehe die Klappe vom Gerät weg.

    Step 15 It takes more than a gentle push. A fingertip is not sufficient. Use the spudger carefully

    Naldo -

  16. lttO16DR6iAOBoaj
    lttO16DR6iAOBoaj
    4UwY2PHSixZNWJZM
    YPryH1b2Lv1xV2uM
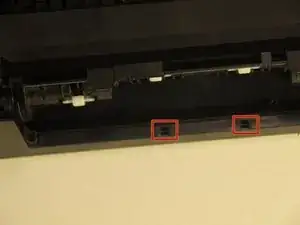
    • Die Abdeckung ist an zwei Stellen in der Mitte der Rückseite eingerastet. Löse die Rasten mit einem Spudger.

    • Wenn die Rasten gelöst sind, kannst du die Abdeckung hochheben und entfernen.

    Pull the front of the cover up about 2-3 inches and the two pictured clips at the back will release easier.

    Naldo -

  17. F4PAYuBnDJZNYGIQ
    F4PAYuBnDJZNYGIQ
    da4VRYJrp5vd5AoM
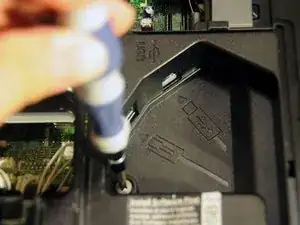
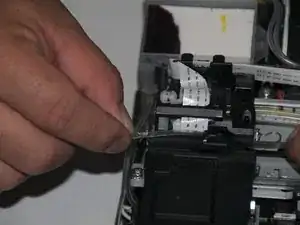
    • Ziehe den Leiter vorsichtig nach links, bis sich sein Ende löst.

    • Schiebe den Leiter oben von der Druckkopf-Einheit ab.

  18. ViBS1V53Vln2RASQ
    ViBS1V53Vln2RASQ
    MkUvLSF1srylPtqR
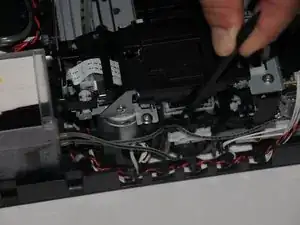
    • Der Druckkopf liegt auf einer Führung. Drücke mit einem Spudger auf das Kunststoffgehäuse der Führung.

    • Schiebe den Druckkopf zur linken Seite des Druckers hin.

  19. I3ahFoDQUrWZXtPI
    I3ahFoDQUrWZXtPI
    mM6YSyPVBpxOiu2J
    4ElaicCHABUKApdL
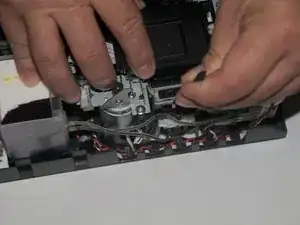
    • Schiebe den Druckkopf bis ans Ende der Schienen.

    • Drücke den Druckkopf zur Rückseite des Gerätes hin und hebe die Einheit von der hinteren Schiene ab.

    • Hebe den Druckkopf vorsichtig von der vorderen Schiene ab.

    Do Step 20 before doing Step 19.

    Naldo -

  20. ebguO3VS6eENOrhM
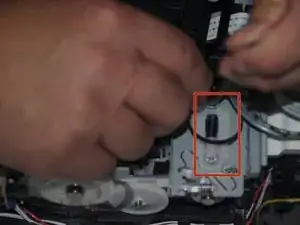
    • Drücke den gefederten Teil des weißen Rads mit einem Spudger zusammen.

    • Halte die Feder gedrückt und löse den Riemen vom Rad.

    • Entferne den Riemen vom Zahnrad auf der anderen Seite.

    • Optional: schiebe den Riemen vom Druckkopf ab.

    Doing Step 20 prior to doing Step 19 will make Step 19 easier and likely less damaging to the conveyor belt.

    Naldo -

  21. xigvARQpHBtsFwDi
    • Drücke die Abdeckung an den Enden zusammen und löse sie dann ab. Die Platine wird sichtbar.

    Not even close. Three clip points need to be released before the cover will come off.

    #1. Un-clip the end nearest to where the ink tubes attach.

    #2 and #3. Release the clips on each side of the cover where his left thumb and pointer finger are holding the cover.

    Naldo -

  22. rDDGwDZAKXbTtII2
    rDDGwDZAKXbTtII2
    BF5NMIKXGyRFLr2q
    • Schiebe die schwarze Abdeckung vom Anschluss ab.

    • Ziehe das Kabel aus dem Anschluss heraus.

    Some basic knowledge of how these tape connections function is very helpful.

    Naldo -

  23. iHxBfsmfCYns2UGJ
    iHxBfsmfCYns2UGJ
    ZSFUQxGXRhOxfE4k
    s1IdjIpgkC61VFsA
    • Hebe die Platine aus dem Druckkopf heraus.

    • Schiebe die an der Platine befestigten Kabel von der Druckkopf-Einheit weg.

  24. tvRuwPrQlkiHLSY6
    tvRuwPrQlkiHLSY6
    T5xCcU5l4CIYxJOS
    f42sZkRBe1AGOuct
    • Entferne den Metallclip, mit dem die Düseneinheit befestigt ist.

    • Hebe die Einheit von der Druckkopf-Einheit ab.

    For Step 24, Kat makes a very good point about the rubber gasket that lies between the nozzle unit and the print head. If you don’t transfer that gasket, you will probably wind up with ink running everywhere but onto your paper.

    Naldo -

    Nothing is mentioned about transferring the conveyor belt. Do it carefully.

    Naldo -

    Where can one buy a replacement printhead?

    nrpardee -

Abschluss

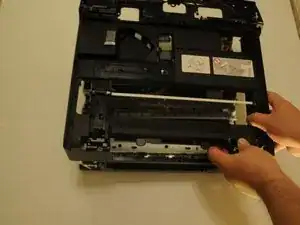
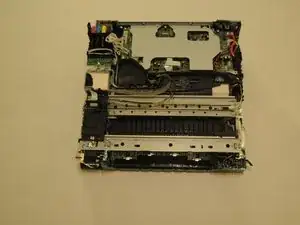
Um dein Gerät wieder zusammenzubauen, folge den Schritten in umgekehrter Reihenfolge.

Henry Cho

Mitglied seit: 29/10/14

1052 Reputation

11 Kommentare

I did follow this guide for a Brother MFC-6490CW although they are not identical it was very helpful for me to follow up to the removal of the print head as I only wanted to clean some blocked nozzles but the principle was the same

crystalbic -

*Note my new print head did not come with the rubber gasket that the sits between the inkjet nozzle unit and the new print head, remember to look for it and move it to the new one.

Kat -

Also after putting the new print head on the inkjet nozzle unit lines / tubing is full of air and needs to be primed in order for the ink to flow again because there is a huge air bubble in the print head.

To do this best way is to (if it is back together without pulling it apart):

1) Start the printer to print a page and when it has started while the paper is still under the print head disconnect the power that way the print head is in the middle and not parked on the right side.

2)Put a couple pieces blotting paper or in my case I used folded up paper towel under the print head

3)Take out all the ink cartridges and using a large syringe and a small tube full of a cleaning solution or use a kit that u can buy online.

Kat -

*Caught off guard not knowing I would need to do this I improvised breaking an old ink cartridge and cutting off the ink nozzle flush with the cartridge so i had the female rubber grommet end and about a ½" piece of plastic tube, I then cut off a bit of spare air hose for my fish tank and got an empty squeeze sauce bottle with a long nozzle and put in some alcohol. I put the plastic tube into the female end and the other end onto the sauce bottle.

Connect it to where the ink cartridge goes in and push the fluid through the line till you see ink / fluid come out of the print head, then do the other lines possibly changing the blotting paper in between colors depending how much mess it makes

Kat -

Then replace the ink cartridges and run a cleaning or to and print a few full color pages .... dont panic if the colors dissapears for a while and it comes out blank because the alcohol needs to fully come out but the new ink will flow up the tubes after the alcohol .... this actually took quite a while to start printing colors again but it did get there and a few more cleans once it was and it was fantastic

The Printer has not printed as well for years :)

Kat -

Great advice, Kat, Thank you! I wouldn't have thought of doing that.

Joseph Usher -

Thank you for the information removing those ink pipe was difficult but your guide helped

Attibutt -

Hi do you have to do step 18 in reverse when you reassemble?

Djdje -

Easier than I thought, but better with gloves ;-)

Andrea -

Bought a new print head for £25. Then I read this guide and decided it looked pretty difficult and my printer Brother MFC-J4510DW c.2014 would have too many differences to confidently use this guide. Instead I found a technique to clean the old print head and it worked. Clean the print head with a paper towel soaked in Windex .. or as we say in UK: a folded piece of kitchen roll soaked in a little window cleaner (my window spray says it contains "5% anionic surfactant" and vinegar - worked well). This is good: https://www.youtube.com/watch?v=Itl3UsPZ...

Peter Fennell -

sfter putting together and turning it on it makes a stuttering noise and will not do anything, don't know what is wrong. any ideas?

marilla -