Einleitung
Diese Anleitung zeigt dir, wie du die Gehäuseschalen entfernen kannst, entweder um sie auszutauschen oder zu ersetzen.
Ersatzteile
-
-
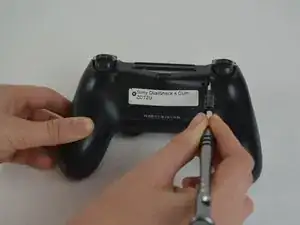
Drehe die vier 6,5 mm Kreuzschlitzschrauben heraus.
-
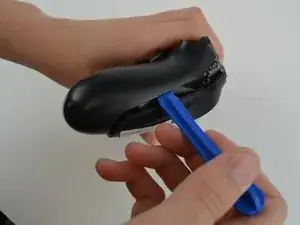
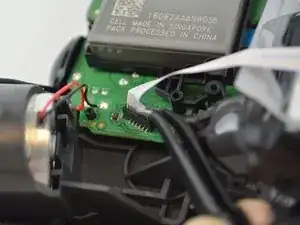
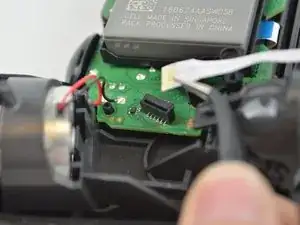
Heble die beiden Kunststoffschalen mit einem Öffnungswerkzeug auseinander.
-
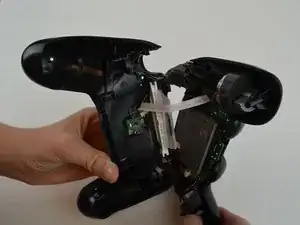
Um dein Gerät wieder zusammenbauen, folge den Schritten in umgekehrter Reihenfolge.
Ein Kommentar
FYI for anyone looking: re-shelling a v1 controller with v2 innards is possible but incredibly time consuming. My 20th anniversary controller died (v3 circuit board) so I transplanted all parts from a PS-Pro controller. It requires lots of cutting and trimming of the shell to match the inner profile of the newer shell to enable it to close up cleanly. There are no cuts or modifications needed to the V2 controller components however, but the new style light bar need migrating across.
Steve -
When re-asembling, be careful to check that all buttons/triggers are moving correctly. They can get misaligned when prying the two shell halves apart.
Tale Spinner -
This part is missing vital information on how to correctly pry the case open. In the 3rd picture you can see there is actually damaged/broken clip already. In order to open the case without damage to the plastic clips inside the controller holding the plastics together you need to insert thin piece of metal between the trigger buttons on each side and push the clip outwards before trying to separate the parts, and if done correctly there is no force needed to pry open the controller. There is actually no necessary need for the clips, but if you want to keep your controller in mint condition without voiding the warranty, take care not to break these clips.
Ville Närhi -
Your advice for opening shell was so bad and harmful.
It's not correct
Kiarash Moallemi -
And two more tiny clips to the left and right of the headphone & EXT port. They’re VERY delicate, reckless prying WILL break at least ONE of these.
Strings Cat -
I've written a guide for how to find and unlatch the clips
Wichtiger Schritt zum Öffnen des DualShock 4 CUH-ZCT2
Richard -