Einleitung
Dein 2009-2012 27" iMac lässt sich plötzlich nicht mehr einschalten, obwohl du alles schon probiert hast: ein Reset des PRAM, einen Neustart, das RAM löschen usw.
Deine Maschine ist wahrscheinlich wegen Überhitzung der CPU/GPU kaputt gegangen (90% der Fälle) oder wegen entlöteten/abgebrannten Bauteilen auf dem Logic Board.
Das Gerät ist ziemlich alt, eine Reparatur lohnt sich nicht.
Aber Hallo - es ist noch nicht alles verloren, verwandle doch deinen alten iMac in einen wunderbaren Monitor.
Alles was du brauchst ist eine LCD Treiberplatine, einige einfache Werkzeuge und vie Geduld.
!! Achtung !!
Bei dieser Reparatur musst du mit hoher Spannung umgehen, du musst wissen, was du tust!
-
-
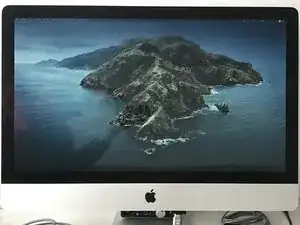
Schaue auf die Rückseite des Gerätes um die Marke und das Modell festzustellen.
-
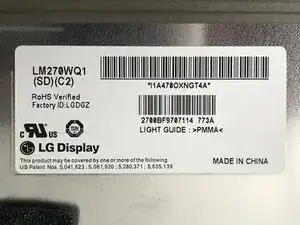
Es wird vermutlich ein Display von LG sein.
-
Meines hatte die Modelkennung LM270WQ1 (SD)(C2).
-
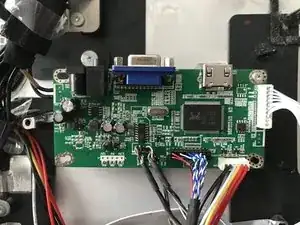
Suche nach einem LCD-Treiber, der das Gerät unterstützt.
-
Ich habe ein kompatibles auf AliExpress für ungefähr 25€ gefunden: LM270WQ1 (S2)(C2) LCD Driver Board.
-
-
-
Nun musst du genau planen, wie du vorgehen willst und welches Material nötig ist.
-
Es ist möglich, das Netzteil des iMacs für deine Zwecke zu benutzen. Warnung: Du musst wissen, was du tust, da hier mit hohen Spannungen gearbeitet wird.
-
Im nächsten Schritt kannst du prüfen, wie das geht.
-
Du kannst aber auch ein einfaches 12V-5A Steckernetzteil kaufen und verwenden.
-
Du kannst sogar die Lautsprecher des iMacs verwenden und über HDMI benutzen.
-
-
-
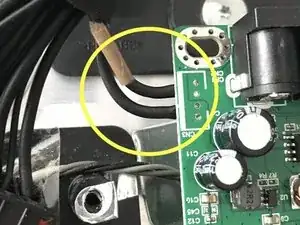
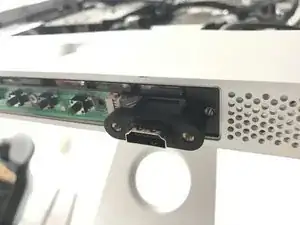
Das Netzteil des iMac hat einen Stecker mit 16 Kontakten. Die Pin-Nummer ist auf dem Stecker aufgedruckt. (Grüne Markierung)
-
Du benötigst die Pins 4 und 8.
-
Pin 4 (gelb) ist der 12V Anschluss (PP12V_G3H_ACDC): dieser Kontakt versorgt das Gerät wenn LED 1 auf der Hauptplatine leuchtet.
-
Pin 8 (rot) ist GND.
-
Überprüfe immer mit einem Multimeter, ob die Spannung stimmt.
-
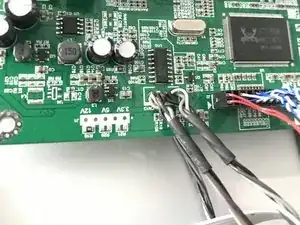
Ich habe diese Kabel abgeschnitten und provisorisch auf die Lötstellen für 12 V und GND auf der Platine angelötet.
-
Es ist aber besser einen 5,5 x 2,1 DC Stecker zu besorgen und die Kabel anzulöten. Dann kannst du den direkt in die Buchse auf der Platine einstecken.
-
-
-
Die internen Lautsprecher des iMacs haben vier Anschlusskabel, zwei für den Hochtöner, zwei für den Tieftöner.
-
Verbinde weiß mit weiß und braun mit schwarz.
-
Überlege, ob du die Kabel lieber an einen JST-Stecker entsprechend dem Kontaktschema anschließen möchtest - der einfachste Weg - oder ob du lieber die JST-Buchse auf der Platine ablöten und dann die Kabel anlöten willst.
-
Die dunklen Kabel sind die positiven Leitungen, die weißen Kabel die negativen.
-
Auf der Treiber-Platine ist negativ außen und positiv innen.
-
VORN/VORP ist rechts negativ/rechts positiv, VOLN/VOLP ist links negativ/links positiv
-
Hinweis: möglicherweise hört sich der Klang nicht gut an und es gibt Störgeräusche. Audio über HDMI funktioniert nicht so gut, weil der Verstärker auf der Platine keine hohe Qualität hat. Aber es funktioniert und ist billig.
-
-
-
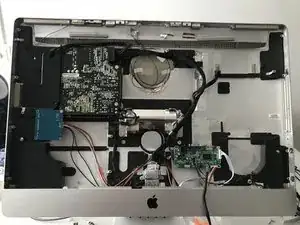
Nun müssen die Platinen eingebaut werden.
-
Hier ist ein praktikabler Vorschlag:
-
Die Hauptplatine kommt auf die rechte Seite, dort wo früher der Lüfter war.
-
Die Inverterplatine wird mit sichtbarer Rückseite (damit das Display nicht gestört wird) mit der unteren linken Schraube des Netzteils befestigt.
-
Du musst dazu etwas von dem kleinen Kunststoffteil abbrechen, welches das Netzteil von der originalen Inverterplatine des iMacs getrennt hat.
-
-
-
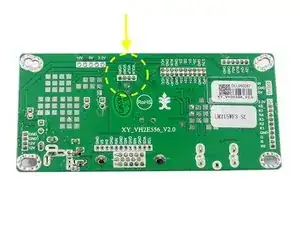
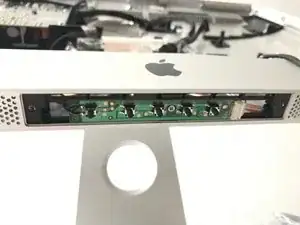
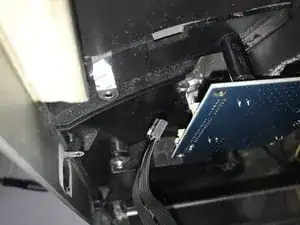
Im ersten Bild siehst du, wie die Controllerplatine eingebaut werden kann.
-
Hier wurde die Schraube verwendet, mit der die Aluminumabdeckung des RAM befestigt ist.
-
Du kannst sogar den originalen Einschaltknopf des iMacs verwenden. Schneide einfach seinen Stecker ab und löte die beiden Kabel auf die entsprechenden Lötstellen auf der Controllerplatine an.
-
Auf diese Weise kannst du mit dem bisherigen Einschaltknopf den Monitor Ein- und Aus schalten.
-
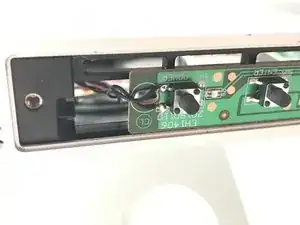
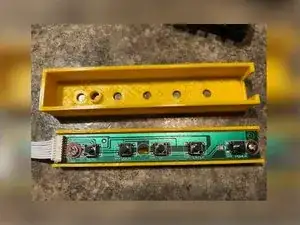
Es gibt sogar eine 3D gedruckte Version für die EH1406 Controllerplatine: EH1406 3D Druck
-
-
-
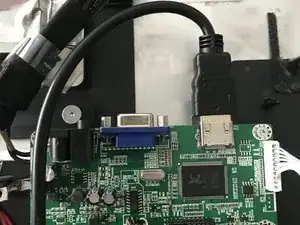
VGA ist nicht unbedingt nötig, HDMI genügt.
-
Du kannst ein langes HDMI Kabel an der Platine anschließen und das andere Ende aus dem Gehäuse heraushängen lassen.
-
Du kannst aber auch eine HDMI Verlängerung kaufen und anschließen, das ist praktischer.
-
-
-
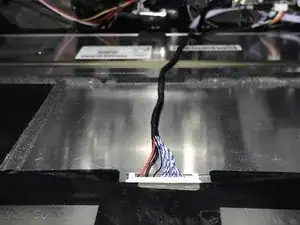
Nun müssen nur noch die Inverter und LVDS Kabel angeschlossen werden.
-
Sie können nur auf eine Weise verbunden werden.
-
Wenn das alles erledigt ist, bist du bereit!
-
-
-
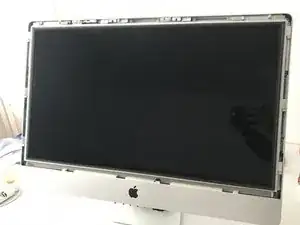
Lege das Display an seinen Platz und befestige es mit zwei Schrauben (oben links und unten rechts), so dass es sich nicht mehr bewegen kann.
-
Schließe nun dein externes Netzteil an, wenn du das verwenden willst, oder stecke das originale Netzkabel ein, wenn du das bisherige Netzteil weiterwendest.
-
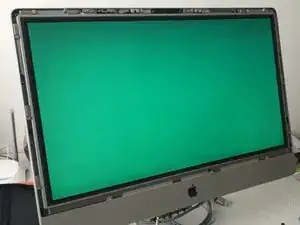
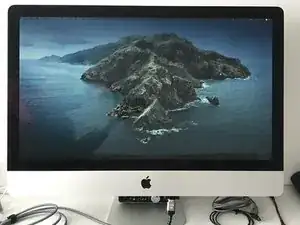
Das Display sollte sich anschalten und einen RGB-Test durchlaufen (alle 2-3 Sekunden sollte die Farbe wechseln), die grüne LED auf der Controllerplatine sollte leuchten.
-

Reduce
Reuse
Recycle

8 Kommentare
Hi Bob,
Firstly, I would like to thank you for your efforts to create such a manual, which has inspired me to turn my iMac A1213 into a monitor. I ordered a DP HDMI To EDP Drive board (for the LM270WQ1-SDC2 panel in my case). I followed your instructions using the iMac PSU, I also connected the speakers. I must admit that everything works well except the brightness.
My iMac is connected to the Mini Mac M4 via HDMI, and compared to my Benq 27" it looks yellowish and about 30% dimmer. Unfortunately, I forgot to measure the brightness on the iMac when it was still working, so I do not know if the screen was already dimmed.
My question is, do you have any idea of the cause of my problem?
Best,
Bob -
Hi!
When I was writing this guide I was reading and doing researches online on how to do it and I remember that a lot of people said their screen looked different compared to when they used it as an Apple device, I remember especially the two things you said.
Since the board should have a "remote" board attached to it, you can try to edit the settings for brightness and color, which can probably improve the situation (but keep in mind that it'll probably never look as good as the original iMac display).
Have a good day :)
Bob M -
Hi Bob,
Firstly, thank you for your excellent tutorial, it inspired me to give my old iMac a new life. I followed your tuto and I purchased the same logic board you recommended. Also, I decided not to reuse the internal speakers and opted for an external PSU.
After connecting everything to test the final montage, the display illuminated, but rather than performing the RGB test, it remained dark. While the controller's green LED lit up as expected, it soon transitioned to red after about 5-10 seconds. I double-checked all the connections between the inverter board and logic board, and tried it both with and without an HDMI cable – no change though.
This is my first time doing something like this, so I'm a bit stuck on figuring out what's going wrong. Any ideas or advice you might have would be super helpful!
Thanks again for the detailed tutorial !
Ben
(Sorry for any spelling mistakes, English is not my native language)
Ben -
Hi Ben!
Aside from the RGB test not appearing when turned on, does the screen function as expected?
If not, did you buy the correct board? Did you check the screen code in the lower corner tag of the display before buying it?
Also, what power supply are you using? How many amperes does it have?
Bob M -
Hi, thank you for your response!
The screen does not function as expected. As soon as the power is connected, the display turns on, but only shows a black screen. I have plugged my laptop into the screen via an HDMI cable, and my laptop detected the external display, but the screen remains black.
I re-checked the screen code: LM270WQ1 (S2)(C2). It's the same as the one you're using, so I bought the driver board you recommended using your AliEx link.
Concerning the power supply, it's a 12V5A brick that I found at home.
Maybe the driver board is damaged for some reason?
Ben
Ben -
Hi Ben,
Yes, it does seem like the board is defective. You should at least see a "no signal" warning when you turn it on.
Sometimes I experience a similar issue, unplugging and replugging the LVDS and inverter cables usually gets it working again. You could try this one last time, just to be sure.
If that doesn't help, I think it's best to return the board and ask the seller for a working replacement.
Best,
Rob
Bob M -
Hello! I had a question. I notice in your tutorial I only see 1/2 speakers in the iMac. Am I only able to reuse one speaker or both?
Thank you! (:
ryan -
Hi! If you look closely, you’ll see both speakers are there.
You can connect them since the LCD driver board has both L & R audio outputs :)
Bob M -