Einleitung
The Nintendo Game Boy Advance SP is renowned for its compact clamshell design and built-in rechargeable battery, yet its legacy charging jack is increasingly cumbersome in today’s era of universal USB-C. This guide provides a comprehensive, step-by-step procedure for replacing the factory port with a modern USB-C connector. You will learn how to:
- Disassemble the SP’s rear housing without damaging plastic clips or ribbon cables
- De-solder and remove the original proprietary charging jack
- Prepare and align a USB-C breakout module for seamless integration
- Perform precise soldering to ensure a reliable electrical and mechanical connection
- Reassemble the unit and carry out final functional and safety tests
Upgrading your Game Boy Advance SP requires advanced handling of small electronics and hot-work techniques. Observe the following safety measures at all times:
- Soldering Risks
– Molten solder and a hot iron tip can cause severe burns. Always work on a heat-resistant mat, and handle soldering tools by their insulated grips.
– Fumes from solder and flux may be harmful if inhaled—work in a well-ventilated area or use local exhaust. - Electrostatic Discharge (ESD)
– Static electricity can irreversibly damage circuit boards and components. Wear an ESD wrist strap or ground yourself frequently by touching a known earth-grounded object. - Component Damage
– Excessive force when prying or desoldering can crack PCB traces or dislodge nearby parts. Use the proper size of spudgers and solder wick, and apply heat sparingly. - Electrical Safety
– Never attempt repairs on a device that is connected to a power source. Ensure your SP’s battery is removed or fully discharged before beginning. - Small Parts & Debris
– Keep track of all screws, springs, and shims—losing even a single tiny component can compromise your reassembly. Work over a parts tray or magnetic mat.
Note: For any troubleshooting, please refer to the video below.
Ersatzteile
-
-
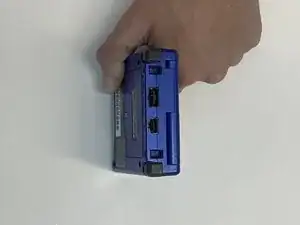
Turn off the GameBoy Advance SP completely before you start cleaning the port.
-
Use a cotton swab dipped in alcohol to gently scrub the inside of the port.
-
-
-
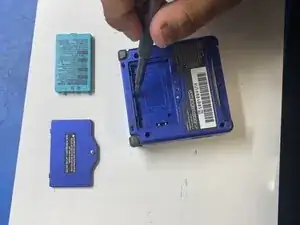
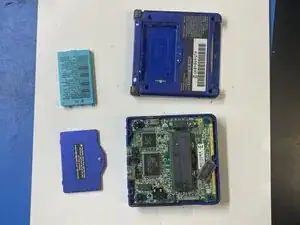
Now, using the SIXPAC Plus screwdriver, take out the EMiEN Tri-Wing 1.5mm screws out as you carefully disassemble your GameBoy into 4 parts: console, battery, back panel, and motherboard.
-
-
-
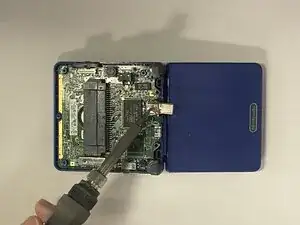
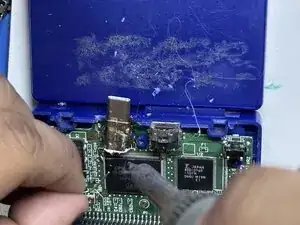
Align your USB-C port in place and ensure the bottom is facing downward.
-
Prepare the solder and iron.
-
-
-
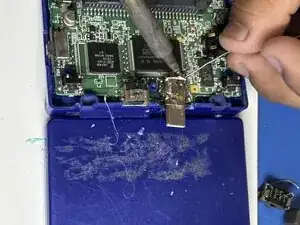
Solder the sides that were previously connected to the old port.
-
After it is secured on both sides, solder the 4 metal pins on the back of the new USB-C port.
-

To reassemble your device, follow these instructions in reverse order.