Einleitung

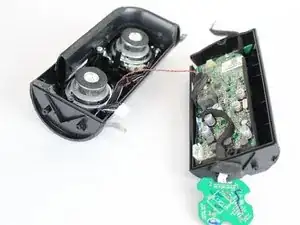
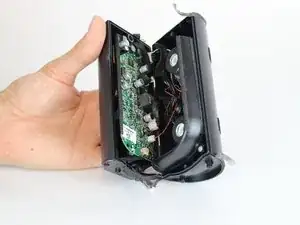
In dieser Anleitung wird gezeigt, wie man die zwei Seiten des JBL Flip 2 Lautsprechers voneinander löst. Hierbei wird alles abgetrennt, um eine sichere Arbeit an den inneren Komponenten zu gewährleisten.

  1. NNGIKwLLWH2txdei
    NNGIKwLLWH2txdei
    gQfNUFXPnfhpFs2v
    • Setze einen Spudger in die Naht an den Gummikappen auf beiden Seiten des JBL Flip 2 ein.

    • Entferne die NFC-Gummikappe sehr vorsichtig, da auf der Innenseite ein Chip aufgeklebt ist. Löse also die Kappe langsam ab und entferne dabei den Chip.

    From where i can buy these speakers?

    Nitin Z -

    First thing I did was rip the wire from the NFC chip! Luclily I don't need it as I only ever use my flip with my iPhone.

    Ken McMahon -

  2. PpJICLQtVU3fQpYg
    PpJICLQtVU3fQpYg
    JZQm5Nmnb46rEvq1
    • Entferne acht 7.0 mm Kreuzschlitzschrauben #1 an beiden Seiten des JBL Flip 2.

  3. QHbFUYniq5MIDeQK
    QHbFUYniq5MIDeQK
    NneRm15SbBwnk5fG
    kKQTpab4JIpxDJvZ
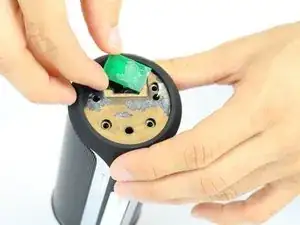
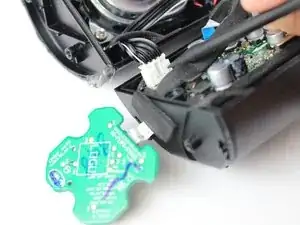
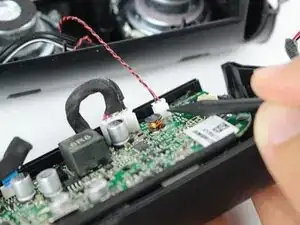
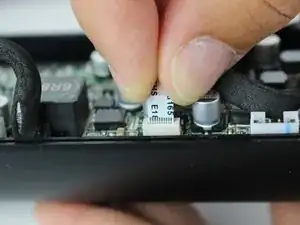
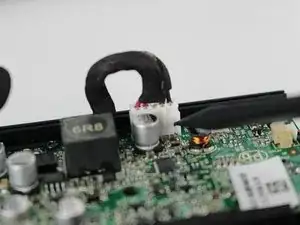
    • Der NFC-Chip ist seitlich am Gerät angeklebt. Löse das Mikrofon mit einem Spudger von der Oberfläche ab.

    • Achte darauf, dass das Kabel zum NFC-Chip im Geräteinneren dabei nicht beschädigt wird.

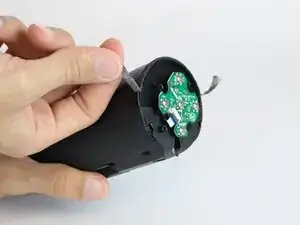
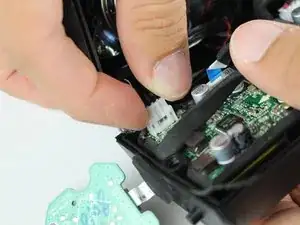
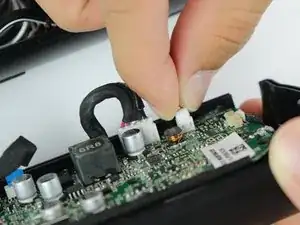
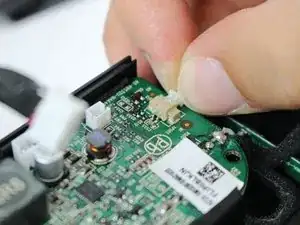
    • Schiebe den NFC-Chip behutsam durch die Öffnung für das Kabel ins Innere des Gerätes hinein.

    what if the wire DID disconnect? could s.o. add a detail pic of exactly where the cables connect on the chip?

    dfhdrt34f3t -

    Need the real name of the NFC chip, caus i broked and need to change

    Thanks

    Daniel Huot -

    My chip reads WN-3088 20130912

    Thomas Blanchard -

  4. xGloFaPKeLFjXyPD
    xGloFaPKeLFjXyPD
    iT4RpuXFrxr66ZKa
    • Löse das Gummi ab, mit dem die beiden Enden verbunden sind.

  5. 6XIiQKcBDJZd1lDm
    6XIiQKcBDJZd1lDm
    3ElFPerRRKsJwe1t
    cQNKtjQC5vNCxg1q
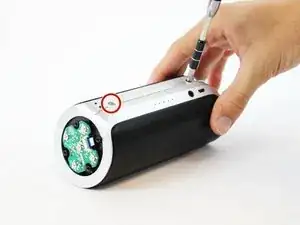
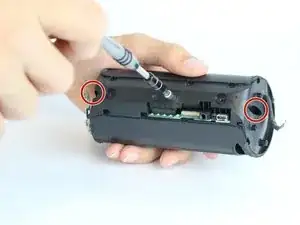
    • Entferne die beiden 7,0 mm Kreuzschlitzschrauben #1.

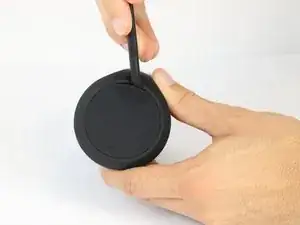
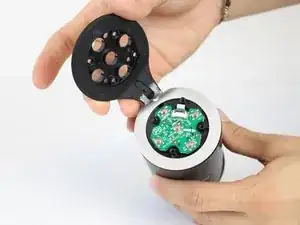
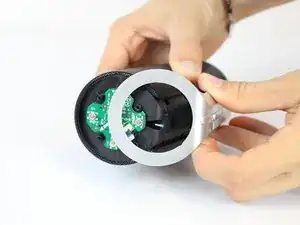
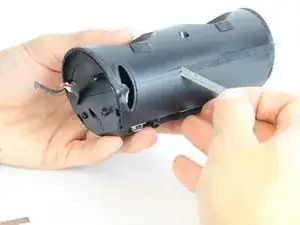
    • Ziehe beide Enden der silbernen Kunststoffabdeckung weg und löse sie ab.

    • Ziehe gleichzeitig und gleichmäßig an den beiden Enden, damit die Abdeckung nicht bricht.

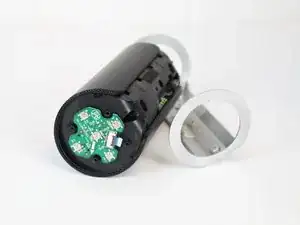
    • Löse die Abdeckung in der Mitte ab.

    Tutto molto interessante.

    Ma la cosa più importante è:

    Dove acquistare gli altoparlanti ??

    terlizzigianfranco75 -

  6. vEq4SKAMIPAHAHE4
    vEq4SKAMIPAHAHE4
    SmgLd2BDYRtiBVQK
    i6nKx5Qqr6lML636
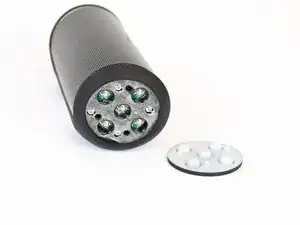
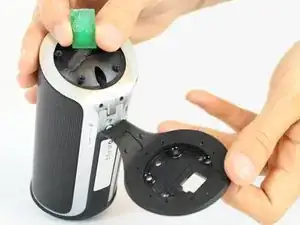
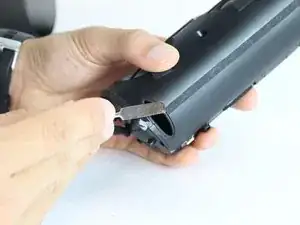
    • Heble die acht Metalllaschen auf der Rückseite des Lautsprechers mit einem kleinen Flachschraubendreher oder einem Spatel hoch.

    • Wiederhole für die vier Metalllaschen an den Seiten, also zwei auf jeder Seite.

  7. AZLoF3IQWOBJrK6N
    AZLoF3IQWOBJrK6N
    Dpy1SpEVPRtLHcUR
    • Ziehe das Metallgehäuse auseinander und schiebe es vorsichtig vom Lautsprecher ab.

    The diagram/steps here are inaccurate. At the centre of the screen on either side, the screen is secured to the speaker housing with a very small Phillips screw. On one side of the screen it is visible. On the other side of the screen, it is hidden underneath the small green printed circuit terminal board which is attached to the unit by a small ribbon cable. You need to gently pry up the terminal board to expose the second Phillips screw. On the model I have there are only six nibs total (three on each side). The centre to screen nibs are the ones secured with Phillips screws.

    Michael Richmond -

  8. TLRCEyTtN2HmPKMX
    TLRCEyTtN2HmPKMX
    AF622sClgqVGP4IZ
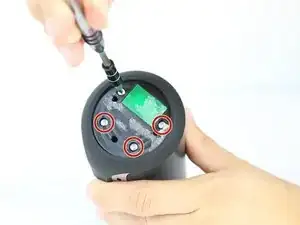
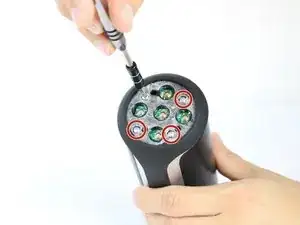
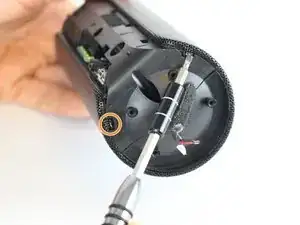
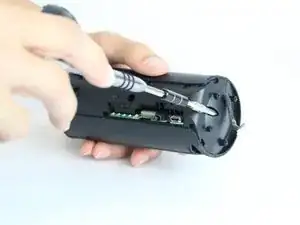
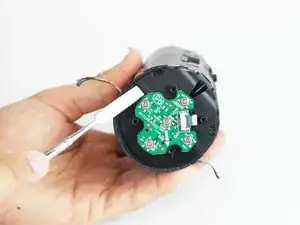
    • Du brauchst eine Verlängerung für den Bithalter, um die drei 13,0 mm Kreuzschlitzschrauben #1 zu erreichen.

  9. nWQfgpWFYboTkCy3
    nWQfgpWFYboTkCy3
    Hljl2huBDFLOq3JY
    4oew3AjiZMWxBU2j
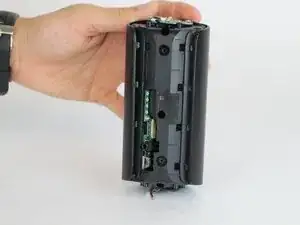
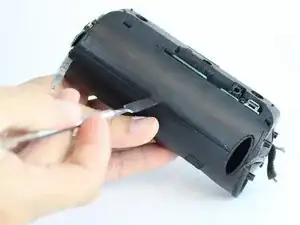
    • Setze einen Spatel unter den schwarzen Klebestreifen auf beiden Seiten des Gerätes.

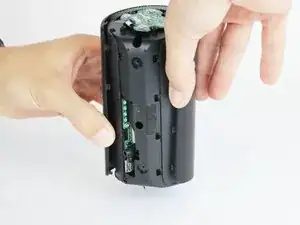
    • Löse das Klebeband ein Stück weit mit dem Spatel ab, dann kannst du es ganz mit den Fingern abziehen. Achte darauf, dass es nicht zerreißt.

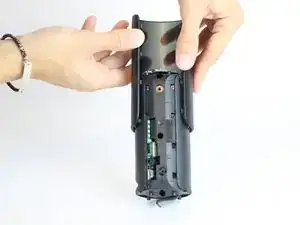
    • Auf der Seite mit den Tasten ist ein weiteres Klebeband. Löse es in gleicher Weise ab.

    For easier removal warm the tape up with a hair dryer. It tears apart very easily.

    hale1730 -

    Keeping the tape intact is impossible - I replaced it with electrical tape.

    Ken McMahon -

  10. sQBK4AQQR1HU1UQX
    sQBK4AQQR1HU1UQX
    tMOokImQy6Y1ighg
    cSshElaq1MtxwHIZ
    • Setze ein Öffnungswerkzeug in die jetzt freigelegte Naht ein und heble das Gerät auf.

    • Benutze ein ESD-sicheres Werkzeug, damit das Gerät nicht beschädigt wird. Nimm den schwarzen Nylonspudger oder ein Kunststoff-Öffnungswerkzeug.

  11. NVKJa4XidlvpOlra
    NVKJa4XidlvpOlra
    iNtsxtNBobIPUob1
    • Trenne das Lautsprecherkabel mit dem Spudger ab.

    Well, this is the end of the adventure for me. The plastic plug that connects the speaker to the motherboard is slightly different on mine. It was very difficult to pry up. When it finally did, the pins that were connected to the motherboard severed from it and stayed in the plug. It is unfortunately toast.

    Michael Richmond -

  12. UemoY6GepaBL1jIY
    UemoY6GepaBL1jIY
    uGZjTISNK6dD1f1D
    • Trenne das Kabel zum AUX-Ausgang mit dem Spudger ab.

    What is the function of auxi. Wire

    Debabrata Paul -

    When you plug in the audio jack it goes to the motherboard, the amplifier and then to the wire directly to the speakers.

    Jose Palacios -

  13. YPaFwMGLEy1EZkDm
    • Löse vorsichtig das Kontrollkabel von der Hauptplatine ab.

    What's the name of the cable connecting the control chip to the motherboard

    Jose Cabello -

    I want motherboard control chip

    moneykandan110 -

    connecting the control chip kitne ka hai

    Niraj Kumar -

  14. CUTxlsycXbPT4HQF
    CUTxlsycXbPT4HQF
    OfCD5dMPFdlESa2Q
    • Löse das Akkukabel mit dem Spudger von der Hauptplatine.

    If you can“t see a connector here , you have an earlier version of Flip2 - the connector is on the backside and requires a different battery - see the comment at the end of the feature

    Klaus -

  15. G4AlIAMSsMHKFqBI
    • Löse vorsichtig das Kabel zum NFC-Chip von der Hauptplatine ab.

Abschluss

Um dein Gerät wieder zusammenzubauen, folge den Anweisungen in umgekehrter Reihenfolge.

John Hornbeck

Mitglied seit: 09/02/16

228 Reputation

0 Kommentare