Einleitung

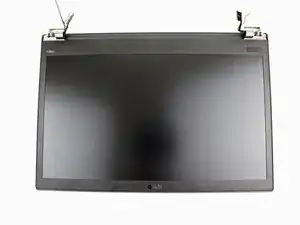
Diese Anleitung zeigt, wie das LCD im Lenovo ThinkPad T480s ausgetauscht wird.

Das LCD (Displaypanel, Bildschirm) zeigt die Ausgaben des Computers visuell.

Anzeichen für ein defektes LCD sind z.B. ein leerer oder schwarzer Bildschirm, Flackern, keine Hintergrundbeleuchtung, oder waagrechte/senkrecht Linien. Wenn das Display zerbrochen ist oder Risse hat, sollte es ausgetauscht werden. Bevor du das LCD austauschst, solltest du erst Lenovos Troubleshooting Anleitung studieren.

Vor Reparaturbeginn muss zuerst der interne Akku deaktiviert werden. Schalte dann das Gerät aus und trenne es vom Netzteil ab.

  1. RNt3cWxTIjeD1Mhe
    RNt3cWxTIjeD1Mhe
    haCRyLGBRClsXGrF
    • Deaktiviere den Akku, schalte das Gerät aus und trenne das Netzteil von deinem Gerät, bevor du mit der Anleitung anfängst/fortfährst.

    • Löse die sechs unverlierbaren Schrauben mit einem Kreuzschlitzschraubendreher #1.

    Somehow I find the screws for the T480s bottom cover to be slightly more prone to stripping, compared to the ThinkPad T480 and X1 Carbon Gen 6. However, the #1 Phillips screws on the T480s have drives that are cut in a way that also let you use a #3 flathead.

    Tai Lam -

  2. Vboy5of3qMKgumu1
    Vboy5of3qMKgumu1
    Xg36ebBqZsGYEUXf
    lIwLqVaU1qnjeJil
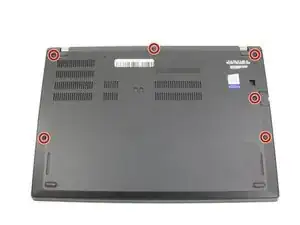
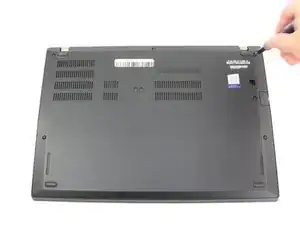
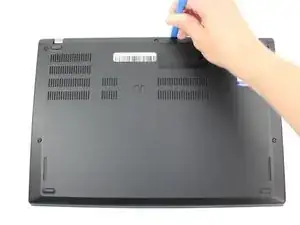
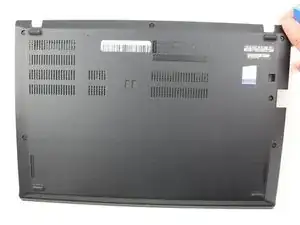
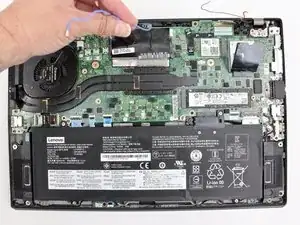
    • Entferne die untere Abdeckung mit einem Öffnungswerkzeug.

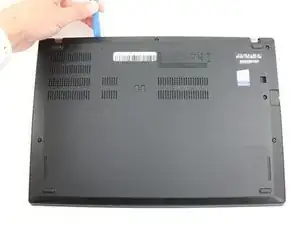
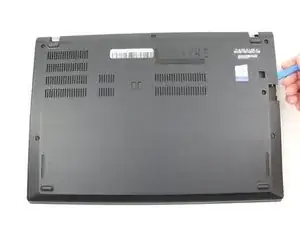
    • Beginne an der oberen Kante in der Nähe des Scharniers und arbeite dich an der Kante entlang, bis alle Clips gelöst sind.

  3. l4tenwgnMuEBiPRu
    l4tenwgnMuEBiPRu
    OndiEfoacVynMaGD
    • Hebe die untere Abdeckung ab.

  4. 3nHbvpX4muPD4TU1
    3nHbvpX4muPD4TU1
    5iOIWYCafD2XRw6B
    3HUCbANhTlagQtVA
    • Benutze den Spudger, um die Koaxial-Kabel der WLAN- und WWAN-Karten zu trennen.

    • Wenn du die WLAN-Karte wieder zusammenbaust, stecke das schwarze Kabel am nächsten zur Schraube und das graue auf der anderen Seite an. Stecke bei der WWAN-Karte das blaue Kabel links und das orangene rechts an.

    • Es gibt auch kleine farbcodierte Pfeile auf jeder Karte, die den passenden Kabeln entsprechen.

  5. ZAItEEFU2pRbFhVH
    ZAItEEFU2pRbFhVH
    RVi3mr4GdeyjkRrX
    KChdrepJmvHXJZv4
    • Benutze den Spudger, um das Display-Kabel vom Motherboard zu trennen.

  6. GtFbnE4JplAGGIWP
    GtFbnE4JplAGGIWP
    1NG2weDhrNBWdHCe
    NbJ3EYQLmy2BJsPv
    • Trenne mit dem Spudger das Kamera-Kabel vom Motherboard ab.

  7. ZDfJskXmaR2OkuIZ
    ZDfJskXmaR2OkuIZ
    jGe6ZNkH1LjyiNAA
    • Entferne alle Antennen-Kabel aus deren Kanal.

  8. SnkPIsvL3cWHW5RT
    SnkPIsvL3cWHW5RT
    YvRBXP3Laj6R6nSD
    YwO6AAVeCN6ALERX
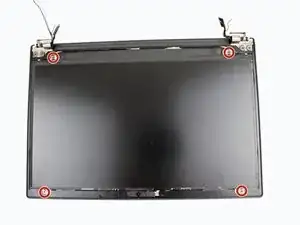
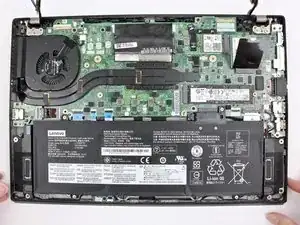
    • Entferne mit einem Kreuzschlitzschraubendreher #1 jeweils links und rechts drei 5 mm lange Schrauben von den Scharnieren.

  9. oroONEhm5dEN1SWL
    oroONEhm5dEN1SWL
    iQQbknHPVFDKtaFT
    MSEOJsawnMKOtodo
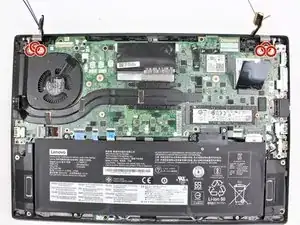
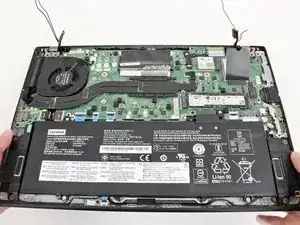
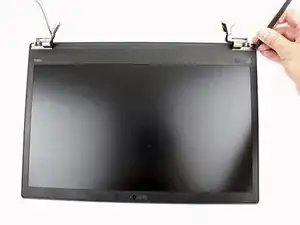
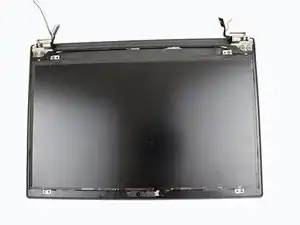
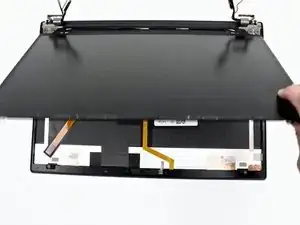
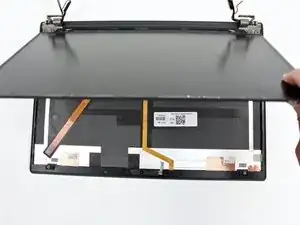
    • Drehe die Scharniere vorsichtig aufwärts und entferne den unteren Teil des Laptops von der Display-Einheit.

  10. PvBuljbPSSF4DEQi
    PvBuljbPSSF4DEQi
    OeSAaflhgHyRw1OK
    bHJlJCac3ihiTMe3
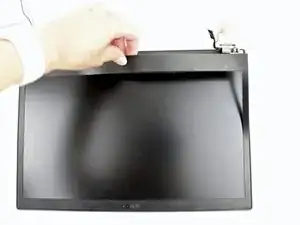
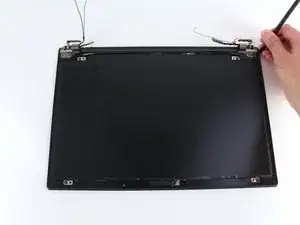
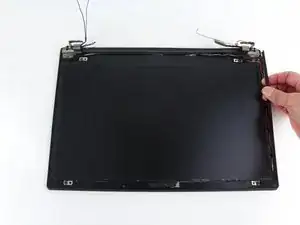
    • Beginne an den Scharnieren mit dem Abhebeln der LCD-Blende von der Kante. Benutze dazu einen Spudger.

    • Sie ist festgeklebt, sei also vorsichtig. Wenn sich die Clips lösen, hörst du ein lautes Knacken, das ist normal.

  11. tHCyJwY4WgWhbOUL
    tHCyJwY4WgWhbOUL
    t52MPYIUP5WFVXEE
    yURlAKEWJhH2nvIy
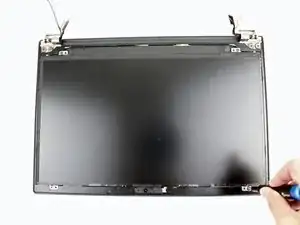
    • Löse die innere Blende mit einem Spudger ab.

    • Beginne an der Ecke mit einem Scharnier und hebe die innere Blende an der Kante mit der Spudgerspitze hoch.

    • Halte die Blende mit den Fingern fest und arbeite dich rund um den Displayrand herum. Ziehe die Blende vorsichtig hoch.

    • Du wirst einen Widerstand spüren und ein Knacken hören, wenn sich die Clips lösen. Sei vorsichtig, die Blende darf nicht brechen. An einigen Stellen ist der Kunststoff sehr empfindlich.

    The internal bezel is more much likely to be reusable than the outer bezel. However, do be careful to not bend the internal bezel too much so that you can avoid cracking the internal bezel during the process. Even if you have 1 crack, you can get away with putting the internal bezel back, as long as the bezel hasn't completely broken into separate pieces at the crack location.

    You may find that you will need to buy an OEM outer bezel replacement from Lenovo, rather than for the internal bezel. Luckily in mid-late 2025, you may be able to still find those from the Lenovo parts store. (Somehow the site for parts isn't like the usual customer-facing web store, where you'd buy a whole new laptop/other pre-assembled accessories.

    This is important to note: Lenovo gives official OEM support and maintains firmware for its business-class computers for 5 years (as this is the max time limit for business-to-business service periods from Lenovo). Models are considered end-of-life after 7 years of its release date and no longer get firmware updates.

    Tai Lam -

    You can no longer assume/depend on the Lenovo parts store to have all parts available after 5 years from release date, and basically you are lucky if you see any individual model-specific parts available after 7 years.

    The general method to get to the Lenovo US parts store for your Lenovo laptop is to find the by web searching for <thinkpad-model-name> support, such as thinkpad 480s support). You will likely find the "Drivers & Software" page, such as this one for the ThinkPad T480s. Click on the "Parts" tab in the vertical on the left to go to the parts page. Lastly, enter the model name of your laptop: in this case, simply typing t480s into the search box and picking any of the results will take you to the ThinkPad T480s parts page as an example. (Don't worry about getting the specific model name correct, there always seems to be at least 2 or more different model names for ThinkPad laptops, including the T480s.)

    Tai Lam -

  12. 1xZsmZZKRPMAPeFF
    1xZsmZZKRPMAPeFF
    ZSOjdMO5dO4mtUMk
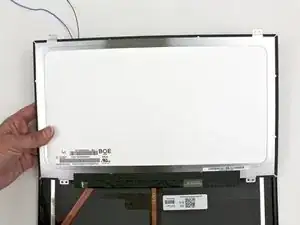
    • Entferne die vier 2,9 mm langen Kreuzschlitzschrauben #1, mit denen das LCD befestigt ist.

    For models that originally came with the WQHD display panel (i.e., the "4K display"), those 4 screws are absent. In fact, there are no screw mount points on the WQHD display panel.

    Instead, the panel will otherwise fit inside a predefined rectangle, bounded to form a slight border.

    Tai Lam -

  13. 2FwoTJcp3udVOlwK
    2FwoTJcp3udVOlwK
    PIWwuWRMvj3RpjLL
    VW1KPjS4fQstkGRB
    • Hebe das LCD behutsam hoch und drehe es herum.

    • Das LCD ist immer noch mit dem Displaykabel angeschlossen, achte beim Umdrehen darauf, dass der Stecker nicht beschädigt wird.

  14. Eiq3nD2UaApMCNCJ
    Eiq3nD2UaApMCNCJ
    DAIAyMRv3uOM5GYH
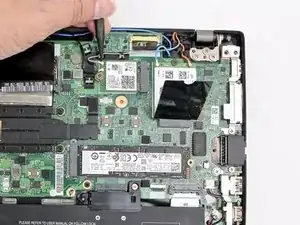
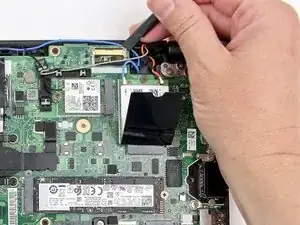
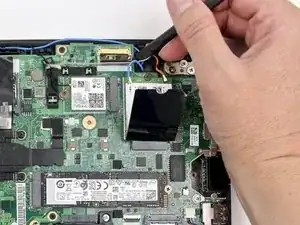
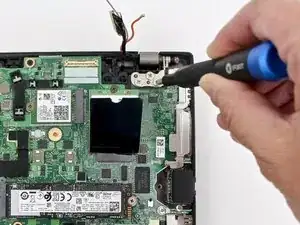
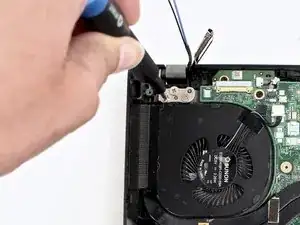
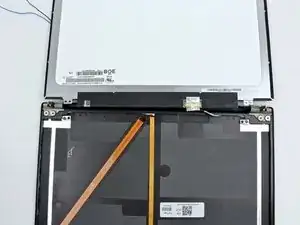
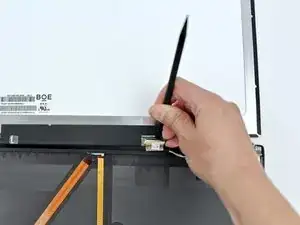
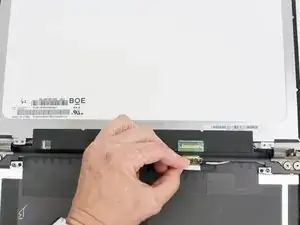
    • Ziehe das schwarze Klebeband vom Displaystecker ab.

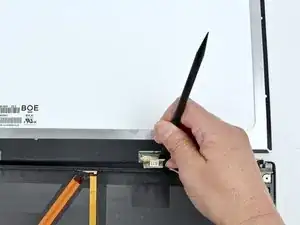
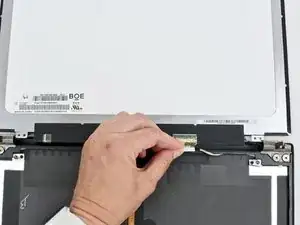
    • Entriegele das Displaykabel mit der Spudgerspitze.

  15. xNocFxUW3ZmqsQNf
    xNocFxUW3ZmqsQNf
    sLgbniafRsEYeMXM
    • Löse das Displaykabel aus dem Anschluss heraus.

  16. gjcP1boVSIN2jPGQ
    gjcP1boVSIN2jPGQ
    6SNBUskTjyND1ou2
    • Entferne das LCD vom Gerät.

    Be very aware when purchasing compatible replacement LCD panels (even from the Lenovo US parts store).

    On the screen that I ordered from the Lenovo US parts store, the connector was about 1cm closer to the right hinge, as shown in Step 16. This meant there was some slack left over in the display cable. My successful spur-of-the-moment decision was to try to fit about slightly less than 25% within the display cable; while gently pulling the display cable through and tucking the rest of the slack in the bottom keyboard half of the laptop.

    Although this felt overall very dodgy - as generally you don't want to bend the display cable too much; I was able to get the new LCD panel to work again.

    Tai Lam -

Abschluss

Um dein Gerät wieder zusammenzubauen, folge diesen Anweisungen in umgekehrter Reihenfolge.

Entsorge deinen Elektroschrott fachgerecht.

Verlief deine Reparatur nicht wie geplant? Versuche simple Fehlerbehebung oder frage in der Community nach Hilfe.

Sarah Westberg

Mitglied seit: 11/03/19

38047 Reputation

5 Kommentare

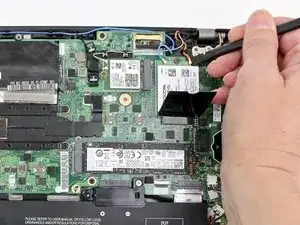
Hello, just wondering about step 4.

The description does not match what the image is showing for the Wi-Fi card wiring. The image is showing the black wire being closest to the screw (bottom) and the grey wire being on the opposite side (top). The description describes the opposite which is correct. The correct wiring can be seen in step 3 when the lid has been opened.

Kromagnon -

Hi Kromagnon, thanks for pointing this out! I believe when I opened up the device, (which was likely used ), the Wi-Fi card cables were inadvertently switched (as shown in Step 3). I wrote my instructions based on how they were initially connected, but when reassembling I put the cables back correctly and missed the fact that the instructions were inconsistent. Step 4 is now correct. Thanks again!

Sarah Westberg -

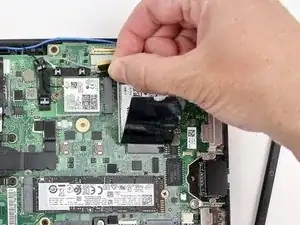
Why even remove the Wifi cables? Do they actually get in the way of the replacement? I have done this before and don't think that they do.

Nathan Morris -

Hi Nathan, thanks for your question. It looks like the Wi-Fi cables are connected to the display assembly, so they will need to be disconnected from the Wi-Fi card prior to removing the display.

Sarah Westberg -

On (the nominal printed page of 69 or) page 75 of the PDF file of Lenovo's official service guide, the writing states:

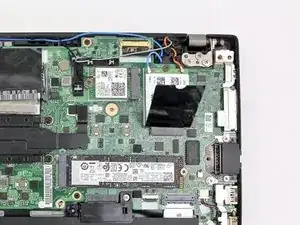
- The gray cable goes to MAIN or 2 of the Wireless LAN (Wi-Fi) card, and

- The black cable goes to AUX or 1 of the WLAN card.

This means the correct cable position is supposed to be:

- Gray is below, nearest the retaining screw; and

- Black is above.

So, currently the photos showing how to connect in Step 3 are correct and the photos in Step 4 are incorrect.

You can see in this video (timestamped) from MobileTechReview. This shows the T480s during 2018, the year of its release. So, this shows how the Wi-Fi antenna cables should be attached, as assembled from the factory for the OEM WLAN card.

Tai Lam -