Einleitung

Diese Anleitung zeigt, wie die Mikroschalter für die rechte und linke Maustaste durch neue ersetzt werden. Du musst die Schalter austauschen, wenn sie defekt sind, oder wenn du leisere haben möchtest.

---------------------------------------------------------------------------------------

Ich habe das von dieser Reddit-Anleitung hergeholt.

Vielen Dank an u/Spook_485

  1. vNQoKwyedm1YDJ1K
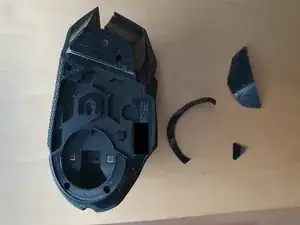
    • Entferne zuerst die magnetische Abdeckung und anschließend die drei Gleiter. Wenn du sie sorgfältig behandelst, kannst du sie wieder verwenden. Die Gleiter bestehen aus einer Gleitschicht aus Teflon und einer Schaumstoff Schicht. Achte darauf, dass die beiden Schichten beim Entfernen zusammen bleiben.

  2. WDfRsOP2UCCZEMdi
    • Entferne die vier Schrauben.

  3. yDaDCQJS1oJULAYx
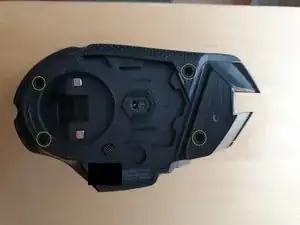
    • Beginne am Ende mit dem Ablösen der Clips. Du brauchst dafür etwas Kraft. Verwende ein Öffnungswerkzeug oder deine Fingernägel, setze sie in den Spalt ein und ziehe die Abdeckung ab.

  4. Ga5E5n1qkyRNFbqk
    • Trenne die beiden Flachbandkabel und den Akkustecker ab.

    For the battery connection, you can stick very thin tweezers into the top of the connection housing via the two tiny holes to assist with pushing out the cable. Mine refused to come out until I did this.

    Andrew -

  5. YtFkBt5kgI2xXCQh
    • Entferne die acht markierten Schrauben.

    There's a ninth screw that needs to be removed; it's just to the left of the top-left screw highlighted. If you don't remove it, you cannot remove the LED cover in step 7.

    Benjamin Cady -

    The screw in the middle can stay at this stage. It only holds the scroll wheel assembly together - if you want to do a deep clean of the scroll wheel you can remove it later after detaching the scroll wheel assembly in Step 10. This screw is also shorter than the others (in this step)

    maciek wolf -

  6. 3H2K2cTwFUhio1Vt
    3H2K2cTwFUhio1Vt
    VEPhUVZlZujIvrUc
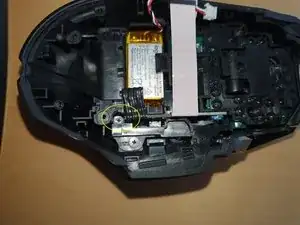
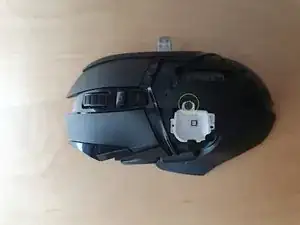
    • Entferne die in Bild 1 markierte Schraube. Sie sitzt recht tief und du benötigst einen dünnen Schraubendreher.

    • Entferne auch die in Bild 2 markierte Schraube. Nun kannst du die LED-Abdeckung entfernen.

    You forgot to mention a screw that is no longer present in the picture.
    It is also necessary for removing the LED cover, otherwise the cover cannot be detached.
    The screw is located a bit further behind the screw shown in image 2!

    Erhan Arslan -

    Fun fact - you can just reach the deep screw using the iFixit 4mm PH00 bit IF before loading the bit into the driver handle you put one of the previously removed small screws into the magnetic driver socket - thus making so the bit won't sit so deep in the socket (which is too wide for the narrow access path) and extending the reach of the thin part of the bit by a few mms enough so it reaches the deep screw. I'm sure there's a better way to say this ;)

    maciek wolf -

  7. FZc31MAZUdNJGBel
    • Entferne die LED-Abdeckung und die Befestigungsschale der LED.

    A guide would typically explain HOW to remove the light cover, an explanation would be appreciated before someone ELSE breaks theirs thinking it just pries off

    dan Garcia -

    To add to my previous comment, there are several clips that can break if you pry them, also on mine at least one of the places a screw goes into needed to be gently but firmly wiggled and pried at until it came loose. The amount of force needed to just pull it out would have likely snapped the entire cover in half

    dan Garcia -

    I'm sorry to hear you had trouble with it. When I replaced mine, the light cover just slipped out without any prying — maybe there's a slight difference in technique or how it's seated.

    einself -

    There's a screw you forgot to mention on the lower part on the mouse. If you don't take-off the screw you will break the cover.

    James Ramirez -

  8. SVMMherQOUqLOUKJ
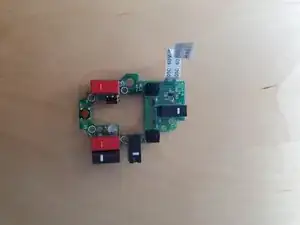
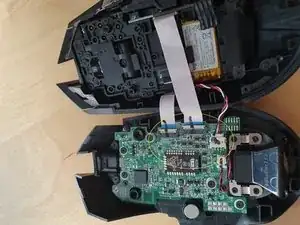
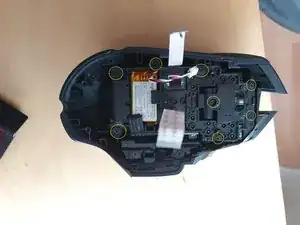
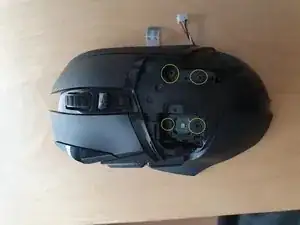
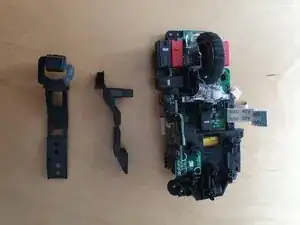
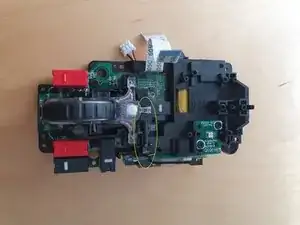
    • Entferne die vier markierten Schrauben, mit denen die Haupttasten am restlichen Modul befestigt sind. Die rechte Maustaste fällt heraus, die linke Maustaste bleibt noch an Ort und Stelle. Lege die rechte Maustaste zur Seite, die linke Maustaste kann lose hängen bleiben. Ziehe dann das komplette innere Modul heraus.

    Removing the internal module can easily be done by lightly pressing down on the mouse-wheel. The module should just pop out.

    GuiMR -

  9. vFPENKQPjWnnvTwD
    vFPENKQPjWnnvTwD
    QqQJBaICXmLuDZYg
    GpEXsgnqZClHNZVJ
    • Entferne die beiden gezeigten Schrauben und die beiden oberen Teile.

  10. KO5kCHC6SY6rUh2X
    KO5kCHC6SY6rUh2X
    OCRftiawpRxcEOYJ
    Uw5qtg6XKgDolMpT
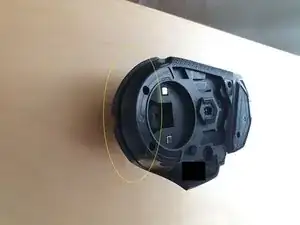
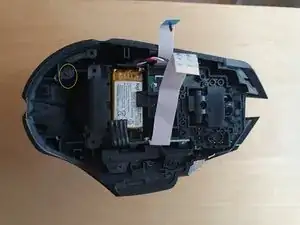
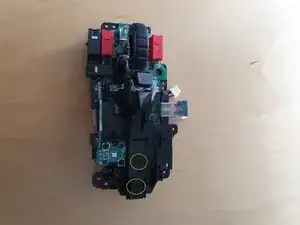
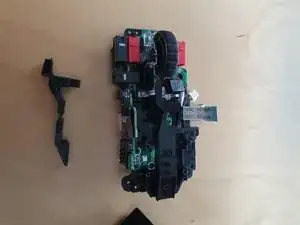
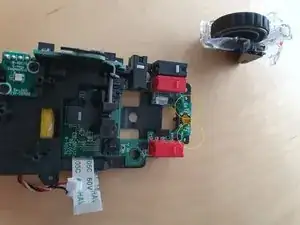
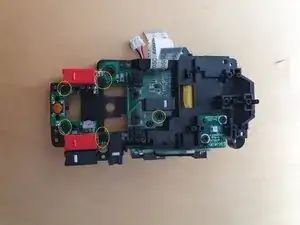
    • Ziehe das Kunststoffteil heraus, welches das Mausrad-Modul festhält. Es geht am Besten, wenn du mit einem spitzen Werkzeug vom anderen Ende her daran drückst und gleichzeitig von der anderen Seite her mit den Fingernägeln ziehst. Du brauchst dafür ziemlich viel Kraft. Wenn das Teil entfernt ist, kannst du das Modul einfach herausheben.

    • Achte beim Herausheben des Moduls auf die beiden Federn, verliere sie nicht.

  11. La2wQP55UHbuTDPp
    • Entferne die beiden gezeigten Schrauben und den Halter des Scrollrads.

  12. awGXtmjpPMKISOxo
    • Entferne die fünf gezeigten Schrauben.

  13. jqJD66wNWYRuSrxj
    jqJD66wNWYRuSrxj
    LkEJxPOEIwdjhMtf
    ckJZTuaUEaJwO3eN
    • Entlöte die Omron-Mikroschalter und ersetze sie durch andere deiner Wahl.

    You can make your life easier by removing (gently with tweezers) the bit of black tape covering the flat cable connector and removing the cable.

    Desoldering might be challenging. It becomes easier if you use nippers to cut the legs of the switches you want to remove as short as possible, making them flush with the solder. Use a desoldering pump to get rid of the solder. Adding a bit of fresh solder to the solder joints before trying to desolder might make it easier.

    GuiMR -

  14. eNa2AXX2La5KLrZV
    • Baue alles wieder zusammen.

Abschluss

Um dein Gerät wieder zusammenzubauen, folge den Schritten in umgekehrter Reihenfolge.

einself

Mitglied seit: 08/01/17

575 Reputation

3 Kommentare

Thanks for the guide, i used some isopropanol to clean the switches instead of chaning them as i had a problem with the right one and now it works flawless.

Bass pojken XD -

Thank you for the guide! I had to replace both my left mouse button and right mouse button switches because of heavy use. I unfortunately de-soldered a bit too hard on my right button switch and had to replace some trace connections but the mouse is working great now! Much appreciated!

Yashin lalji -

Thanks so much for the guide; my middle mouse button was no longer giving tactile feedback when I pressed the center wheel. I ended up removing the tactile dome (just the dome and tape) and using one from my old 2011 Ford F-150 key fob works like new.

Mike Morrison -