Einleitung

Prerequisite only guide to remove the screen on a MacBook Neo.

  1. WbSdu5AymGWVTiVq
    WbSdu5AymGWVTiVq
    wFCeasfoijRlCsp6
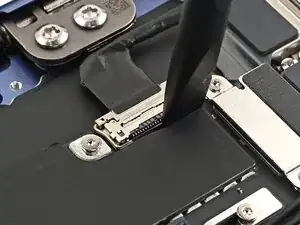
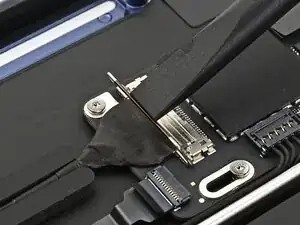
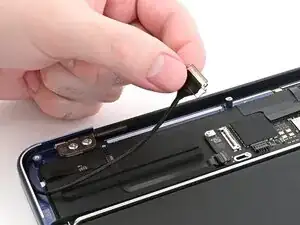
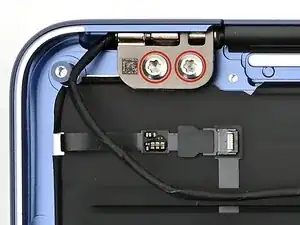
    • Use the flat end of a spudger to gently push under the metal buckle of the display cable connector, located on the top‑right corner of the logic board, to unclip it.

  2. 3XMuUcPWKkfZHVYa
    3XMuUcPWKkfZHVYa
    JBT1UaDxrw3YZJCG
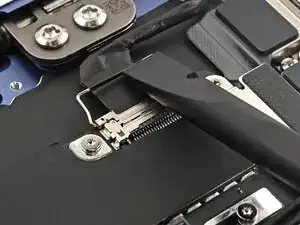
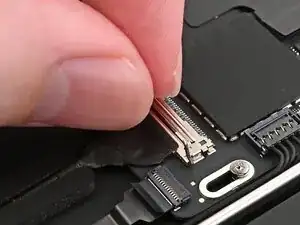
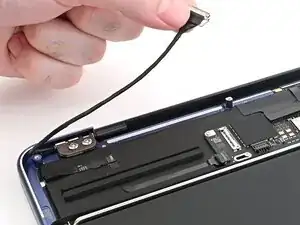
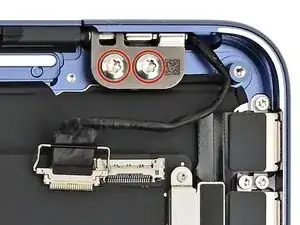
    • Grab the buckle and cable together and gently pull the connector straight out of its socket.

  3. jj1lkML3oFEJReeV
    jj1lkML3oFEJReeV
    ECnLudXTL3JDQpHY
    WYhaGBSVwjmU5NVX
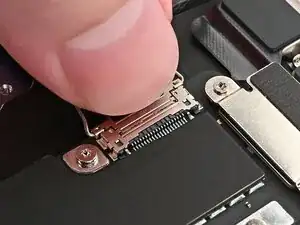
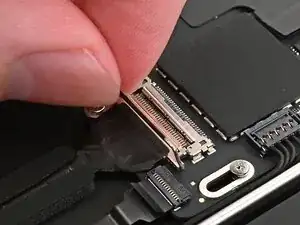
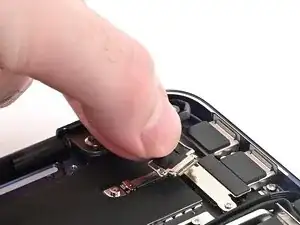
    • Repeat this procedure to disconnect the camera cable, located on the left edge of the logic board.

    • To reconnect:

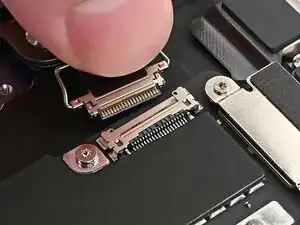
    • Grip the cable and buckle together and insert the connector fully into its socket. Realign it as necessary and don't try to force it into the socket.

    • Flip the buckle over the socket and use a spudger to press the buckle down until it clicks into place.

  4. UtBGSN1RvMNAACdD
    UtBGSN1RvMNAACdD
    xBOTXHRjGpKn1XeF
    oANRhVVTcTSaY6O5
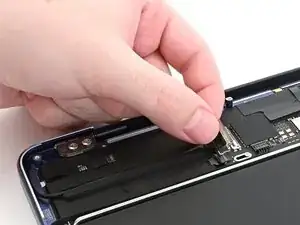
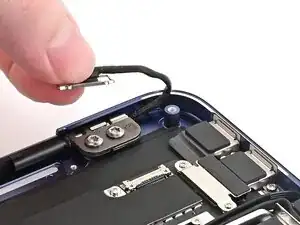
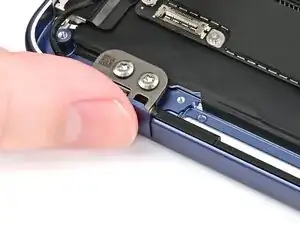
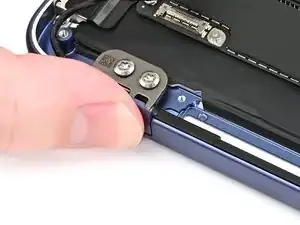
    • Pick up the buckle and cable together and gently pull it out of its channel securing it to the frame.

    • Free the cable so it's not wrapped around the corner of the laptop frame.

  5. uLBJS1D5jtWtKlvu
    uLBJS1D5jtWtKlvu
    RCVeaxiavftmFEP3
    • Hold the display cable's buckle and cable together and free it from the laptop frame.

  6. 1UHRkMcpFC5HZMYJ
    1UHRkMcpFC5HZMYJ
    ImuiP6jYOJ4ao1n5
    • Use a Torx Plus 8IP screwdriver to loosen (not remove) all four hinge screws.

  7. AViEU4XCK2JFcq3n
    AViEU4XCK2JFcq3n
    UKfCHHL23jGZK1Dy
    V5yqkLWnsk3irJJU
    • During reassembly:

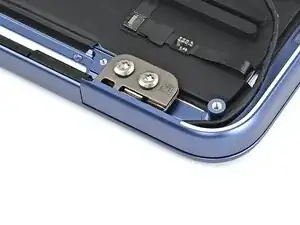
    • Install the hinge screws without tightening them, then close the lid.

    • Adjust the screen until it is correctly centered and aligned on each side. The screen should sit flush with the rest of the laptop. Finally, tighten the screws.

    • If the screen clicks or snaps upon opening, loosen the hinge screws and adjust the alignment. Make sure the screen doesn't sit too far forward, or it can catch on the body when opening and closing.

    • If desired, add a little blue threadlocker to the screw threads to prevent them from loosening over time.

  8. smPcG2rTppifkxTT
    smPcG2rTppifkxTT
    2ZTcIpsMCwmJGlox
    3pAtEtlStRSB2vPb
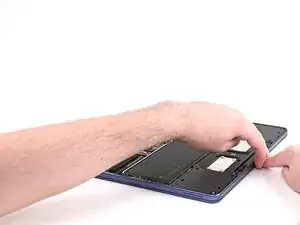
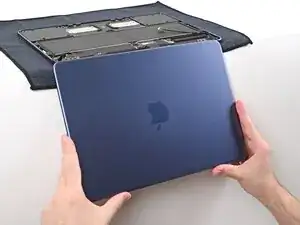
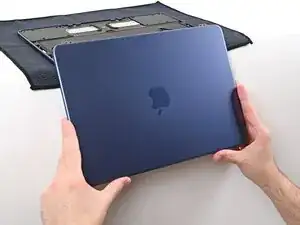
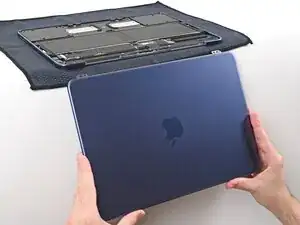
    • Open the laptop all the way and gently place it keyboard side down on a table, so the screen hangs over the edge.

    • You can place a soft cloth under the keyboard to protect it.

  9. PZVuoVPNNohkCeCD
    PZVuoVPNNohkCeCD
    6UVLXtpvNB1PXoaC
    yFoSJJ6CpLSVU2hw
    • Keep a firm grip on the laptop, as it can easily fall off the table.

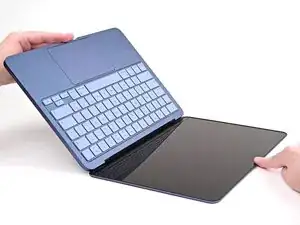
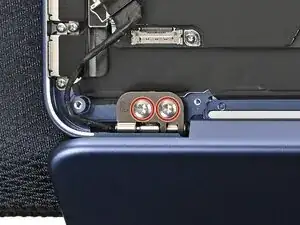
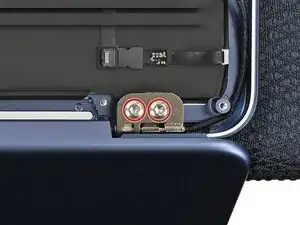
    • Support the screen with one hand and use your free hand to remove the four 6.2 mm–long Torx Plus 8IP screws securing the hinges.

  10. KuSnAuYGVrqSfkxi
    KuSnAuYGVrqSfkxi
    Ld4cxPSKXUuRmNPW
    1SoTsbkUxk2GTMcC
    • Hold the screen with both hands and lift the hinges out of their recesses to remove it.

    • During reassembly, be careful not to scratch the new screen on the edge of the laptop frame. If the screen itself has any plastic liners, leave them in place until reassembly is complete.

Nick Schultz

Mitglied seit: 24/03/24

47138 Reputation

0 Kommentare