
Einleitung
Hinweis: Wenn du dein Gerät auseinandernimmst, kann die Garantie für das Gerät erlöschen. Gehe daher vorsichtig vor und schicke es nach Möglichkeit zuerst ein, damit es vom Unternehmen bearbeitet werden kann.
- Diese Anleitung ist vielleicht etwas länger, als der Rest. Aber solange du dir Zeit nimmst und vorsichtig bist, kannst du das Display erfolgreich austauschen.
Ersatzteile
-
-
Alle 6.35mm Schrauben wurden mit einem J00-Bit des iFixit pro Toolkit entfernt.
-
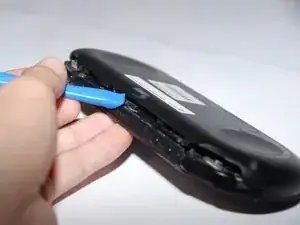
Du findest vier Schrauben auf der Rückseite, entferne diese wie auf den Bildern gezeigt,
-
-
-
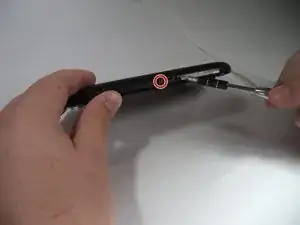
Es sind zwei Schrauben auf der Unterseite, neben der Ladebuchse. Entferne diese mit dem J00-Bit des iFixit Toolkit.
-
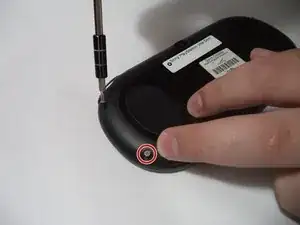
Zuletzt entferne die obere Schraube unter dem Staubschutz mit dem J00-Bit des iFixit Toolkit.
-
-
-
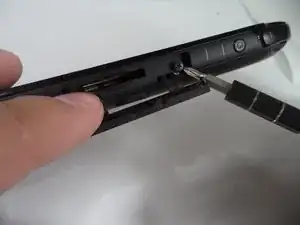
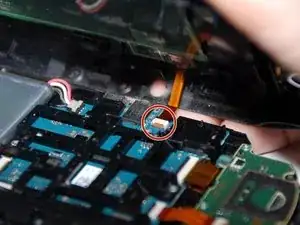
Während du dies tust musst du vorsichtig die Flachbandkabel lösen, welche mit der Hardware verbunden sind.
-
-
-
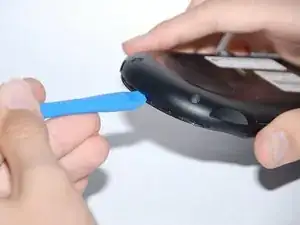
Nachdem die Flachbandkabel entfernt sind und die Rückwand komplett abgenommen ist, kommst du an die Hardware heran.
-
-
-
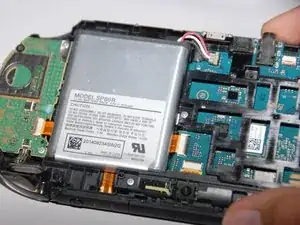
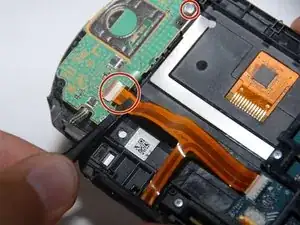
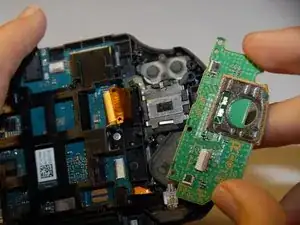
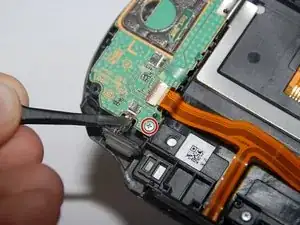
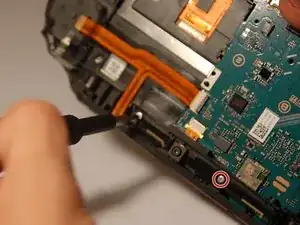
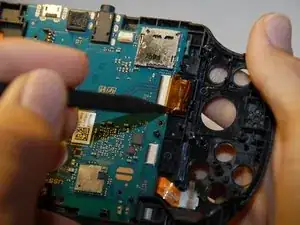
Löse das Flachbandkabel von der grünen Platine links ab.
-
Entferne die beiden 6,35 mm langen JIS000-Schrauben von der grünen Platine.
-
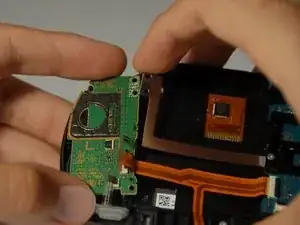
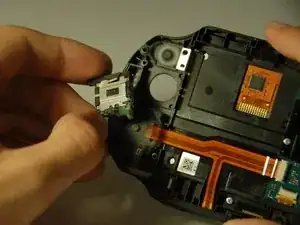
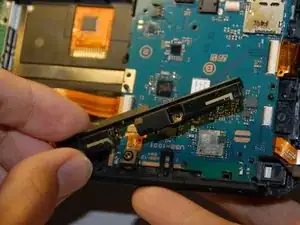
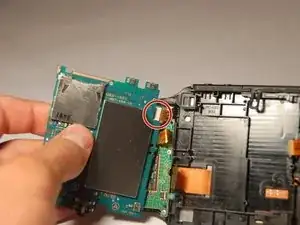
Die Platine wird noch von einer Metallleiste festgehalten. Entferne erst die Leiste, dann die Platine.
-
-
-
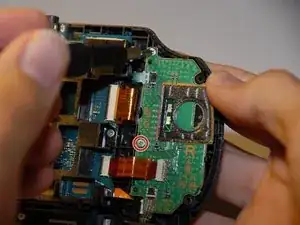
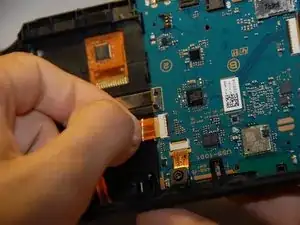
Löse die Flachbandkabel von der grünen Platine.
-
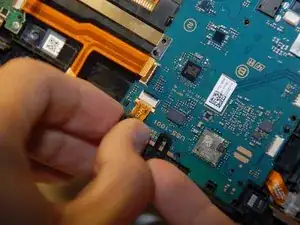
Entferne die beiden 6,35 mm langen JIS00-Schrauben.
-
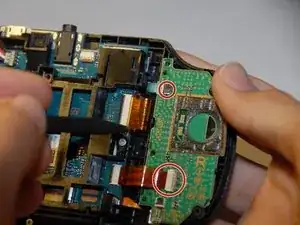
Entferne die grüne Platine.
-
-
-
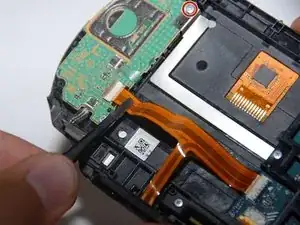
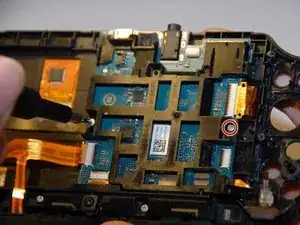
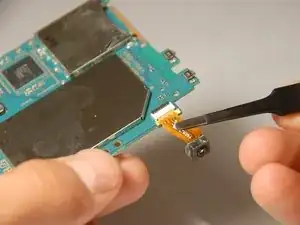
Löse vorsichtig die drei Flachbandkabel aus den Anschlüssen.
-
Löse nun die beiden Schrauben, die das Gehäuse festhalten. Es handelt sich um 6,35 mm Schrauben, die mit einem J00-Bit aus dem iFixit Pro Werkzeugsatz entfernt werden können.
-
Hebe vorsichtig das Metallstück an, das die grüne Platine noch festhält. Nimm dann vorsichtig die grüne Platine heraus.
-
-
-
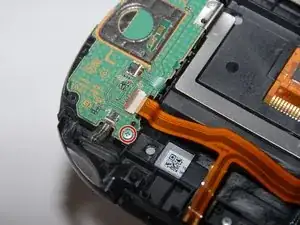
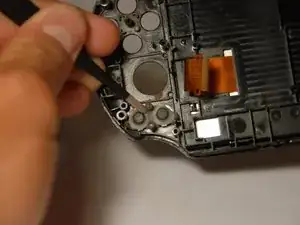
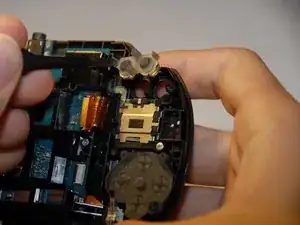
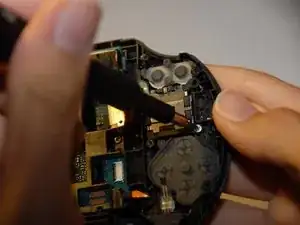
Eine weitere Schraube wird sichtbar. Drehe die 6,35 mm lange JIS-Schraube #00 heraus.
-
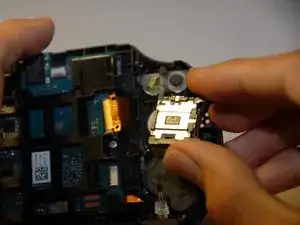
Hebe sorgfältig den Joystick heraus.
-
Nun kannst du den Joystick reparieren oder ersetzen.
-
-
-
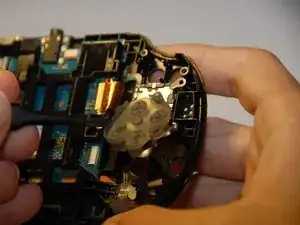
Entferne die darunter liegende 6,35 mm lange JIS-Schraube #00.
-
Hebe vorsichtig den Joystick heraus.
-
Nun kannst du den Joystick reparieren oder ersetzen.
-
-
-
Drehe die beiden 6,35 mm langen JIS00-Schrauben heraus.
-
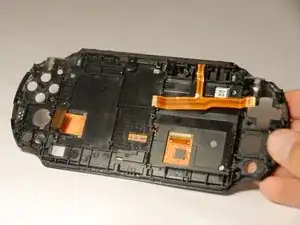
Hebe das Kunststoffteil sorgfältig aus dem Gerät.
-
-
-
Entferne die beiden 6,35 mm langen JIS00-Schrauben am unteren Rand heraus.
-
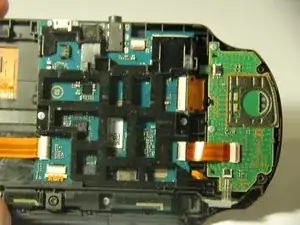
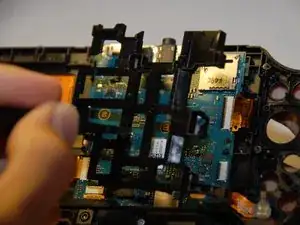
Hebe vorsichtig die untere Platine heraus.
-


Um das Gerät wieder zusammenzubauen, befolge diese Anleitung in umgekehrter Reihenfolge.
5 Kommentare
Any instructions on replacing the screen for a non-black case without replacing the whole front? It’s not the easy way but since they don’t sell the blue front with new screen, it’s the only way.
David -
I couldn't find an answer anywhere else so here you go (3 years after you asked).
Take a heat gun or hair dryer and gently heat the border of the screen to soften the glue. Gently twist the front shell to help separate the screen.
Repeat as needed until a corner becomes raised/separated from the shell.
Take a rounded tip metal spudger (flat metal pry tool) and carefully slide it between the shell and the screen. Apply more heat and begin slowly working your way round the edge of the screen. I found it best to use two spudgers, one to twist and separate the screen, the other to slide as flat as possible under the screen.
The screen is recessed under a top glass cover which is where the glue is. I found if you push the spudger in between the cover and shell, it will separate the glue and stop it hits the screen.
Continue to slowly work your way round the edge of the screen until it comes off.
i didnt need to remove the motherboard etc, i just heated the screen from the front and unplugged it from the motherboard and it popped off easily. Saves time.
Any leads my ps vita is working well touch is working everything working but no display at all? But i can touch and do stuff with imagining but jo display help
Tayyab -
I actually broke a 32GB storage card because I didn’t remove it first before I open the chasis. Beware of this!!! REMOVE YOUR CARD FIRST!!!
Daniel Wang -