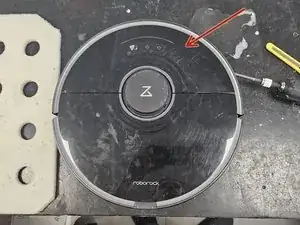
Einleitung

Hinweis: Diese Reparatur erfordert Lötkenntnisse und -material.

Diese Anleitung zeigt, wie ein einzelner Cliff Sensor (nicht die ganze R/L Einheit) im Roborock S7 ausgetauscht wird.

  1. 5GkZrdBJlEOR52JY
    5GkZrdBJlEOR52JY
    r6VkLuJZ6ObYQt5t
    • Entferne zuerst die vordere Hälfte der oberen Abdeckung.

    • Sie wird nur von recht losen Laschen gehalten. Mit etwas Kraft lassen sie sich lösen.

    • Verbiege die Abdeckung aus Kunststoff nicht zu sehr. Sie ist zwar biegsam, aber wenn sie zu stark verbogen wird, kann sie sich verformen oder reißen.

    • Entferne dann die hintere Hälfte der hinteren Abdeckung.

    • Wenn die Schrauben und Clips gelöst sind, kommt sie einfach heraus.

  2. TOiBioXDNwWEoZLj
    TOiBioXDNwWEoZLj
    1vteBTGHsrj2e1xx
    6nBrhI3qfBWafFoV
    • Entferne die Gummikappen über den beiden Schrauben.

    • Entferne die Schrauben.

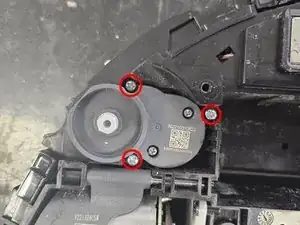
    • Entferne die Einfassung des LiDAR.

    • Entferne die Schrauben am LiDAR, dann das LiDA selbst.

    • Je nach Typ des Gerätes gibt es drei Versionen des LiDAR. Eines ist deutlich kleiner und mit Kabeln angeschlossen, die anderen beiden durch Steckverbinder.

  3. cKNIv32LupvppPhe
    cKNIv32LupvppPhe
    6ZW2ZKYs2rJvLXx6
    TeNZKlIeg2NVFAhQ
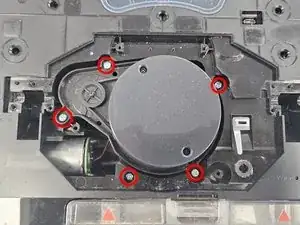
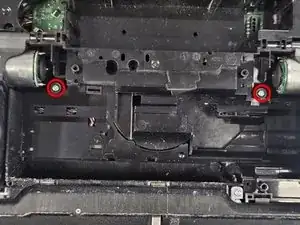
    • Entferne fünf Schrauben und die Seitenbürste, dann die untere Abdeckung.

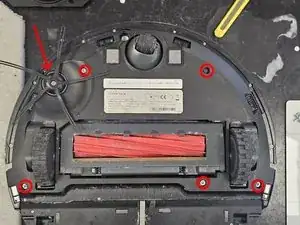
    • Entferne den Akku. Ziehe ihn nach oben, dann von links nach rechts. Trenne dann den Stecker ab.

    • Gehe vorsichtig mit dem Stecker um. Er geht kaputt, wenn du am Kabel reißt, anstatt ihn zu drücken und herauszuziehen.

    • Entferne die markierten Schrauben, dann die obere Abdeckung der Stoßleisten, dann die Leisten selbst.

    Be careful of the LED embedded in the bumper (on « Max » version I think). 1cm cable to disconnect from the chassis before removing the bumper !

    Guillaume PELESE -

    Hello!

    The LED cable you're referring to is only present in the S7 MaxV model (the one with the camera).

    I plan on creating a separate teardown of it once I get the time.

    DegenFixer -

  4. ASXb3bvcoiRS2NPp
    ASXb3bvcoiRS2NPp
    CnHNnWb1OZvcyeJR
    pRxmPupBc4f1XiTG
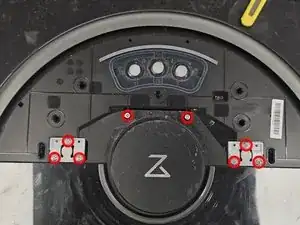
    • Entferne den Motor der Seitenbürste.

    • Entferne die beiden Schrauben darunter. In den beiden mit Pfeilen markierten Löchern sind Schrauben, die kleinere eine Kreuzschlitzschraube #1, die größere #2. Entferne die Schrauben, dann das Seitenpanel.

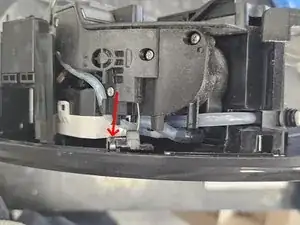
    • Entferne das Kabel vom Kunststoffgehäuse, eine gewinkelte Pinzette ist gut geeignet.

    Not sure if needed to remove wiring. The key is that under the wire ball is a gap to put in a flat head screw driver.

    Christopher Teeny -

  5. UZcx2IVKIVFft1vB
    • Psst, sie schläft.

  6. Jk2PJAREtwYX4RXf
    Jk2PJAREtwYX4RXf
    XeRFfVjSS5hhY3Wy
    ruYHnyO6amJF6eY6
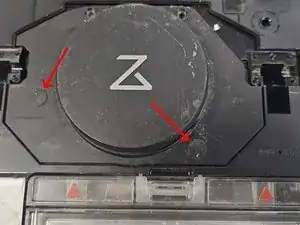
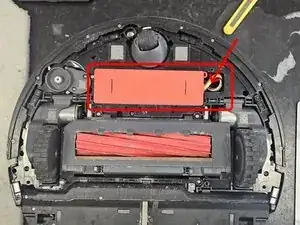
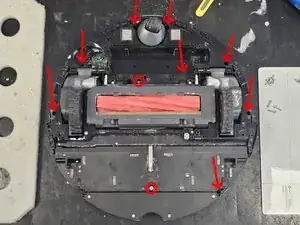
    • Entferne die in Bild 1 markierten Schrauben.

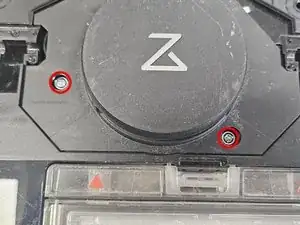
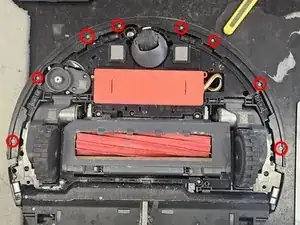
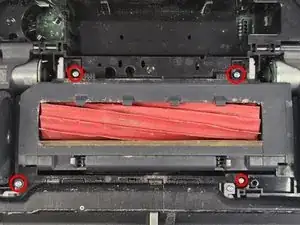
    • Entferne die in Bild 2 gezeigten Schrauben, dann die Hauptbürsteneinheit. Es ist nicht nötig, die Abdeckung oder die Bürste selbst zu entfernen. Ziehe einfach die Einheit heraus.

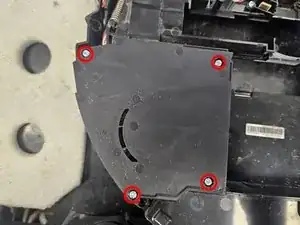
    • Entferne die beiden Schrauben, die von der Hauptbürsteneinheit verdeckt waren.

    Не открывает там держит резинка через которую засасывает пыль

    Модель s7 maxV

    romeo karleone -

  7. MQNpYbjvHENKm5kr
    MQNpYbjvHENKm5kr
    2AoxMkZ4RjQLVAcb
    • Löse diese beiden Laschen.

  8. IWDH4XkfbTESVyN3
    • Voilá - das Gerät ist zerlegt.

  9. r6KZBMw5ZRneIS4S
    r6KZBMw5ZRneIS4S
    EjJIMCO4lndds1iM
    4r6NvT3W11LS2Nvi
    • Zuerst musst du den defekten Sensor identifizieren. Fange mit dem an, der am häufigsten beschädigt ist.

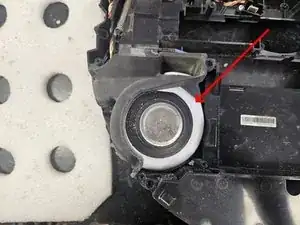
    • Es handelt sich um den Sensor nahe beim Gebläse. Entferne die Abdeckung über dem Gebläse, dann das Gebläse selbst.

    • Die häufigste Ursache für den Fehler ist, dass Wasser eingesaugt worden ist. Davon landet immer ein wenig im Sensor und beschädigt ihn.

  10. 6dviLnWXsbLppBUF
    6dviLnWXsbLppBUF
    fU1TSNynvoH63Elv
    QjJ6SdWRqUmrwpc4
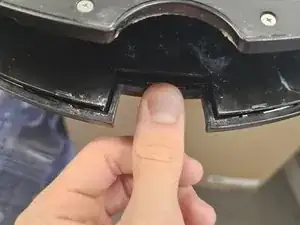
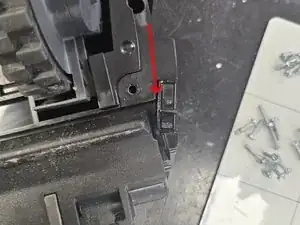
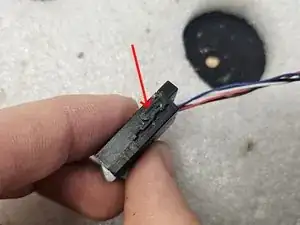
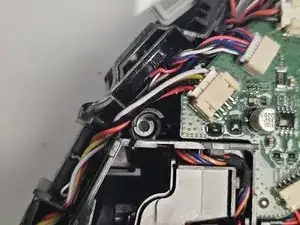
    • Schiebe ein dünnes Werkzeug in den Spalt ein. Ein Jimmy von iFixit eignet sich sehr gut dafür.

    • Du kannst auch versuchen, den Sensor mit einem Hammer zu lösen, riskierst aber, dass dabei der Kunststoff bricht.

  11. EF5wfwvXIpdDmL4F
    EF5wfwvXIpdDmL4F
    OUfvJwLjSVkCsIRc
    mrCmygUtJWtdP6if
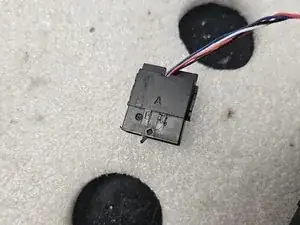
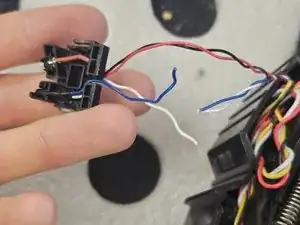
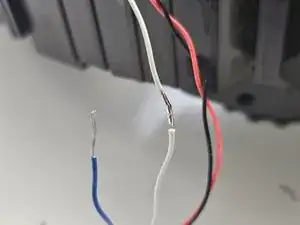
    • Nimm den Cliff Sensor auseinander. Er wird von zwei Clips auf beiden Seiten zusammengehalten. Biege sie auf und schiebe dann die beiden Teile auseinander.

    • In diesem Fall war der Fehler deutlich sichtbar.

  12. GHu6JxeKgj4tWWWW
    GHu6JxeKgj4tWWWW
    XFmImL34josdSbaN
    • Tausche das beschädigte Teil aus.

    • Setze das Gehäuse wieder zusammen.

    Hi, what kind of (and where did you get them) diodes did you use for this fix? Thanks!

    Lil Hubb -

    At some point after re-assembly, seal the wire entry point against moisture and dust with silicone or similar. Or else you'll be doing this again someday.

    bob cov -

  13. A53JnIJdxvisOsSM
    • Warum sitzt sie so merkwürdig da?

  14. DNNPsfouBFGBpSMV
    DNNPsfouBFGBpSMV
    KTqG3XpQmDOktrAp
    xPZCLPj4GDuDHsKs
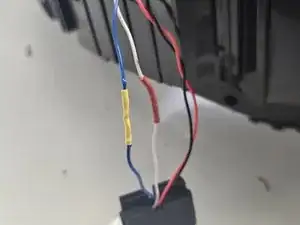
    • Und nun der lustige Teil der Arbeit: Das Löten!

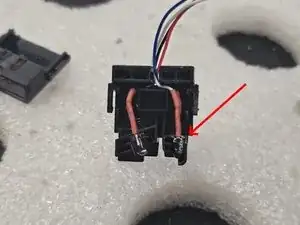
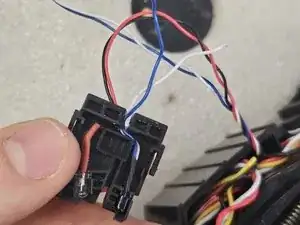
    • Löte die Kabel wieder zusammen, hier blau an blau, weiß an weiß.

    • Weiß könnte positiv sein, blau negativ. Aber es spielt keine Rolle.

    • Isoliere die Verbindung, z.B. mit einem Schrumpfschlauch. Diese Lötarbeit ist wirklich leicht.

    Thanks for the explanation. I ended up replacing one complete sensor, so I had to solder four wires, and it worked perfectly! I bought a new set with three sensors on AliExpress, cut one off, and used it to replace the old sensor.

    The vacuum cleaner now works perfectly again — and all for a part that cost about €15.

    I had only owned the vacuum for 2.5 years, and it cost me €550, so this guide helped me out a lot!

    remcog -

  15. xVR3OBoXUpkpcIRc
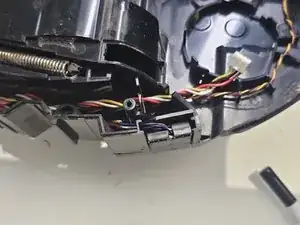
    • Setze den Cliff Sensor wieder an seinen Platz zurück. Teste, ob wieder alles richtig funktioniert.

  16. WmFvpITjDioN2ayO
    • Achte beim Zusammenbau darauf, dass kein Kabel dieses oder ein anderes Schraubenloch verdeckt.

Abschluss

Um dein Gerät wieder zusammenzubauen, folge den Schritten in umgekehrter Reihenfolge.

DegenFixer

Mitglied seit: 18/09/24

5361 Reputation

10 Kommentare

Hi,

An object got lodged in the wheel well of my S7 and now it can't sit and vacuum normally. Could you please tell me which parts I need to remove to get there? Do I need to remove the water tank parts?

taye1234 -

Where did you get the actual sensor to replace? I don't know what that part is or where to find it. Thanks!

Casey Johle -

Look for s7 cliff sensor in google, amazon or alibaba...

Michael Büssow -

You're so lucky... nobody can fix that whithout your feline assistant !
Thanks anyway :)

Pika Ksou -

Alguém tem link de compra desse sensor? Preciso do sensor

Darlei Dallagnesi -

What is the part number of the sensor? Actually, I need the part number for the IR illumination LED.

bob cov -

Unfortunately the only way I discovered how to clean the inside of the new sensors on Q7 Max (since they did not have a release) is I had to carefully break off the top portion, clean the inside of the housing with the alcohol+cutips, and then replace the broken off portion and tape it down. I will likely have to clean it more often in the future but the cliff sensor problem is now fixed whereas I would have had to buy a new sensor (if that's even possible) and take the whole Roborok apart to do it.

Stephen Taylor -

Thanks a lot! I got entire new sensors, but was happy I could follow your guide for the disassembly!

Richard van Schaik -

had a cup spill on my Roborock Qrevo S5V and shorted one of the cliff sensors. The board used by the cliff sensor was fried. Rather than try to find a replacement cliff sensor (not many on Amazon or Aliexpress) I decided to "disable" the broken cliff sensor by soldering two of the cables to trick the vacuum into never seeing a cliff. The other 3 still function perfect.

Very similar to the tape or aluminum foil trick, but that didn't work for me because the cliff sensor was shorted to always see a cliff.

Ben Wendell -

Thanks for the explanation. I ended up replacing one complete sensor, so I had to solder four wires, and it worked perfectly! I bought a new set with three sensors on AliExpress, cut one off, and used it to replace the old sensor.

The vacuum cleaner now works perfectly again — and all for a part that cost about €15.

I had only owned the vacuum for 2.5 years, and it cost me €550, so this guide helped me out a lot!

remcog -