Einleitung
Diese Anleitung zeigt, wie die Hauptplatine im Nintendo Wii U GamePad ausgetauscht werden kann. Du benötigst einen Schraubendreher PH0 und eine Pinzette.
Ersatzteile
-
-
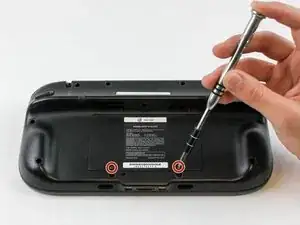
Drehe das GamePad um und entferne die beiden 4,7 mm Schrauben mit einem Kreuzschlitzschraubendreher #00.
-
-
-
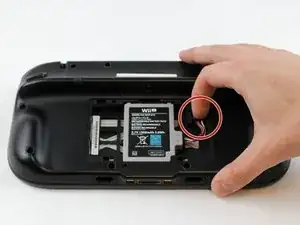
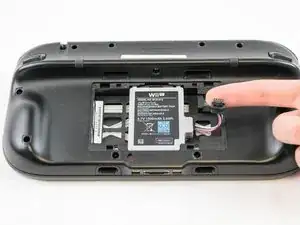
Drücke mit deinem Finger nach unten und ziehen sie Akkustecker heraus.
-
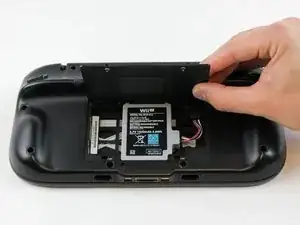
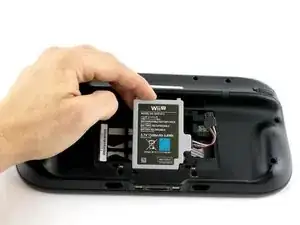
Entferne dann den Akku aus dem Akkufach.
-
-
-
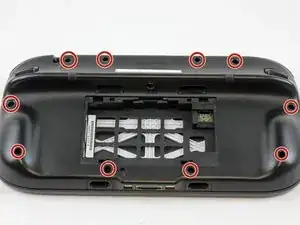
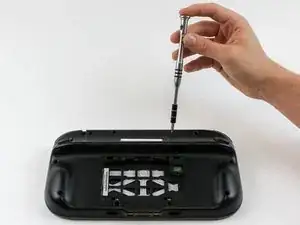
Entferne die zehn 9 mm Schrauben am äußeren Gehäuse mit einem Tri-Wing Y1 Schraubendreher.
-
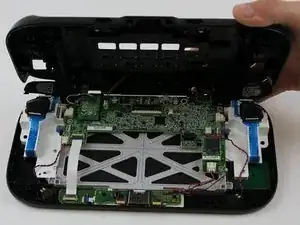
Hebe die Rückseite des Gehäuses an.
-
-
-
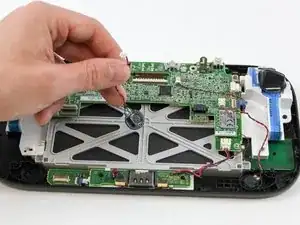
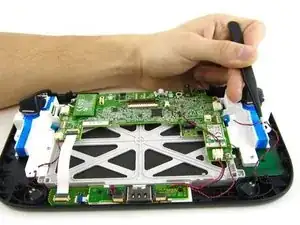
Ziehe mit den Fingern den Stecker des Rumble-Motors am äußeren Gehäuse von der Hauptplatine ab.
-
-
-
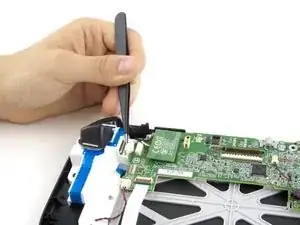
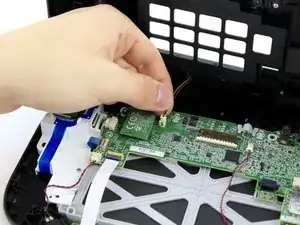
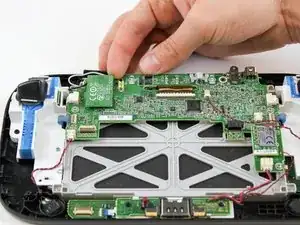
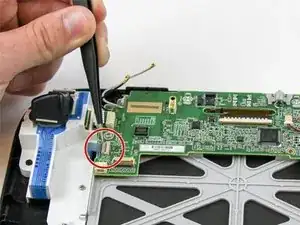
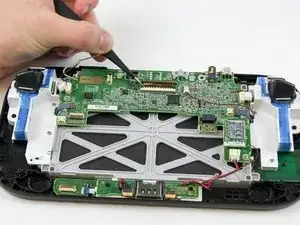
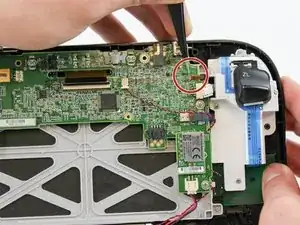
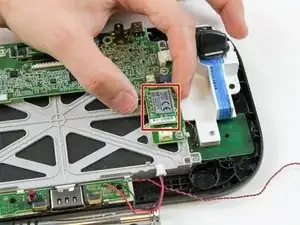
Hebe die schwarze Sicherung vorsichtig hoch. Sie kann leicht kaputt gehen, wenn du sie nur an einer Stelle hoch ziehst. Entferne das braune Flachbandkabel mit einer Pinzette.
-
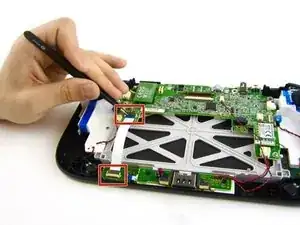
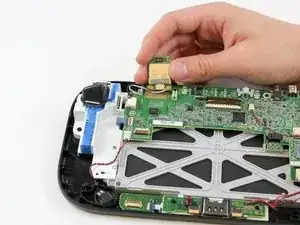
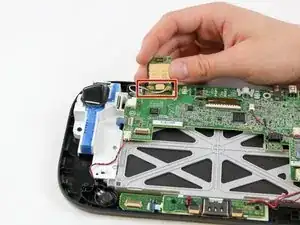
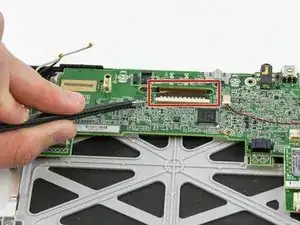
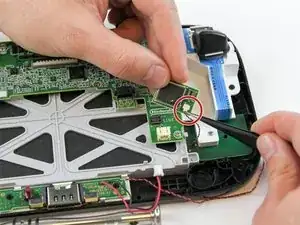
Entsichere und löse das kleine Flachbandkabel zum Touchscreen links vom braunen Flachbandkabel.
-
-
-
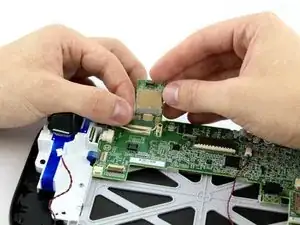
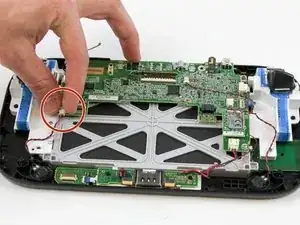
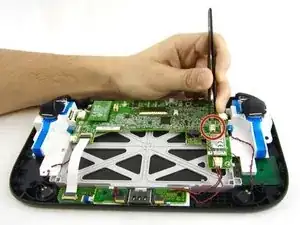
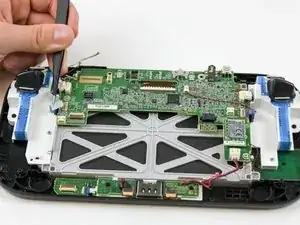
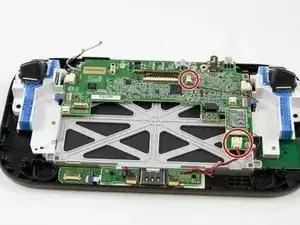
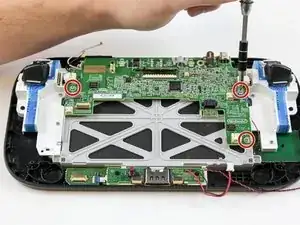
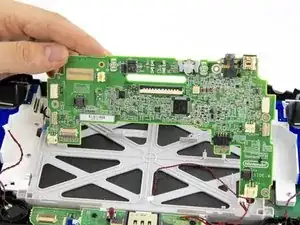
Entferne die restlichen drei 5,1 mm Kreuzschlitzschrauben #0.
-
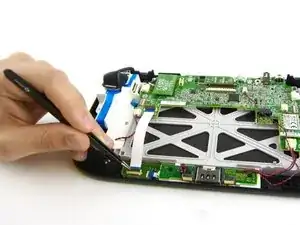
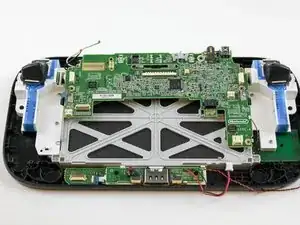
Hebe die Hauptplatine hoch und entferne sie.
-

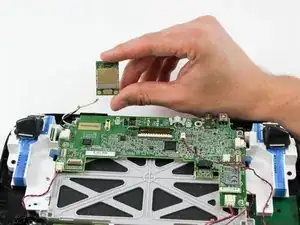
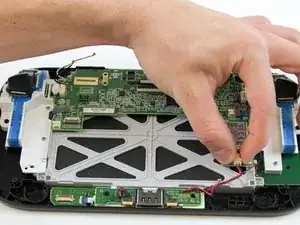

Um dein Gerät wieder zusammenbauen, folge den Schritten in umgekehrter Reihenfolge.
3 Kommentare
i need help with the tiny clasp for the touch glass ribbon. the tiny grey clasp snapped off and now the ribbon will not stay in, so i can't use the touch screen, if there a way to secure that tiny ribbon to the contact?
Roxanne -
How can i see what version off motherboard i need to buy to replace it
I got 30X52504 as number on the board
"This guide is retained solely for historical purposes. Use the updated version of the guide to perform your repair." ok cool, but where
tried to unscrew the 10 Tri-Wing size Y1 screw with my iFixIt toolkit
unfortunately the tool is too “fat” and short, it cannot reach 4 screws on the corners of the gamepad.
having the iFixIt toolkit and needing to purchase an additional slim screwdriver it’s a shame…
AJtriple -