Introduction
This guide shows you how to replace the all-in-one Display and MagSafe cable of your Apple Thunderbolt Display.
-
-
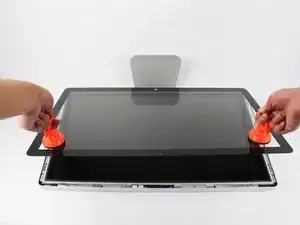
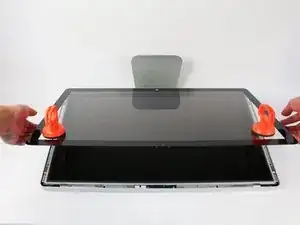
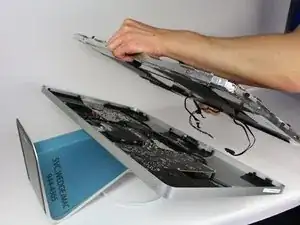
Lay down the display with screen side up.
-
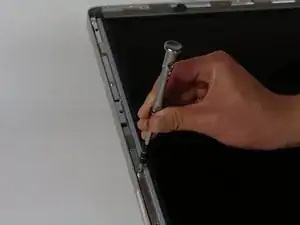
Place the two suction cups on both sides of the top of the screen and make sure to lock them in place.
-
The glass screen is connected to the rest of the display by small magnets. Lift slowly and the screen will come right off.
-
-
-
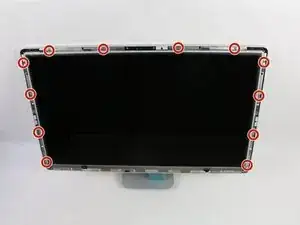
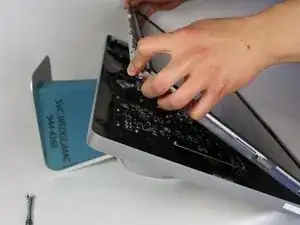
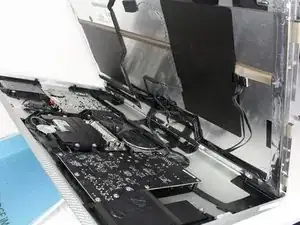
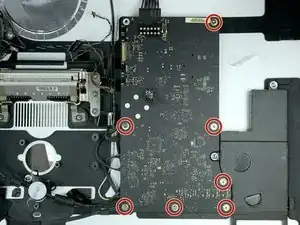
Unscrew the 12 screws around the side edges and the top of the LCD with the TR 10 Screwdriver.
-
-
-
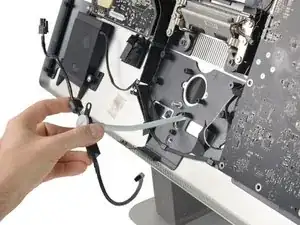
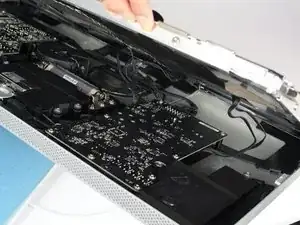
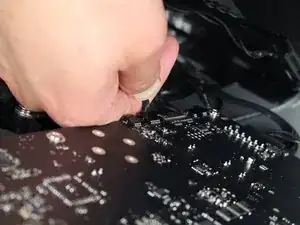
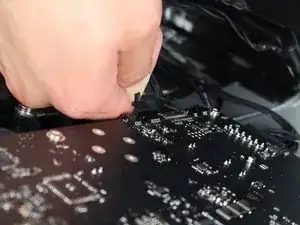
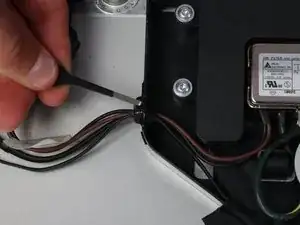
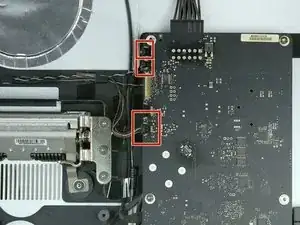
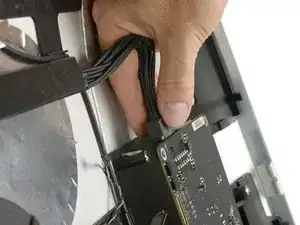
For the first of the four wires (furthest away from the wire that is held in by a screw), grab onto the connector and pull slowly.
-
-
-
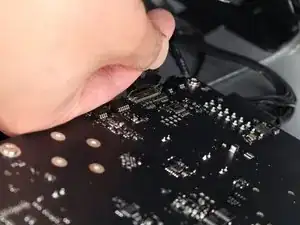
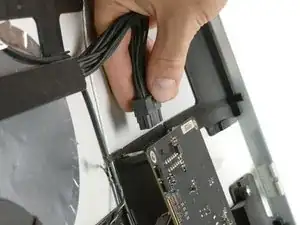
For the next connector, which is right next to the previous wire, there is a piece of tape attached to a metal bar.
-
Flip the metal bar over using the tape as a handle.
-
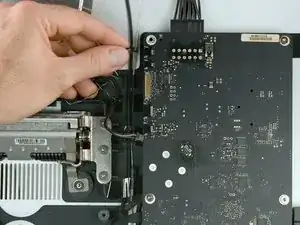
Next, grab onto the connector and slowly pull it from the socket in the logic board.
-
-
-
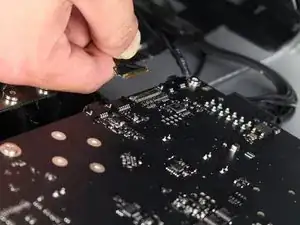
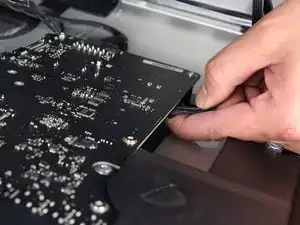
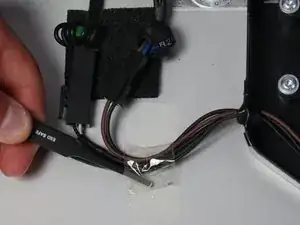
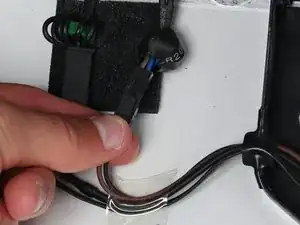
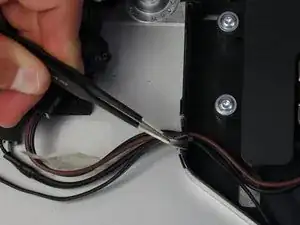
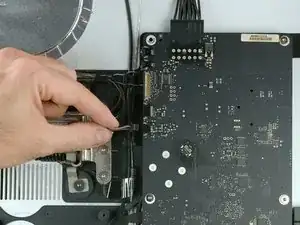
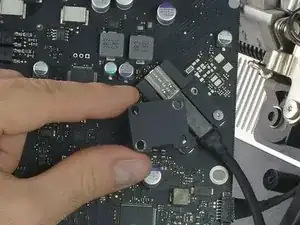
For the connector on the other side of the logic board, grab the connector from underneath and carefully pull it from the board.
-
-
-
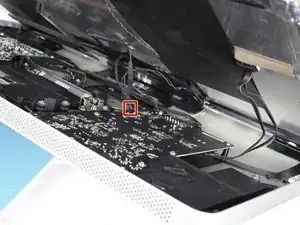
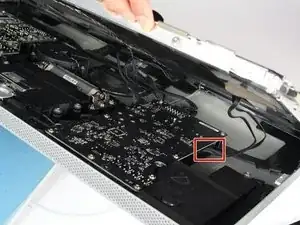
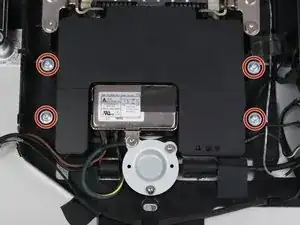
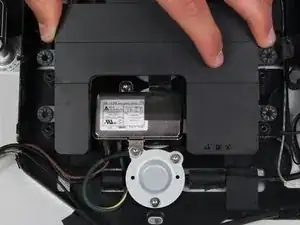
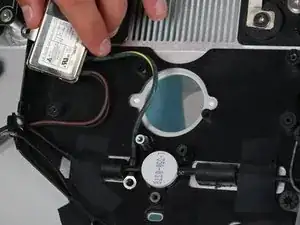
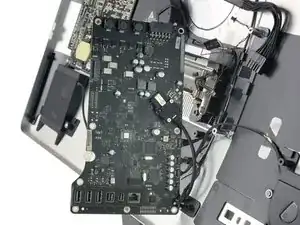
You should now see the EMI filter right in the middle of the device (although held in by a few other components).
-
Follow the wires coming out of the bottom of the Power adapter off to the left.
-
Take the tweezers and remove the piece of tape holding the wires to the casing.
-
There is only one connector that needs to be taken out (even though there are two right next to each other!).
-
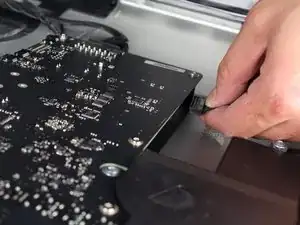
Grab the connector from the bottom and pull it carefully from its corresponding socket.
-
-
-
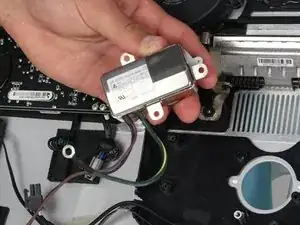
Next, remove the piece of electrical tape that is holding wires into the casing connecting to the power adapter.
-
-
-
The surrounding speaker component (the black box) around the power inlet needs to be removed.
-
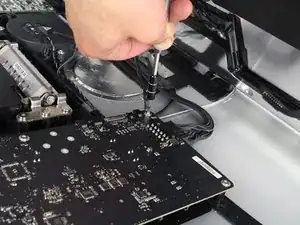
Use the TR 10 screwdriver to remove the four screws.
-
Disconnect the speaker from behind the logic board by carefully pulling at the plastic end of the cable.
-
Remove the speaker.
-
-
-
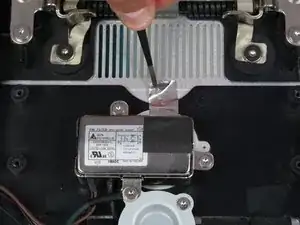
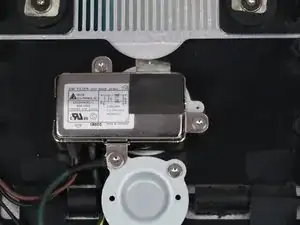
Now that the middle speaker is out of the way, the EMI filter is easily accessible.
-
Using tweezers, remove the silver tape that is at the top of the filter.
-
-
-
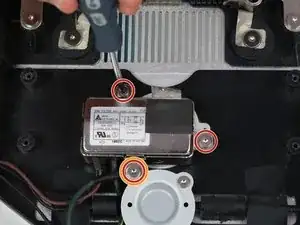
The EMI filter is connected by three screws. Use the T10 screwdriver to remove them.
-
The screw that holds in both the filter and a wire that is connected to it is a different size and should be kept identifiable from the other two screws.
-
The green and yellow wire that was held in by the different screw is tucked behind another component. To get it out, squeeze it behind the black wire and the filter will be able to be removed from the casing.
-
-
-
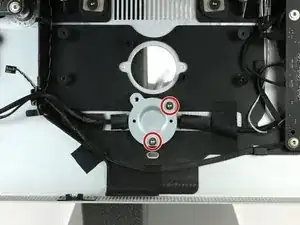
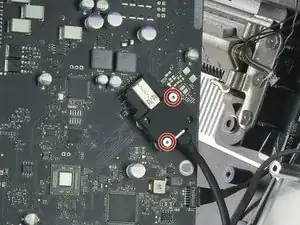
Remove the two T10 screws from the metal plate holding the cable in place.
-
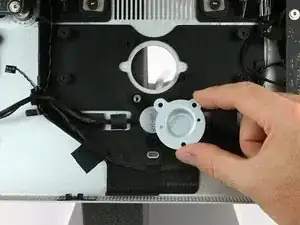
Remove the metal plate.
-
-
-
Carefully remove three cable connectors from the logic board by walking them out while holding them at the plastic end.
-
Fan control cable
-
Temperature sensor cable
-
Fan power cable
-
-
-
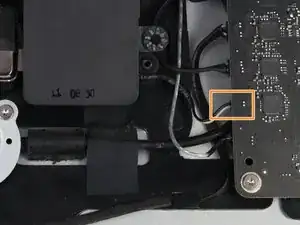
Now you are able to reach behind the logic board to disconnect the cable running to the power board.
-
-
-
Carefully flip the logic board to the left using the remaining cables as a hinge to get access to the display port.
-
Remove the two Torx T6 screws from the metal plate securing the display port connector.
-
Remove the metal plate.
-
-
-
Unplug the Thunderbolt cable from the logic board.
-
Thread the remaining Thunderbolt & MagSafe cable through the cutout in the rear case.
-


To reassemble your device, follow these instructions in reverse order.

59 comments
Unbelievable amount of very detailed and careful work to replace a Thunderbolt cable which is attached on the inside to a standard Thunderbolt socket! Why not just have the socket on the back of the unit?????
You can actually use the socket on the back of the unit as an input if your octopus cable is dying, as long as you are connecting directly to a Thunderbolt 1 or 2 Mac. If you are using the Thunderbolt-3-to-Thunderbolt-2 adapter, you have to use the built-in cable.
Tim -
In reply to Tim - This is not true - I am running a 2018 Mac Mini using the Thunderbolt 3 to Thunderbolt 2 adaptor and a standard Thunderbolt 2 cable connected to the external thunderbolt connector on the Thunderbolt Display - It works fine.
Nice one Tim! Saves me opening the screen! Thanks!
Me too! I was just about to start dismantling my display when I noticed this tip - I’d even bought some suction cups. Thanks Tim!
Oh, my, yes! What a useful comment. It makes sense that this would work but I would not have thought of it. @timgostony Thank you very much indeed!!!!!
At the top of this guide for the Apple Thunderbolt Display Thunderbolt & MagSafe Cable Replacement, it says that there are “No Parts Required” I beg to differ. I need this guide because I need to Replace my Apple Thunderbolt Display Thunderbolt & MagSafe Cable because the connector at the computer end is sketchy and if touched causes the image to glitch and go out. I know its the cable because this issue is not present with any other display or projector I plug into the same port on my computer. So, I ask, do you have a reliable source for an Apple Thunderbolt Display Thunderbolt & MagSafe Replacement Cable so I can use this guide and fix my monitor once and for all?
Answered my own question. http://a.co/d/bOlf4s0
Hi Stephen, You’re right, the wording is somewhat confusing. Of course you need a replacement part to replace something ;) This has been forwarded and we’ll hopefully change it soon to provide proper information. Thanks for the parts link; i’ll put this into the “parts” section for the time being.
Instead of $14 foam block, I used a full roll of paper towel and two pillows. While it worked, if I ever did this again, I would buy the block of foam. Since you’re removing a power cable, you need to be able thread it through and I think the foam block would make that easier.
Josh Miller -
You can also use a single handle, double cup floor lifting suction cup. Just place it in the centre of the screen near the camera and lift slowly.
Steve A -
I just used a toilet plunger to remove the screen and it worked like a charm!
Philip Jacob -
That’s what I call resourceful—made my day. I hope your repair was successful.
Tobias Isakeit -
Great idea, thanks a lot!
Yvan Sandoz -
The glass lifted off the magnets quite easily after just using my fingernails. No suction cups or toilet accessories needed.
Adrian Gropper -
I had the same problem and after removal of the fan and a bit of work with the vacuum, the fan is quiet. Thanks to ifixit for the great instructions that made this easy.
John Perser -
To keep the screen up, other soft objects might work, but it's important that the hole in the back isn't covered because you will need to thread the new Thunderbolt/MagSafe cable through it and it would be a hassle to do it after everything's been set up.
Thomas -
Anybody got any links to glass screen replacement supplier for the A1407 Thunderbolt Display? Im finding it impossible to find a replacement without it being crazy money.
Michael McMillan -
Instead of a wedge, I used 4 rolls of toiletpaper, one under each corner.
jnbruin -