Introduction
Use this guide to replace the hard drive in your Apple Time Capsule Model A1302.
-
-
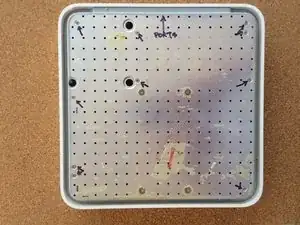
Open the Time Capsule by exposing the screws that hold the device together. The screws are concealed by the rubber base, which is the bottom surface of the device.
-
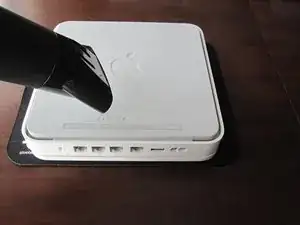
Use a heat gun or hair dryer to heat the rubber base, which softens the adhesive holding it on.
-
Starting in a corner, carefully lift the rubber base to prevent tearing. You can use a guitar pick or a small, plastic ruler to help separate the rubber from the metal.
-
-
-
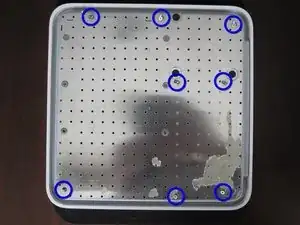
Once the rubber base is separated from the device, remove the 8 Phillips PH00 screws that attach the metal bottom of the case to the plastic top of the case.
-
-
-
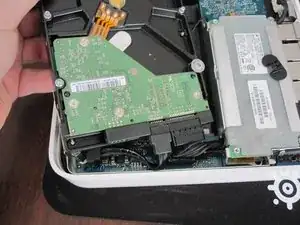
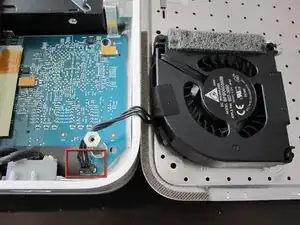
Lift up the left side of the metal plate and slowly flip it over the right edge of the device.
-
Since many people have had serious problems with the fan power connnector breaking, it is advisable to NOT try to disconnect the fan power connector. Be VERY careful with this connector. It is extremely fragile. If you absolutely have to disconnect the fan from the logic board, VERY carefully use a spudger or tweezers to do so.
-
-
-
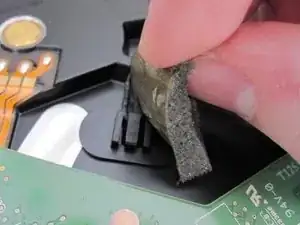
Peel off the foam and set the sensor aside. Be gentle with the foam because you will reuse it to connect the sensor to the new HDD.
-
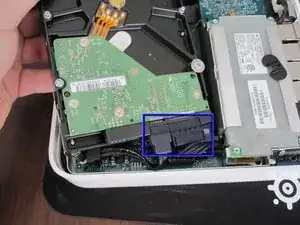
Lift the HDD out of the device and disconnect the two SATA cables from the HDD.
-
-
-
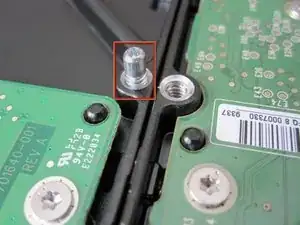
Using a Phillips #00 screwdriver, remove the four metal spacers (pegs) from the old HDD and install them in the same locations on the new HDD.
-
Place the temperature sensor in approximately the same position on the new HDD as on the old HDD. Cover the sensor with the foam, using adhesive tape if necessary.
-


To reassemble your device, follow these instructions in reverse order.

68 comments
Worked like a charm! Instructions were very thorough. Thank you
jlechuga -
I dislodged the fan connector from the logic board. How can I go about fixing this? Can I just solder the connector back onto the board? Thanks
Jon -
Yes. It says to follow the article bakcward so yes connecting correctly sshould work…
Success! I would get a flash of a green light after a factory reset then the flashing amber followed by a solid amber. No wifi signal or HD. Put my ear to the unit and heard the click of death. New hard drive per above and I was back up and running in 20 minutes.
Stuart -
Slowly start peeling at one corner... worked better than shown on the pictures.
Markus -
Slow down particularly near the bottom label where it is stiffer. Either that or I needed to give it more heat. Going too fast can risk tearing the rubber base if the adhesive is strong.
ElvinC -
If you are wondering if the Time Capsule will still work as a router if you remove the HDD and leave it out, the answer (according to another webpage I read) is YES, it will still work. Apparently, you get a warning with the AIrPort Utility about a missing HDD, but it still works. I wanted to keep and reuse the 1TB Hitachi HDD for offsite data backup.
CraigH -
Use an iron instead of a heating gun or hairdryer!
Gradually raise the temperature while checking for separation, while moving over the rubber. I first cleaned the rubber with some soap, to avoid scorching dust or grease. The setting for synthetic fabrics seemed to do the job with my Tefal iron; probably a little over 100 degrees centigrade. No steam off course!
Worked like a charm without leaving almost any residual glue.
Sticking the rubber sole back after the repair was also successful.
Frits de Bruijn -
Thanks for sharing this.
kenatkenichikato -
Adhesive tape used is Nitto No. 5015. I found a piece of a back-paper left underneath the rubber…
vesa -
Is there a possibility to change an already changed 2TB SATA to a bigger one? Mine is full. because I added another MacBook Pro, but I’d rather not buy a newer TimeCapsule
Bette Rose -