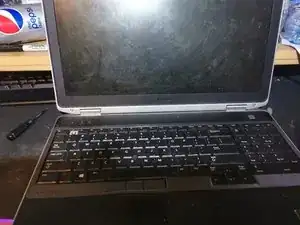
Introduction

  1. EDcrZjumpEUYqsxu
    • Pull back the 2 battery tabs.

  2. mEjIXHbn2JLyNgHE
    • Pull out the battery.

  3. vFwf5P1MFKKCoEBm
    • Push the button next to the DVD drive.

  4. LGw23Lkea6Gt6jRl
    • Pull out the DVD Drive.

  5. isWvuBT4KDTlPqPF
    • Undo the 2 Phillips #00 screws.

  6. 1Xs5IrZS2hID2x2r
    • Pull out the hard drive.

  7. vlLaRjBAdNPUYksM
    • Remove the 5 Phillips #00 screws.

  8. l1Aw2yPi411qAyvo
    • Remove the back cover.

  9. HsHOF4GBx1pLKmWc
    HsHOF4GBx1pLKmWc
    6aspNMVIOefQresT
    • Flip over and open the laptop.

  10. 2bFxHfWxnRS35U2D
    2bFxHfWxnRS35U2D
    AYYxMXAKY6rSmh6p
    Uns2s2noCgGPQvph
    • Use your fingernail or opening tool to remove the keyboard bezel.

  11. AHfeZAWnYtuvEpQX
    • Remove the 3 Phillips #00 screws.

  12. rigw5OHvLkgZ5es6
    • Carefully remove the keyboard.

    • Do not lift up the keyboard too much, as it is still attached via a ribbon cable.

  13. kCOcOfOctnwmk13A
    kCOcOfOctnwmk13A
    yUdmApWwdSQEfraY
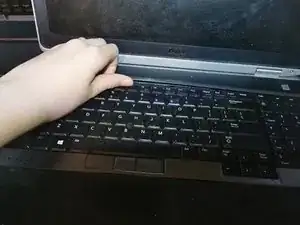
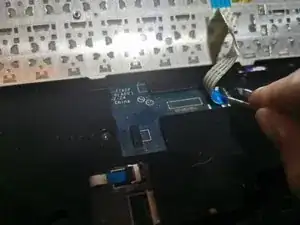
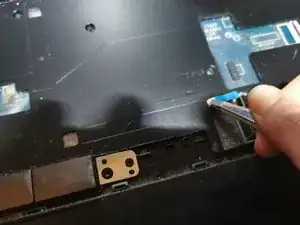
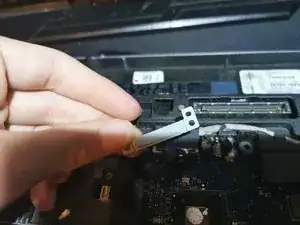
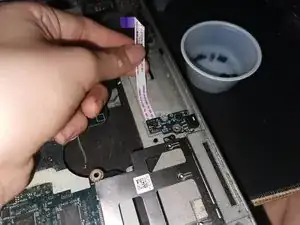
    • Use a pair of tweezers or your fingernail to lift up the ribbon cable lock.

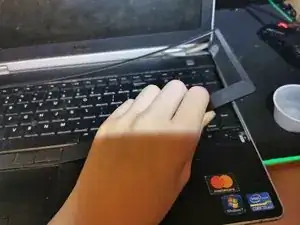
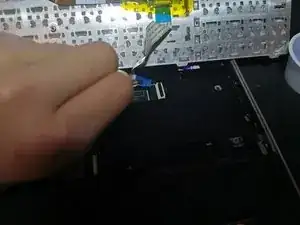
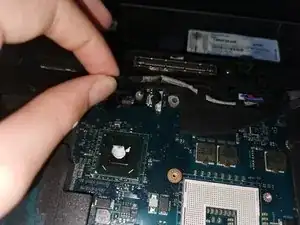
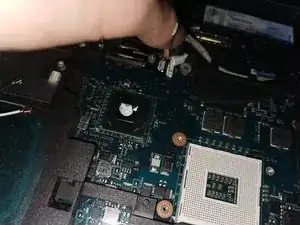
    • Use a pair of tweezers or your finger to remove the keyboard ribbon cable

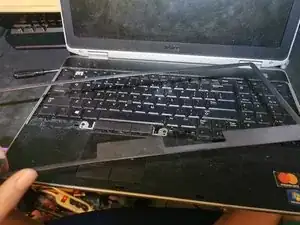
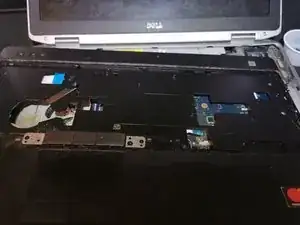
    • Set the keyboard aside.

  14. ytgA6ykCmgVxdHMv
    • Remove the 10 Phillips #00 screws.

  15. oZ6LtijkiNuXdcDQ
    • Flip over and open the laptop.

    • Remove the 8 Phillips #00 screws,

  16. BSYyGHo3X6YnABJU
    • Use a pair of tweezers to remove the trackpad ribbon cable.

  17. cCGgNEBFI5MrbEIE
    • Use a pair of tweezers to remove the ribbon cable for the lights and buttons.

  18. 4dmrhAGvhHYBNqFi
    • Lift off the laptop's palmrest.

  19. ZXQKQHxrDkYYmRw1
    ZXQKQHxrDkYYmRw1
    XFeJ4n4ibNlZdBHB
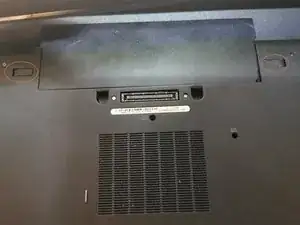
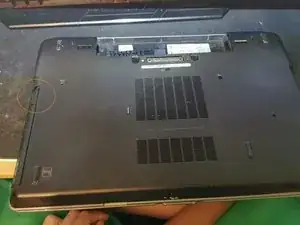
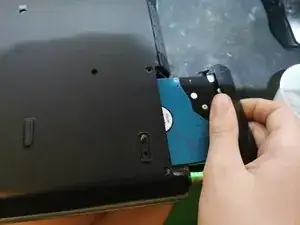
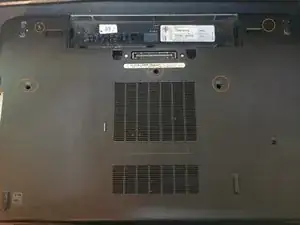
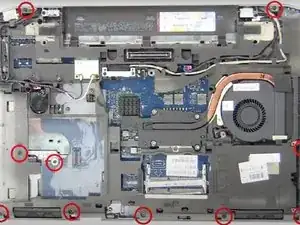
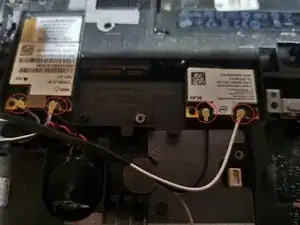
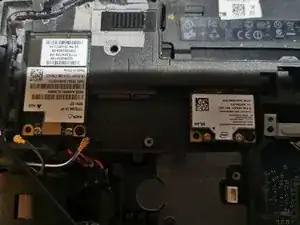
    • Close and flip over the laptop.

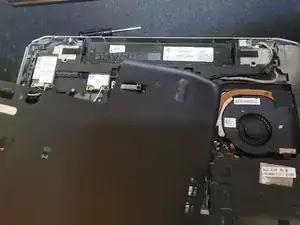
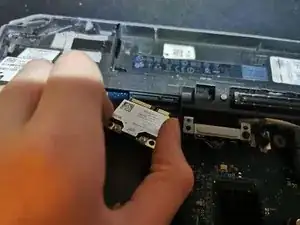
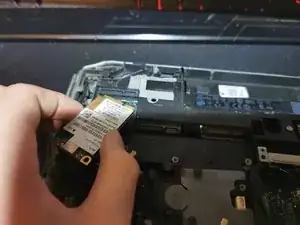
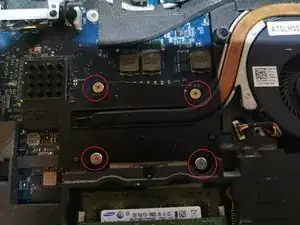
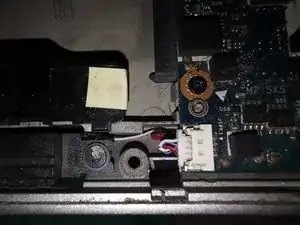
    • Remove the antenna cables and screws from the Wi-Fi card and the cellular card.

  20. JBZU2OEkhSdpntYF
    JBZU2OEkhSdpntYF
    cxNIMDPf1oAMGYlM
    • Remove the Wi-Fi and cellular cards.

  21. muCMlEEoBIonZOSA
    • Disconnect and remove the CMOS battery.

  22. HFc3uIfdGKWK15SD
    • Remove the 4 heatsink screws.

  23. TNysXa6GH62tPHhg
    TNysXa6GH62tPHhg
    AkXDGm1VqfSFHOdu
    • Disconnect and remove the heatsink.

    • Make sure you have thermal paste before doing this! You will need to reapply the CPU's thermal paste.

  24. OnXM1IDL5KY5cnJb
    • Use a knife or flathead screwdriver to turn the CPU lock counter-clockwise.

    • Remember to turn the CPU lock clockwise when reassembling the laptop! If you don't, the system will not turn on.

  25. aJ1l1neb1BpMdERk
    • Remove the CPU

    • Be VERY CAREFUL to not bend ANY pins on the CPU.

  26. MGjqc5UxgHAGX3KA
    MGjqc5UxgHAGX3KA
    NF3tqKJKwDGD5jPY
    • Unscrew and remove the bracket.

  27. G2BN3w1JutwXus1u
    G2BN3w1JutwXus1u
    cEX4rRjrEXXDBA6j
    • Disconnect the display cables.

  28. DmLNYhW136tXKhFN
    DmLNYhW136tXKhFN
    qXW3shkrucYnGwyq
    prg6XPHU5bHapxtW
    • Flip over and open the laptop.

    • Remove the 2 motherboard cables.

  29. qdqAsmGmgArKFOhF
    • Remove the 5 motherboard screws.

  30. m4CVULuemXqxLgSc
    m4CVULuemXqxLgSc
    4tgvLUHEPYTKGTAT
    • Remove the 2 bracket screws.

    • Remove the bracket.

  31. lDLsZdMRGOFKMqph
    • Remove the motherboard.

Conclusion

To reassemble your device, follow these instructions in reverse order.

Ella

Member since: 26/08/19

1879 Reputation

0 comments