
Introduction
This is a prerequisite guide! This guide is part of an another procedure and is not meant to be used alone.
Tools
-
-
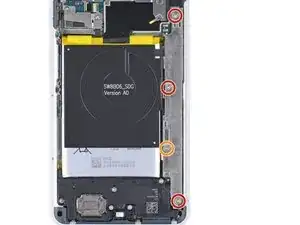
Remove the following four T3 screws securing the metal cover bracket:
-
Three 4 mm long screws
-
One 3 mm long screw
-
-
-
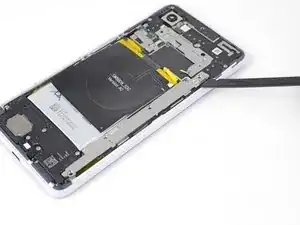
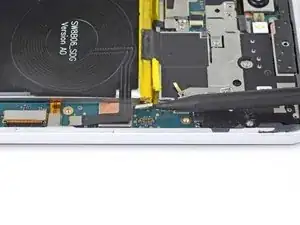
Insert the flat end of a spudger underneath the top right edge of the metal bracket and pry up to loosen it.
-
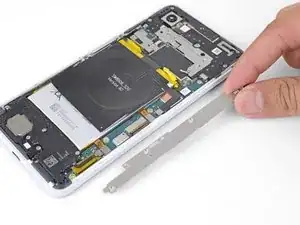
Remove the metal cover bracket.
-
-
-
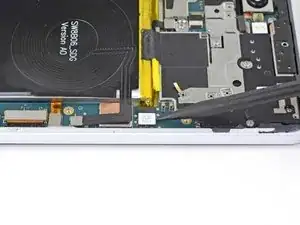
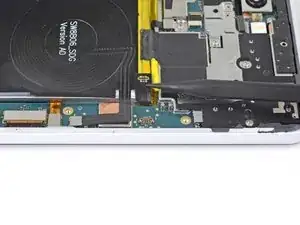
Use the point of a spudger to pry up and disconnect the battery connector from its socket.
-
Bend the battery cable such that the connector will not accidentally touch the socket.
-
Conclusion
To reassemble your device, follow these instructions in reverse order.

Be careful when putting the screws back in that you do not over tighten. This will cause you to destroy some pixels on your screen.
Brian Retterer -
The long screw on my disassembly was adjacent to the lettering for the Qi inductive receiver, and not close to the silver exposed part of the battery as indicated
Andrew Munro -
In my case, all the screws are the same length.
Krzeszny -