
Introduction
Prerequisite guide only! This guide is part of an another procedure and is not meant to be used alone.
This guide shows how to remove the clipped and screwed on plastic midframe for the pixel 3a.
-
-
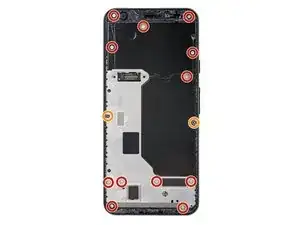
Remove the fourteen T3 screws of the following lengths securing the plastic midframe:
-
Twelve 4.3 mm silver T3 screws
-
Two 4.3 mm black T3 screws
-
-
-
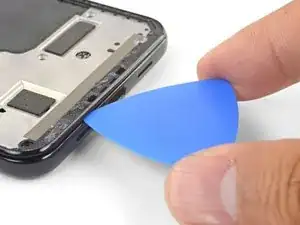
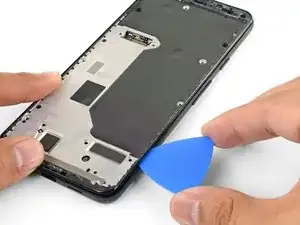
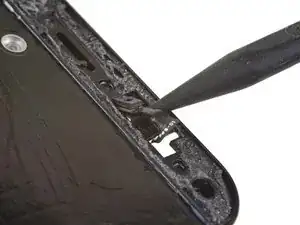
Insert an opening pick into frame seam at the bottom of the phone. This seam sits between the plastic midframe and the back cover.
-
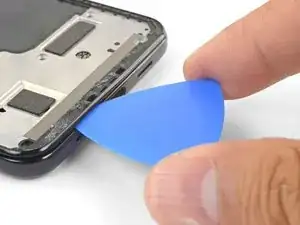
Slide the pick along the seam to release the clips holding the plastic midframe.
-
-
-
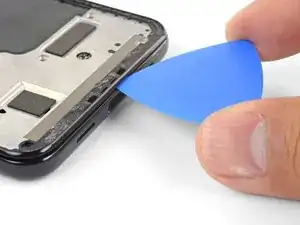
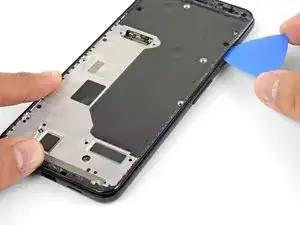
Slide the opening pick along the left and right edges of the phone to release the midframe clips.
-
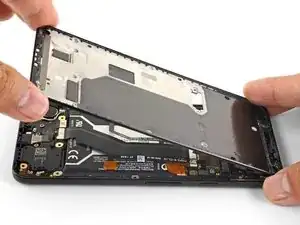
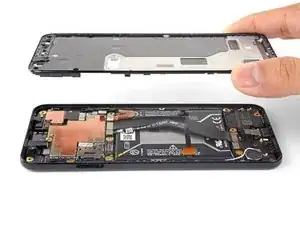
Lift the bottom edge of the plastic midframe up but do not remove the midframe. The midframe is still tethered to the phone by the fragile proximity sensor cable at the top edge.
-
-
-
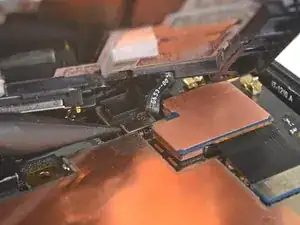
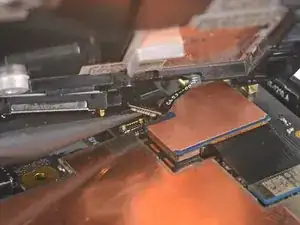
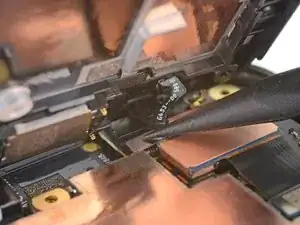
Use the point of a spudger to carefully pry up and disconnect the proximity sensor connector from the motherboard.
-
Remove the plastic midframe.
-
-
-
Align the top edge of the plastic midframe with the phone.
-
Use the point of a spudger to carefully align and push the proximity sensor connector onto the motherboard socket.
-
This takes a bit of patience and finesse. Once you have the connector in place, you can also use a finger to gently press the connector onto the socket.
-
Use the point of a spudger to carefully pry the proximity sensor out of its recess on the midframe. The sensor is lightly adhered to the midframe.
-
Remove the sensor from the midframe. Attach the sensor connector onto its motherboard socket.
-
Thread the sensor cable through the midframe and reposition the sensor in the recess. Press down with your finger to adhere the sensor back onto the midframe.
-

To reassemble your device, follow these instructions in reverse order.

I found that a T3 bit didn’t get purchase on the screws in my Pixel 3a, but the T4 bit worked great. Not sure what’s up with that.
E. Dunham -
This is definitely possible, depending on which kit’s T3 bit you use, along with potential screw quality variances.
Arthur Shi -
My Pixel 3a has been apart three times for a non-functioning front camera. The first time, it was by a Google authorized repair shop, and the camera stopped functioning again after a few months. When I took it apart the second time, I noted that many of the screws weren't seated before I removed them. The camera module had become disconnected and simply reseating the connector fixed it. I was careful to fully drive all screws and apply an appropriate amount of torque to them, thinking the repair shop failed to do so. After 9 or 10 months, my front camera stopped working again. Again, I'm noticing a lot of the screws have worked themselves loose. I'm going to try to find an appropriate thread compound that I can precisely apply to these tiny screws.
Reid Solberg -
Hey Reid,
I would suggest blue Loctite or threadlocker. Dab a small drop on each screw before you install them.
Arthur Shi -
One of the bolts was rounded, so the torx screwdrivers (T3 or T5 in the kit) couldn't bite and loosen it. Not sure how to go forward.
Won Choi -