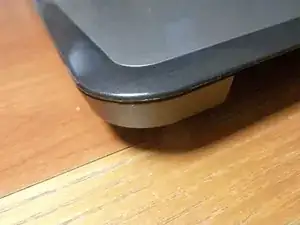
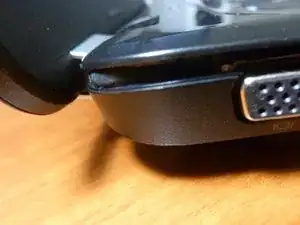
Introduction
Disassembly to clean dust from the fan and heat sink.
-
-
Power off and unplug the laptop.
-
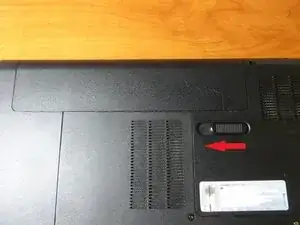
Then, remove the battery. Move the switch in the direction indicated, take the battery out, and set aside.
-
-
-
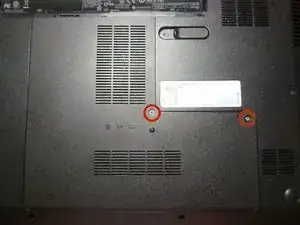
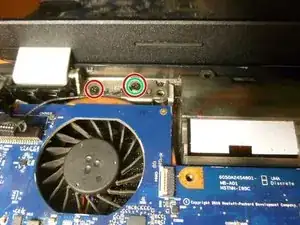
Loosen the two screws indicated (they won't come out all the way).
-
Take your spudgering tool and release the plastic clips, starting at the top. There are no clips on the left side, just tabs.
-
Lift and remove to the upper right, in order to release the tabs.
-
-
-
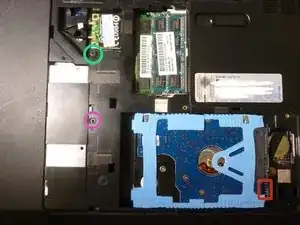
Slide the hard drive to the left, clear of the SATA connectors and lift it out.
-
If you're having difficulty removing the hard drive, insert your spudger into the gap and gently ease the hard drive away from the SATA connectors.
-
Remove the screw that holds the optical drive in and slide the drive out.
-
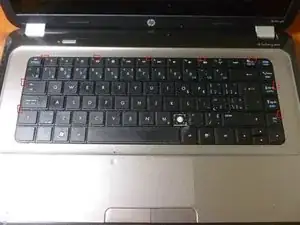
Remove the screw that helps hold the keyboard in.
-
-
-
Move the two tabs outward to release the RAM stick, then pull it out. Repeat for the other stick.
-
-
-
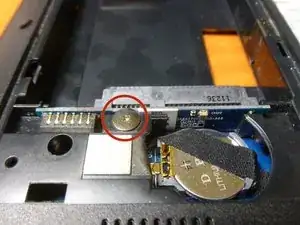
9 plastic clips secure the keyboard.
-
Detail of a clip.
-
To release the clips, push them in with a screwdriver or similar tool, while lifting the keyboard up. The first few clips are the hardest.
-
-
-
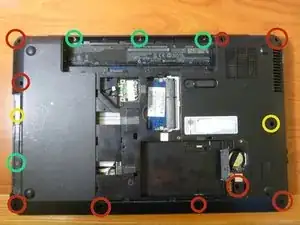
Remove all of the indicated screws.
-
Note that these screws are smaller than the ones indicated with red circles.
-
The screw on the right is hidden under a rubber plug. Remove the plug with a pointy object such as a push pin, then remove the screw.
-
-
-
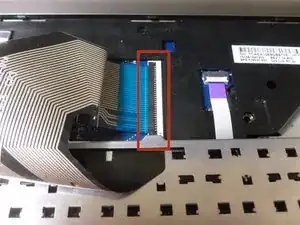
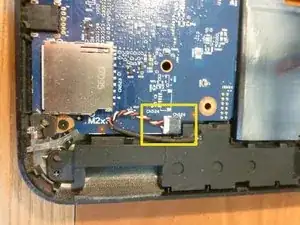
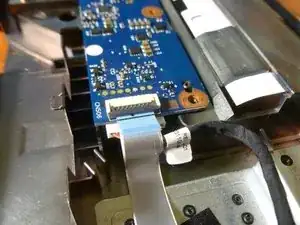
Disconnect these cables in the same way you disconnected the keyboard cable.
-
Also remove the six screws labeled "M2.5x4".
-
-
-
The top of the laptop is held on by plastic clips. Take your guitar pick/butter knife/opening tool and start undoing the clips. It's usually easiest to start at the gap where the optical drive was located.
-
-
-
Detach the cables from the wifi card, noting the numbers on the cables and which ports they were plugged into.
-
Unplug the display cable on the left side. First, partly peel the tape away, then use a screwdriver to help detach the cable. There are small tabs on each side to help.
-
-
-
Remove these screws on the left side to detach the hinge.
-
Remember to put the cable back under the screw when you reassemble!
-
Remove these screws on the right side.
-
Lift the display assembly away and set it aside.
-
-
-
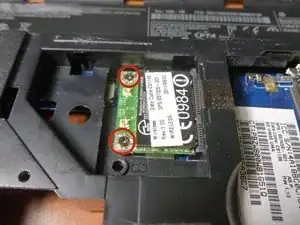
Turn the laptop over and unscrew the wireless card. It will pop up, as the RAM did. Slide it out and set it aside.
-
Near the upper right corner back on the top of the laptop, unplug the cable for the USB port by raising the black part. Then unplug the power cable by pulling it out.
-
-
-
On the bottom of the laptop, remove this screw, then lift the left side of the SATA assembly straight up to disconnect it from the motherboard. Remove and set aside.
-
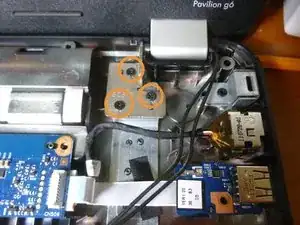
Unscrew these three screws, then move the assembly to the right to disconnect it from the motherboard.
-
-
-
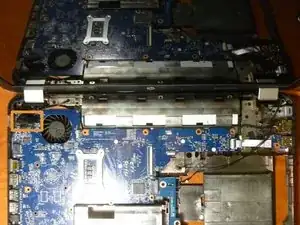
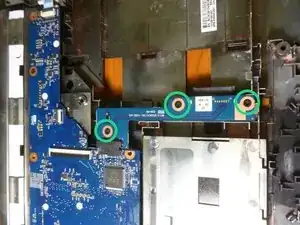
Remove these three screws and move the motherboard to the right to lift it out of the frame.
-
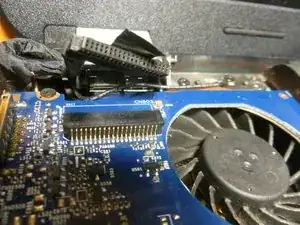
The cooling assembly. Use compressed air to blow all the dust out! I wouldn't recommend removing the CPU heat sink unless you have thermal paste handy to reapply.
-


To reassemble your device, follow these instructions in reverse order.

57 comments
after cleaning and put it back , now my laptop can't start
If you took reasonable precautions against static electricity, you probably forgot to connect one of the cables.
Patrick -
This guide was unbelievably useful, my G6 was heating up to 80+ degrees under light loads and turning off due to overheating, I was about to write it off, thought I might as well try this.
Once you get to the last step, it is possible to partly remove the fan (it stays attached at one corner) and clean out the gap between the fan and the bladed thing that looks like a barber's hair clipper.
That for me was full of a thick cake of dust, now that's gone the computer stays at 50+ degrees, and the battery life is massively improved (I was getting about 20 minutes due to the fan) and the fan is no longer louder than the speakers. Thanks uploader!
Absolutely amazing instructions! Better than the videos out there because the detail is so precise and easy to follow!
Problème possible sur les HP : la batterie est bloquée avec le verrou coincé en position ouvert. Solution : glisser une ou deux cartes plastique dans l'interstice de la batterie et les faire glisser tout le long pour débloquer la batterie
Sylvain Pelloquin -
Pour moi le loquet esg bloquer
jonas agudze -