Introduction

This guide will show you how to replace the screen on a HP Photosmart M547 in order to fix your device.

  1. KJpvNW5Ea4PscXod
    KJpvNW5Ea4PscXod
    rELeJ5WcAChPBcrV
    MYsGElMTcPlQe3Eh
    • Disconnect from all power sources. (Remove batteries, chargers, etc.)

  2. XSj1suASTbIv3sKe
    XSj1suASTbIv3sKe
    IOYXLJBynUBDFkAL
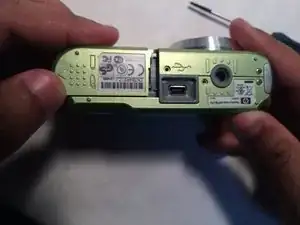
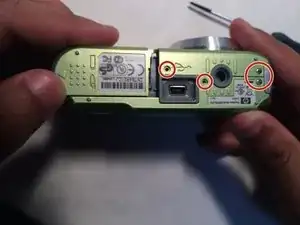
    • Remove the five 5mm screws from the bottom of the camera with a PH00 screwdriver.

  3. aNc4jKtRVdHtIaQQ
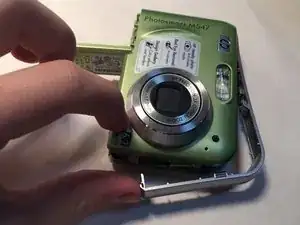
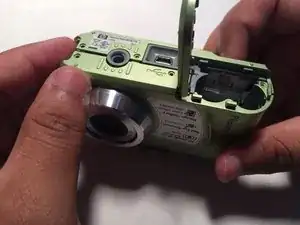
    • Pop the silver siding off of the camera. Proceed carefully as to not break the plastic.

    Hi. I am in need of the flap that covers the batteries. The one on my camera is cracked and almost immediately the batteries dies.

    If you can help, please respond. Thank you, BJ

    brenda nickleson -

  4. SwdpYAsusVDv5X2v
    SwdpYAsusVDv5X2v
    IbC5Z3dHCrUZgusJ
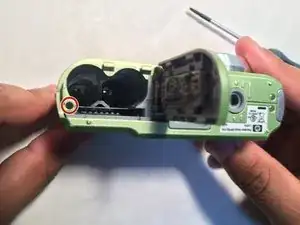
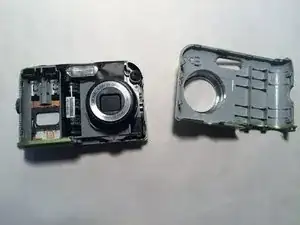
    • Make sure that the siding is fully removed and the battery dock is open. Carefully pry the top off of the camera.

  5. PCcYnPcCC25cUQcr
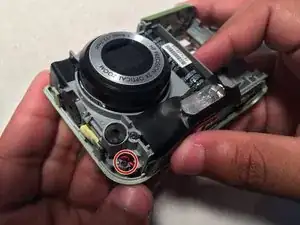
    • Approach from the front of the camera, make sure that the black/red wires as not covering the screw.

    • Carefully remove the black 5mm screw from the camera with a PH00 screwdriver.

  6. YxEuVQvntJiXxhuh
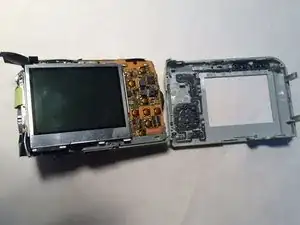
    • Flip the camera over and pop off the plastic siding.

  7. JWvuNCKOycFoSTCB
    JWvuNCKOycFoSTCB
    rxSbhvvGVdvGIJPX
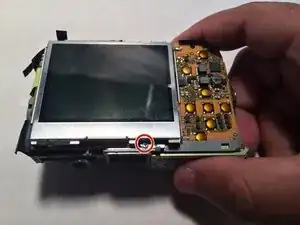
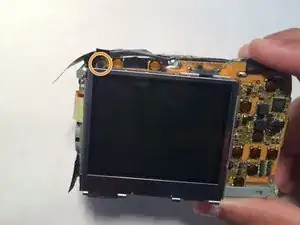
    • Look for the silver 5mm screw connecting the screen to the circuit board. Then carefully remove it using a PH00 screwdriver.

    • On the opposite corner of the screen there is a similar screw. Carefully remove that one as well.

    • You may need to peel back thin, black plastic to get to the screw. The plastic is purely there for dust protection.

  8. bAB5dPC2EohpQrjv
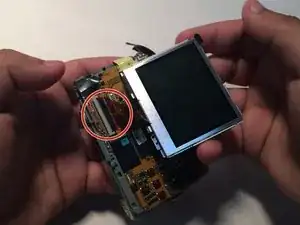
    • When you lift the screen off of the rest of the camera, you will see a small piece of ribbon wire connecting the screen and circuit board.

    • To remove this connection, you must lift the black bar at the base of the ribbon wire (on the circuit board), then slide the ribbon wire out.

  9. YVrJMtUru21lRsQx
    • Congratulations! You have removed the screen, you can now replace it and reassemble your camera.

Conclusion

To reassemble your device, follow these instructions in reverse order.
Jason Curran

Member since: 08/02/17

101 Reputation

0 comments