Introduction

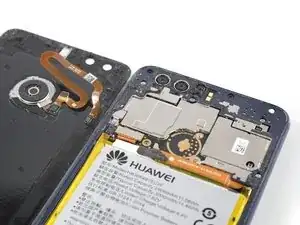
Use this guide to replace a worn-out or dead battery in your Huawei Honor 8.

If your battery is swollen, take appropriate precautions. For your safety, discharge your battery below 25% before disassembling your phone. This reduces the risk of a dangerous thermal event if the battery is accidentally damaged during the repair.

You’ll need replacement adhesive to reattach components when reassembling the device.

  1. Nk1AMxB5eXUdAjl3
    • Before you begin, switch off your phone.

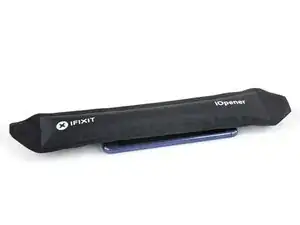
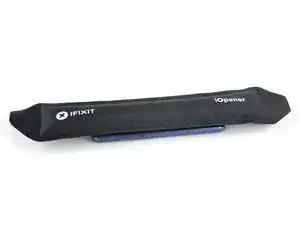
    • Apply a heated iOpener to the back of the phone to loosen the adhesive beneath the rear glass. Apply the iOpener for at least two minutes.

  2. BFgh2yoWmPOjhGIF
    BFgh2yoWmPOjhGIF
    SJUe2VCbFr6J3Ey5
    QcQsVbKrkmtsWodF
    • If the phone's rear glass is cracked, the suction cup may not stick. Try lifting it with strong tape, or superglue the suction cup in place and allow it to cure so you can proceed.

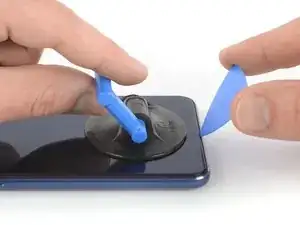
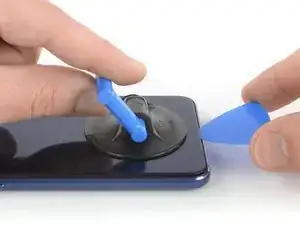
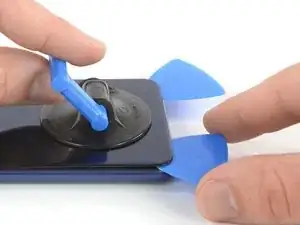
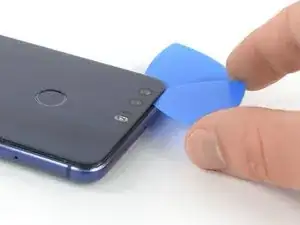
    • Secure a suction handle to the lower edge of the rear glass, as close to the edge as possible.

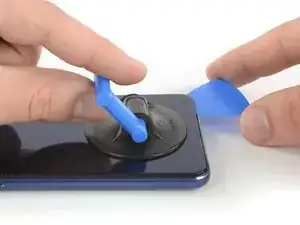
    • Lift the rear glass with the suction cup to create a small gap between the glass and the frame.

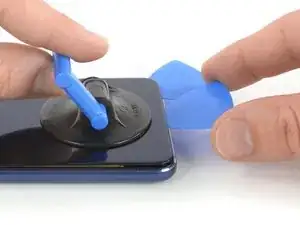
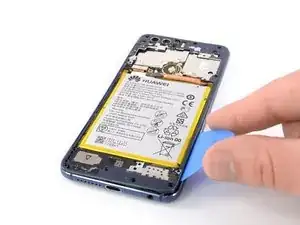
    • Insert an opening pick into the gap.

    • If you have trouble, apply more heat to further soften the adhesive. Follow the iOpener instructions to avoid overheating.

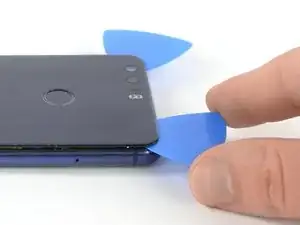
    • Slide the opening pick to the bottom right corner.

  3. EAKEIm1TKL1YOUlW
    EAKEIm1TKL1YOUlW
    I1PYeGHRbujR4n2N
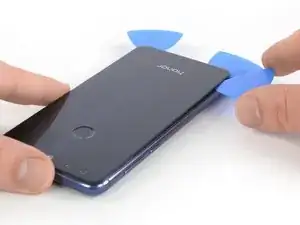
    • Insert a second opening pick and slide it to the bottom left corner to cut the adhesive.

    • Leave the opening picks in place to prevent the adhesive from resealing.

  4. eXbQ1dCmsLaOTAyh
    eXbQ1dCmsLaOTAyh
    JLJDtwtj3xaQTl4U
    RxpRDdQx66egx5Mj
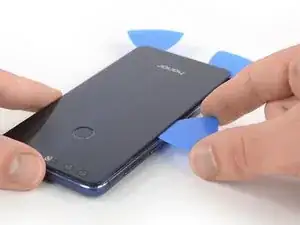
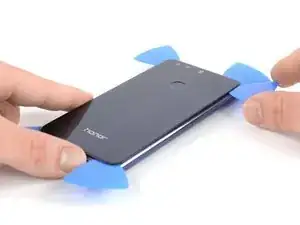
    • The fingerprint cable is located above the power and volume buttons on this side of the phone. Only use the tip of the opening pick in this area to avoid damage.

    • Insert a third opening pick at the bottom left corner.

    • Start to slide the tip of the opening pick from the bottom left corner along the side to cut the adhesive.

    • Leave the opening pick in its place at the top left corner to prevent the adhesive from resealing.

  5. kiKhJRCrN3LyjXvG
    kiKhJRCrN3LyjXvG
    AStPmMJeW5BRJAyf
    • If the adhesive gets hard to cut it most likely cooled down. Use your iOpener to reheat it.

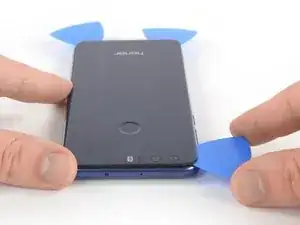
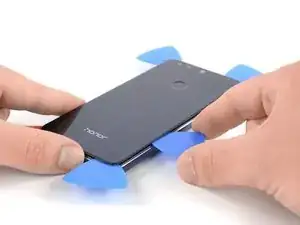
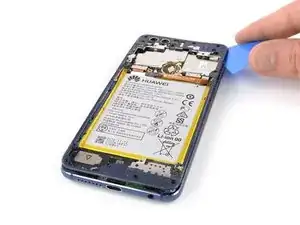
    • Insert a fourth opening pick under the top left corner of the rear glass.

    • Slide the opening pick along the top edge of the phone to cut the adhesive.

    • Leave the opening pick in the top right corner to prevent the adhesive from resealing.

  6. 3oQ2cfEVIvI32UpL
    3oQ2cfEVIvI32UpL
    u1Y6fSITCYBmksgI
    • Insert a fifth opening pick at the top right corner of the phone.

    • Slide the opening pick along the right side to cut the remaining adhesive.

    • The fingerprint cable is still connected to the motherboard. Don't try to remove the rear glass all the way yet.

  7. 4EvuS1XBXMFCsV1Q
    4EvuS1XBXMFCsV1Q
    IkbyrQUfLBMrhdlQ
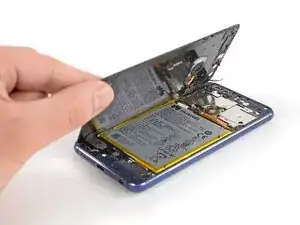
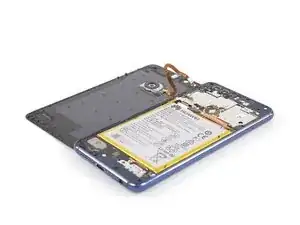
    • Carefully lift the rear glass and fold it to the left side of the Honor 8.

  8. VbmsKlwFr4ELEKkU
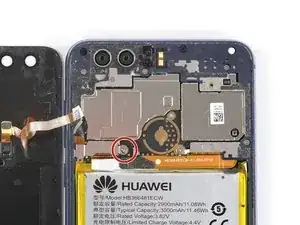
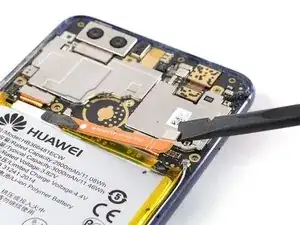
    • Remove the Phillips #00 screw (2.8 mm length) that secures the metal bracket on top of the fingerprint flex connector.

  9. KyHCIYqO5jUGy6Es
    KyHCIYqO5jUGy6Es
    LvOL6Yk5DYGOqgaj
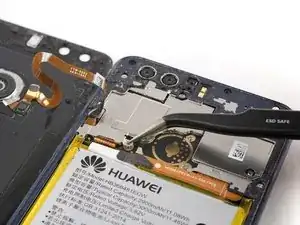
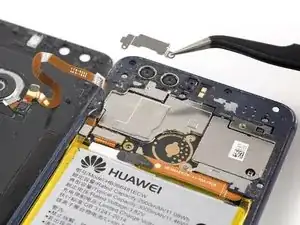
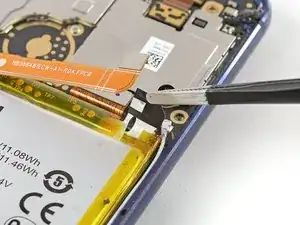
    • Use a pair of tweezers to remove the metal bracket that sits on top of the fingerprint and display flex connectors.

  10. ifE4YUwPkBduU6jJ
    ifE4YUwPkBduU6jJ
    nsXf15O3idJKMDYg
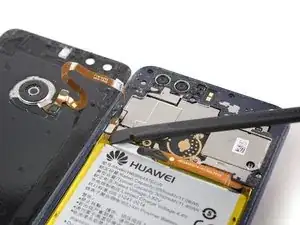
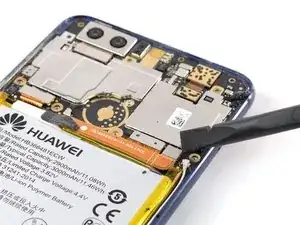
    • Use a spudger to pry up and disconnect the fingerprint flex connector.

  11. QBCByEP1TtjEcg2K
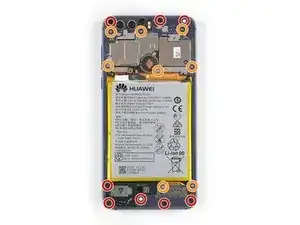
    • Remove these Phillips #00 screws securing the midframe bezel:

    • Eight screws with 3.5 mm length

    • Eight screws with 2.9 mm length

    • Some screws might be covered with a tamper proof sticker.

  12. DsLZvdcUHfYJKNIZ
    DsLZvdcUHfYJKNIZ
    1LmHysFput5dblfG
    QlDoURL4ls1iJPuQ
    • Insert an opening pick underneath the top right edge of the midframe bezel.

    • Use the opening pick to pry up the midframe bezel.

    • Insert the opening pick underneath the bottom left corner of the bezel and pry it up.

  13. bVdrBlxAMGVLflJn
    bVdrBlxAMGVLflJn
    YFD6RvDYf516qZXE
    • Insert the long edge of an opening pick in the seam between the midframe and the bezel on the left side of the phone.

    • Slide the opening pick along the left side of the phone to cut the adhesive underneath the midframe bezel.

  14. NCggDQvFo4vqIqG4
    NCggDQvFo4vqIqG4
    VIIkA2ELNt2DcoUX
    • Repeat the procedure on the right edge of the phone to cut the adhesive underneath the midframe bezel.

  15. YCVGtAMUOuQ3oSNX
    YCVGtAMUOuQ3oSNX
    JOkmqkFKg4Wehj5p
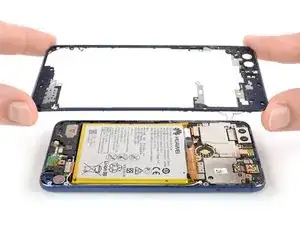
    • Carefully grasp the midframe bezel from the bottom corners and lift it upwards.

    • Remove the midframe bezel.

  16. jf5JDjFRjOEmXPWv
    jf5JDjFRjOEmXPWv
    YMIBbp2YoDmCMB1W
    • Use a spudger to pry up and disconnect the battery flex cable.

  17. kyuUFJLSTgKJRHWC
    kyuUFJLSTgKJRHWC
    MsYYChjNAxDaSDqc
    wBuSccvnPHQbAsuF
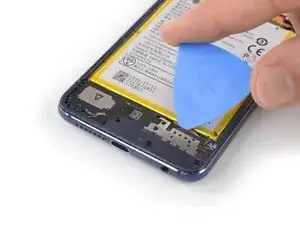
    • Use a pair of tweezers to lift the black adhesive pull tab off of the top right corner of the battery.

    • Use a pair of tweezers to pull out the adhesive strip.

    • Make sure you pull out the strip in a slow and steady motion and in a flat angle. To prevent the adhesive strip from ripping, it is helpful to twist the strip around the tweezers during the removal process.

    • In case the adhesive strip rips, follow the next three steps.

  18. fIdSlCk2hnXm6X3N
    fIdSlCk2hnXm6X3N
    HWPQbmim4lnZINGM
    • Apply a heated iOpener to the screen for at least two minutes to loosen the adhesive beneath the battery.

    • The adhesive beneath the battery is very strong. You might need to repeat this process during the removal procedure several times. If heat does not work you can apply isopropyl alcohol (>90%) to the corners of the battery and let it penetrate the adhesive for several minutes before continuing.

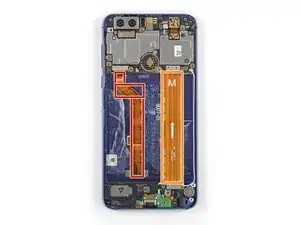
    • The flex cables underneath the battery are laid out as shown in the image. Try to avoid prying close to the marked areas to prevent damaging the cables.

    • Display flex cable

    • Interconnect flex cable

  19. EmY3DS23ENjKvgwL
    EmY3DS23ENjKvgwL
    fJHYMBFWp5YIblKo
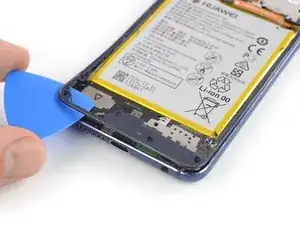
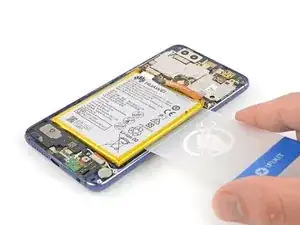
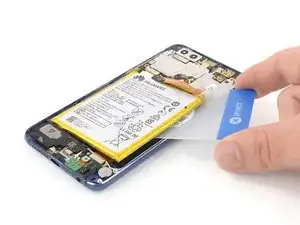
    • Try to deform the battery as little as possible during the following process. Soft-shell lithium-ion batteries can leak dangerous chemicals, catch fire, or even explode if damaged. Do not use excessive force or pry at the battery with metal tools.

    • Insert an opening pick or a plastic card under the battery where the adhesive strip was located.

    • Slide along the right side of the battery to cut the remaining adhesive.

    • Carefully pry up the right side of the battery to loosen the adhesive.

  20. asdessDkvpWCS1bg
    asdessDkvpWCS1bg
    QvoHbRRJEFevRm6P
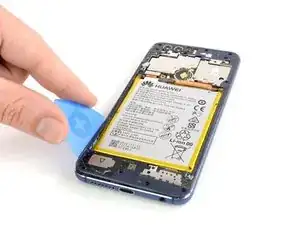
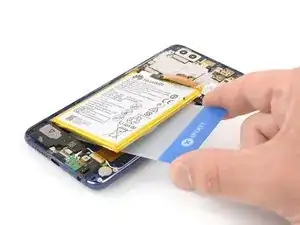
    • The display flex cable and interconnect flex cable run underneath the battery. Be careful not to damage them while cutting the remaining adhesive.

    • Slide a plastic card underneath the battery and cut the remaining adhesive between the flex cables and underneath the left side of the battery.

  21. gApFWjDSDRMKr2Hb
    gApFWjDSDRMKr2Hb
    PlJA6QAHmdV6GYVs
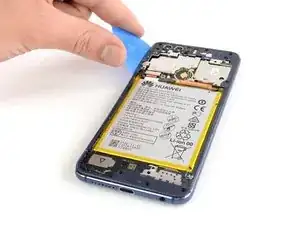
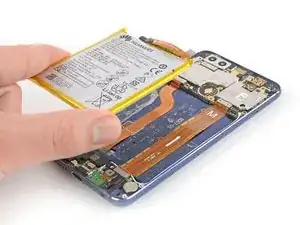
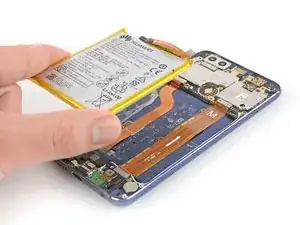
    • Remove the battery.

    • Do not reuse the battery after it has been removed, as doing so is a potential safety hazard. Replace it with a new battery.

    • Before installing a new battery remove any remaining adhesive from the phone, and clean the glued areas with isopropyl alcohol and a lint-free cloth.

Conclusion

If possible, turn on your phone and test your repair before installing new adhesive and resealing the phone.

Secure the new battery with pre-cut adhesive or double-sided adhesive tape. In order to position it correctly, apply the new adhesive into the phone at the places where the old adhesive was located, not directly onto the battery. Press the new battery firmly into place.

To reassemble your device, follow these instructions in reverse order.

For optimal performance, calibrate your newly installed battery: Charge it to 100%, and keep charging it for at least two more hours. Then, use it until it shuts off due to low battery. Finally, charge it uninterrupted to 100%

Take your e-waste to an R2 or e-Stewards certified recycler.

Repair didn’t go as planned? Check out our Answers community for troubleshooting help.

Dominik Schnabelrauch

Member since: 23/11/16

167372 Reputation

11 comments

Had great success using a hair dryer instead of the iOpener. Possibly it wasn’t hot enough? Hiw maby Watts do you recommend?

Rhoshy -

If you use isopropyl alcohol to dissolve the adhesive and remove the battery make sure it doesn’t go towards the screen (as the phone is likely going to be facing down) and that it dries completely before closing up the phone again.

I made the mistake of leaving the phone - although still opened - face down overnight and the alcohol seems to have gotten into the screen, causing bubbles and discoloring on the screen.

Emiliano -

Thank you very much for this guide, great help! I also changed the usb port and had to watch the guide for that also :) Took some more time for a firt timer hehe, Also I did not have the pre cut adhesive, only 3 mm. I will probably find one and order it.
Christoffer Johansson -

Very good guide, thanks a lot! I didn’t have the iOpener, so, I used very hot water in a ziplock bag and it worked great.

André Tousch -

Very good guide, but actually, I didn’t even need to remove the circuit board. With enough warmth from the iOpener on the display side and cautiously working with all the picks, I was able to remove the battery right after removing the middle frame.

Nicolas Rieger -

Thanks for this excellent guide! I succeeded in changing the battery in my phone. This was my first time opening up a phone so I’m even more pleased that it went so well. For the tools, I used things that I had on hand (suction cup from a bathroom hook, regular tweezers, thin cut up plastic card to make picks, hair dryer) and they all did the job. However the “picks” I used were not sturdy enough, which made it harder to cut the adhesive. If I did this again I would cut up a thicker card, or just buy some picks.

Abigail Merritt -

I just changed the battery, the phone turns on, but my finger touch on the screen no longer works. What have I done!

computers -

Guida ben fatta, qualche consiglio su quale adesivo usare per richiudere lo smartphone?

Luca -

Ciao @lucaorl Ti consiglio di ordinare il Fix kit batteria, che include anche un foglio adesivo pretagliato (Huawei HB366481ECW Battery), oppure questo adesivo pretagliato da solo (Tesa 61395 Tape) Buona riparazione!

Claire Miesch -

I've bought a iFixit kit and I've followed all the instructions of this guide. The battery replacement is not easy but if you are a little bit skilled with repairs you can do it. Thank you.
Giacomo -

Also needed the hair dryer instead of the iOpener. Otherwise worked really well!

Took me a couple of hours, as opposed to the given 45 min - 1 h; Had zero experience though, so generally very happy!

Martin -