Introduction

prereq only battery disconnect

  1. xpDgRe5sC5HBFNfB
    • Switch off your phone.

    • Use an iOpener to loosen the adhesive beneath the rear glass. Apply the iOpener for at least two minutes. You might want to repeat this step several times during the back cover removal.

    • The adhesive of the Huawei P20 Pro is of moderate strength, however a hair dryer, heat gun, or hot plate may also be used if you aren't able to open the device with the iOpener. Be careful not to overheat the phone—the OLED display and internal battery are both susceptible to heat damage.

    Ich hatte keinen iOpener. Daher hab ich das P20 Pro für ein paar Minuten auf eine Wärmflasche gelegt. Die Klebeschicht konnte relativ schnell gelöst werden.

    David T. -

  2. qLQSfjVYYigAlcsB
    qLQSfjVYYigAlcsB
    hjc3FkdK5AgAPPkq
    mC32MvX3MBTsGFdH
    • If the phone's rear glass is cracked, a suction cup may not stick very well. Try lifting it with strong tape, or superglue the suction cup in place and allow it to cure so you can proceed.

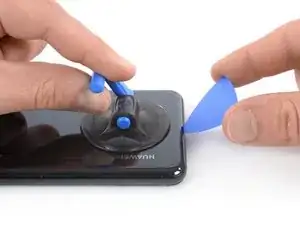
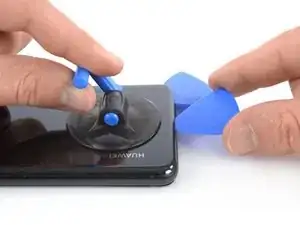
    • Press a suction cup onto the rear glass close to the bottom edge of the phone.

    • Lift the bottom edge with the suction cup, opening a slight gap between the rear glass and the frame.

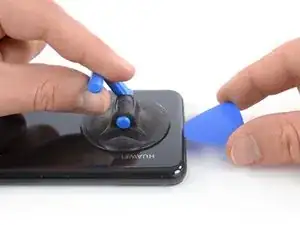
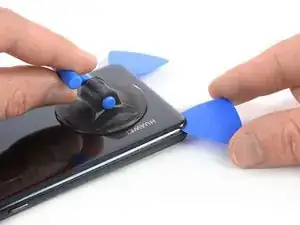
    • Insert an opening pick in the gap and slide it to the bottom right corner. Leave it there to prevent the adhesive from resealing.

    if the back cover is not broken, i’d suggest NOT to use an opening pick as if the phone was not heated enough, you may crack the glass on the edges. better use the iPlastix, it is thinner and less stressful for the glass.

    Stefano Restuccia -

    It is better to put a peak on the side because the side opens first than the bottom of the phone.

    이정일 -

    I have to agree that is is much easier to start opening from the side. Do read the rest of the guide though, to make sure you won’t hit something when opening it from the side.

    Jacob Cain -

  3. IKE2EPSZlMgYRUCW
    IKE2EPSZlMgYRUCW
    jSnSyxxrd3BcGmOS
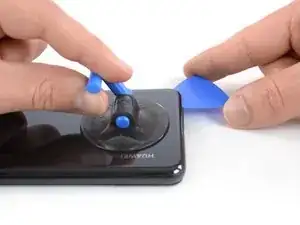
    • Insert a second opening pick and slide it to the bottom left corner. Leave it there to prevent the adhesive from resealing.

  4. grCAZb2cWgyJOJRU
    grCAZb2cWgyJOJRU
    UfGdHGnfRhWEfKlW
    QDqlKGmQ11vwxoMq
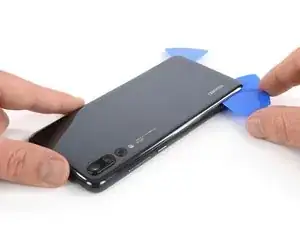
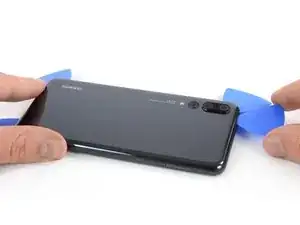
    • Insert a third opening pick at the bottom left corner.

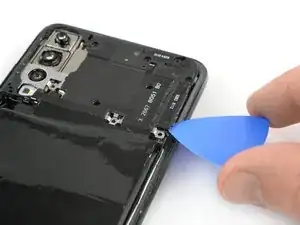
    • Slide the tip of the opening pick along the left edge of the phone to cut the adhesive.

    • Leave the opening pick in the top left corner of the phone to prevent the adhesive from resealing.

  5. 6PUVXBeYmsNgNiYq
    6PUVXBeYmsNgNiYq
    wTA6yTcmQWEPFCKs
    • In case you're having trouble to cut the adhesive, reapply the iOpener for another minute to loosen it.

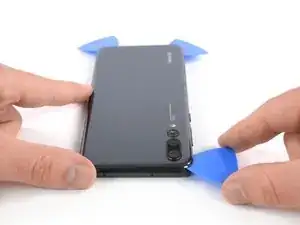
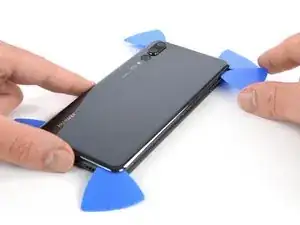
    • Insert a fourth opening pick at the top left corner of the phone.

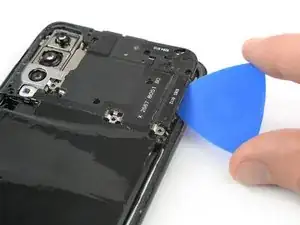
    • Slide the opening pick along the upper edge of the phone to cut the adhesive beneath the rear glass and leave it in the top right corner.

  6. G4cCQI6GjiWrxlZC
    G4cCQI6GjiWrxlZC
    pJHckn3vUQZZRAHu
    36bUESsEL1YJwUQr
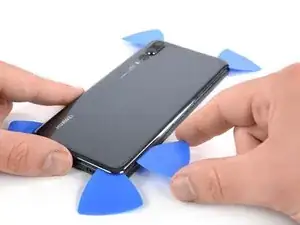
    • Insert a fifth opening pick at the top right corner of the rear glass.

    • Slide the opening pick along the right edge of the phone to cut the remaining adhesive.

    • Don't open the phone all the way yet. The proximity sensor flex cable is still connected to the motherboard.

  7. yiTIZnUSURwQO3Ca
    yiTIZnUSURwQO3Ca
    3mt2kVFnlifkDJCW
    opxbNEBmIBWBSqAl
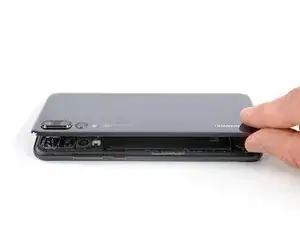
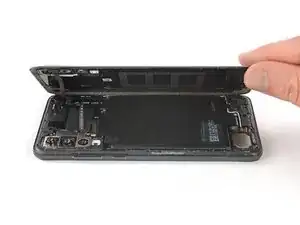
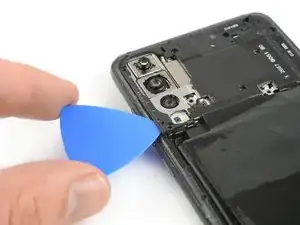
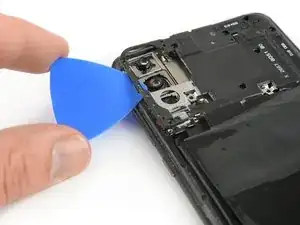
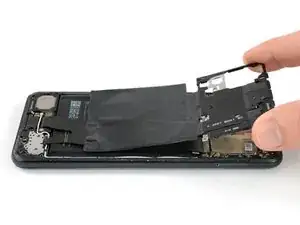
    • Carefully lift the rear glass until you can reach the connector of the proximity sensor flex cable next to the rear camera assembly.

  8. WgEZU4VYwsBUAGoN
    WgEZU4VYwsBUAGoN
    1nbUiBTHAFOgANc5
    • Use the flat end of a spudger to pry up and disconnect the proximity sensor flex cable.

  9. TAPkFQDLU5kJaO3D
    TAPkFQDLU5kJaO3D
    GaqTJ3SVEspFhJqr
    • Remove the rear glass.

    • Before installing fresh adhesive and reassembly, remove any remaining adhesive from the phone, and clean the glued areas with isopropyl alcohol and a lint-free cloth.

  10. RhCfvCP2nNsJcDAo
    • Remove the nine Phillips #00 screws (3.4 mm length).

  11. 6eEW4dJDhSwQOSxU
    6eEW4dJDhSwQOSxU
    kPKRhlu6aEZiXviX
    eJtdndfDWxgRVGXa
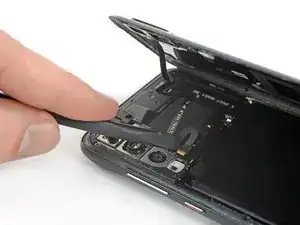
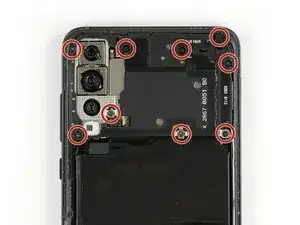
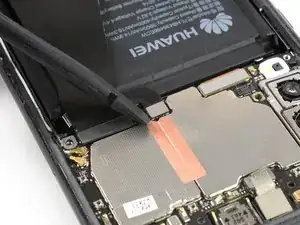
    • Insert an opening pick under the left side of the motherboard cover that includes the NFC.

    • Slide the opening pick towards the top left corner of the phone and twist it to pry the cover out of its plastic clamps.

  12. yI32FgFnGwScjPZ3
    yI32FgFnGwScjPZ3
    UEOwDhKgMsruF5jI
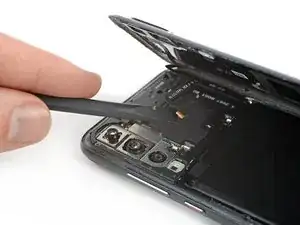
    • Repeat the previous process on the right side and twist the opening pick to pry up the motherboard cover.

  13. JqyvPfRcMGtBI4mr
    • Remove the motherboard cover.

    Porque cuando desconectas el nfc no vuelve a funcionar?

    Vanesa Gutierrez -

    a teraz to zopakuj po vychodňarsky

    Lukas Franko -

  14. ijkmoXtESVCJiZeZ
    ijkmoXtESVCJiZeZ
    iTbIVrBFioKSoZRp
    • Use the flat end of a spudger to pry up and disconnect the battery flex cable.

Conclusion

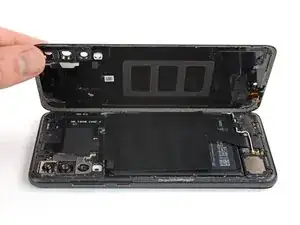
To reassemble your device, follow these instructions in reverse order.

Dominik Schnabelrauch

Member since: 23/11/16

167366 Reputation

0 comments