Introduction

Use this guide to remove and replace the complete display with the frame of a Huawei P9 Plus.

  1. rfwQB6Hsx4QExALS
    rfwQB6Hsx4QExALS
    kNvWjeAeEOkSxesl
    • First switch off your phone.

    • Remove the SD and SIM card tray.

  2. CLP6PcycYfHFocK3
    • Remove the two P2 Pentalobe screws on either side of the USB C port.

  3. SnKQsZn3pLHHwbx1
    SnKQsZn3pLHHwbx1
    SYWrUmjlRsVZOkx3
    • Use an iSclack or a suction handle to separate the display unit from the rear case.

    • Do not fully separate the pieces as they are still connected by the fingerprint sensor cable.

  4. gD5ZKKObpLTybubJ
    gD5ZKKObpLTybubJ
    XQfD1RGfnMYC362v
    CXsdZNgYEJyCIV2d
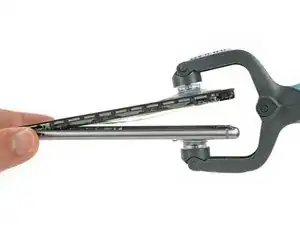
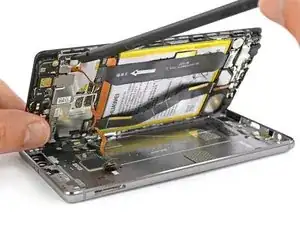
    • After separating the rear case flip the other half open to get to the flex connectors.

    • With a spudger unplug the flex connector of the fingerprint sensor and the one of the side buttons.

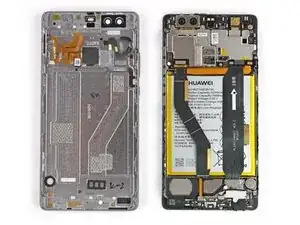
    • Remove the rear case.

  5. WcQskAHTHvCq6iyX
    WcQskAHTHvCq6iyX
    lpYSWnEH5po6EhHe
    • Remove the sticker that sits on top of the left screw above the battery.

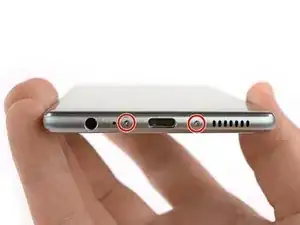
    • Remove the three Phillips #00 screws that hold the metal plates in place.

  6. RnXRtd1vk2TFyZH2
    RnXRtd1vk2TFyZH2
    tiqDeABQxGNE5X2y
    • Both metal plates have little hooks. Use a tweezer to free them and unhinge the plates by carefully moving them upwards.

  7. CVQygvxoTVNmZQFe
    CVQygvxoTVNmZQFe
    ydSwPLCXuoePgRF6
    CZYMwLgNisUCTTdL
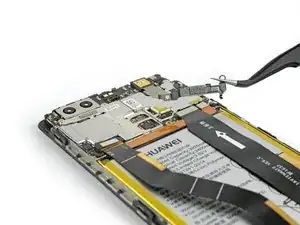
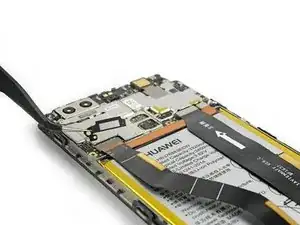
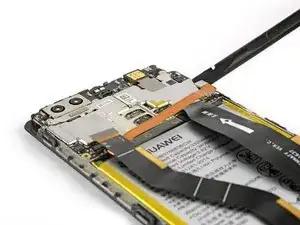
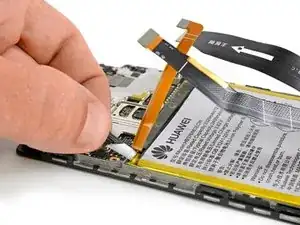
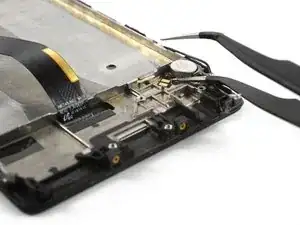
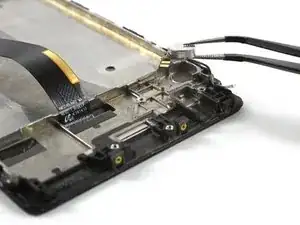
    • Use a spudger to unplug the screen flex cable.

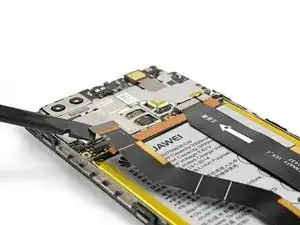
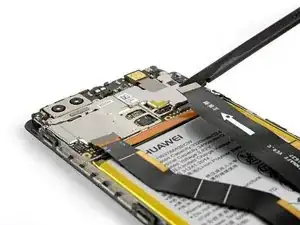
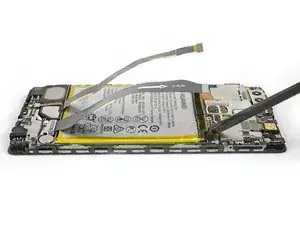
    • Unplug the motherboard flex cable and the battery flex cable afterwards.

  8. xVXqnSQtQwOhEuhh
    xVXqnSQtQwOhEuhh
    UoYD2UDkEVumbMUb
    • The adhesive strips at the top of the battery are less likely to rip if you pull them horizontally in a straight line and not upwards or in any other direction.

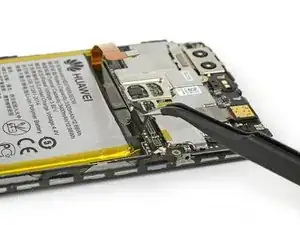
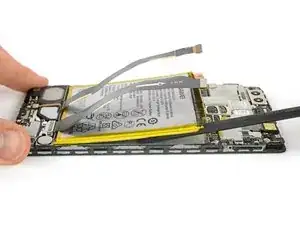
    • Use a set of tweezers to unfold the black tab enough to grab with your fingers.

    • Pull the first adhesive strip in a slow and constant movement.

    • Jerking or slackening your grip can cause the adhesive to bunch up and rip.

  9. Enu5ouFdYXGoPD3X
    Enu5ouFdYXGoPD3X
    TxW21IPJBUnVPdsn
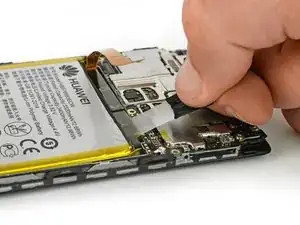
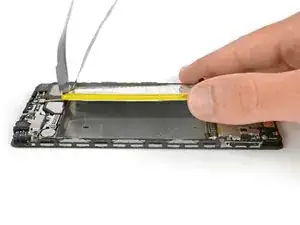
    • Loosen the end of the other adhesive strip with a tweezer and pull it out. If needed use the iOpener again to soften the glue a little.

  10. FAcoYS2wMecLBDGR
    FAcoYS2wMecLBDGR
    uTVtQnKWTxngExMH
    lmiO3ELJAnaKk3HT
    • Use a spudger to slide under the battery.

    • If you managed to pull out the adhesive strips you can easily lift out the battery. Otherwise use the iOpener once more to soften any adhesive leftovers. There are no cables under the battery that can be harmed.

    • Remove the battery.

    • When reassembling your phone, replace old adhesive with stretch release adhesive strips, double-sided tape, or pre-cut adhesive strips.

  11. R4oqfTEVD6LXAgG2
    R4oqfTEVD6LXAgG2
    wYwJWVLrjWvHyMqM
    2DeD6aMXNrISJV5i
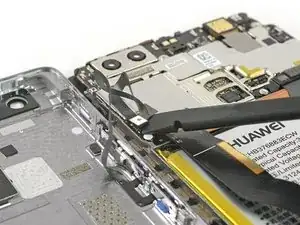
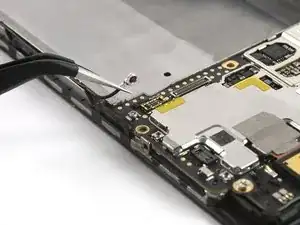
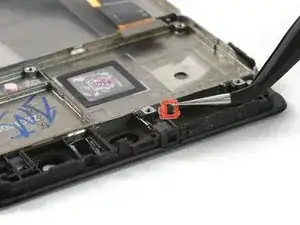
    • Use a tweezer to remove the sticker that sits on top of the screw next to the antenna cable.

    • Unplug the antenna cable and release it from the bracket on the metal plate covering the main flex cable.

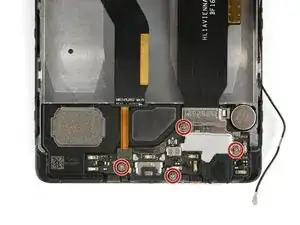
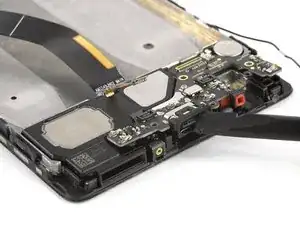
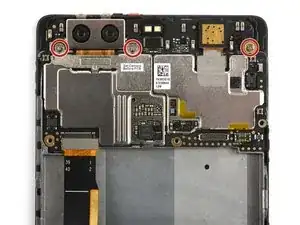
    • Remove the four Phillips #00 screws.

    Il cavo dell'antenna è del wifi oppure del segnale di rete?

    Mauro Minetti -

  12. JKQU222DGrqDIoGp
    JKQU222DGrqDIoGp
    SIWAwQHWFxQ2VQFf
    qeLQJljZsUSbpGYc
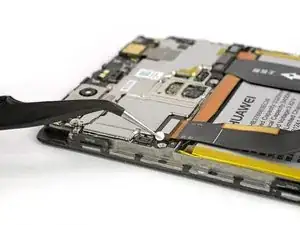
    • The plate, which is covering the motherboard flex cable, has little hooks on each side. Use a tweezer to free them and unhinge the plate by carefully moving it upwards.

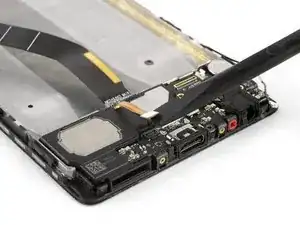
    • Use a spudger to unplug the motherboard flex cable and remove it.

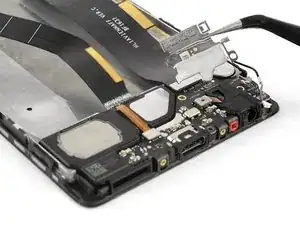
    • Unplug the flex connector of the loudspeaker.

  13. Lg6ntVhtPfUCVPJY
    Lg6ntVhtPfUCVPJY
    F5oP1sv4BA3HAa23
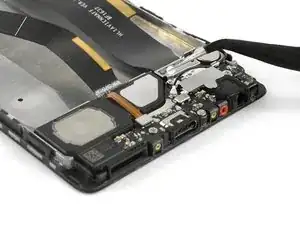
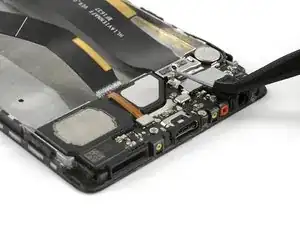
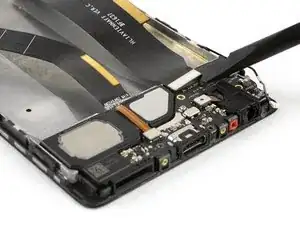
    • Use a spudger to unplug the flex connector of the headphone jack.

    • Remove the headphone jack.

    • Be careful with the contacts inside and in the bottom area of the headphone jack. They can be damaged easily.

  14. NCkjPlUXvBTav2Gj
    NCkjPlUXvBTav2Gj
    HeID3WFoc2JIrHDn
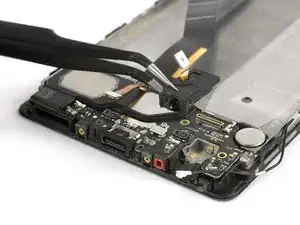
    • Use a spudger to lift out the daughter board.

    • Lift the loudspeaker out of the mid frame. There is some adhesive underneath, so it can be a little bit sticky.

  15. KfVWRB5y3A4Mx1PO
    KfVWRB5y3A4Mx1PO
    DJGKmKFLj1KanIOY
    E1bNtYLjZWu5E1AU
    • Use a tweezer to loosen the vibration motor flex cable. Be careful since it is a little bit sticky.

    • Remove the vibration motor.

    • Use a tweezer to unplug the antenna cable and remove it.

  16. LwVtaYQasPBP1pCd
    LwVtaYQasPBP1pCd
    WnfXZIRLhUhCfu5g
    Hg5f4UtGRQlVUIxh
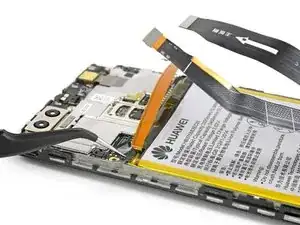
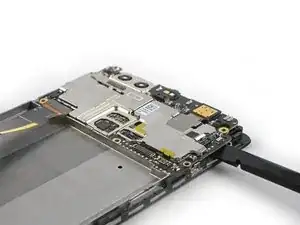
    • Remove the three Phillips #00 screws.

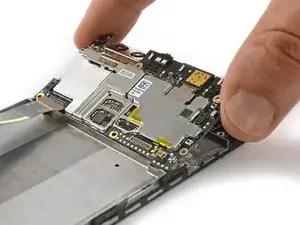
    • Use a spudger to lift and remove the motherboard assembly, being mindful of the cameras.

    • On the back of the motherboard are thermal pads (pink rubber-like gobs) for heat dissipation. If theses thermal pads broke, are too dried out or stick to the old display assembly, you need to apply new thermal pads on the new display assembly or the motherboard.

  17. urYiINJUpKlLHlMn
    urYiINJUpKlLHlMn
    UQWhQHTjhZDZuN3l
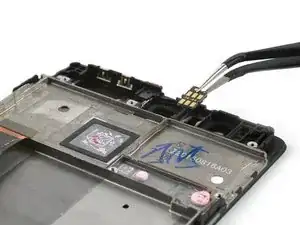
    • Remove the earpiece speaker with a tweezer.

    • Take care of the metal connectors to not bend them.

    • Carefully remove the proximity sensor from its recess.

  18. cgSp4CIvCIukm6YE
    cgSp4CIvCIukm6YE
    qsMgrDR5lYBrNGNM
    qdEDSykEZukGpRHP
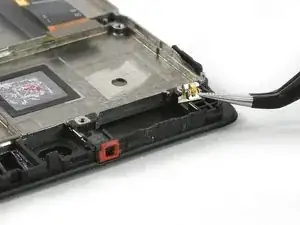
    • Carefully remove the spring contacts from the display assembly without bending them.

    • Remove the rubber microphone gasket.

    • Before reassembly check your new part for any components that might need to be transferred from the old one (e.g. plastic inlay for the proximity sensor). Also check if the thermal pads (pink rubber-like gobs) need to be replaced.

    • When reassembling your phone replace old adhesive with double-sided tape or pre-cut adhesive strips.

Conclusion

To reassemble your device, follow these instructions in reverse order. Reapply adhesive where necessary after removing any residue.

Dominik Schnabelrauch

Member since: 23/11/16

167288 Reputation

6 comments

should camera work before putting into rear case?

maclaw -

Can you do with the Camera replacement and where to buy it? Thank you in Advance.

Juan Carlos Núñez Duarte -

do you sell huawei p9 32gb mainboard?

chiang paul -

Hat super geklappt, aber ein kleines Plastikteil war nicht mit in der Anleitung: https://imgur.com/a/SFYVXnE

Worked perfectly, but a small piece of plastic was missing in the instructions: https://imgur.com/a/SFYVXnE

Sv443 -

Thanks for the note. Added it as an example for the check old and new part for missing components)

Tobias Isakeit -

Podria alguien decirme que debo hacer? Cambie pantalla de este modelo p9 plus… y, aparentemente funciona todo bien ..

Ero se agota a bateria muy rapidamente… anteso cambie debateria a una nueva…pero elproblema persiste…. ¿Que podria ser…. Sera quealguna arte del movil se produjo un error y este consumiendo demaciado… …alguien me puede dar una mano?.

Muchas gracias d antemano

Mi nombre es jose

Jose Llanos -