Introduction
There are many benefits to adding a second hard drive or SSD to your iMac such as improved speeds, greater storage space, and less heartache when installing new software. Use this guide to install one using our optical bay hard drive enclosure.
-
-
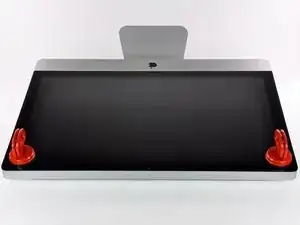
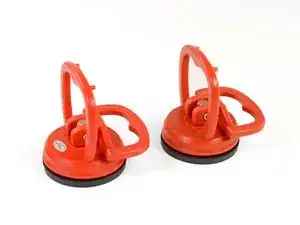
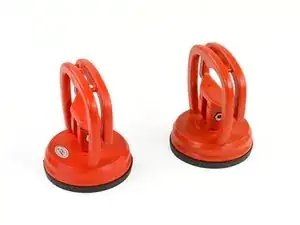
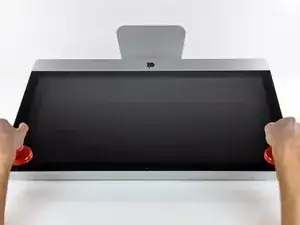
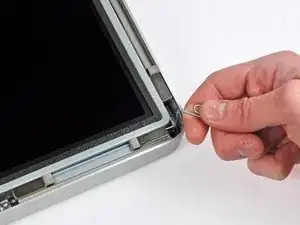
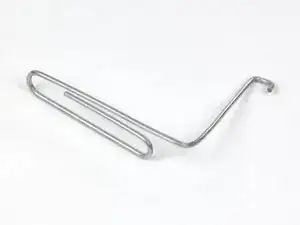
Stick a heavy-duty suction cup near each of the two top corners of the glass panel.
-
While lightly holding the suction cup against the glass, raise the movable handle until it is parallel with the other handle (as indicated by the third picture).
-
-
-
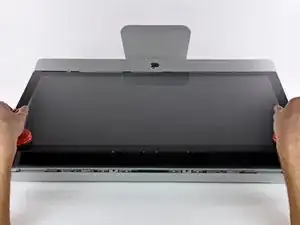
Gently lift the glass panel perpendicular to the face of the LCD, enough to clear the steel mounting pins attached along the underside of the top edge of the glass panel.
-
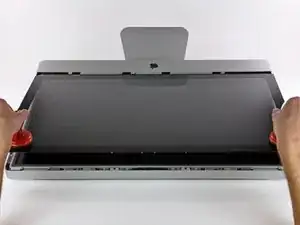
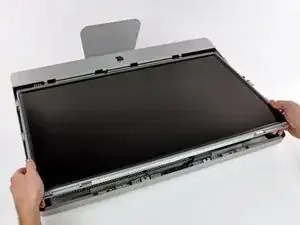
Pull the glass panel away from the lower edge of the iMac and carefully set it aside.
-
-
-
Carefully lay the iMac stand-side down on a flat surface.
-
Use a thin hooked tool to lift one side of the top edge of the display by its steel outer frame.
-
-
-
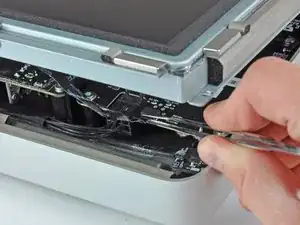
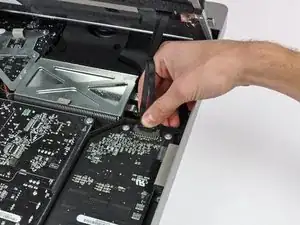
Use a pair of tweezers to pull the vertical sync ribbon cable out of its socket on the LED driver board near the top left corner of your iMac.
-
-
-
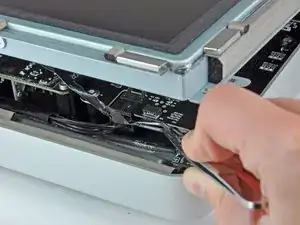
Rotate the display out of the outer case enough to disconnect the LED backlight power cable from the LED driver board.
-
-
-
Squeeze the two display data cable connector arms together to unlock it from its socket on the logic board.
-
Pull the display data cable connector away from its socket on the logic board.
-
-
-
Lift the display for enough clearance to disconnect the LCD thermal sensor cable connector from its socket on the logic board.
-
-
-
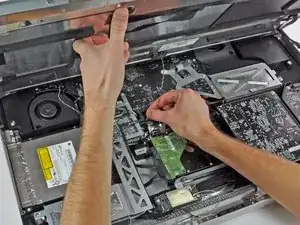
Carefully pull the display toward the top edge of your iMac and lift it out of the outer case.
-
-
-
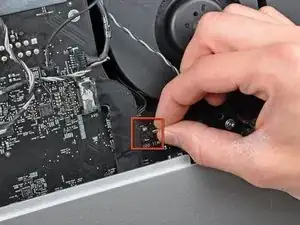
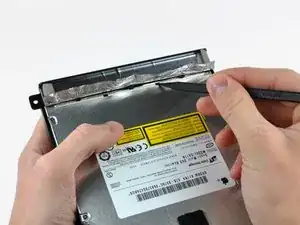
Pull the optical drive thermal sensor connector straight away from its socket on the logic board.
-
-
-
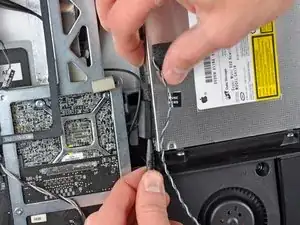
Insert a spudger between the optical drive connector and the optical drive.
-
Twist the spudger to slightly separate the optical drive connector from the optical drive, then use your fingers to pull the connector away from the drive.
-
-
-
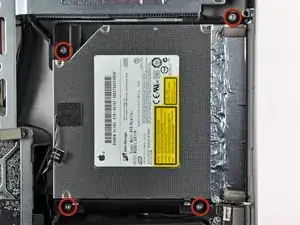
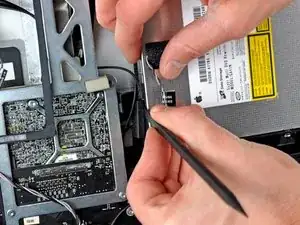
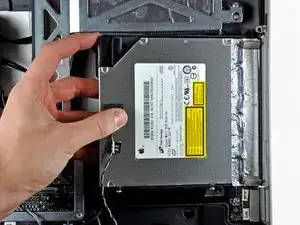
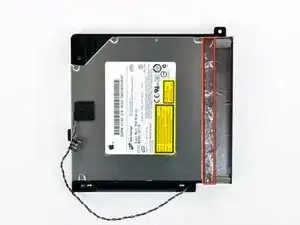
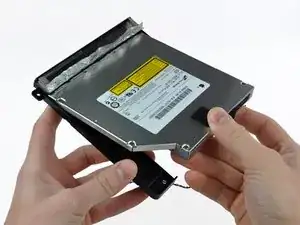
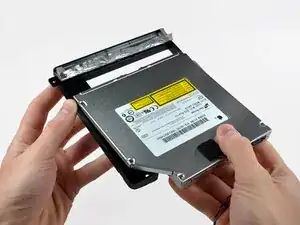
Lift the left edge of the optical drive slightly and pull it away from the right side of the outer case.
-
During reassembly, note that there are two holes in the optical drive face plate into which two stubby plastic posts must engage for proper positioning.
-
-
-
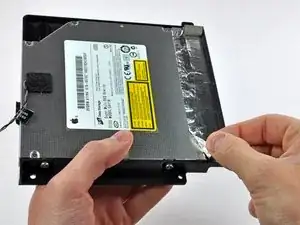
Peel back the portion of aluminum tape highlighted in red, leaving the rest attached to the black plastic optical drive bracket.
-
-
-
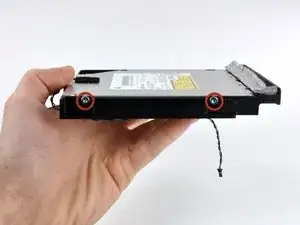
Use the tip of a spudger to press each of the optical drive bracket tabs out of their slots on the bottom of the optical drive.
-
Rotate the optical drive bracket slightly away from the optical drive.
-
Pull the optical drive bracket away from the open end of the optical drive, minding any tabs that may get caught.
-
-
-
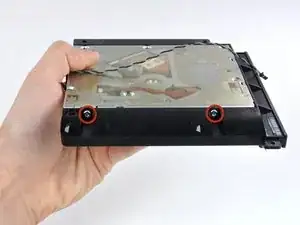
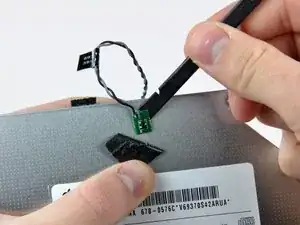
Use the tip of a spudger to peel back the piece of foam tape covering the optical drive thermal sensor.
-
Use the flat end of a spudger to carefully pry the thermal sensor up off the adhesive securing it to the optical drive.
-
If you have a disc or anything else stuck inside your optical drive, we have a guide to fix it.
-
-
-
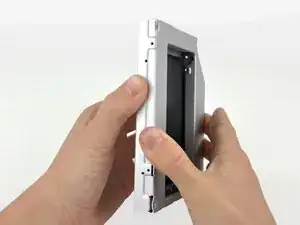
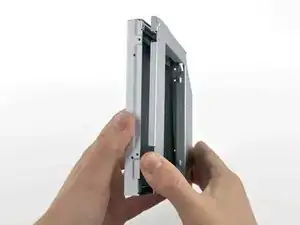
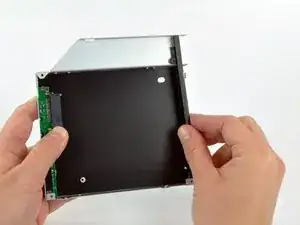
Starting from the left edge, gently pull open the optical bay enclosure.
-
Continue to pull open the two halves of the enclosure until they separate.
-
-
-
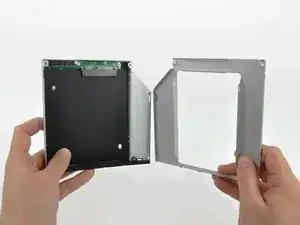
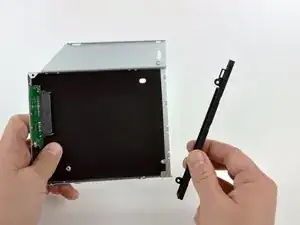
Lift the black plastic faceplate out of the optical bay enclosure.
-
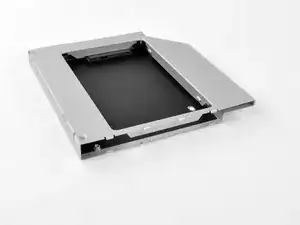
Reassemble the optical bay enclosure without the faceplate, reusing the original three 3.0 mm Phillips screws to keep it intact.
-
-
-
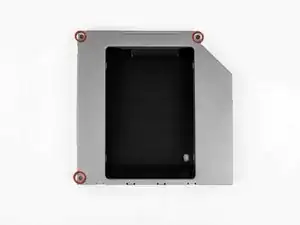
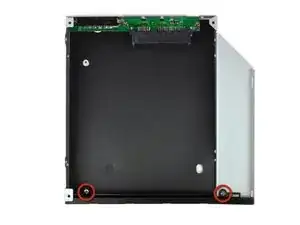
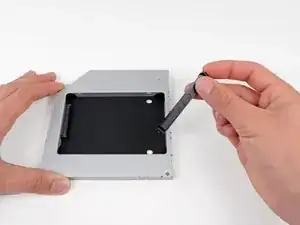
Remove the plastic positioner from the optical bay hard drive enclosure by pressing in on one of the clips on either side and lifting it up and out of the enclosure.
-
-
-
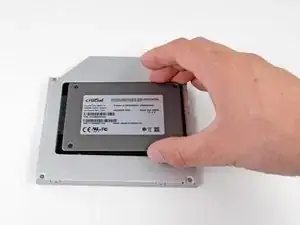
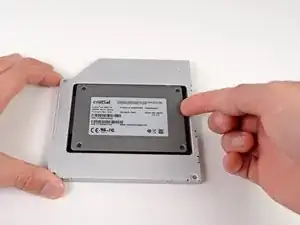
Make sure that the hard drive connectors are facing down before placing it into the enclosure.
-
Gently place the hard drive into the enclosure's hard drive slot.
-
While firmly holding the enclosure in place with one hand, use your other hand to press the hard drive into the enclosure connectors.
-
-
-
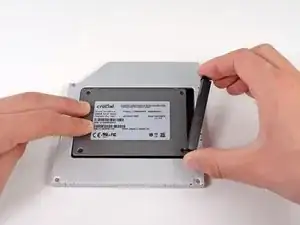
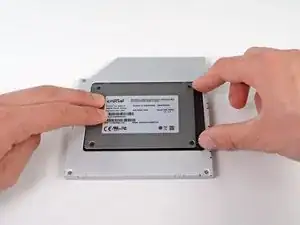
Once the hard drive is snug, reinsert the plastic positioner while holding the hard drive against the bottom of the enclosure.
-
Reconnect any cables you have removed from the original optical drive onto the optical bay enclosure.
-


To reassemble your device, follow these instructions in reverse order.

12 comments
Not terribly difficult, though I did install an SSD in my son's 20" iMac. Used the OWC data doubler bracket, which, of course, isn't designed for the iMac. I had to bend some metal in order to make it work at a very basic level, but otherwise didn't run into any real roadblocks.
I used OWC Data Doubler. Fit no prob.
Success, and not as difficult as I thought. Getting the glass out (27") was a bit nervous but it's strong and the suction cups work well. The display itself has a heavy frame around it so also is strong. I used a large soft artist's brush to dust the display and inner glass. I carefully used needle nose pliers on the cables and connectors, couldn't get enough grip with tweezers.
I have iMac late 2009 (EMC 2374) and the optical bay fits well into it. I installed Samsung SSD 850 PRO 256 Gb with a documented speed 520/550 (write/read). But unfortunately it seems because of ODD (optical disk drive) link I've got only 250/270. Anyway I'm pretty happy, because I merged SSD with my hybrid HDD 2 Tb (150/150) and now have 2.25 Tb Fusion drive with about x2 speed. My advise - don't buy expensive SSD with high speed if you want to link it through optical bay - the speed will be cut anyway.
The real matter is the interface that is an old 3GB/s instead of a recent 6GB/s that limit the performance of SSD drive
Question: would it be faster/better to mount the SSD on the original HD bay? Is that a faster/better SATA interface?
macmai -
You can easily lift the glass panel off the magnets with only your fingernails (or something thin like a credit card or a guitar pick). No need to buy suction cups you will only use once.
Nick Caron -
Yes, you don't need the specific suction cups to remove the display cover - it's held on by magnets, and if you start at the center by the iSight you can work out to the edges and remove it. I had an iPhone screen suction cup around and it helped with balancing the screen when you pull it out fully, but by no ways is it required.
jtowner -
Great guide and pretty straight forward the only thing that took me ages and I didn't manage to undo were the power btn cable (step 28) and the thermal sensor (step 25) Seemed like they were glued on! Very difficult to remove and obviously conscious so I didn't break anything!
Eddie -
Thanks!!! Worked excellently.
I used a plunger (clean first ;-) to get the screen off, and http://exirion.net/ssdfanctrl/ for fan control.
Then, i did not take out the whole display and left it in the hinges on the bottom side and held it up with two small cardboard boxes. Easy enough to disconnect the hdd then.
I replaced with an ssd, put that into a ssd enclosure. Had to drill an extra hole in it to fasten the pins that hold it in place.
Used Carbon Copy Cloner to make an image from the old hdd, with the sad connected via usb. Checked it of it booted via System Preferences > Startup Disk. It worked so the took the imac apart and replaced the disk. Booted, everything was working as always, only faster!
Frank303 -
I'm replacing my optical drive too. what exactly needs to be plugged into the SSD? I don't have the kit - as I am not sure one is required if I buy something like this: http://www.amazon.com/gp/product/B0056OB...
Can you please advise? Can I do it with this piece, or do I need to get the entire bracket kit?
Allen Borza -
My display data cable forks, with a smaller section going up near the camera board. Where it forks, it is attached to the aluminum plate that attaches around the cpu board. I haven't seen any images that look similar, and I'm stumped at how to remove this second section of the cable. 2010 i7 build to order
Awolf -
Agree with the other comments here. Despite buying suction cups, not sure they were necessary as the screen removed very easily. A sat nav suction cup would do the job fine.
Stuart Bloomfield -
I can confirm that it is possible to remove the front glass using fingernails rather than suction cups. It isn’t easy, but if you try you should be able to pry off the glass.
I did this twice: once at the beginning of the procedure and once again at the end, when I realized that a big pice of lint was trapped under the glass.
gordonhamachi -
Don’t use suction cups. totally unnecessary. screen pops off with fingernails.
Kieran Hobbs -
The reason for caution about suction cups tends to be making sure you don’t apply uneven pressure on the edges of the glass and crack it in the process of removal. I do agree however that some pretty small suction cups would do fine. These suction cups can be had at your local princess auto (Harbor freight) for a few bucks and are useful elsewhere as well. if you use your fingernails or other items just try and do it evenly :)
Abirinder Brar -
good duct tape or gaffer tape wrapped around your hands makes an excellent glass removal 'tool'. Even clear packing tape works a charm.
Stu Blair -
A great first step that minimizes that first gust of dust migration when the glass is lifted is to clean the glass, sides *and the back* before lifting the glass, and then lift SLOWLY. Most of that dust is already trapped inside and pulled up as the screen lifts, but with care you can keep it there (or gently vacuum out with a micro vac…).
John -
before starting any of this…there is a device that you can use that comes with the IFixit kit to format and either clone or restore your hard drive to the new drive…it will save you a lot of headaches..it is a SSD enclosure that you can plug into your existing computer …
Tom Richter -
Thanks for the instructions. Before doing this the first time, suggest to everyone, read through at least twice. This is the easiest step, as you’ll soon see. As for removing the glass, USE suction cups, either the ones the sell here, or others. DON’T skimp. Also wear gloves when handling the glass. Don’t take chances.
ECJohansen -
Duct tape works too!
Dani -