Introduction

This guide will provide information on how to disassemble an Intel NUC8i7BEH or similar.

  1. iLv2KjMvmsEfKi3Y
    iLv2KjMvmsEfKi3Y
    cWkGXg56xnc1GGM2
    ElVf2YnFFoXJ3ODF
    • Place the NUC upside down and select a PH2 Phillips screw driver bit

  2. 5LXcETZhgCEBFtFI
    5LXcETZhgCEBFtFI
    yhK2wBwtjDRRugrU
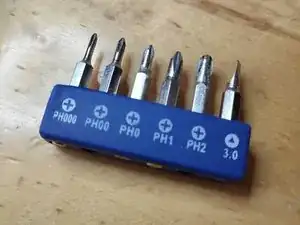
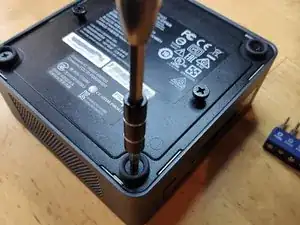
    • Start by using a Phillips head #2 screw driver to remove the lower screws on the lower case door.

    • These screws are held in with retainers, so they won't fall out when you flip the lid.

    What are the size of these case screws?

    Michael Lepore -

  3. bhndLRHUWyFtdiAA
    bhndLRHUWyFtdiAA
    QCAYcvFb6ruhUtpT
    Js5rdDRXVIdhWCDH
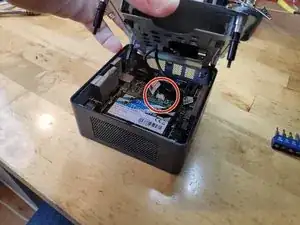
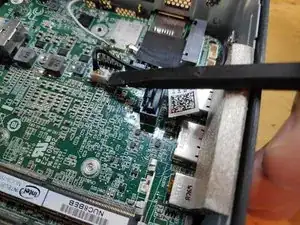
    • Lift the door, and keep an eye on the cables that connect to the NUC's motherboard. These cables are the power and data cables for the 2.5" hard drive bay.

    • Carefully unplug the cables from the motherboard, and set the bracket aside.

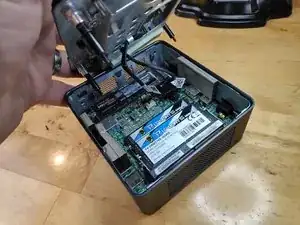
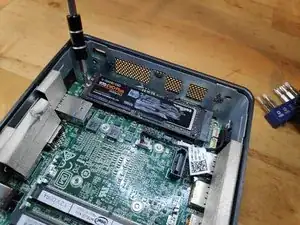
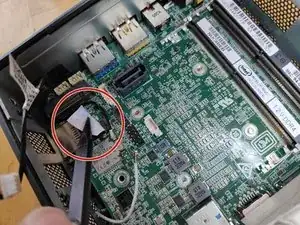
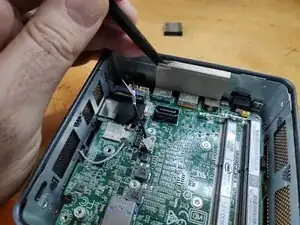
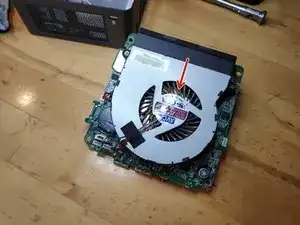
    • In the last photo, the slot for a blade SSD is marked with a red arrow. This is where you would install the blade SSD, and use a screw to hold it in place.

  4. YGPRvVCtYEhLU3Lt
    YGPRvVCtYEhLU3Lt
    asuqDIHLiiFmxoMX
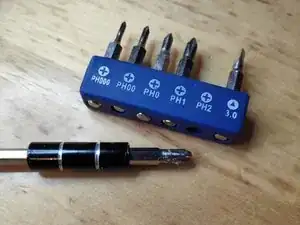
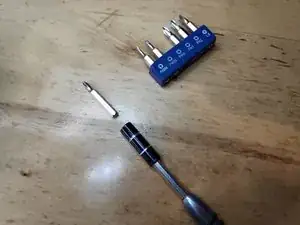
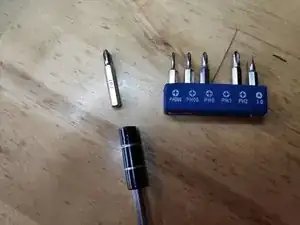
    • Change the screw driver bit to the PH1 one.

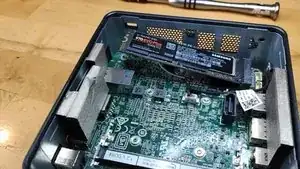
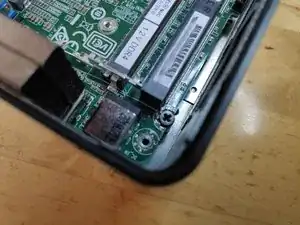
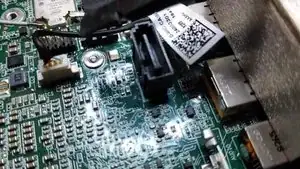
    • Unscrew the V-NAND SSD and carefully slide it out of its connector.

  5. Previous step as video
    • Previous step as video

  6. MIpgTEX1mQENjsuu
    • Change the screw driver bit to PH1

  7. frD4VaxFk5pt4o16
    frD4VaxFk5pt4o16
    4EXFJdxOJKpMDNDC
    IwkjojFXbgxpK2GU
    • Unscrew the screws marked in red circles

    Hello, may I know what is the screw size? I already stripped mine so I'm trying to get a replacement screw when I have the stripped out. Mine was stripped and cannot get it out. Can you please help me? I've already used the rubber and glue method but no luck.

    Fitri Suhaimi -

  8. bXN2KelA6UENepsV
    bXN2KelA6UENepsV
    dJAAGRBCACvZLIsX
    ejDFmgh1Q1KhFLJI
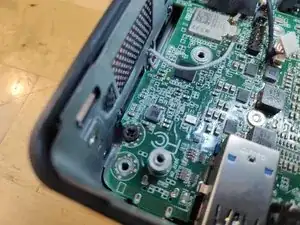
    • Remove the WiFi and Bluetooth antenna cables (be extremely careful when doing this otherwise you risk to rip the base contact terminal off the PCB)

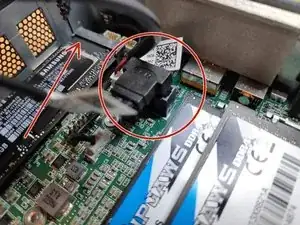
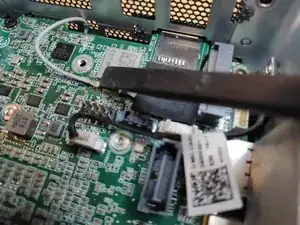
    • Remove the stereo mic cable from the motherboard connector.

    • Pay attetion to the WiFi cable hidden under a black piece of tape

    Remove WiFi an Bluetooth antenna Cable very carefully. Terminals can be ripped of easily.

    Christian Reinhold -

    very true, I’ll add it to the guide

    Vladimir Knobel -

    Added to the step in the guide, thanks for pointing that out!

    Vladimir Knobel -

    Note that the WiFi and Bluetooth antenna cables lift/pull off vertically (not slide off horizontally, as I presumed from the photo). They are circular connectors with a pin in the middle. Getting them off was okay (I actually used tweezers), but it was fiddly work trying to push them back on.

    Carl -

  9. Disconnect mic cable
    • Disconnect mic cable

  10. Remove padders from the sides
    • Remove padders from the sides

  11. iieAfEfVcF1664xQ
    iieAfEfVcF1664xQ
    canT2xLG6FaTCVcD
    • Not all are necessary only the two depicted.

  12. tOgKIPOLBLUM3Q23
    tOgKIPOLBLUM3Q23
    J6onfbukKHgZMbNn
    pHZ6AT6LBiErPDil
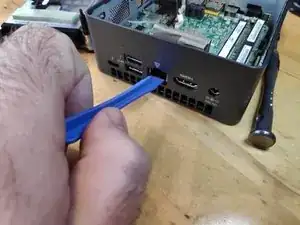
    • Use a pry tool to lift the motherboard from the casing

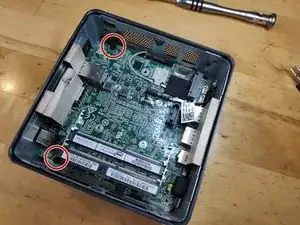
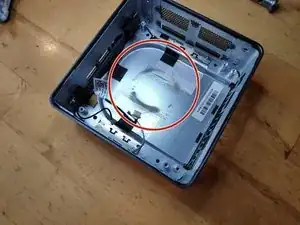
    • Marked with red circles the dust signs evident on first sight

    Amazing! Could replace the fan. Have also removed the 4 screws of the heatsink , and renewed the thermal paste underneath it. That was necessary. It was dried out. THANKS!! It works like new: no overheating anymore. A lot faster.

    lutgart.schreyen -

    The key for getting the motherboard is to move apart very firmly the two opposite sides of the metal casing, so as to let the connectors move down.

    Jan Drouaud -

Conclusion

To reassemble your device, follow these instructions in reverse order.

Vladimir Knobel

Member since: 27/03/14

2112 Reputation

7 comments

I’ve awarded the 30 points because these how to in steps are just great. One little critic, having read other stuff I understood the later models had greater risks of breaking things because of the more complicated wifi and mic cables, and these steps could have been better explained, like do the wifi cables plug in or slide off a splade like connection, and what can I use as a pry tool from around the house. These are the frightening steps to someone who has not done this unit before, while just about everything else isn’t much different to opening and taking parts out of a laptop.

Marlon Kirby -

Thank You, I was having fan noise issues with my NUCi7BEH and was trying to figure out how to pop the MOBO from the case.

This guide was fantastic, loads of dust collected on the heat sink, clean air and it seems to be running great now.

Ave temp before this clean out was 65ºC but would spike from 90-100ºC under any load at all, even the VMs just spinning up.

Now after clean, all is good, temps idle sitting at around 35ºC now and under load about 70º C. Huge difference.

Big Thanks to Vladimir for making this wonderful guide.

Alan -

Thanks, Vladimir Knobel, for putting together this excellent instruction with video and pictures. I used it to remove and replace my fan. I greatly appreciate it!!

Jeff Humpton -

merci, ça m’a bien aidé et j’espère avoir résolu ce pb de ventirad, j’ai pu dépoussiérer. encore merci.

contactsebastien -

thanks for all ! Experienced pb with my Intel® NUC Kit NUC8i5BEH : CMOS battery failed. Everything is ok now thank you for all the screens and videos very good tutorial to disassemble and check the problem

Regards Raph

Raph GLC -

Thanks Vladimir, very clear.

I love my NUC. About 6 years old and trouble free; except now. Going down with the message overheating.

It will boot OK and heats up quickly and goes down in 10 to 15 minutes.

Hoping its something simple like dead fan.

Regards, Robert

Robert TURKINGTON -

I can't fix things like that. My machines broke down when I touched them.

iscribble

bowman wise -