
Introduction
Prerequisite only - This guide is only part of other guides.
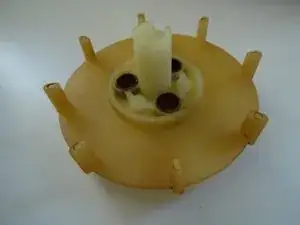
Removing the grindstones in grinders of the OEM manufacturer Eugster. (Jura and similar ones e.g. AEG and Siemens, Bosch, Melitta, Nivona, Krups)
-
-
Now the grinder is free. Again take a picture, then pull out the axis of the adjuster with moderate force.
-
Depending on the model you will find a silicon sealing on top of the grinder ring, remove it.
-
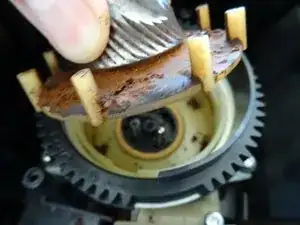
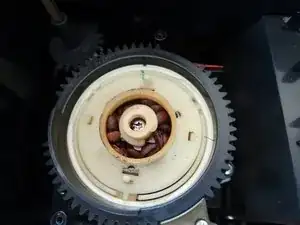
Watch the fabrication signs , here green. This alignment must be restored later. Now turn the great black gear about 90 degrees counterclockwise. The grinder ring is free and can be lifted off.
-
-
-
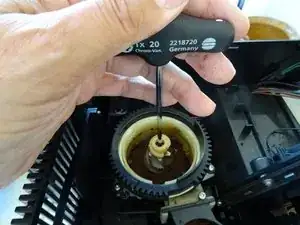
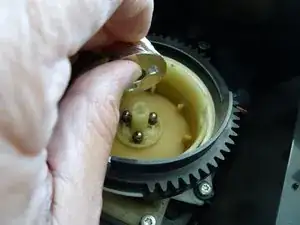
The grinding cone is fastened with a long Torx T20 screw. The screw head is often covered with remnants of coffee beans. Expose the head and turn the screw out counterclockwise.
-
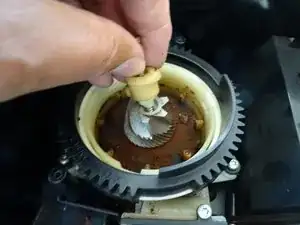
Now the bean feeder (the small white snail) can be removed. The grinder cone and drive can now also be lifted up carefully.
-
-
-
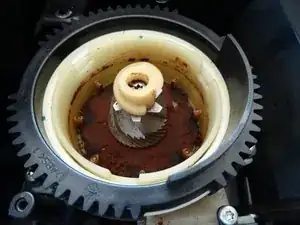
In most of the cases the mill is full of sticky old coffee powder. Clean everything thoroughly for excellent coffee aroma.
-
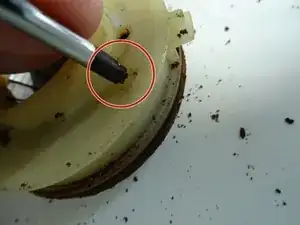
The felt ring around the drive axis can be pulled out carefully using a needle. Clean it. For the inner grinder use a paint brush and a wet cloth, the other parts can be cleaned with a brush and warm water. Each part must be dried well before reassembling it.
-
-
-
Push both of the small latches alternately. Then the ring cover should come out.
-
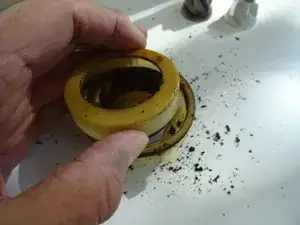
Two clamps hold the grinder ring in its place, push them aside and it should come free.
-
Again clean everything. Press the new ring and cover in its place. With that the grinder ring is exchanged.
-
-
-
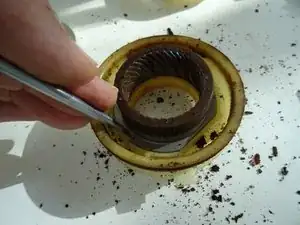
First insert the cleaned driver, then the three sleeves, springs and balls. Now fit the grinding cone on the three balls.
-
Then fit the auger, screw in central screws. When screwing in, push the cone downwards and make sure that everything meshes.
-
-
-
Insert grinding ring. The black gear is turned to the right again until the three marks are aligned. Then reinstall the adjuster drive shaft as it was originally.
-
Then install the remaining parts in reverse order.
-
You can set the grinding degree nicely by placing an empty roll of toilet paper perpendicular to the open mill and filling it with a few coffee beans. Plug in the plug (be careful!), choose a cup of coffee and watch as the coffee grounds fall out of the grinder.
-
-
-
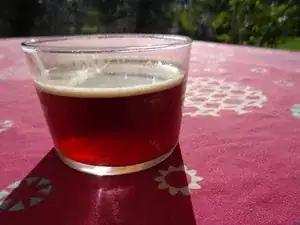
These two pictures are no fake: Before repairing the grinder the coffee is thin and transparent. With new stones the coffee is strong and has a fine crema. The repair was a real success!
-


Now follow the remaining steps in reverse direction to reassemble your device.
19 comments
Thank you for the guide. I have FILL BEANS error, I followed this guide. No problem. But with new burrs, I still have FILL BEANS error. Any idea why? My burrs were not so bad. I only have 2000 espressos on the counter.
Which model of Jura is it?
VauWeh -
Z5, first generation
So my guess is the “Fill-Bean-Sensor", consisting in an infrared LED and a photocell. You can see it in the bean funnel on top of the mill. Perhaps you disconnected it while ?
VauWeh -