Introduction

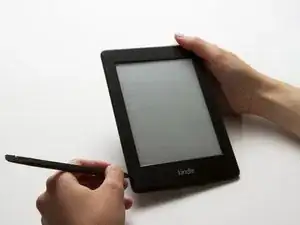
Replace your Kindle's old motherboard with a new one.

  1. l6YfE2jZFZPgjnbT
    l6YfE2jZFZPgjnbT
    v232H5bUQRNS4I1A
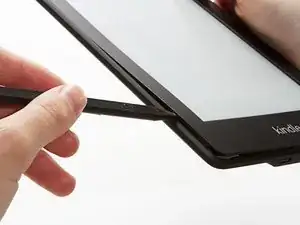
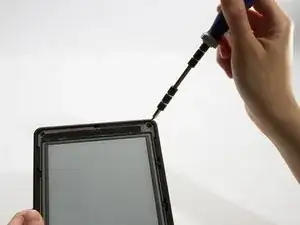
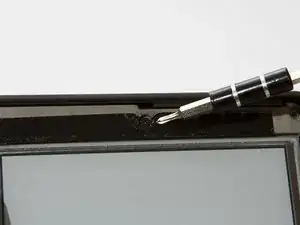
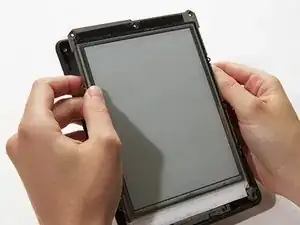
    • Using a spudger or plastic opening tool, gently pry the bezel from the screen. It is easier to start in the corners and work your way around the bezel.

    • Do not insert the spudger too far under the bezel; it could easily damage the screen.

    I found it easier to start this step off with one of the Opening Picks found in the iOpener pack.

    NathanF -

    The glue on bezel started to peel the sticky back protective layer off the screen for me - managed to smooth it back down, although now have an unsightly crease. I would try to hold the screen down when you pull the bezel off to stop damaging the screen.

    Callum Rogers -

    This step is most time consuming. Take you time and try not to scratch the bezel :)

    Oleksii -

    Couldn't get the plastic spudger under the edge of the bezel. A right-angle X-Acto blade was a satisfactory tool here.

    dbrick -

    The glue was VERY difficult...I used a trick, from taking apart phones, and used a hair drier to loosen up the glue...worked like a charm.

    billkaris -

  2. eehmSQ1GQCtSUWAM
    eehmSQ1GQCtSUWAM
    mSkG2naoP2YZttuh
    BTFwBysYHHKV33Y5
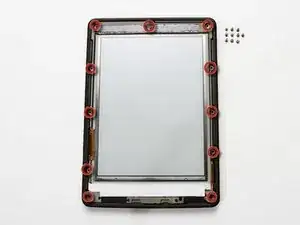
    • Remove the eleven 3.0 mm Phillips screws surrounding the midframe.

    • At the top of the display, a strip of black tape covers one screw.

    On 3G version you will not have the top middle screw.

    BJones -

    Hello, the original battery is 1420m Ah and 3.7VDC, but the buttery you offer to sell is 1600mAh, is it right? there is no problem with different mAh? mi kindle is the amazon kindle 1est generation

    Paula Ponce de Leon -

  3. aGfN4NevUPtVveNb
    • Lift the midframe out of the case.

    • If the midframe is stuck, slide it to the left first, and then lift it out.

    There are clips in the bottom of the case helping hold the midframe in. Lift the top of the midframe up enough to clear the black back piece and then slide up and out.

    BJones -

  4. OlqJjhiOD5YDSuGJ
    OlqJjhiOD5YDSuGJ
    RjSDqWAwMMMiPxCI
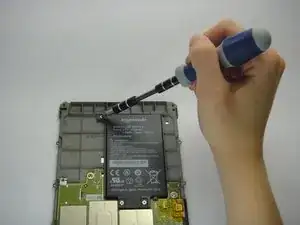
    • Turn over the midframe to locate the battery.

    • Remove the three Phillips 3.0 mm screws securing the battery to the midframe.

  5. aiaJ3CmXFPTPslVs
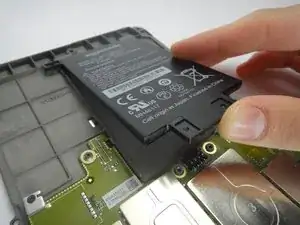
    • Gently lift the battery from the bottom, and slide it out of the midframe.

    Thanks for providing this guide, I would have been lost without it. My old kindle, however, had very stiff and hard rubber/plastic. There was no way I could have slid the glass to the side or gotten the plastic spud under the edge of the glass or the plastic.

    What I did was to remove a piece of the plastic next to the glass , about 1/8” square, then insert a putty knife in between the two sides towards the edges. It all popped apart without breaking anything. Perhaps I could have done this without cutting out the little piece.

    Joseph L Woollett -

    Thank you for this very user friendly guide.My kindle is now working as new.The screws are small and fiddly and the correct tools are essential. I took roughly about 45 minutes from start to finish and the most difficult part was taking the casing apart without damaging the screen .. A 5 star service.

    jonesmrse -

    Thanks for the useful and practical guide. Five stars.

    dbrick -

    The bezel sits on a film meant to protect the screen. When lifting the bezel, it is a good idea to slightly push on the screen with cardboard or something elese, to make sure the screen film stays on the screen as you lift the bezel.

    tropdetremblay -

  6. 3YRxr33SCctdYQjo
    3YRxr33SCctdYQjo
    dR12MFGMehODUZJn
    dgTCoHVgtbJUssxY
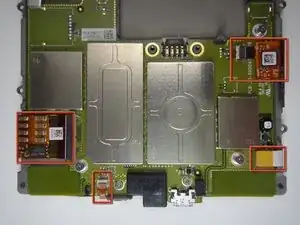
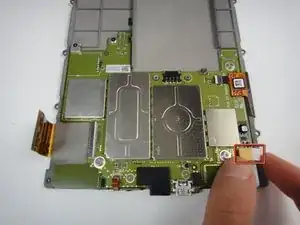
    • With the case and battery removed from the midframe, begin removing all cables attached to the motherboard.

    • Place the device so the midframe's backside faces up. Start with the cable on the bottom left corner.

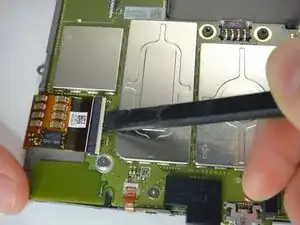
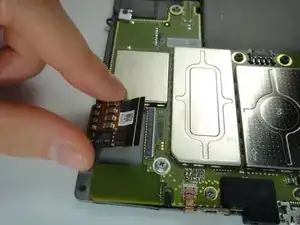
    • Use a spudger to lift up the white locking cable tensioner and slide the flex cable out.

    • Proceed counterclockwise to the next cable and repeat. Small flex cable on the bottom won't need cable tensioner lifted, just carefully pull out.

    The second connector is not exactly a "repeat". The lock to be lifted is on the cable side, whereas the first connector's lock is away from the cable.

    Yishai Sered -

    Does anyone know the part number or for that matter where i can purchase the original LED assembly?

    Thanks

    naz zan -

  7. nXYvhidJFoKAfL4y
    nXYvhidJFoKAfL4y
    dFSsAFBPhmJUZnDD
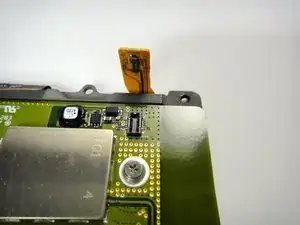
    • Remove the white flex cable by gently lifting the yellow plastic connector.

  8. SelbPVNBp1ldSMYf
    SelbPVNBp1ldSMYf
    F6cir5pLskggGIgC
    xIOdyYrBjmBoWSL3
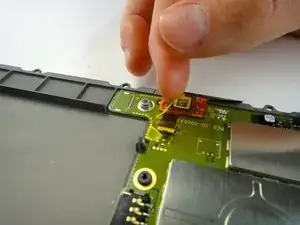
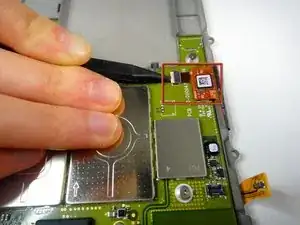
    • Remove the yellow anti-static tape from the display ribbon cable connector.

    • Use a spudger to lift up and disconnect the cable tensioner.

  9. cn3o1wKFJ3QbP1qs
    cn3o1wKFJ3QbP1qs
    ZTLXfBXDxgwcaZFa
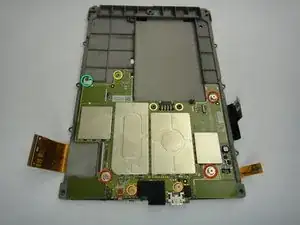
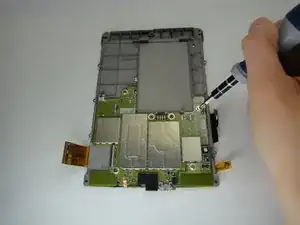
    • Use a Philips screwdriver to remove the seven 3.0 mm Phillips screws securing the motherboard:

    • Three silver screws with silver washers

    • Two silver screws with no washers

    • One black screw with a golden washer

    • One black screw with a square washer

  10. jvrO1bUGHlDqMGK2
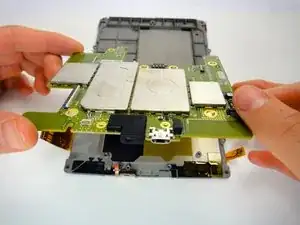
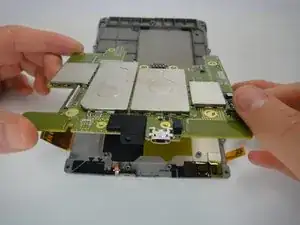
    • Remove the motherboard.

Conclusion

To reassemble your device, follow these instructions in reverse order.

Isabelle Burgess

Member since: 24/01/13

1555 Reputation

2 comments

Not sure if this is an error, but on the 3G paperwhite, we needed to use a #0 Phillips, not a #2. Great guide otherwise!

Caleb Begly -

Please suggest what type of controller is used and the model and flash memory in the Kindle Paperwhite 1st Generation?

ven 1949, div 0004

Elecrash -