Introduction

Amazon’s Kindle Paperwhite 3rd Generation (7th Generation of Kindles) possesses a 3.7 Volt, Lithium Polymer battery (Model No: MC-354775-05). This guide requires that the Kindle is turned off, and that a plastic opening tool, and a PH000 screwdriver are used.

  1. mgFAVxtMlxIQ4UXM
    mgFAVxtMlxIQ4UXM
    ruqm6aaQeXEtg61H
    ZtSyLsMBHoJtCOq5
    • Ensure that the device is turned off before beginning.

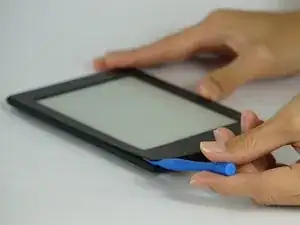
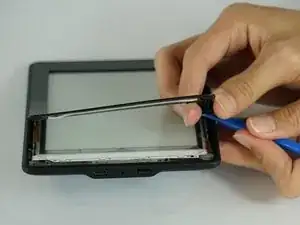
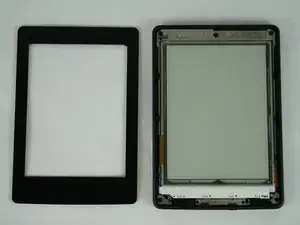
    • Gently pry the bezel off the screen using a plastic opening tool. Start at the corners and slide around the edges until you return to your starting point.

    • Be careful if using the metal spudger, as it can scratch the surface of the Kindle.

    Be very careful along the lower left side, where the cable to the touchscreen can be easily cut with a plastic spudger.

    John Kenny -

    Be careful at the top of the 3G version. The wifi and cell antennas are located along here.

    James Sullivan -

    I can’t get my spudger in to start lifting. Any advice?

    Davey -

    it takes a bit of force to first insert the spudger into the crack

    bonjoukhadar -

    Be careful inserting the spudger too quickly. The glue holding the screen pulled loose in two spots along the side before the bezel did and there are lines along the border of my screen now.

    Nick -

    I made my own version of Nick’s error: I inserted a pick too far under the bezel, and very slightly separated the screen, leaving a small shadow in a corner. Easy does it!

    Other than that, battery replacement was super-easy and successful.

    Brad Compton -

  2. MbWZKSBHjy5mrCMG
    MbWZKSBHjy5mrCMG
    ST1NGusypgqBckxL
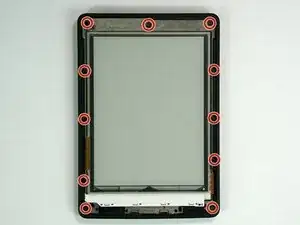
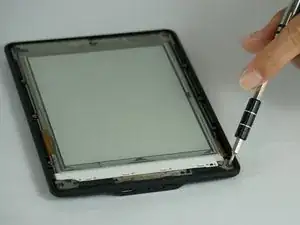
    • Unscrew the eleven 3.2 mm Phillips #000 screws surrounding the frame.

    I have a 3rd Gen Paperwhite and there are only 10 screws. 5 along each side

    bonjoukhadar -

  3. tXbdeuCkakiQOUZC
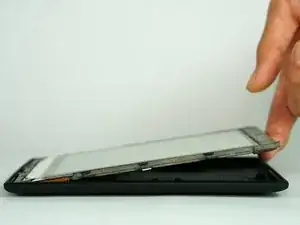
    • Gently lift the mid-frame out of the case with your hands.

  4. qp3NYCcJFisoelfD
    qp3NYCcJFisoelfD
    STsGkWp46qJkgbPj
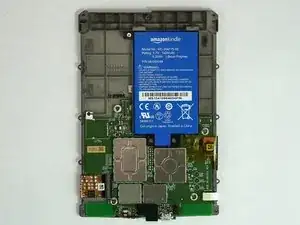
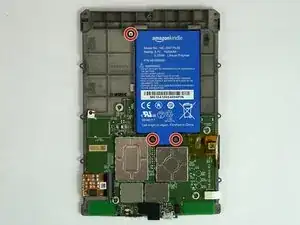
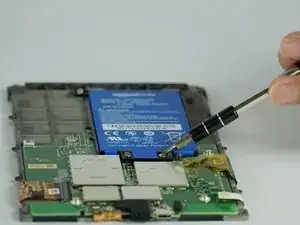
    • Unscrew the three 3.0 mm Phillips #000 screws that are securing the battery.

  5. WdpZapnw22YZYyQl
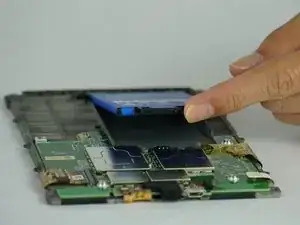
    • Gently lift the battery from the frame.

    We had a Kindle that unfortunately took a dunk in (clean) water. It was then inoperative. I followed this guide, and took the battery out, let everything dry for a few days, then replaced the battery. Now it works fine! Thanks!

    Frank Demarest -

Conclusion

To reassemble your device, follow these instructions in reverse order.

Micah Smart

Member since: 10/02/16

2852 Reputation

16 comments

Same for 5th Generation ??

PAUL FRIEND -

where can i buy a new battery ?

david horn -

you need a taobao.

lol

kassadin -

where can I buy a replacement battery?

boelens -

If the charging light does not turn on (at all, no colour) - does it make sense for me to try a new battery?

Artūrs Lataks -

Yes unless you want to buy a new Kindle. Batteries (MC-354775-05) run under 20 from various sites.

DDD -

I used this guide to replace the battery in my Kindle which I bought in 2016 - the battery was down to only holding charge for a few hours. My kindle usage is heavy though - especially while sitting out 12 weeks of redundancy with nothing to do - it was a real sanity saver.

I bought the replacement marked as 58-000049 compatible - which it was

Thank you

jacqui_scarff -

How can I tell which generation my Kindle Paperwhite is?

pbr -

when removing the frame, the edges of the display have unfortunately lifted off a bit, respectively there are now some slight scratches at the corners of the display, as if the foil was off there.

Is there anything I can do about it? Thanks in advance

bastimm -

Thank you for this! Just did it myself. The only thing I would add to this guide is that you may need to replace the adhesive for the bezel — the corner that I initially peeled off had some trouble staying down after I replaced it.

Matthew Fox -

Worked almost fine for me! Found replacement battery on ebay with original model number.

The only point I somehow struggled with is the fact that there is no option to shut down the paperwhite. The only options my device provide are reboot and display off (and cancel of course). However, I selected reboot, lowered 2 screws from the battery and before booting up again I removed the last screw and replaced the battery.

Groej Htro -

This worked fine for me battery is great only problem is that the backlight (actually front light at bottom of display) no longer work!1

David Binder -

That worked well. Thank you.

judithmatz -

Go easier on the spudger than I did. Go in too far, and you can separate the screen, causing a permanent issue. Any tape from under the bezel that tears needs to be replaced as best you can as its absence will cause light to show through the bezel in that spot when you reassemble anything.

shf781 -

Available for Kindle 8th generation.

cssuntherrao -